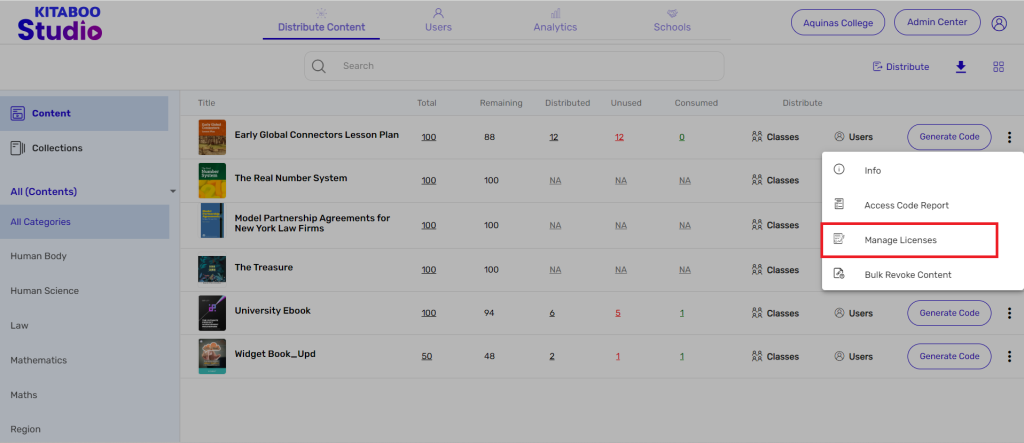
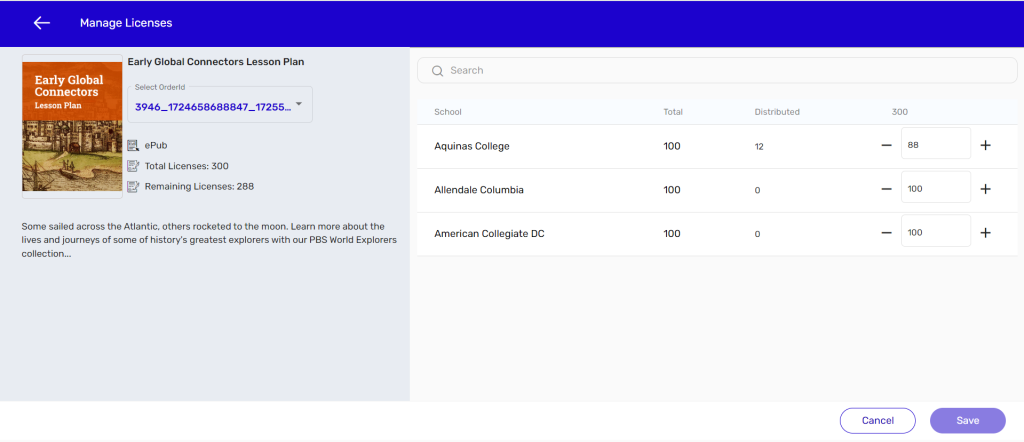
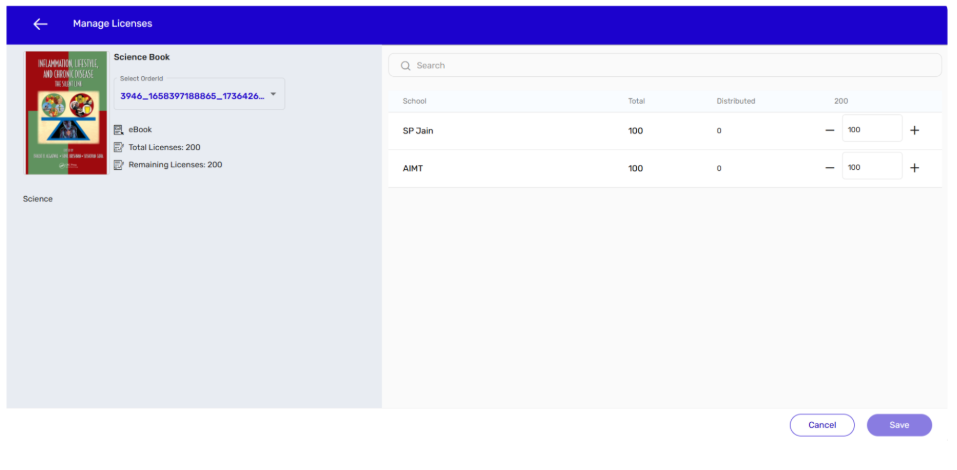
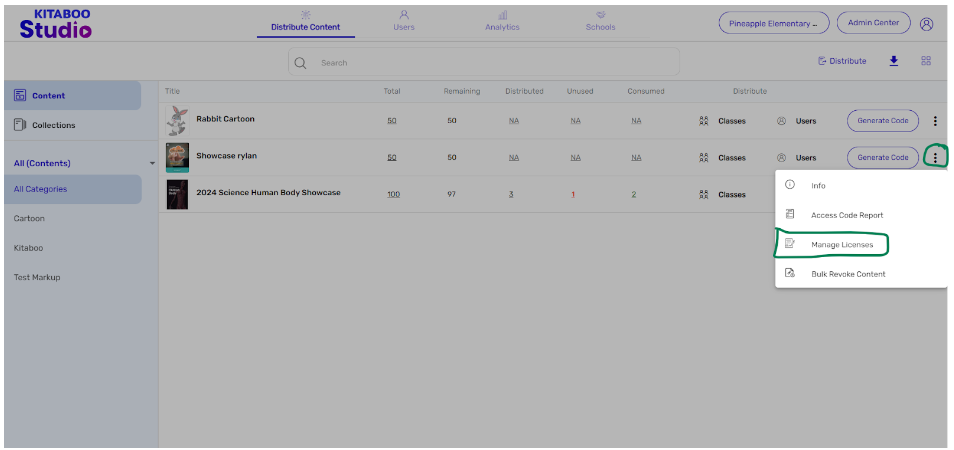
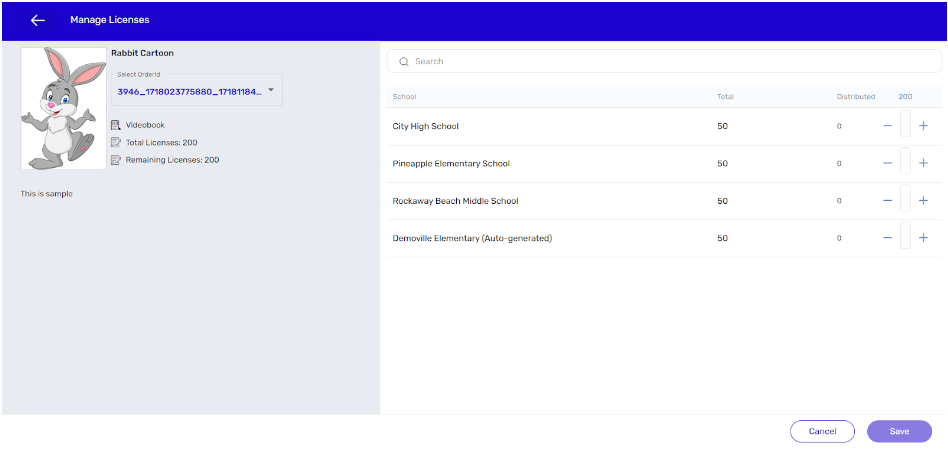
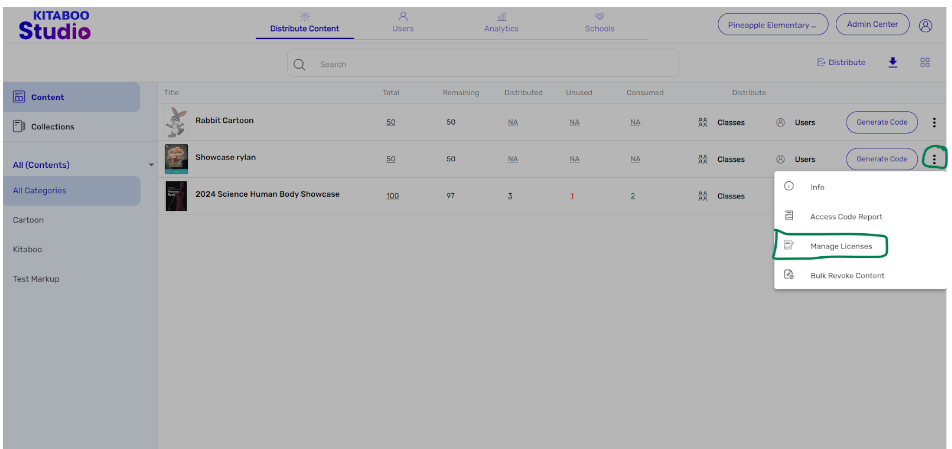
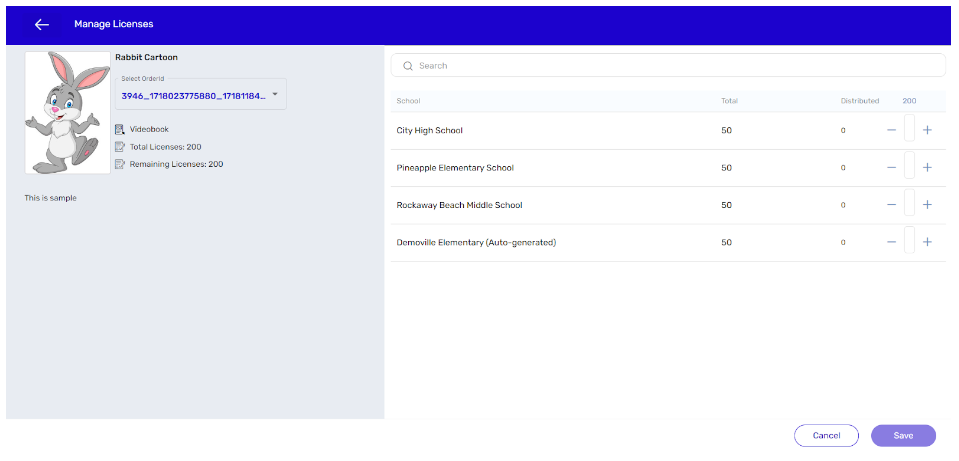
- Manage License (Add on)
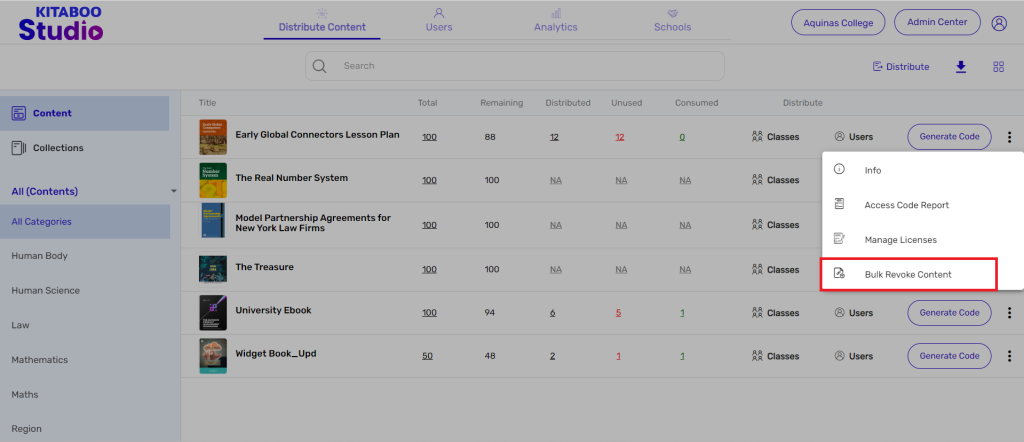
- Bulk Revoke
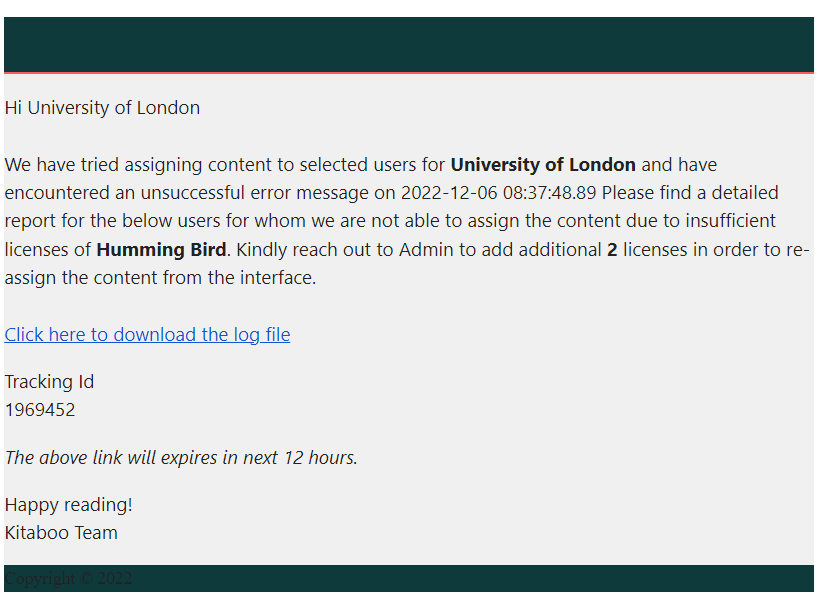
- Generating Access Code
- Direct Distribution (Add On)
- Creating Single User or Multiple Users (Bulk Upload)
- Admin Center and Profile and Settings
- Revoking Content
- Distributing Content
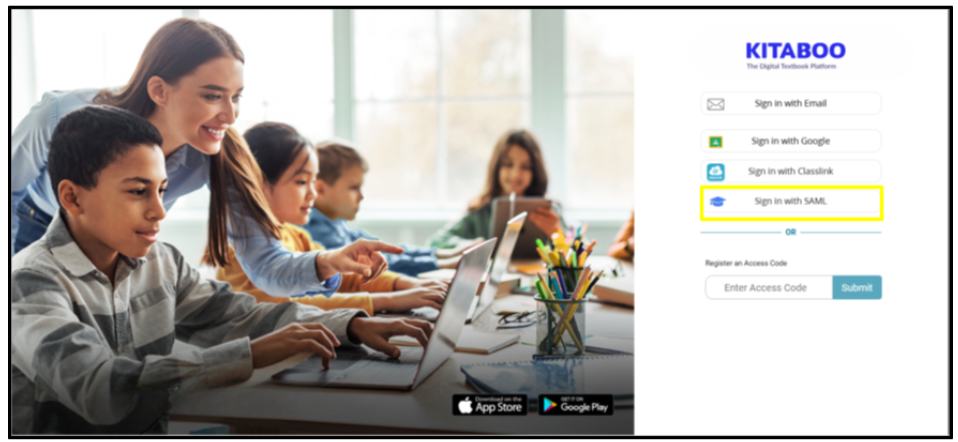
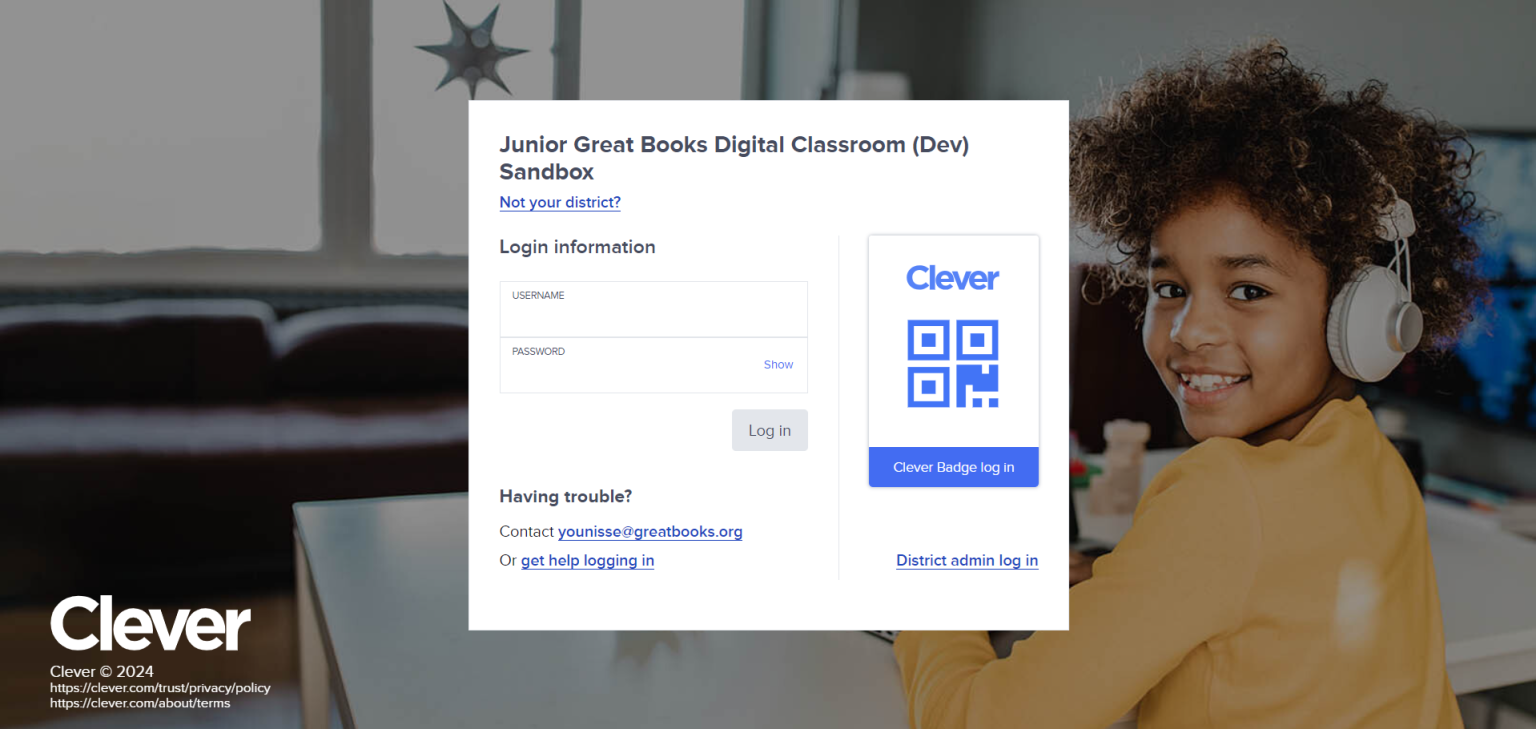
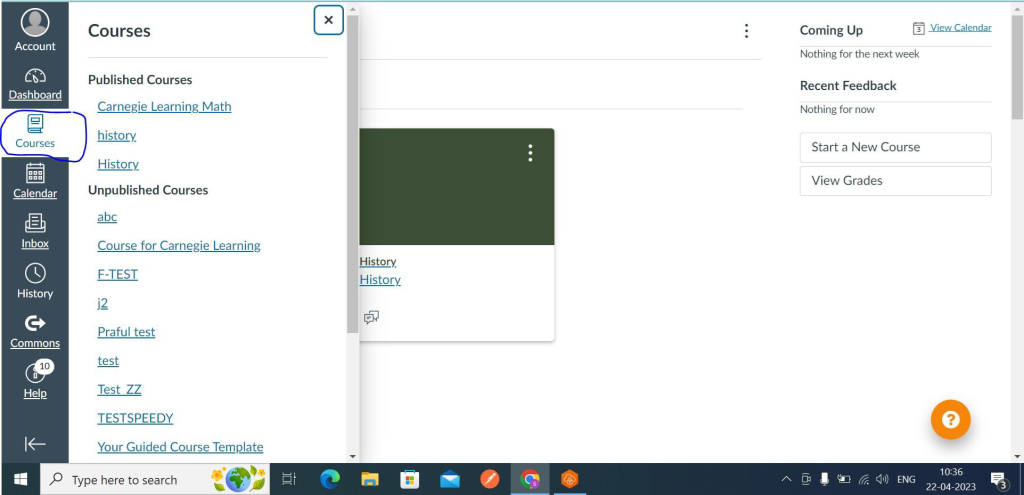
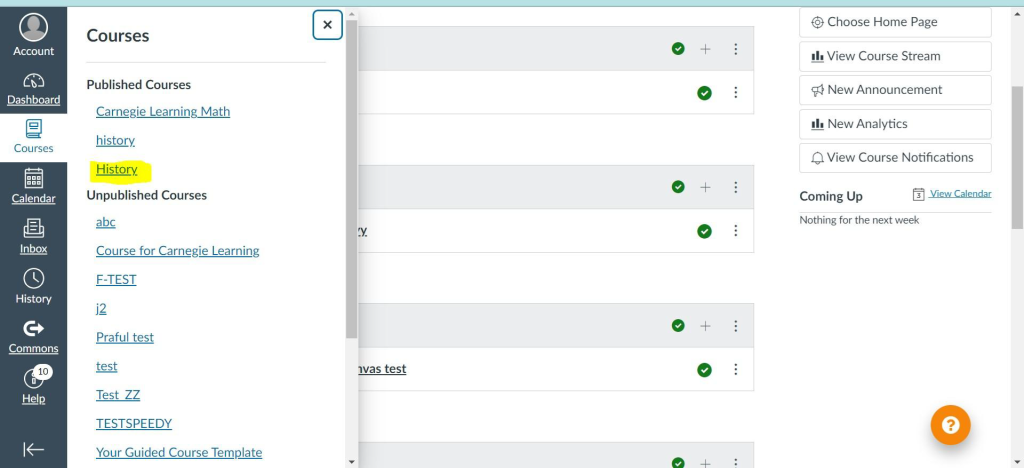
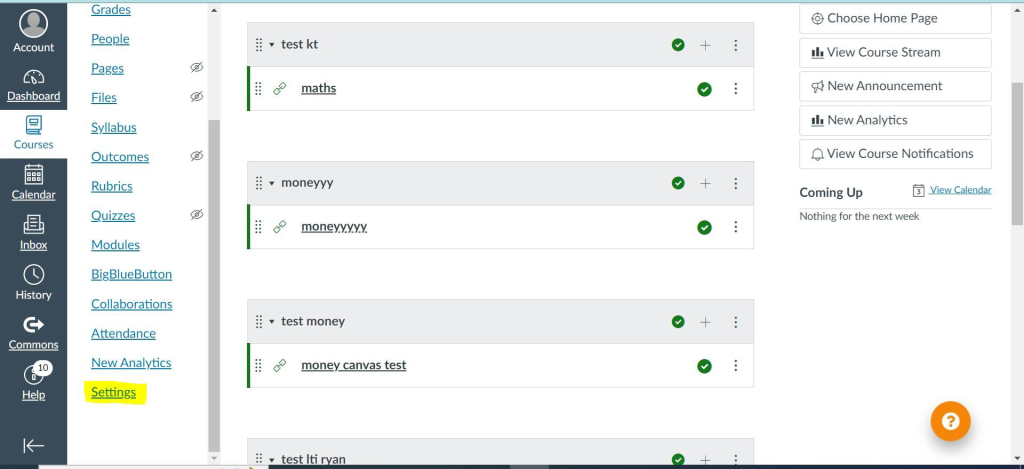
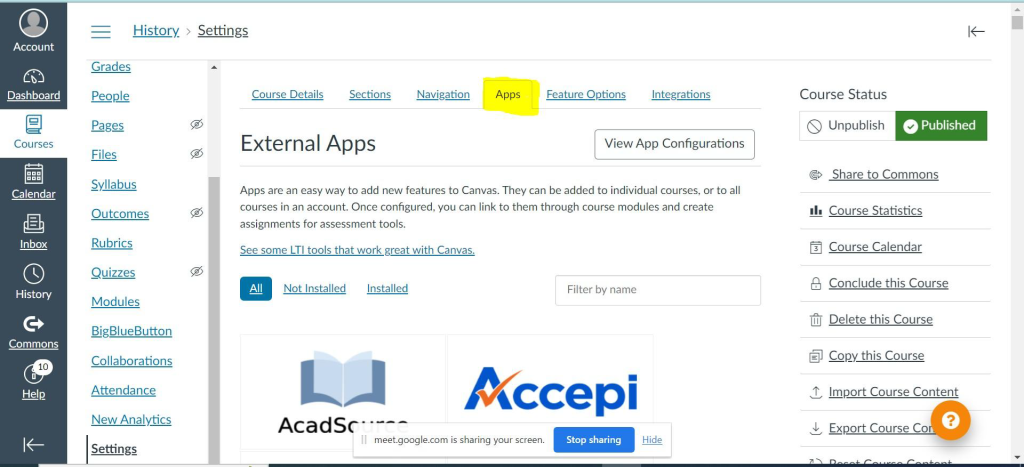
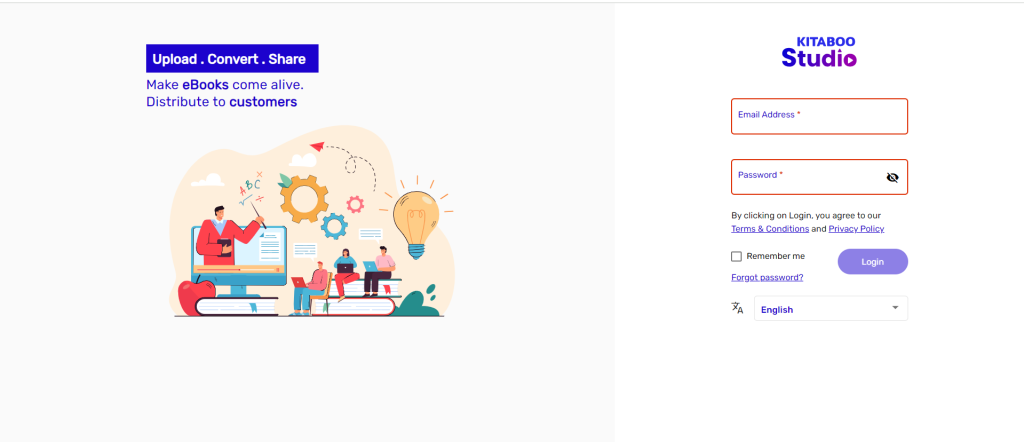
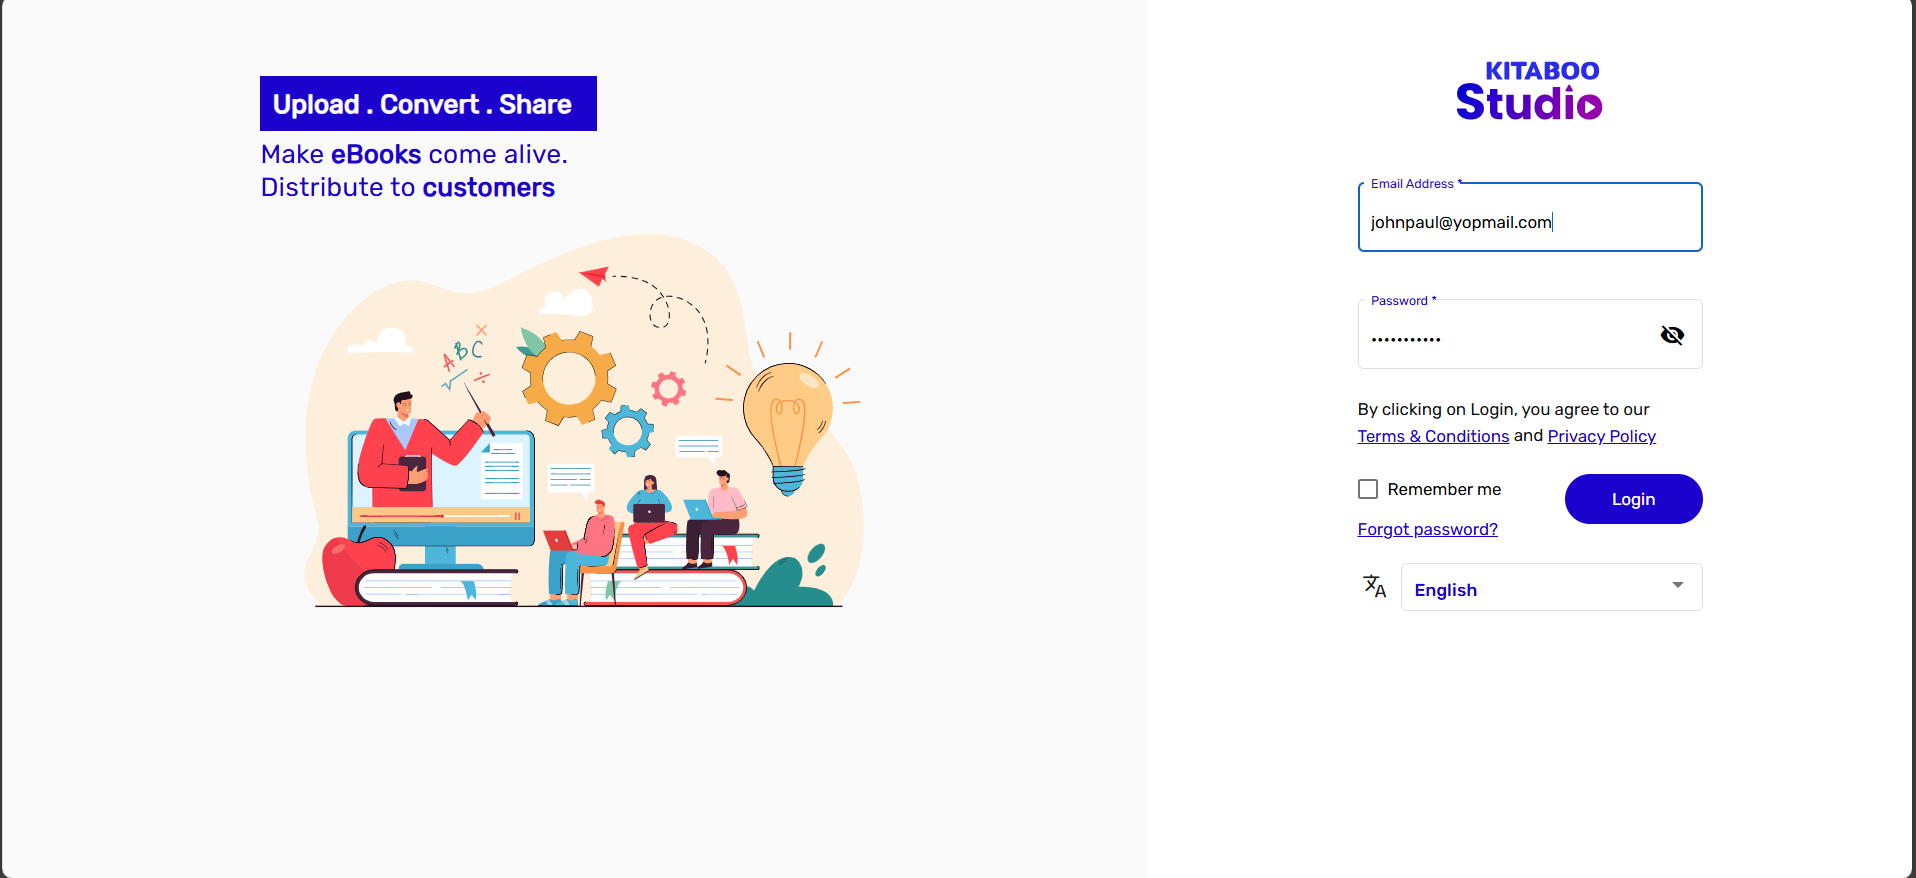
- Signing in to Kitaboo
- Promote User/Transfer
- Create Class/Update Class
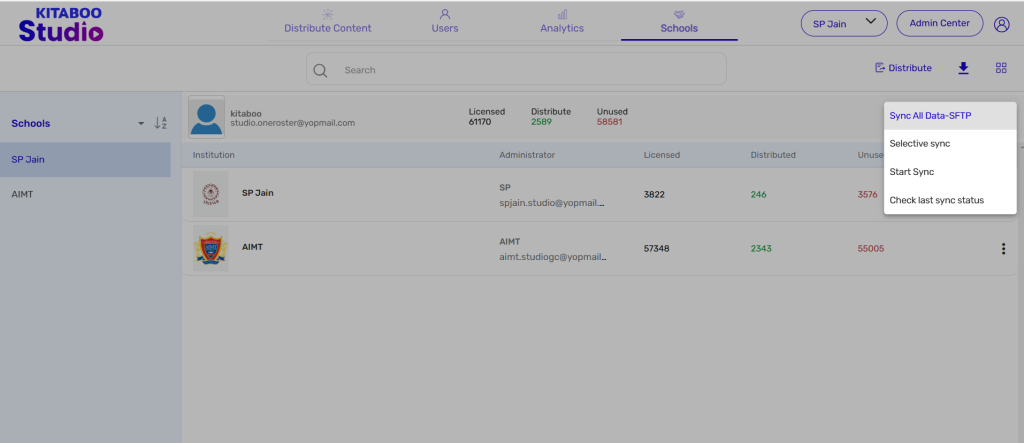
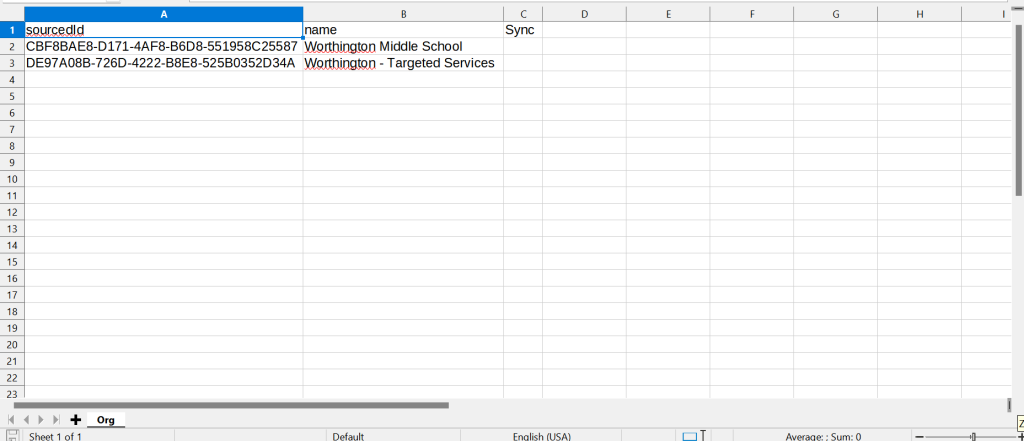
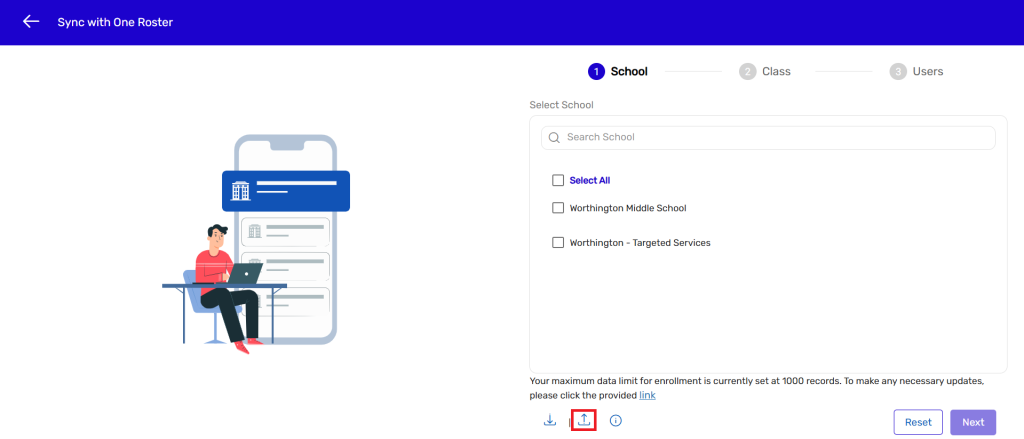
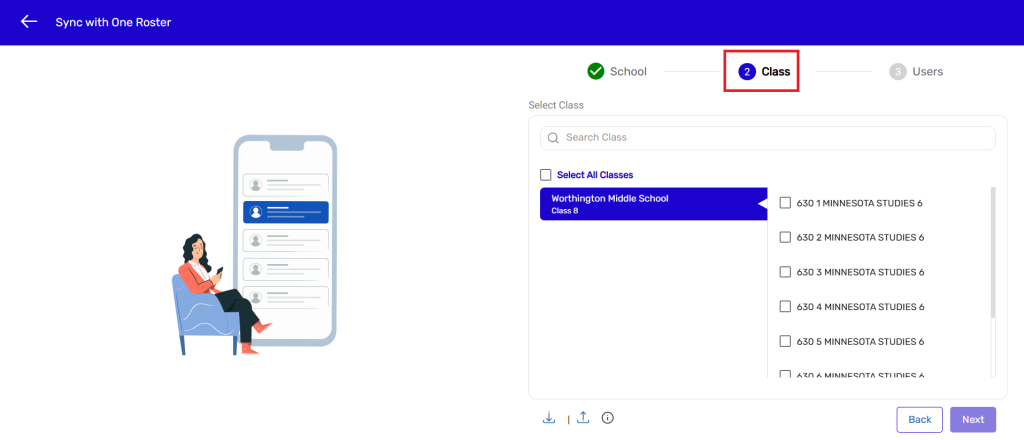
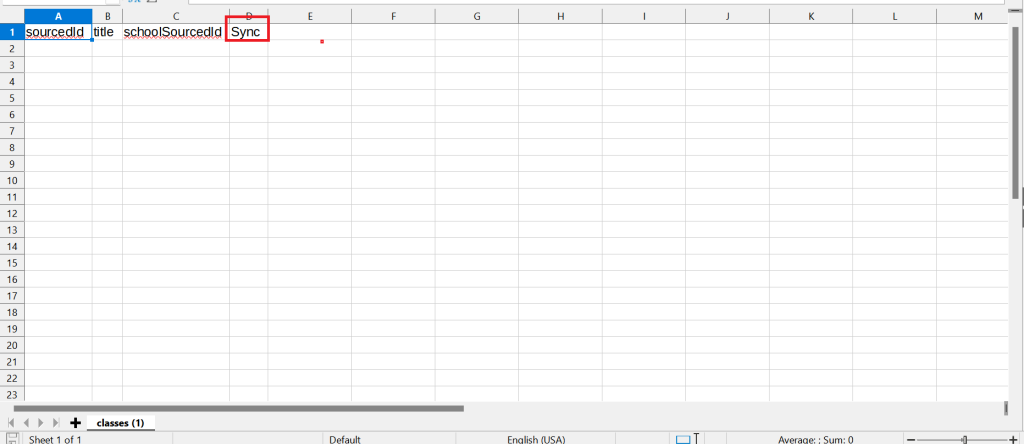
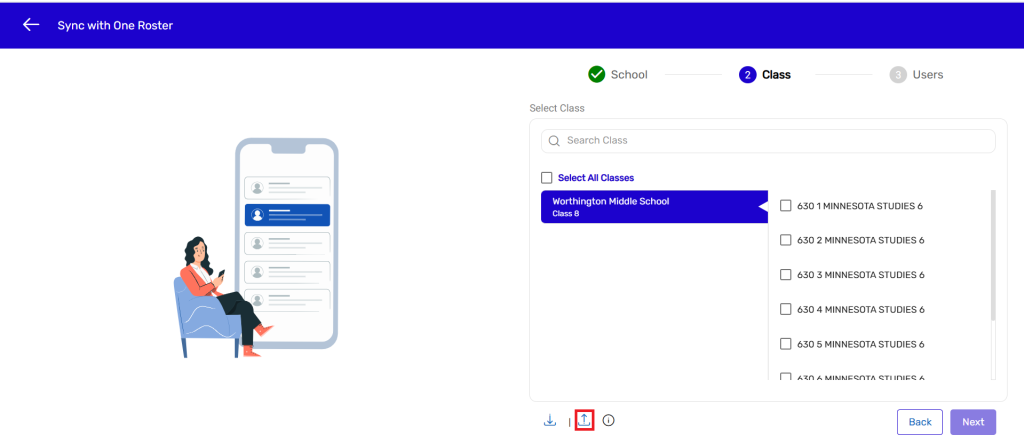
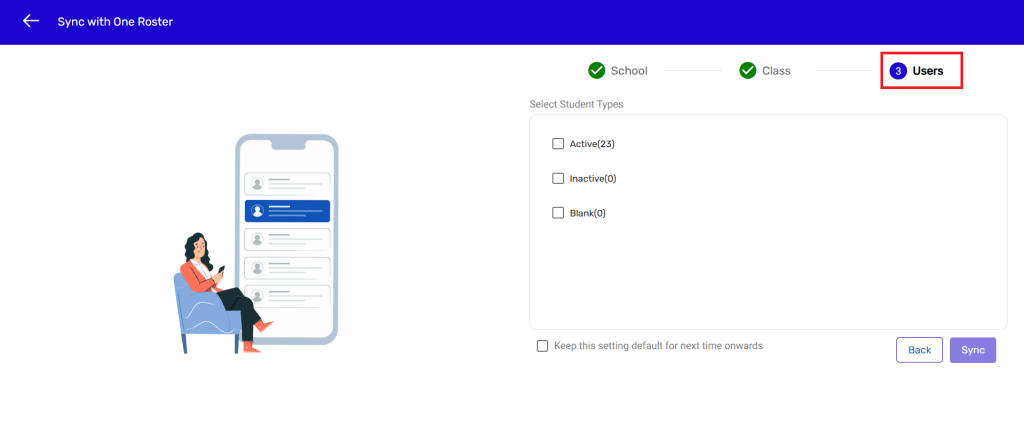
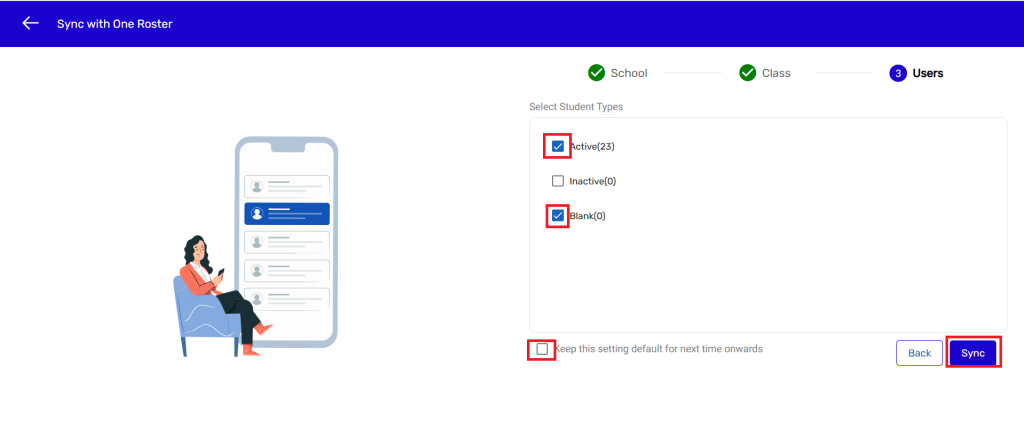
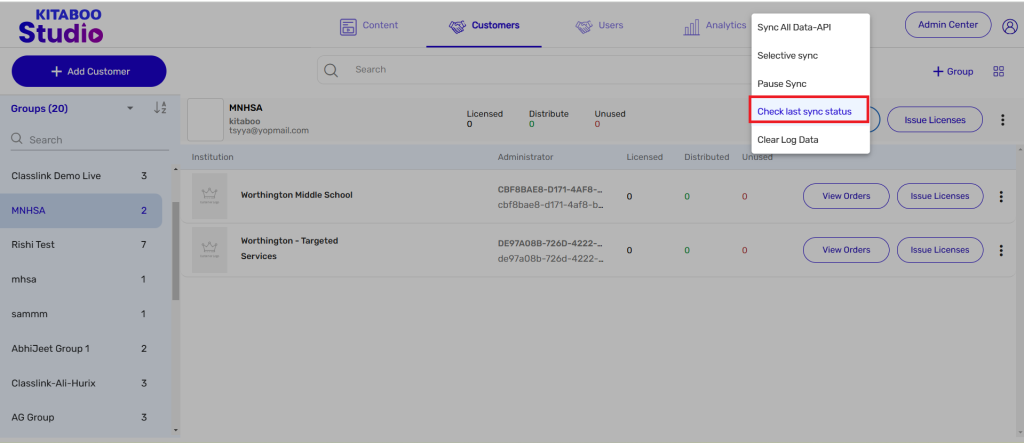
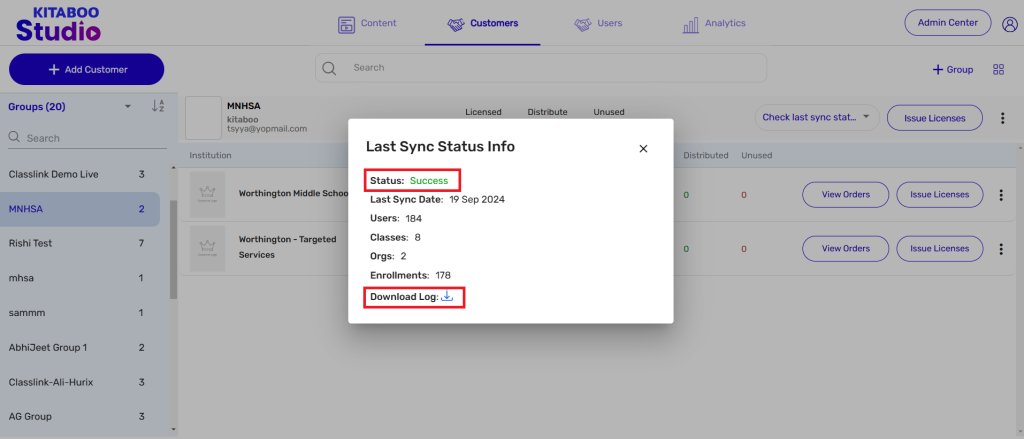
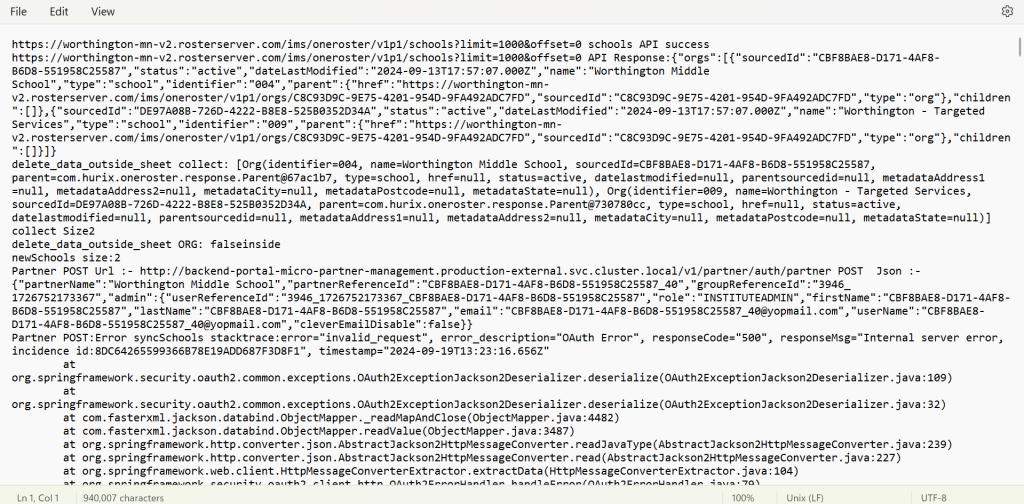
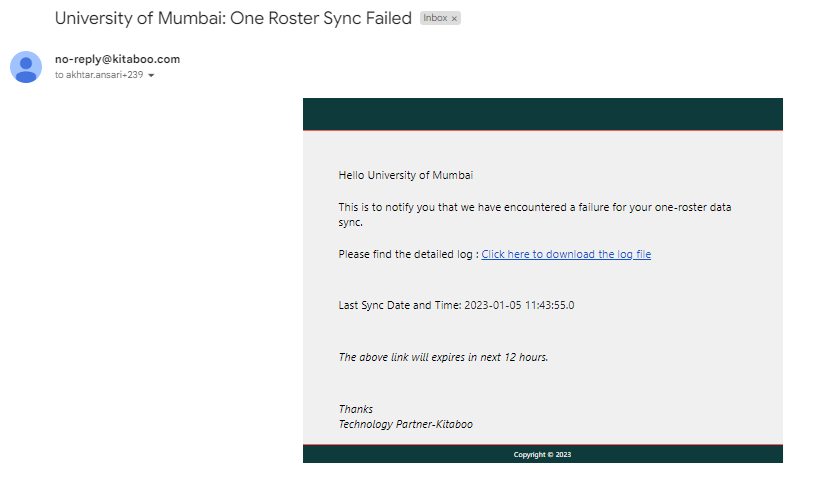
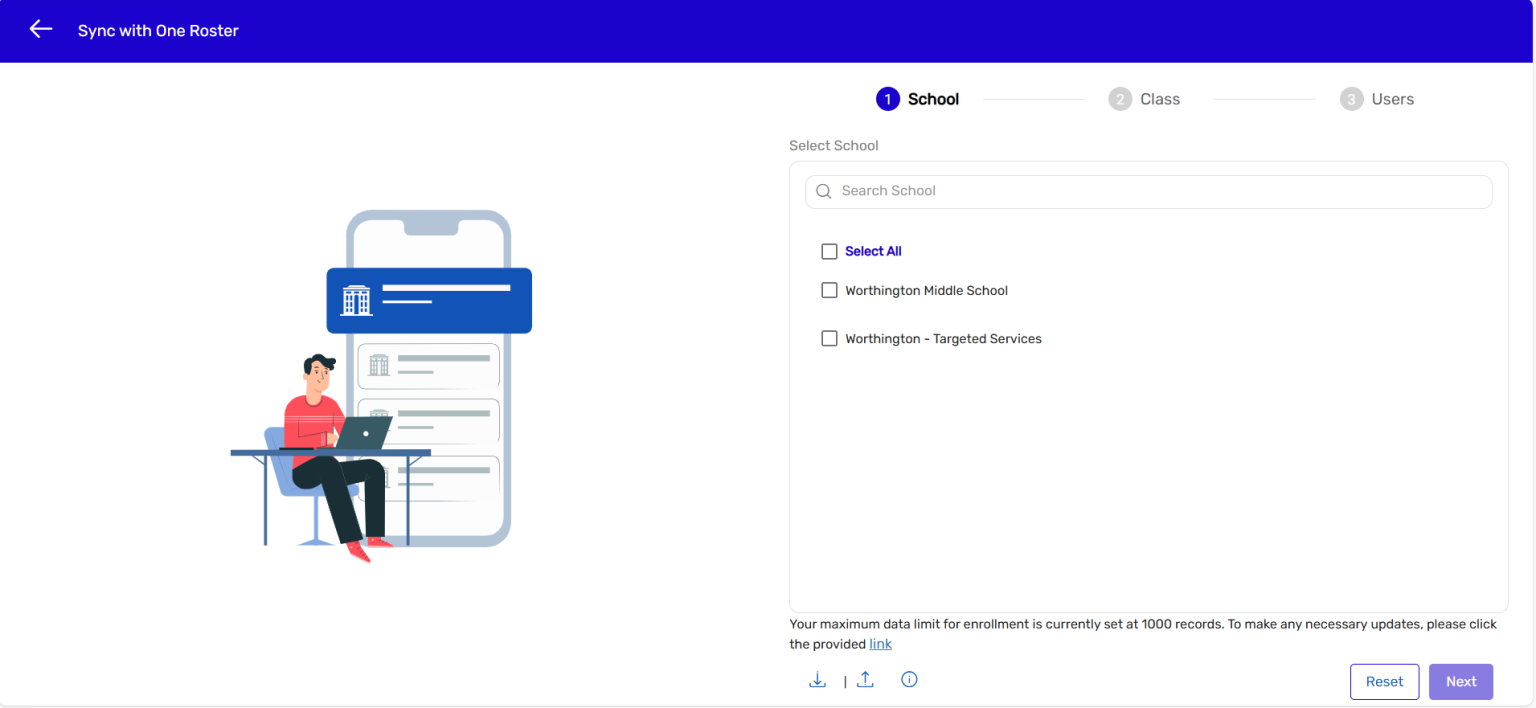
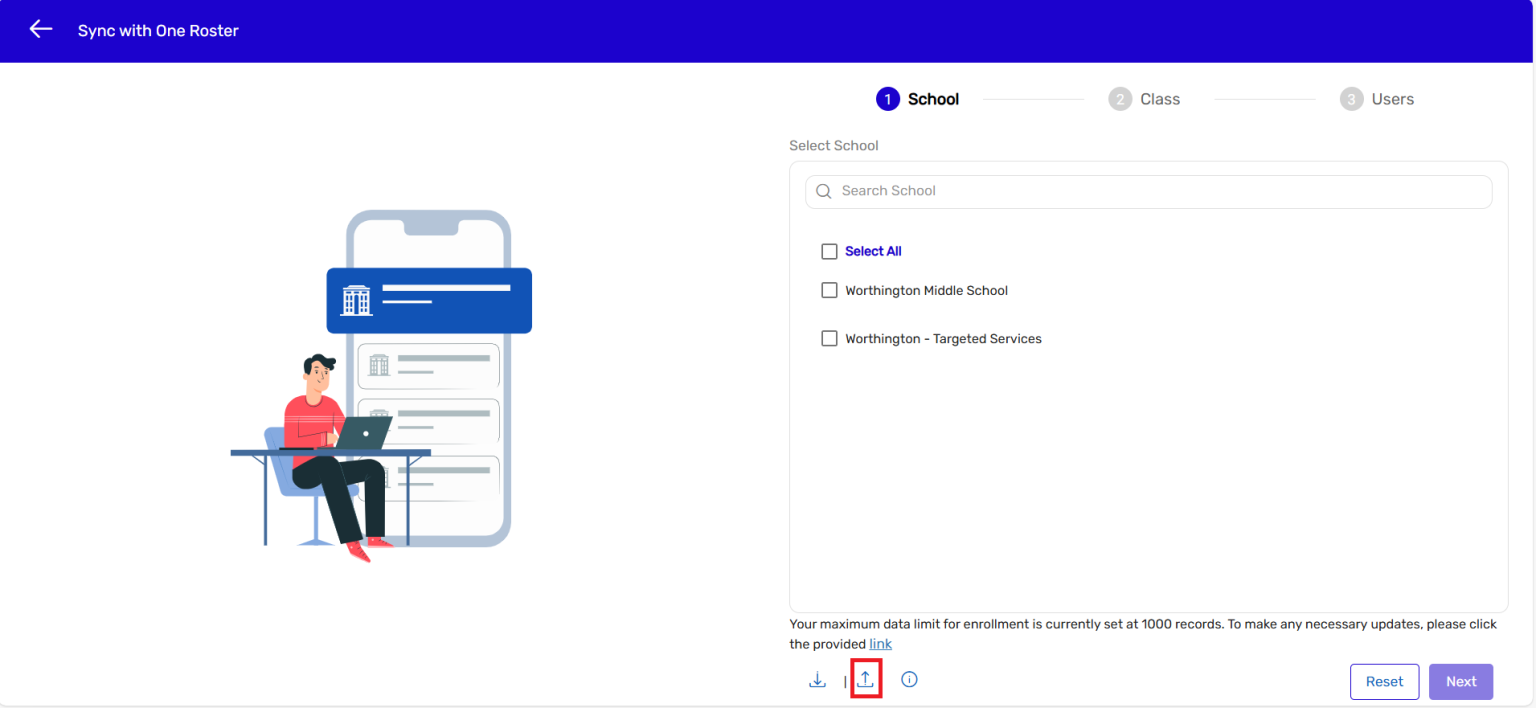
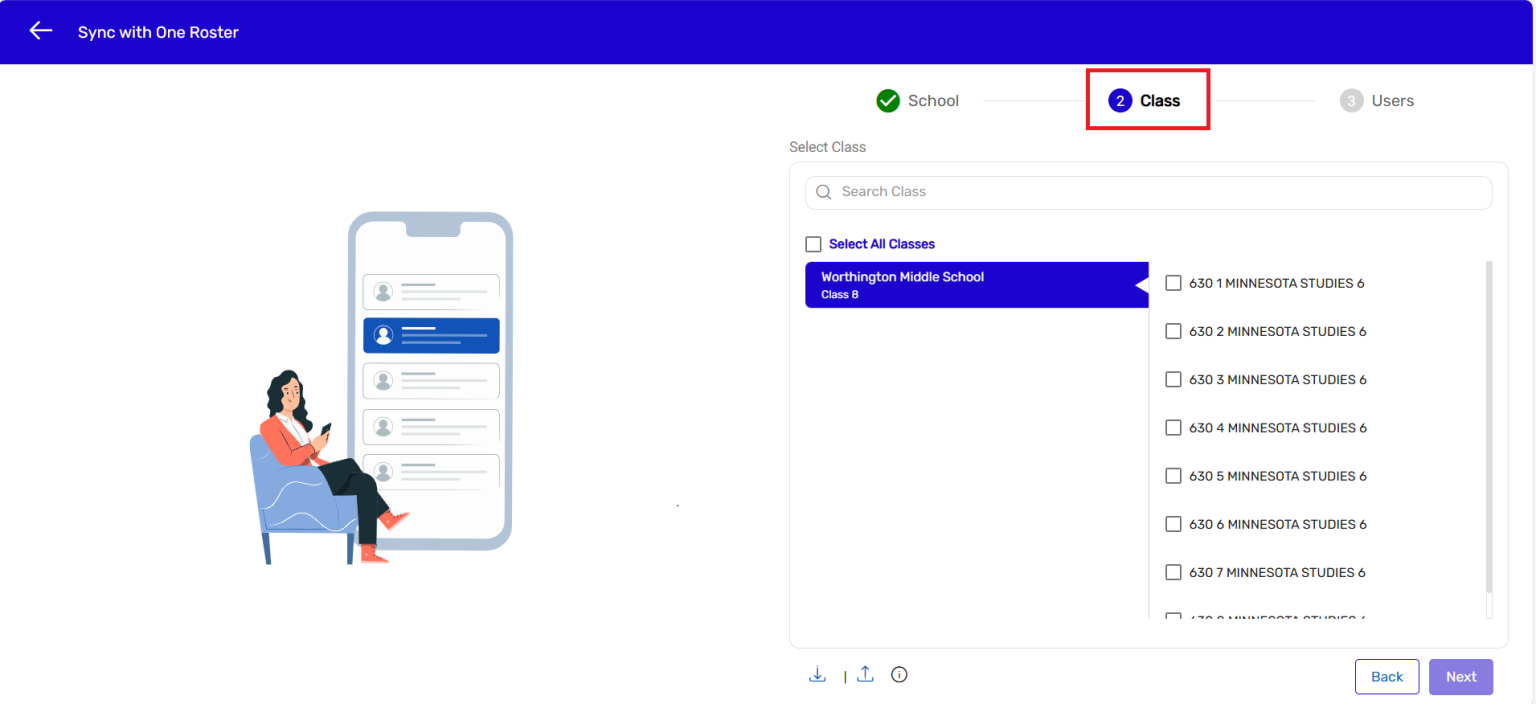
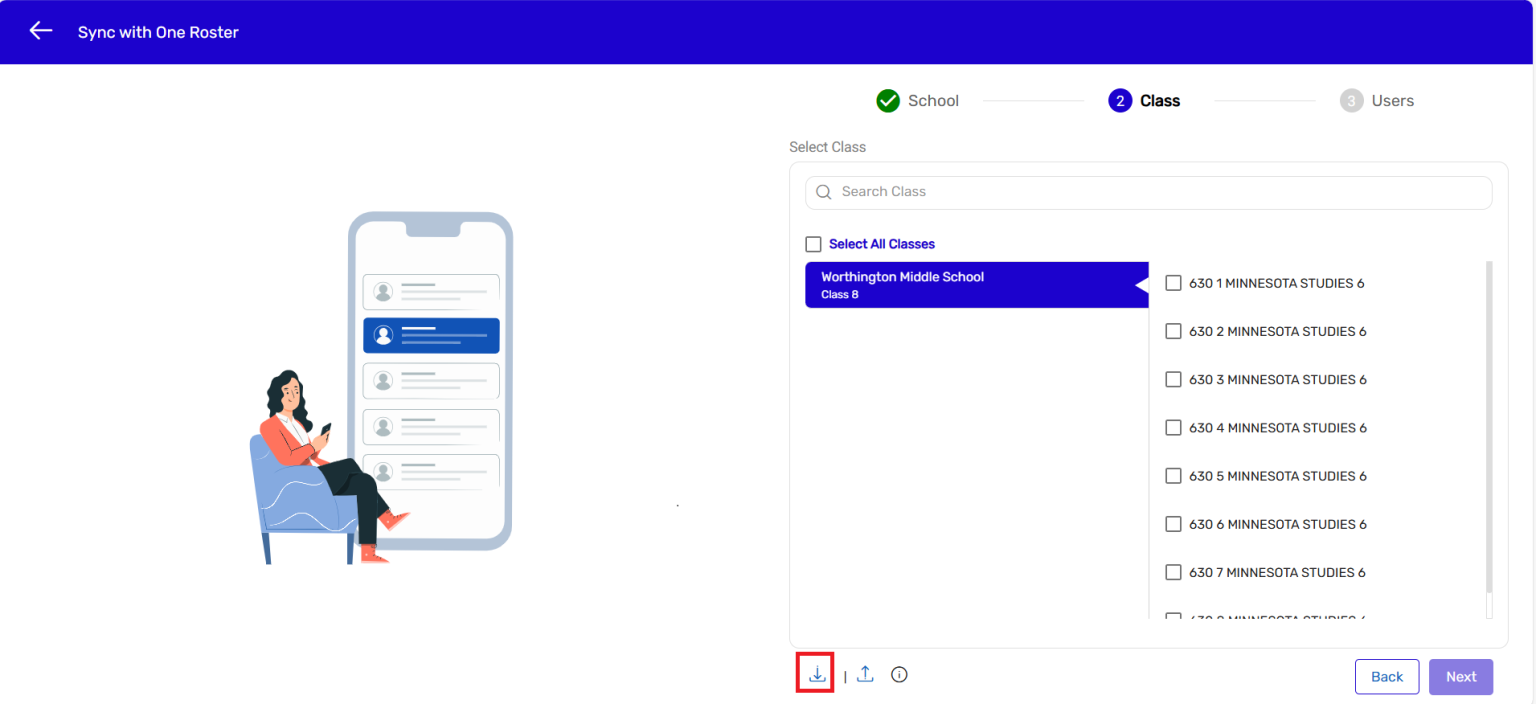
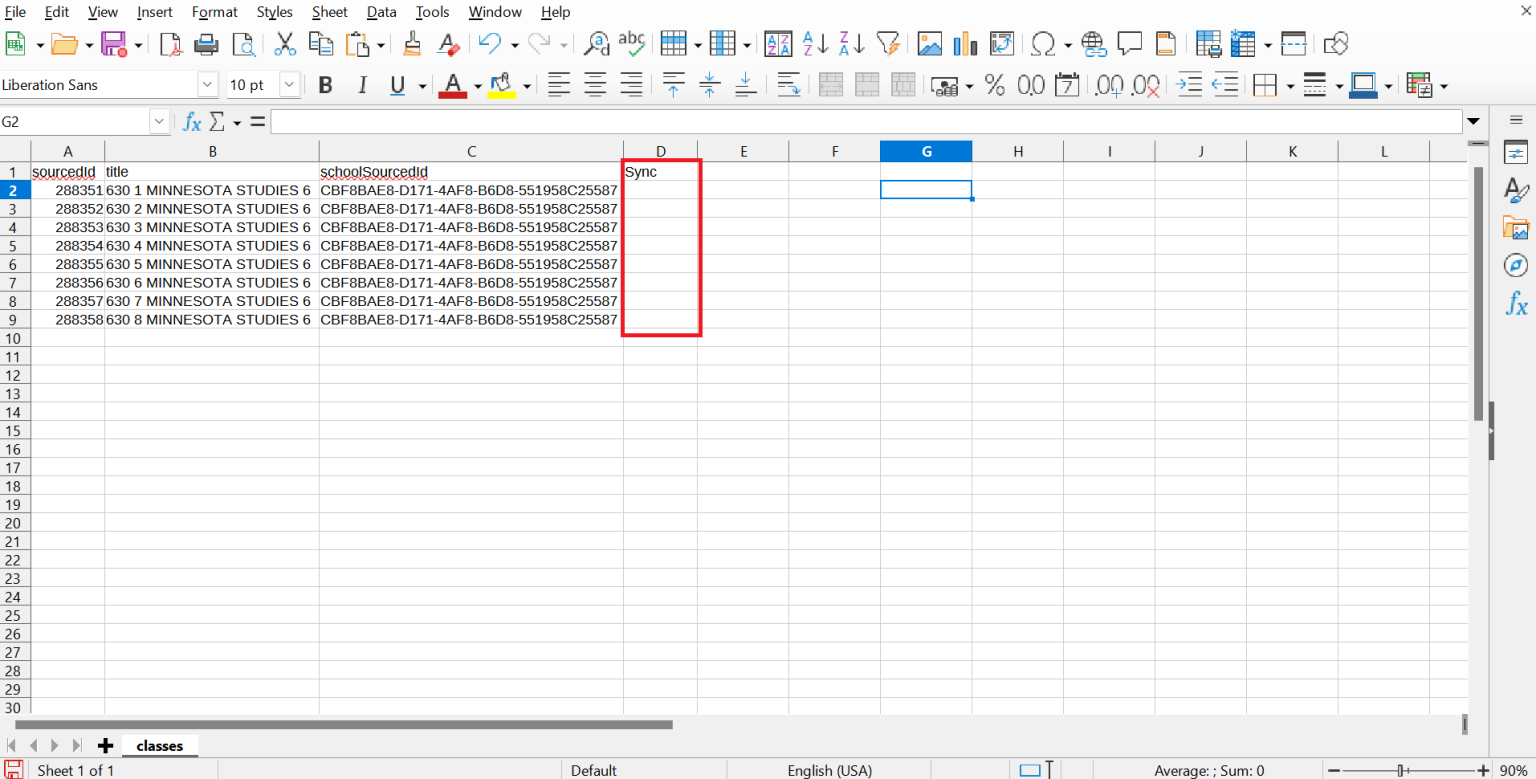
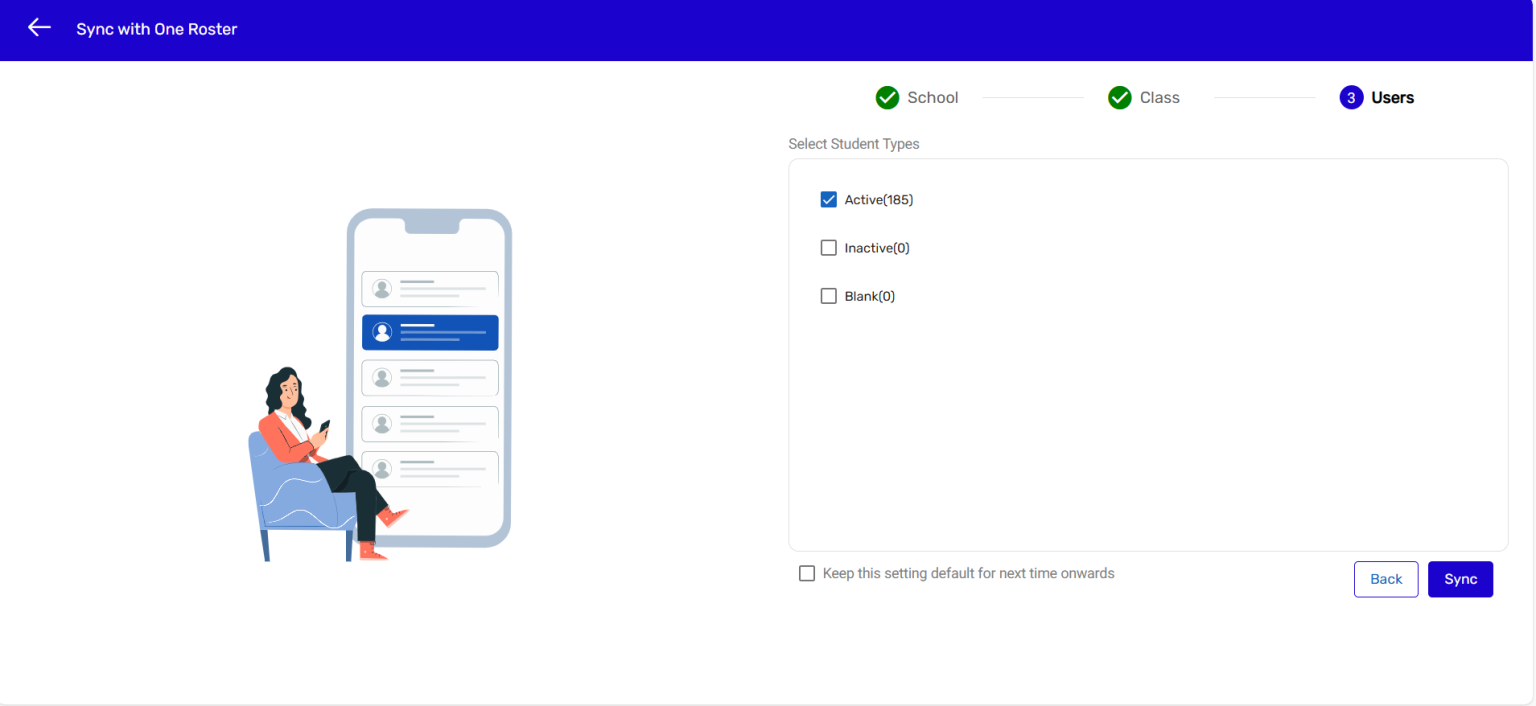
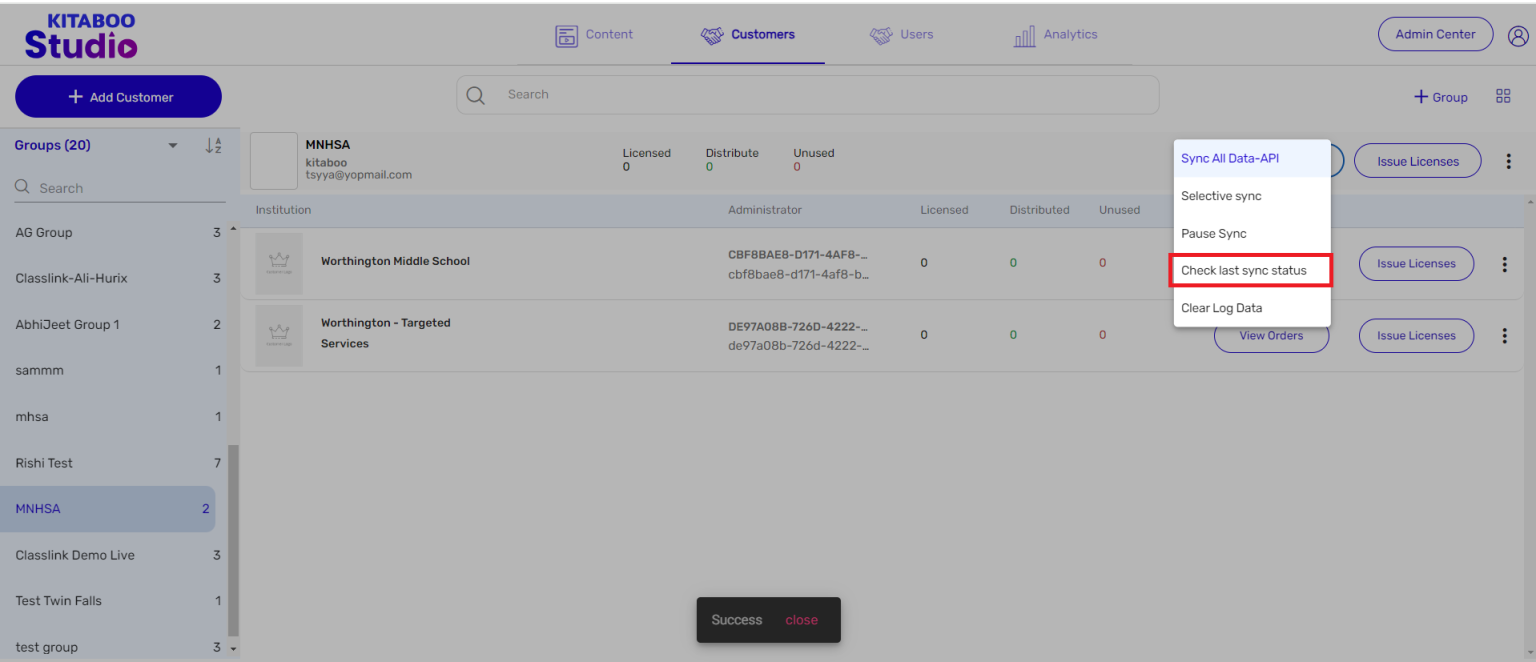
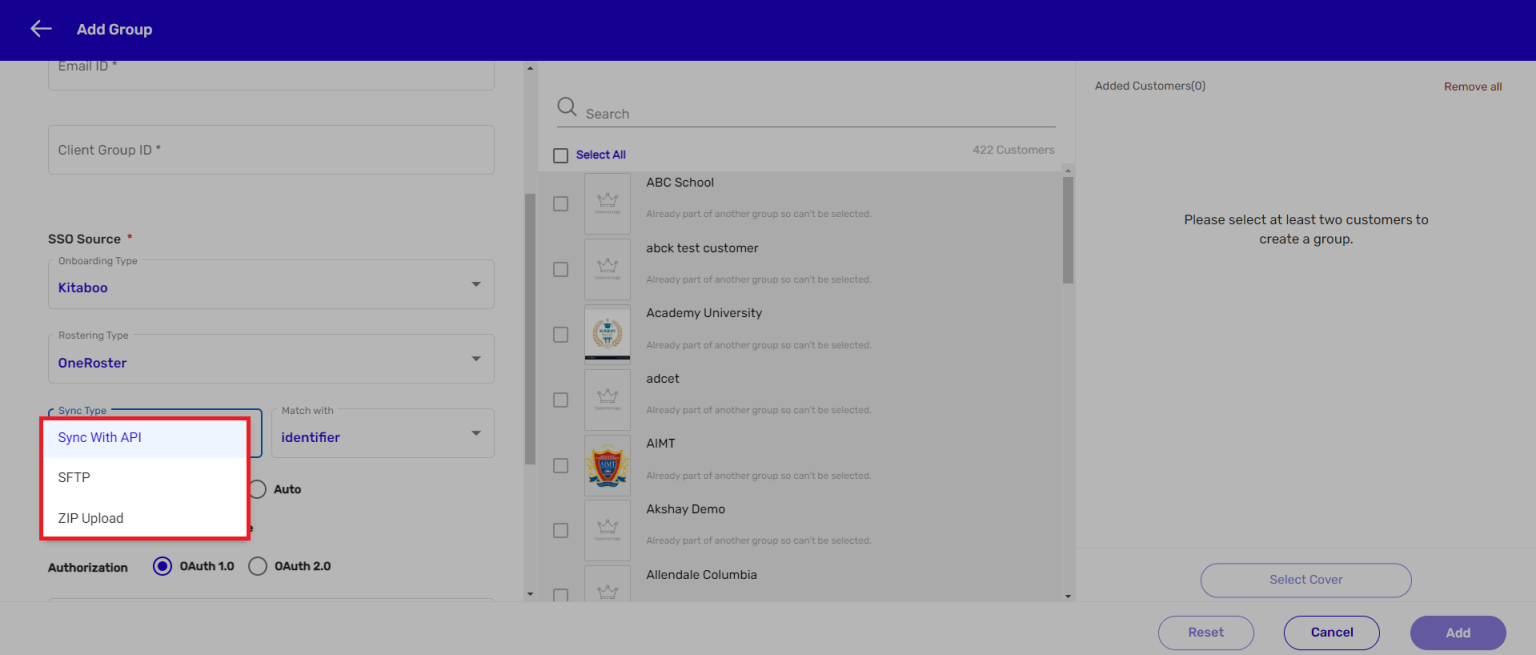
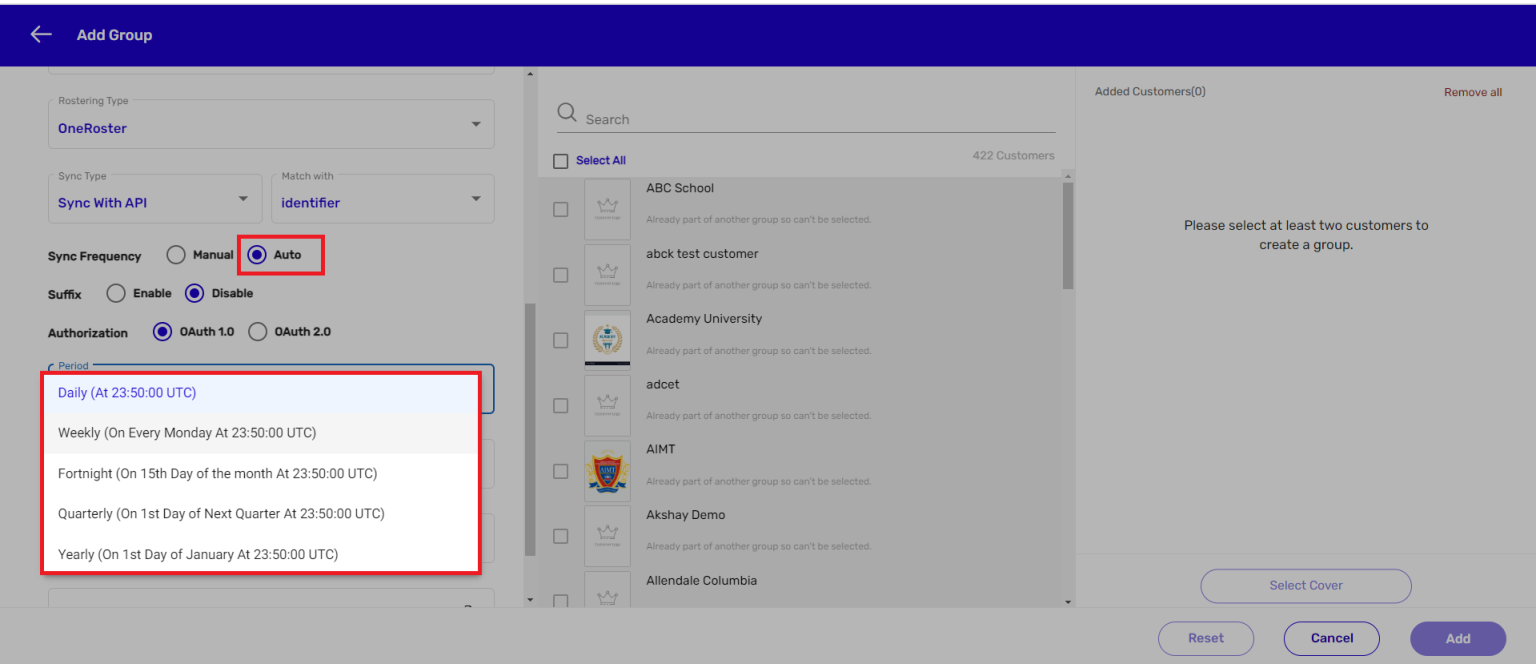
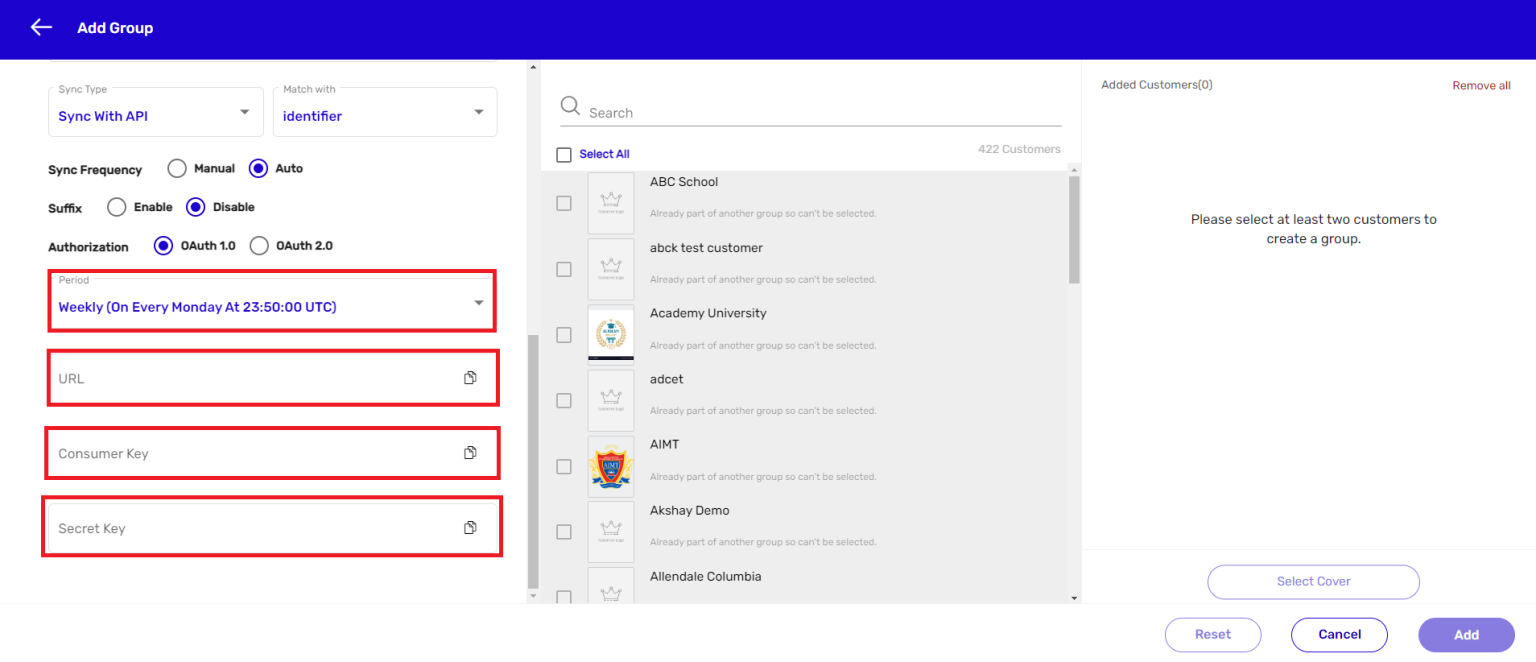
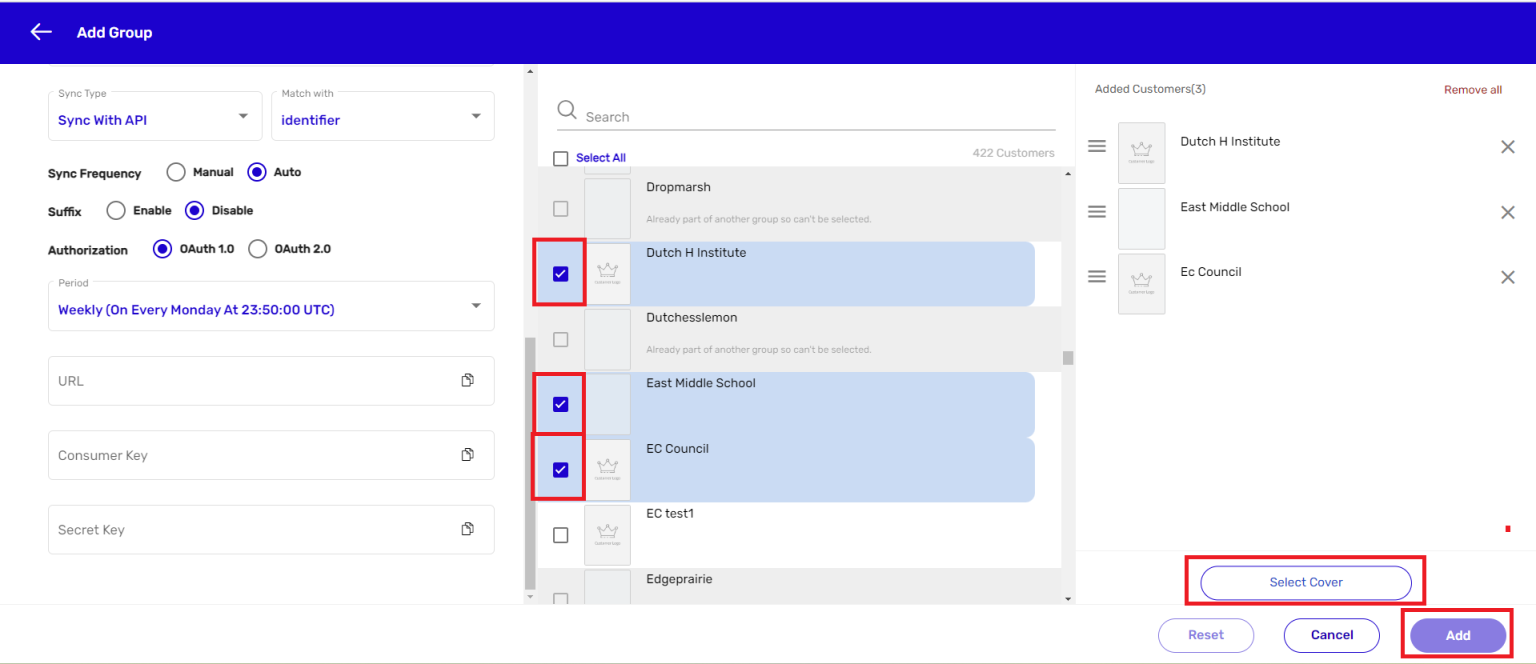
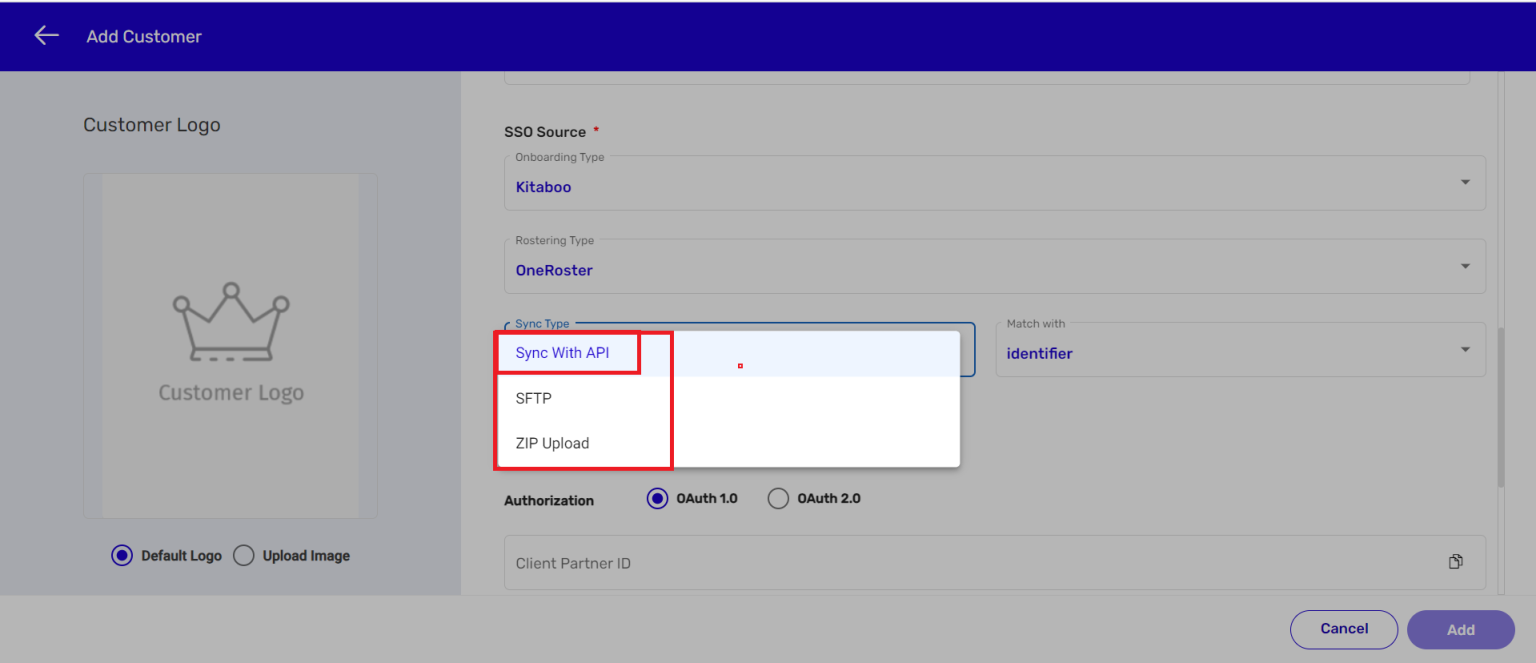
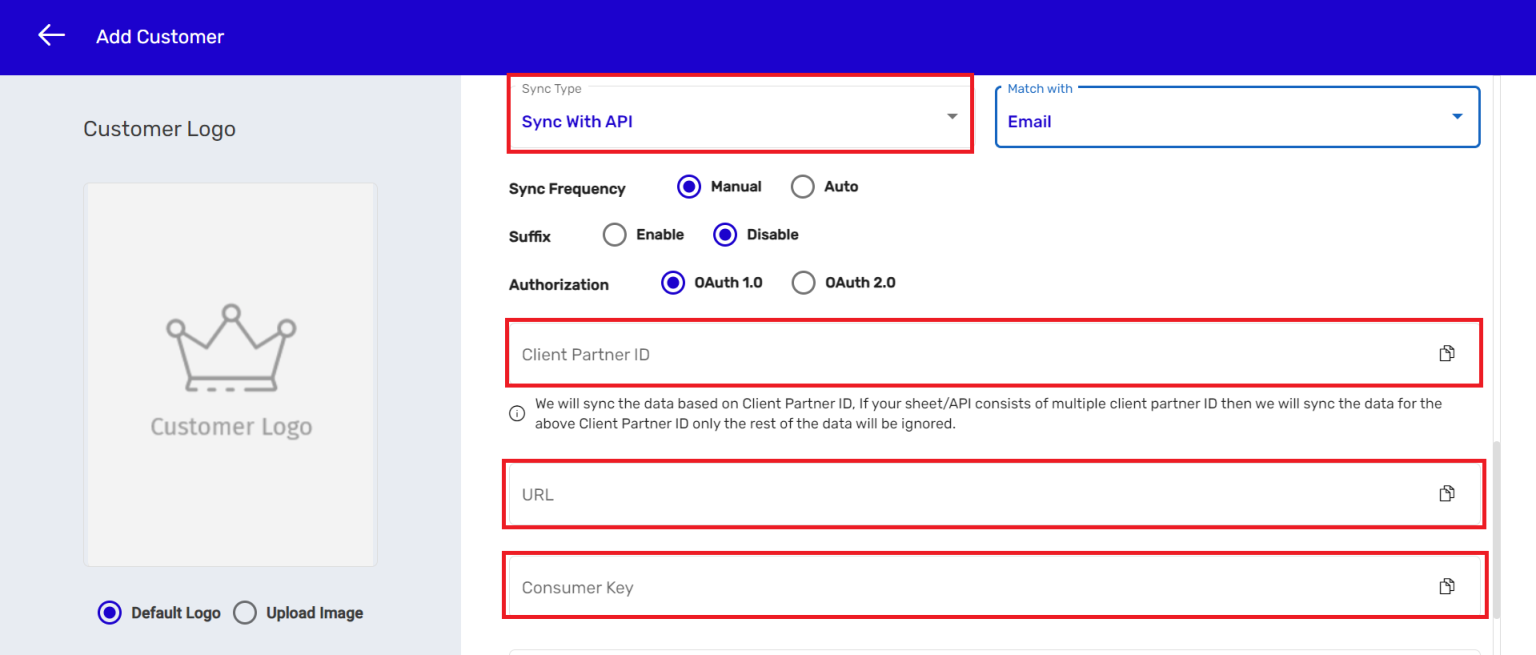
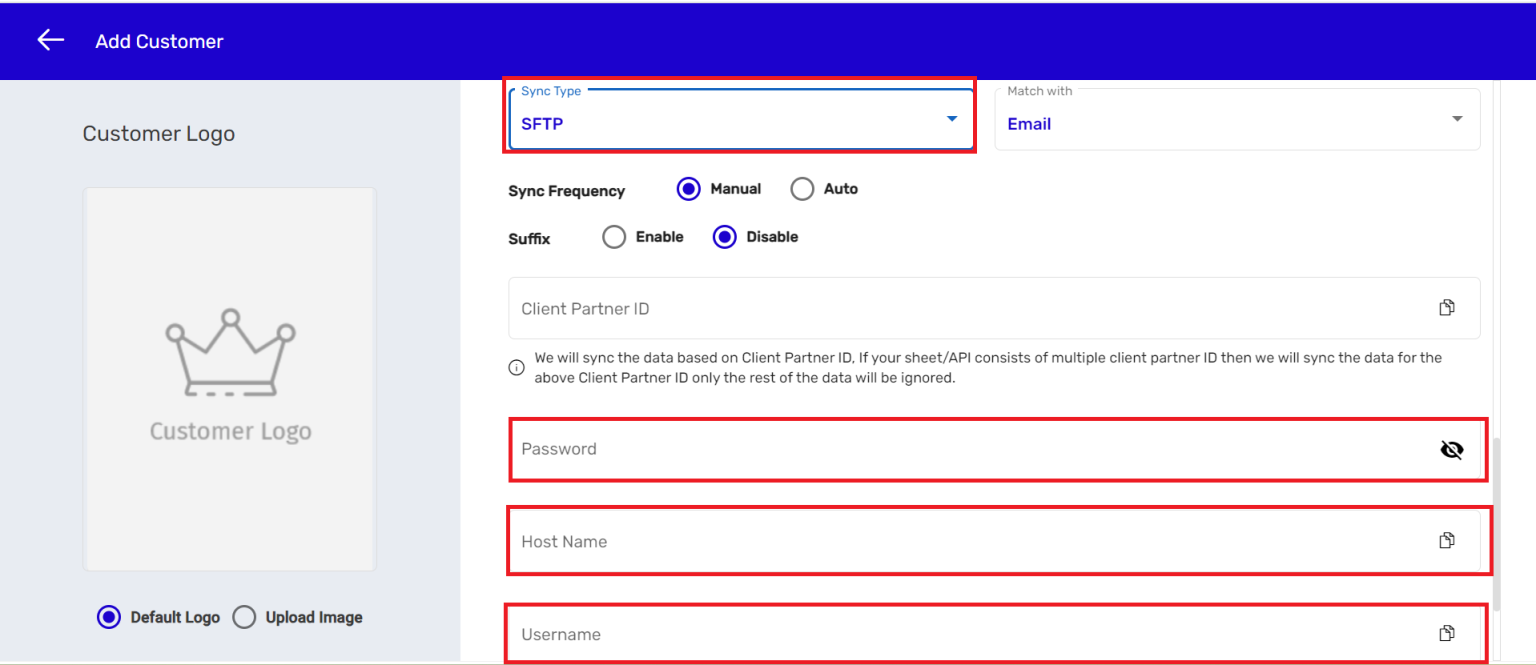
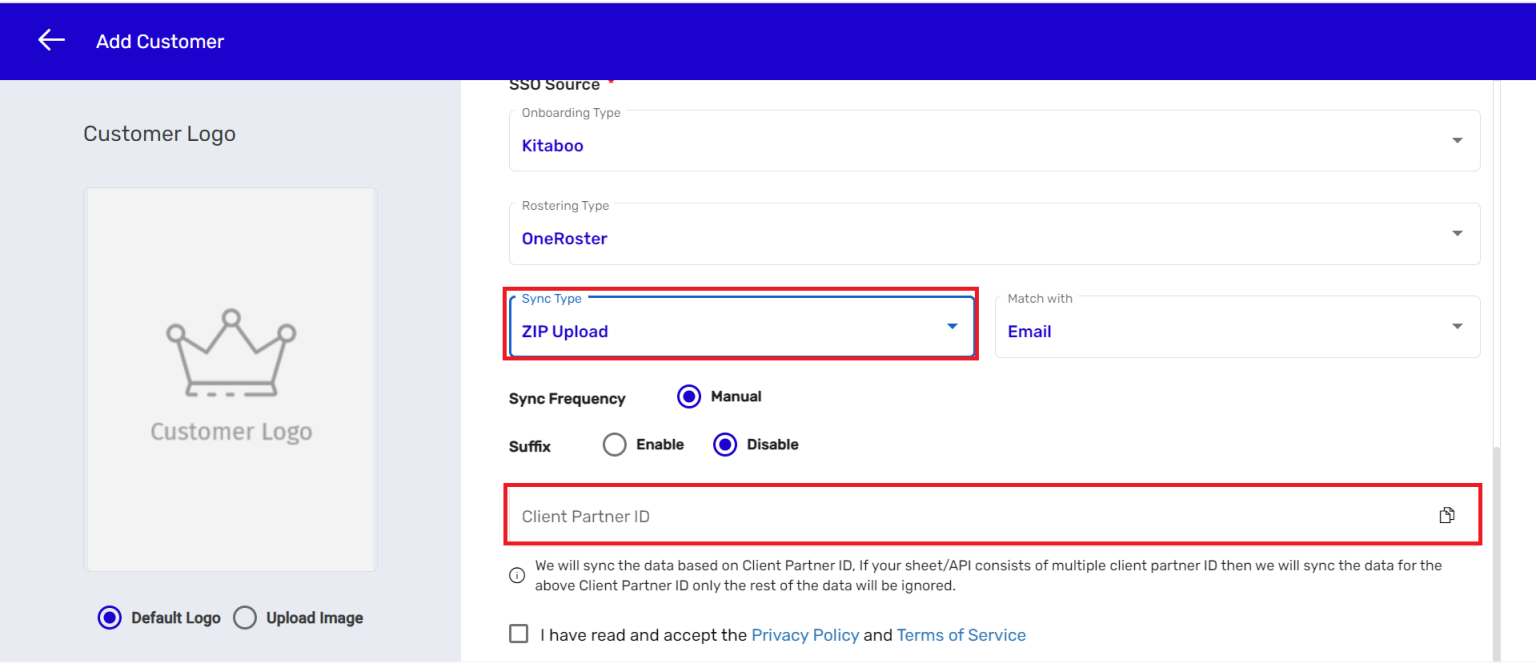
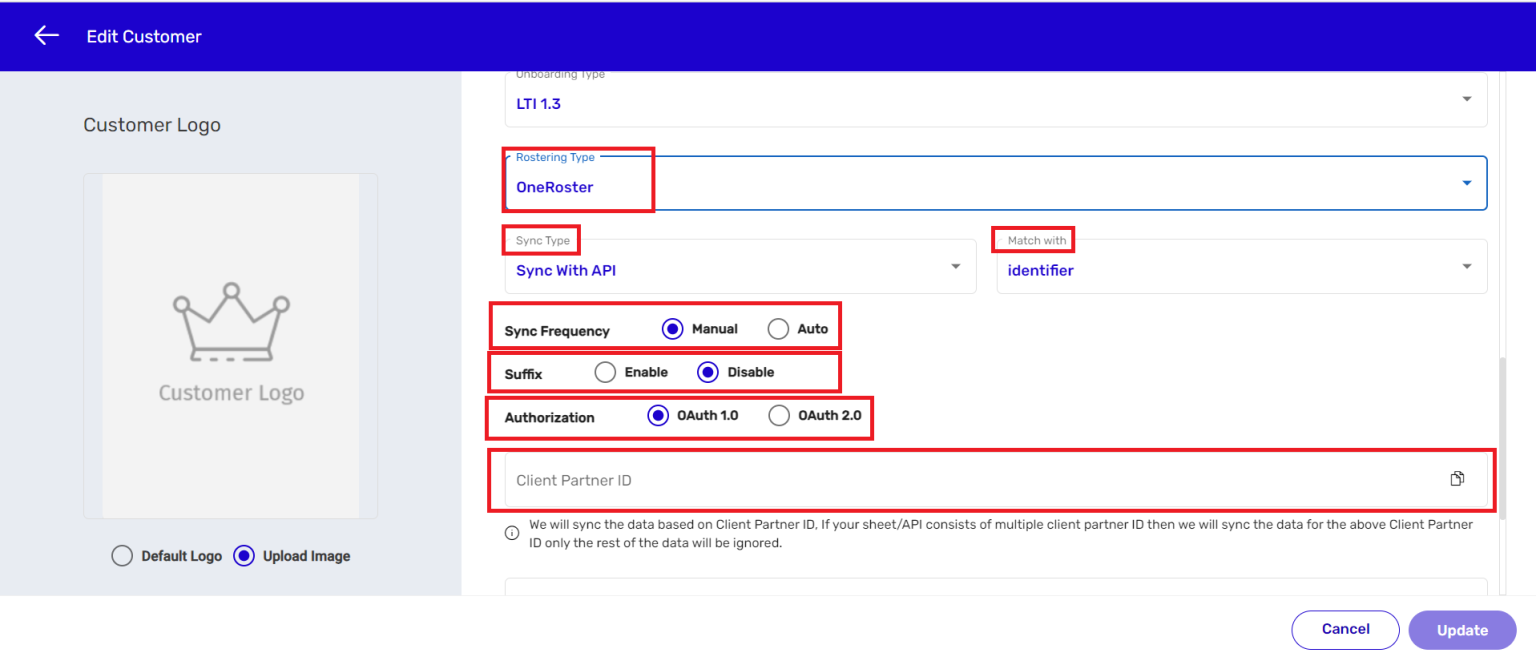
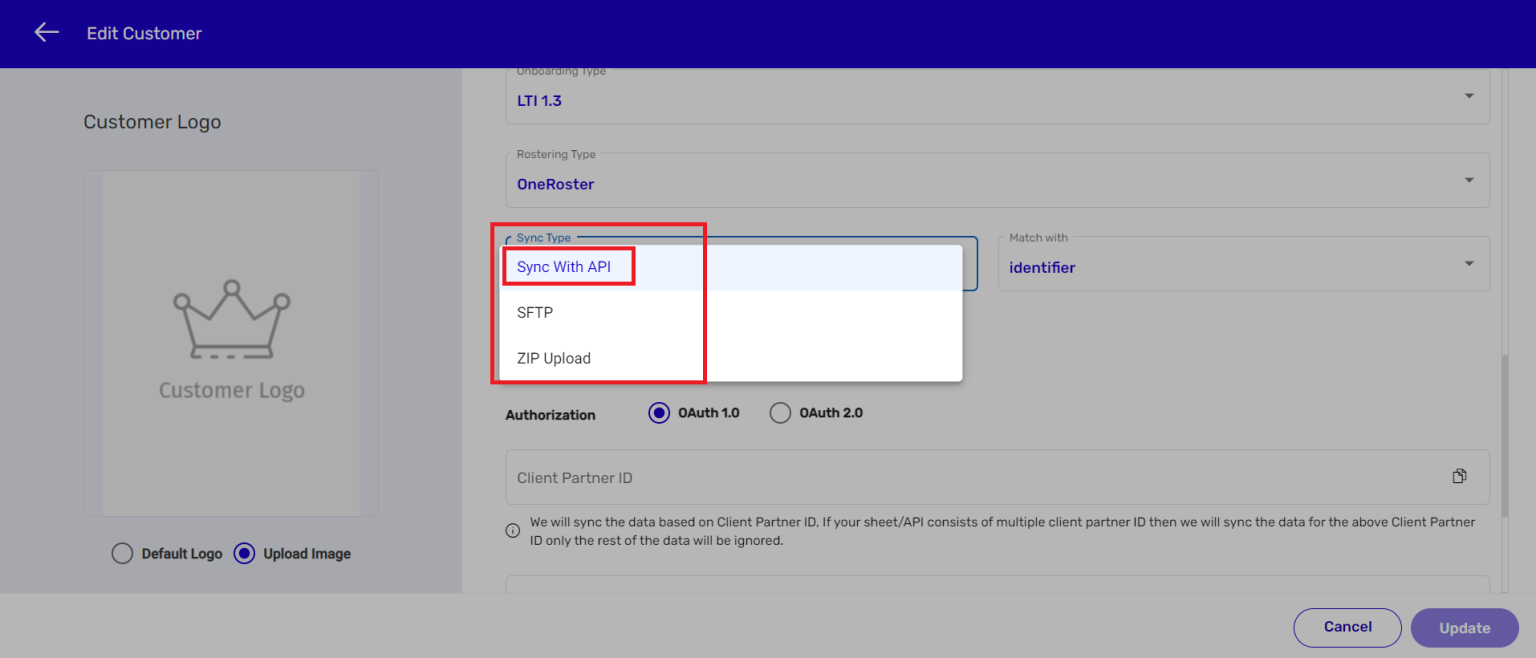
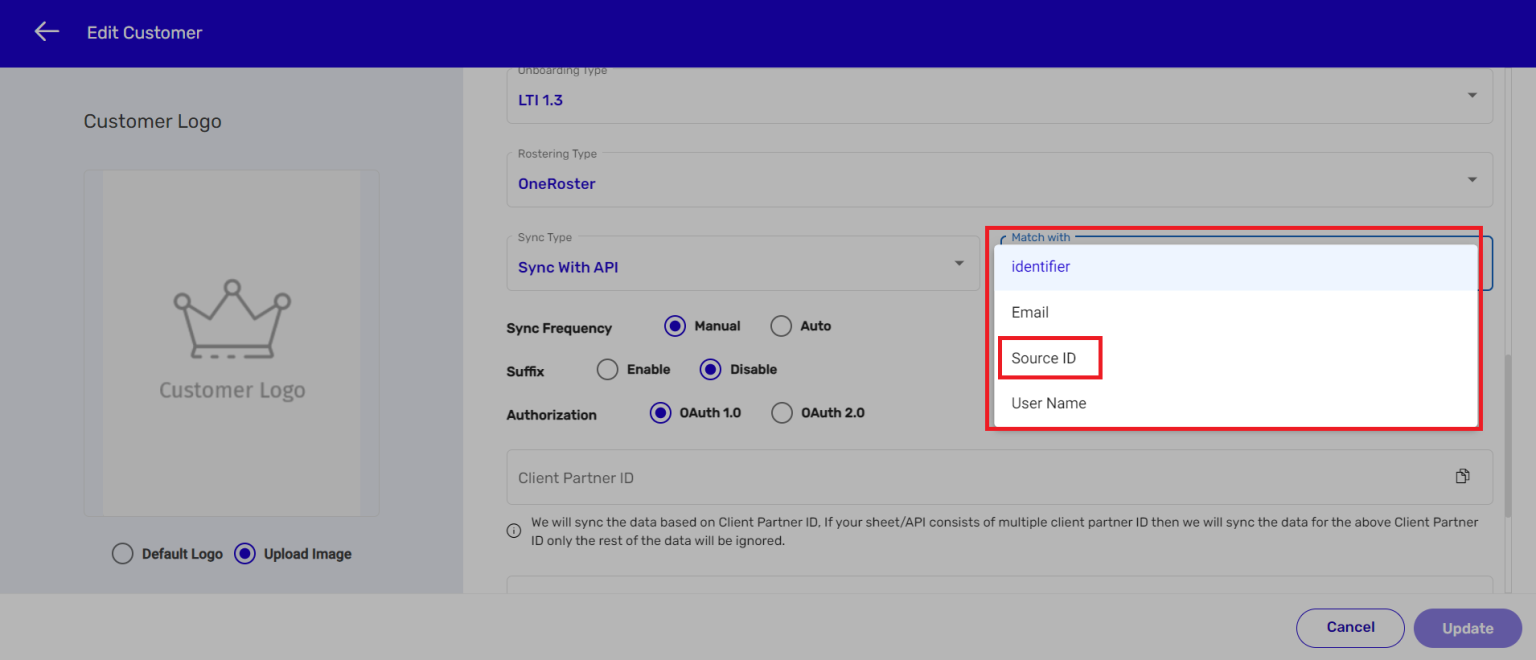
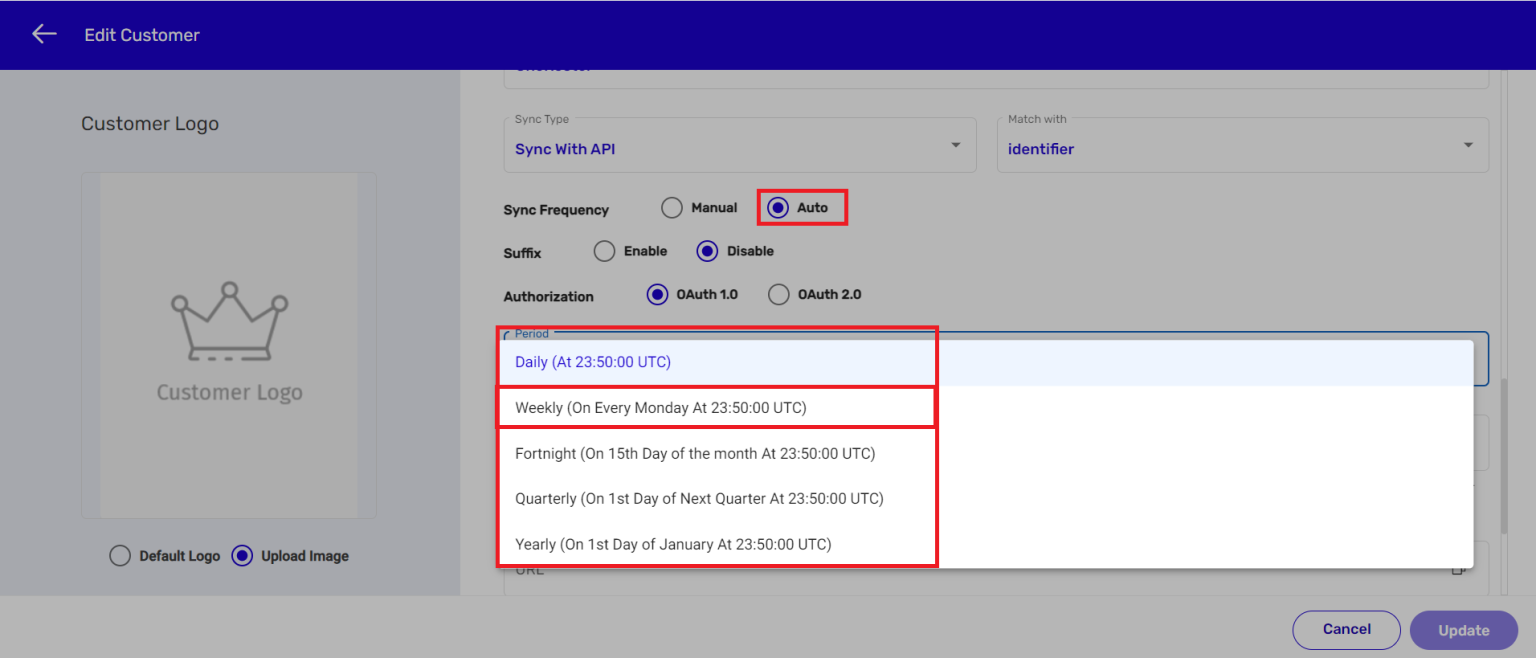
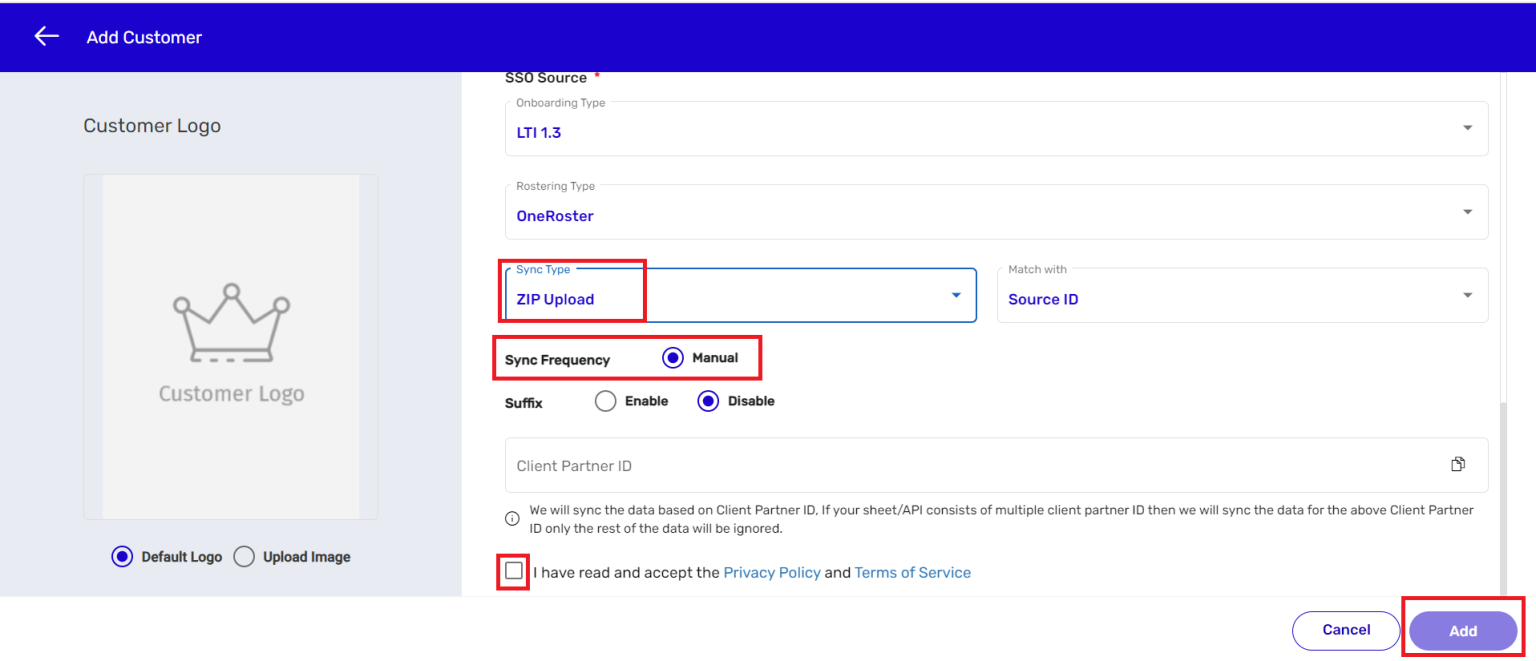
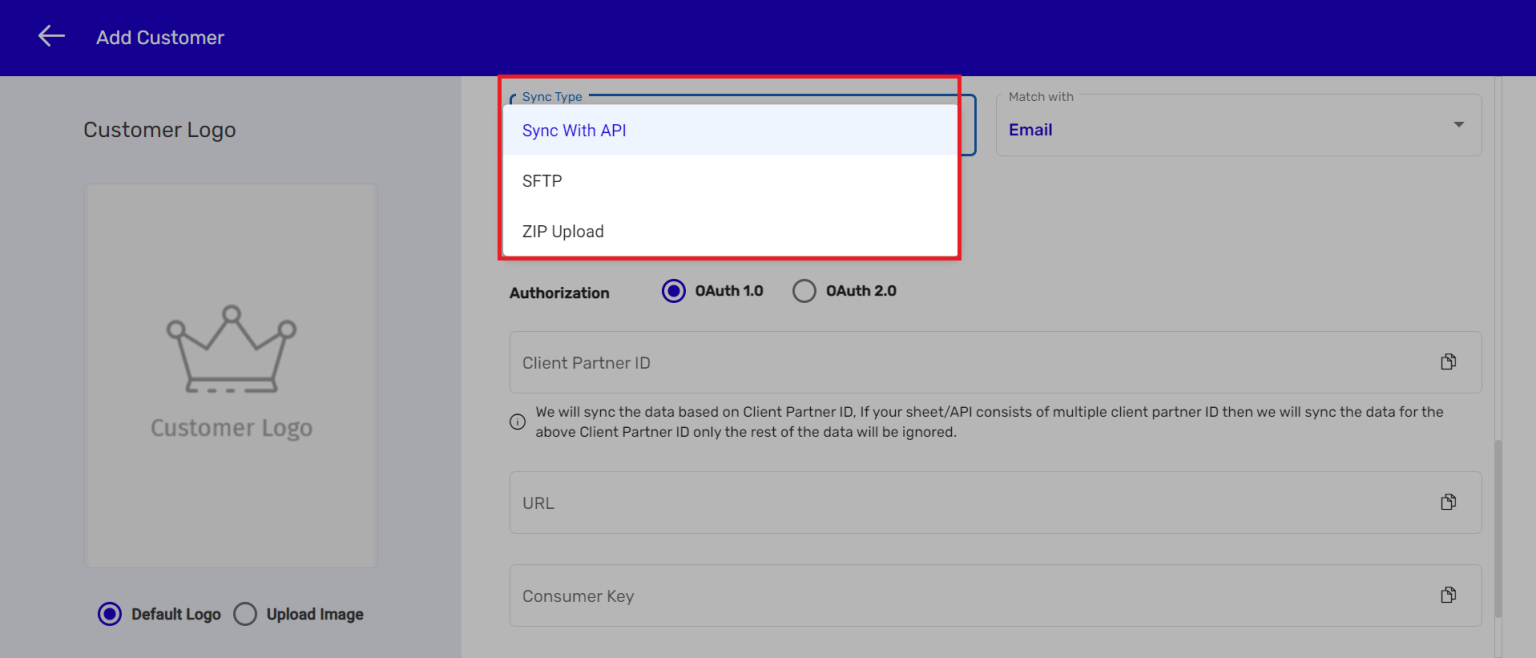
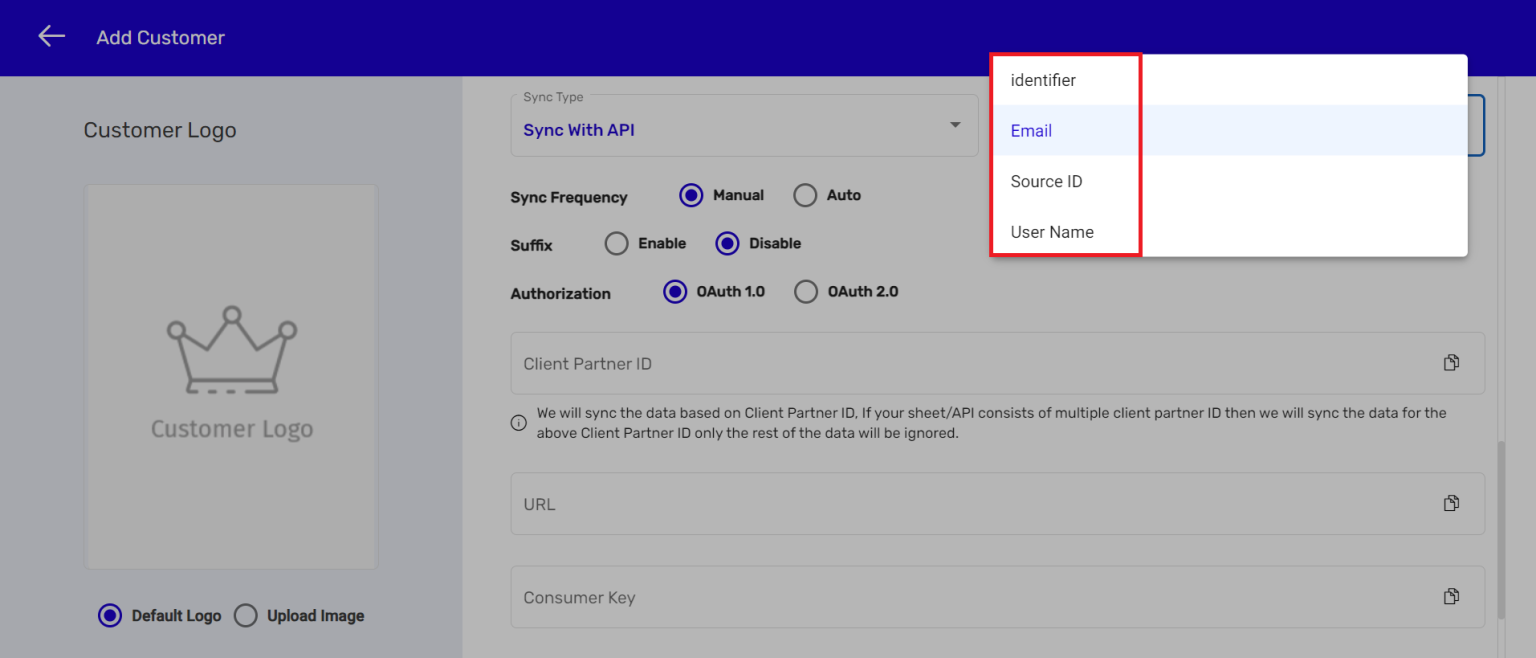
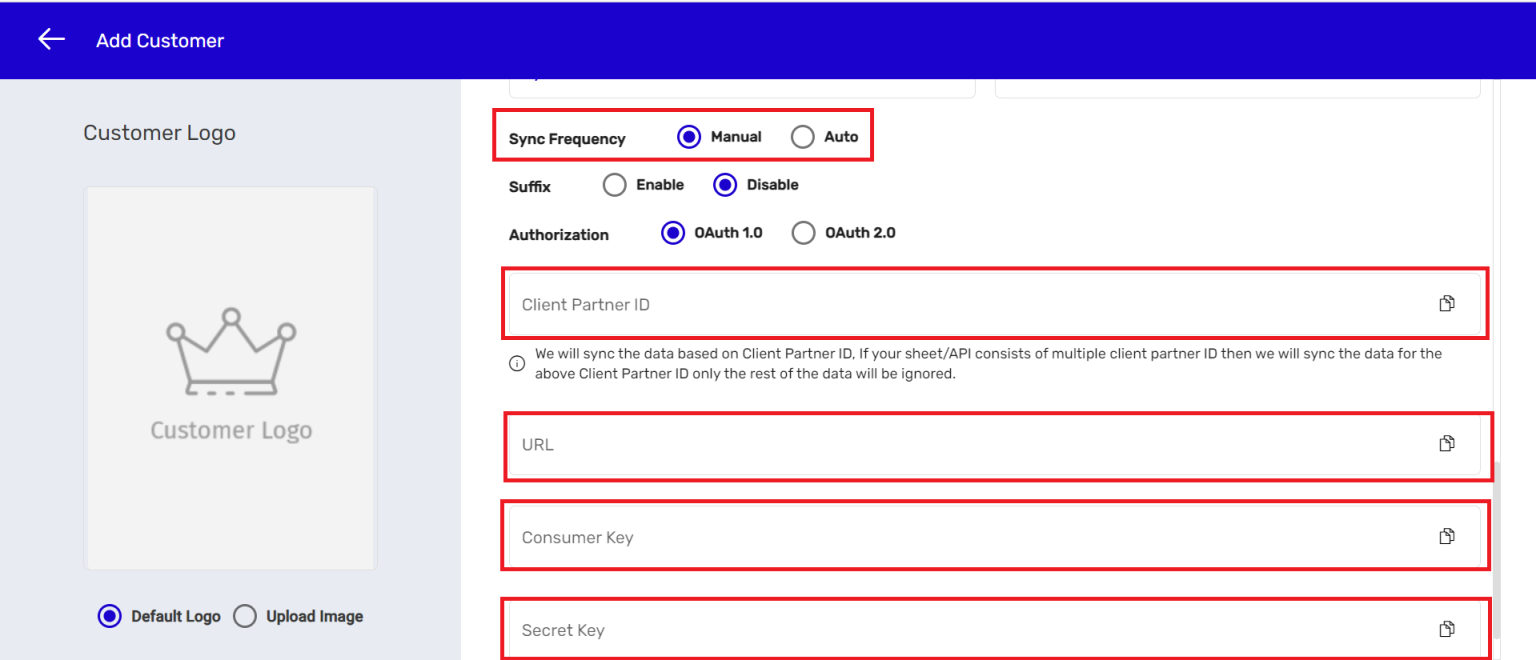
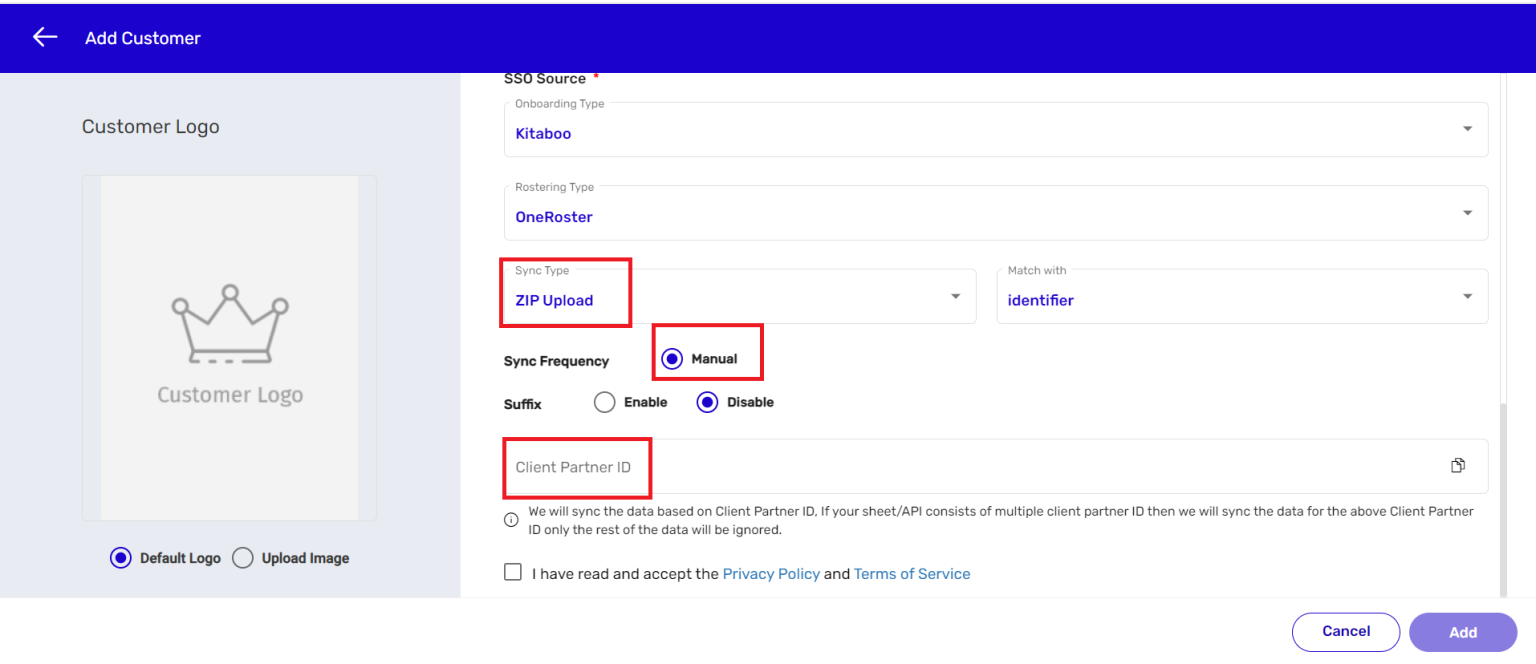
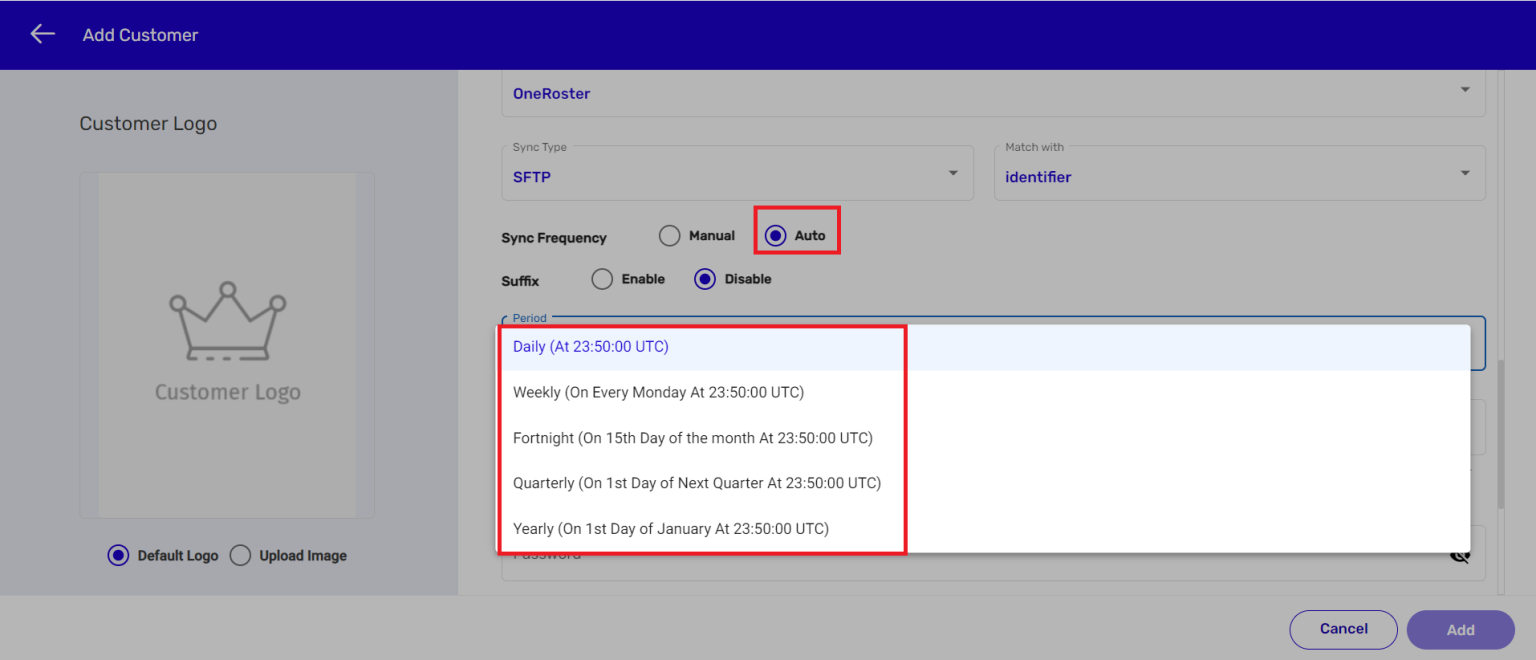
- Selective Oneroster Sync with API/ZIP/SFTP

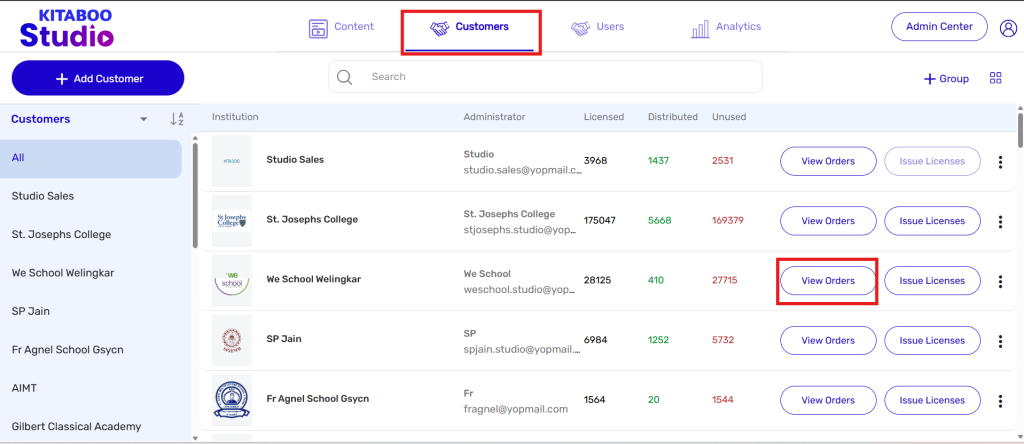
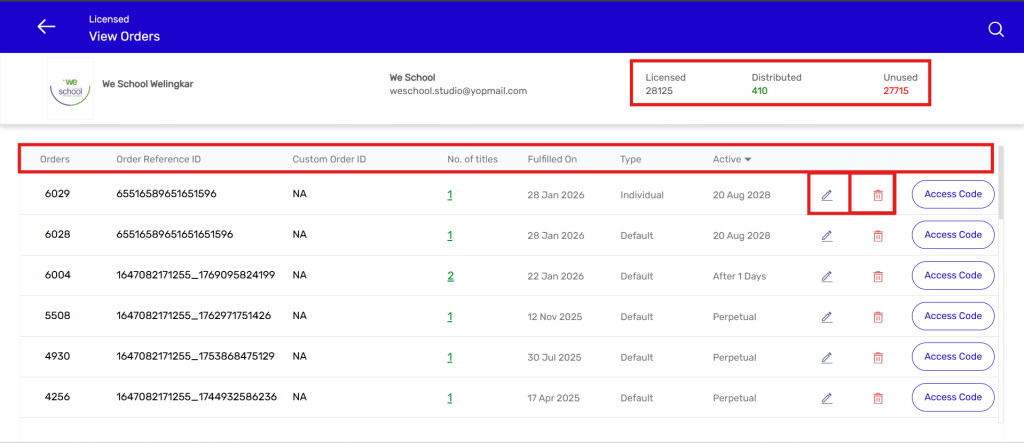
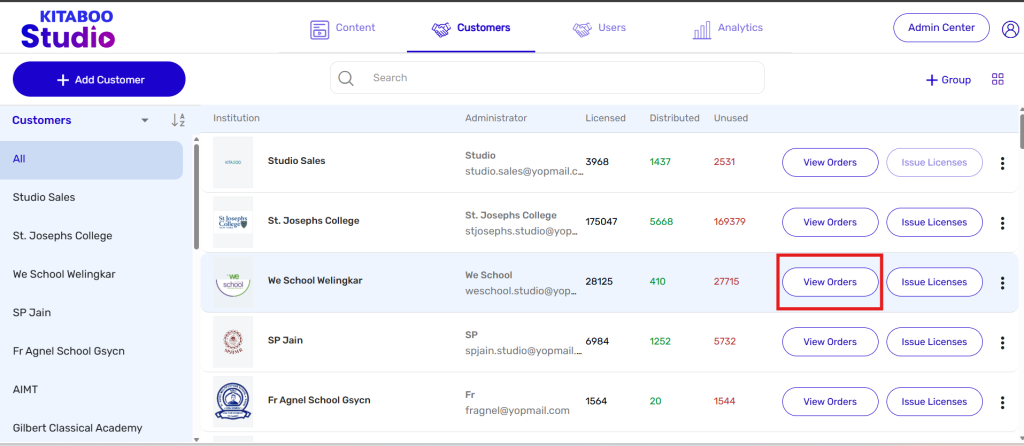
- Customer Order Details -View Order
- License Management
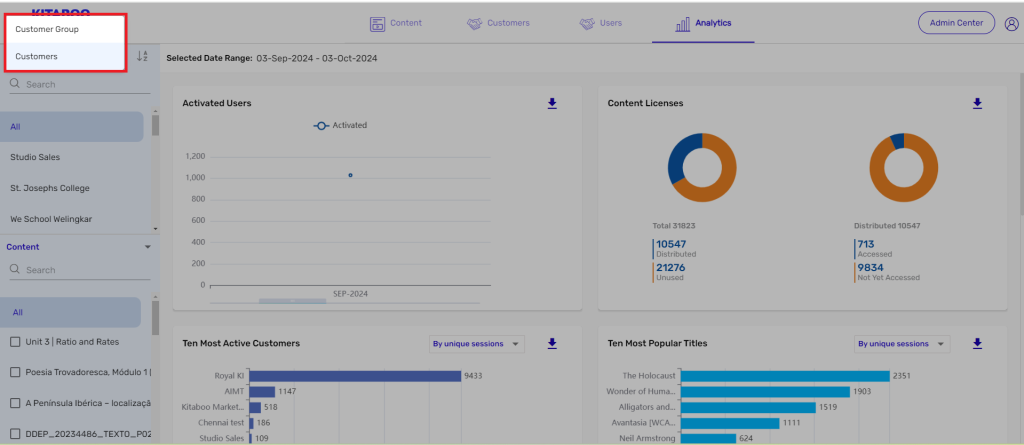
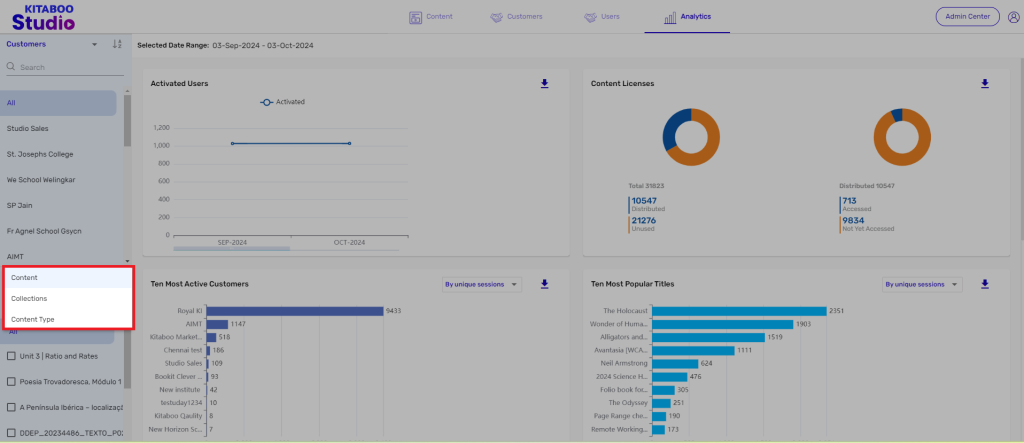
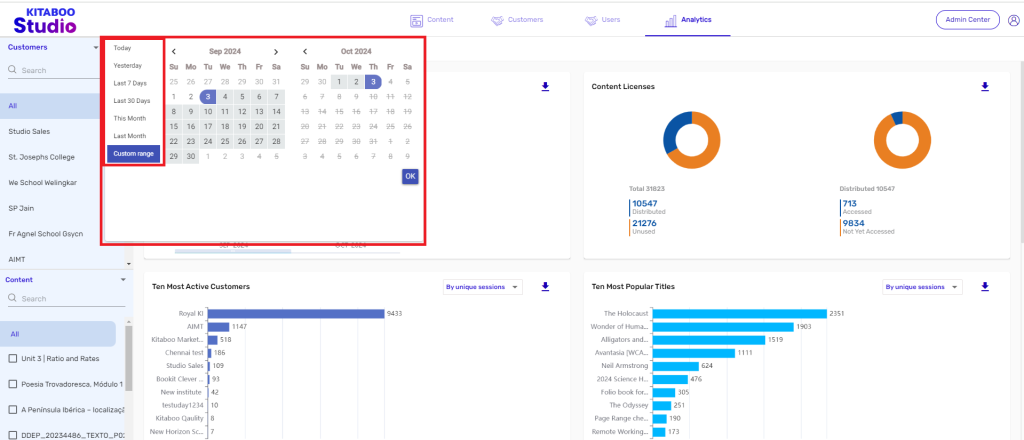
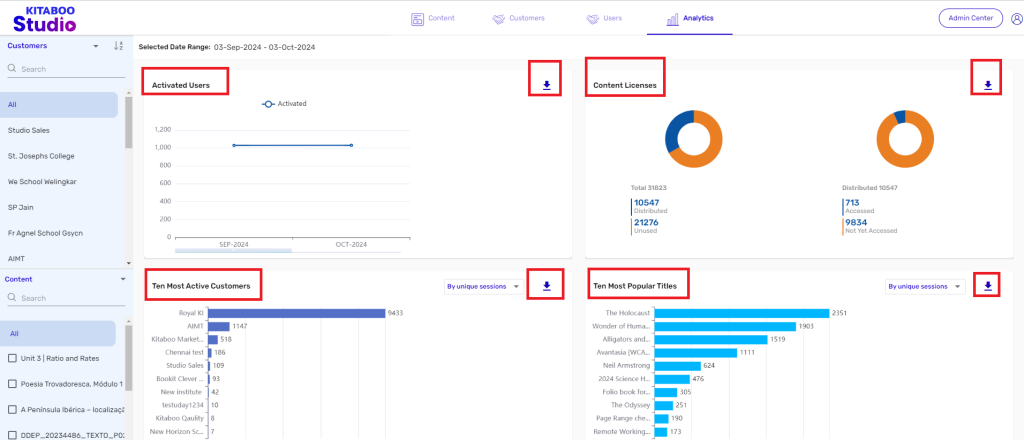
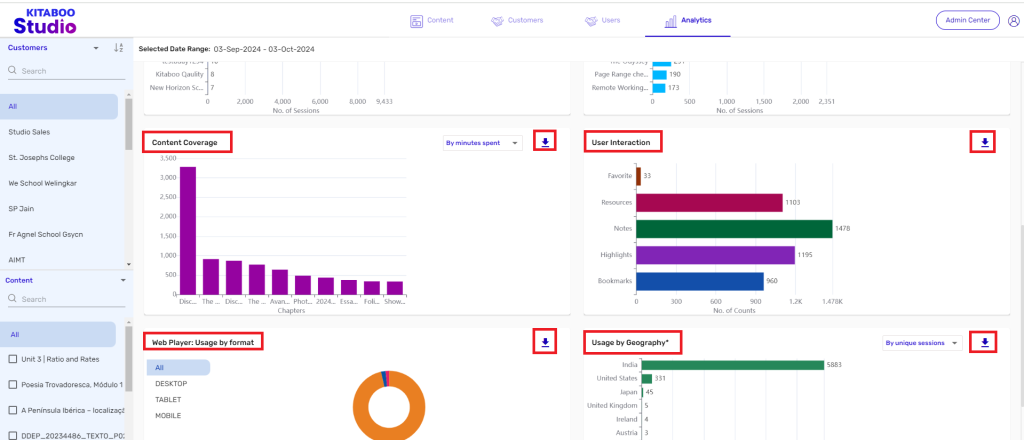
- Analytics Dashboard and Reports Overview
- How Kitaboo Reader – Text-to-Speech (TTS) Works
- Activated User – Definition & Billing Policy
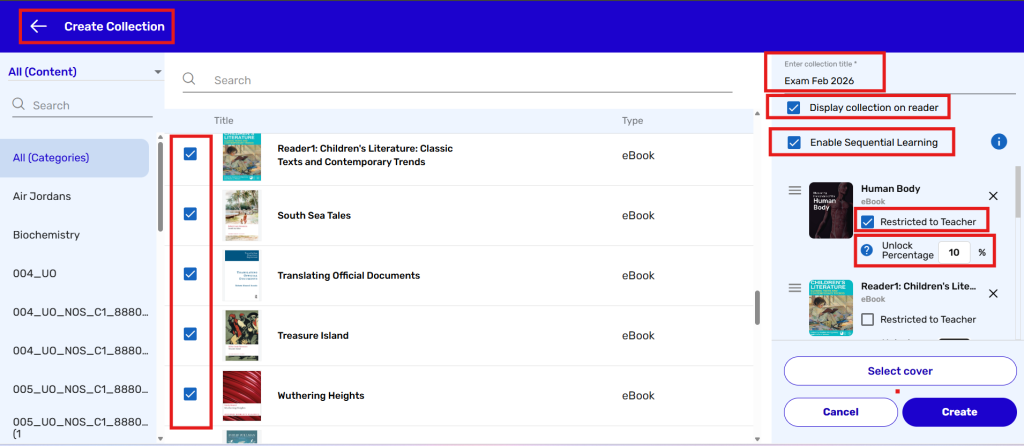
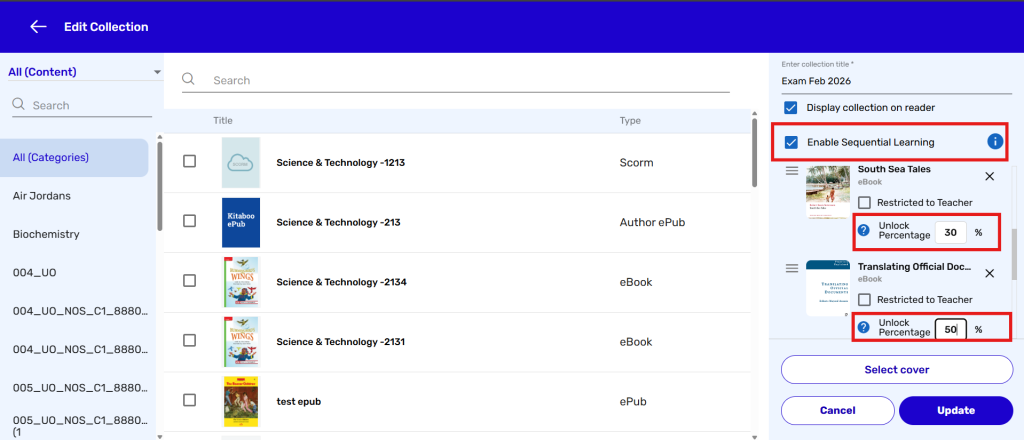
- What is Sequential Learning and How to Enable It? (Add On)
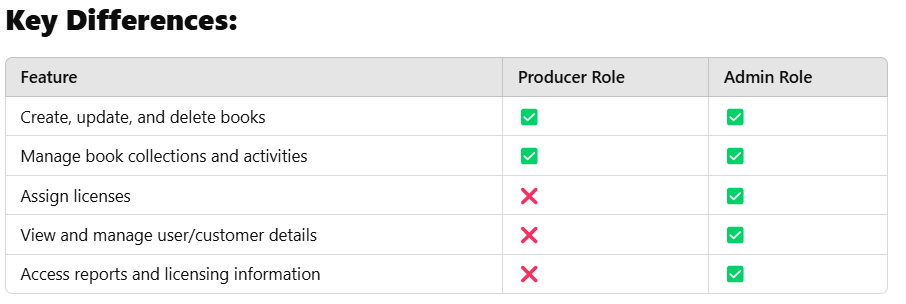
- Understanding User Roles: Producer vs. Admin
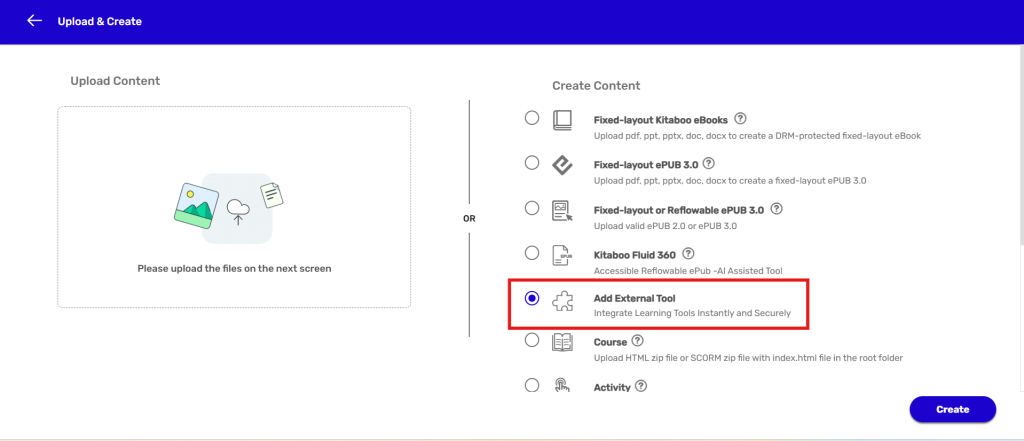
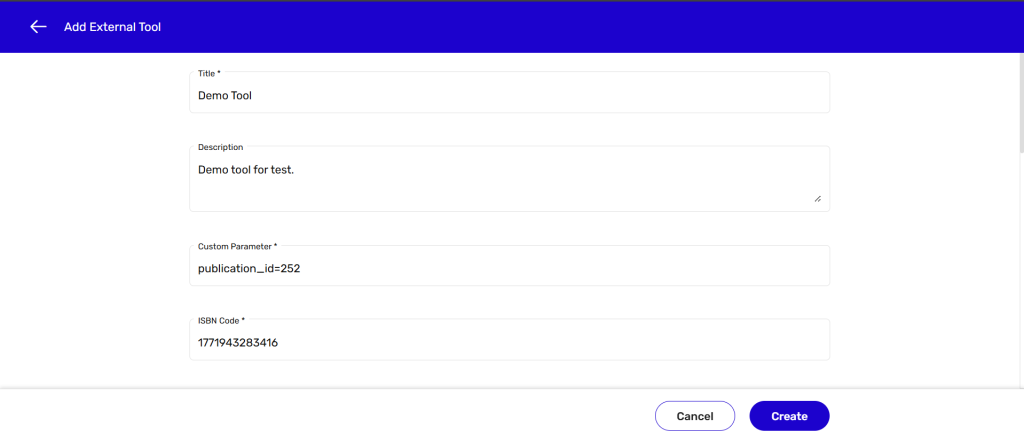
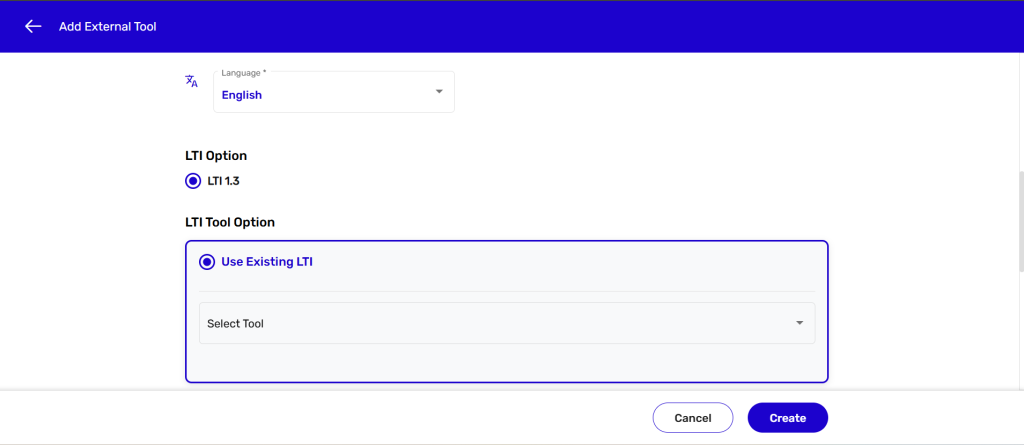
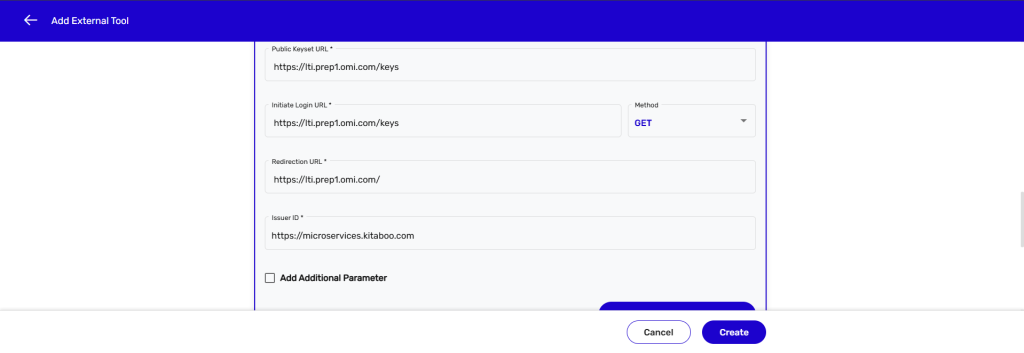
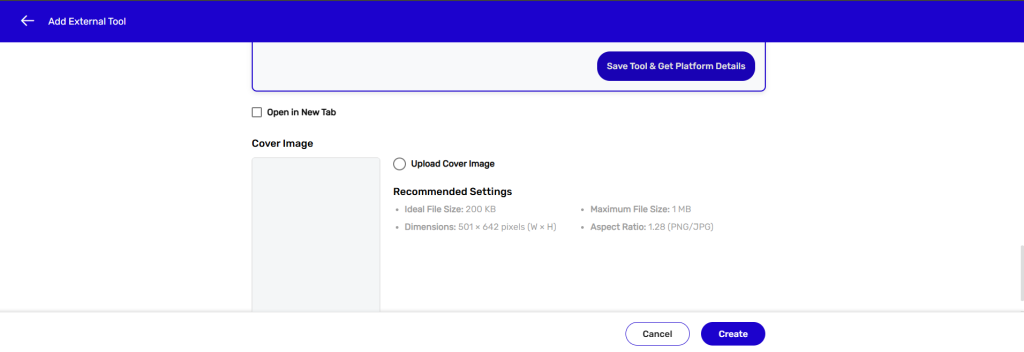
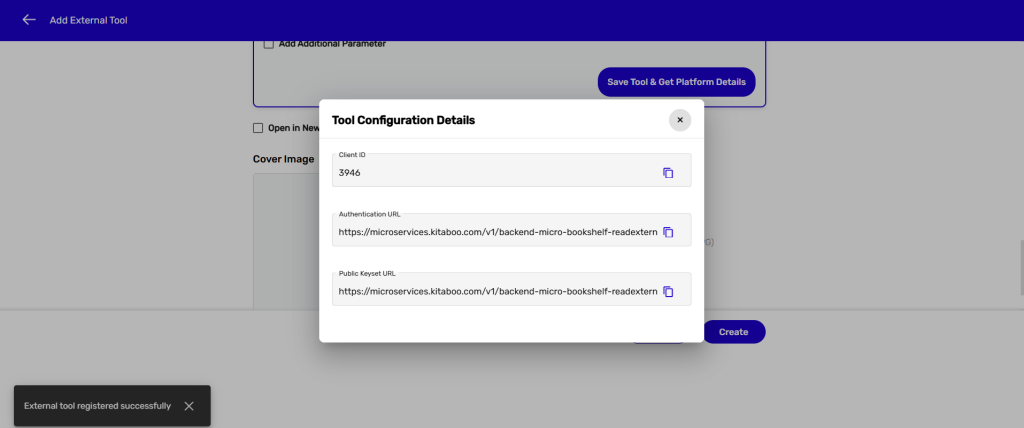
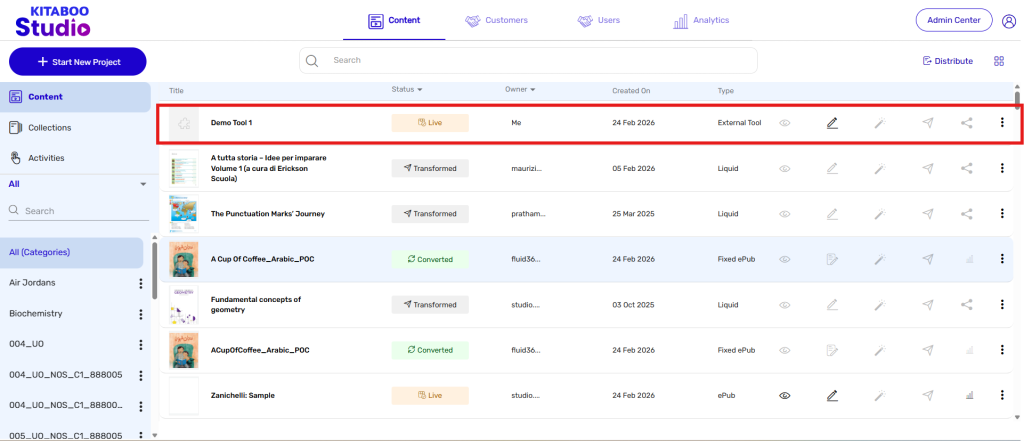
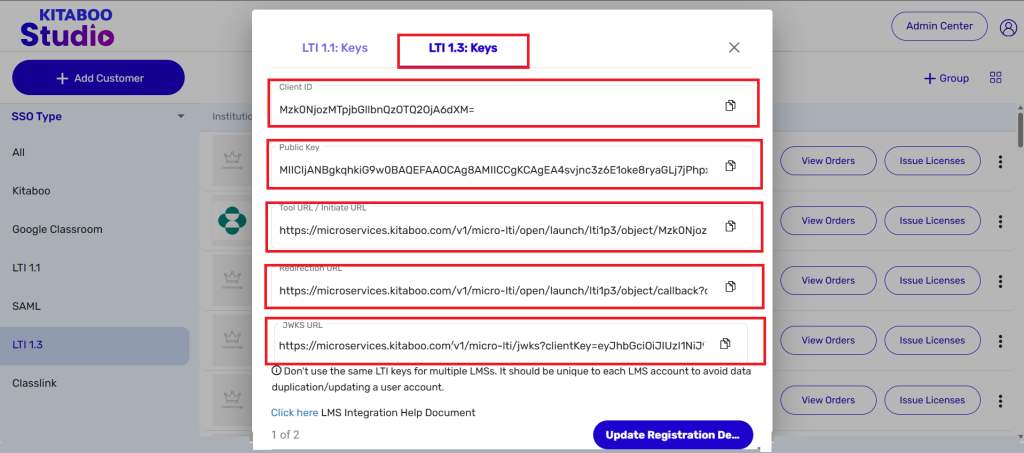
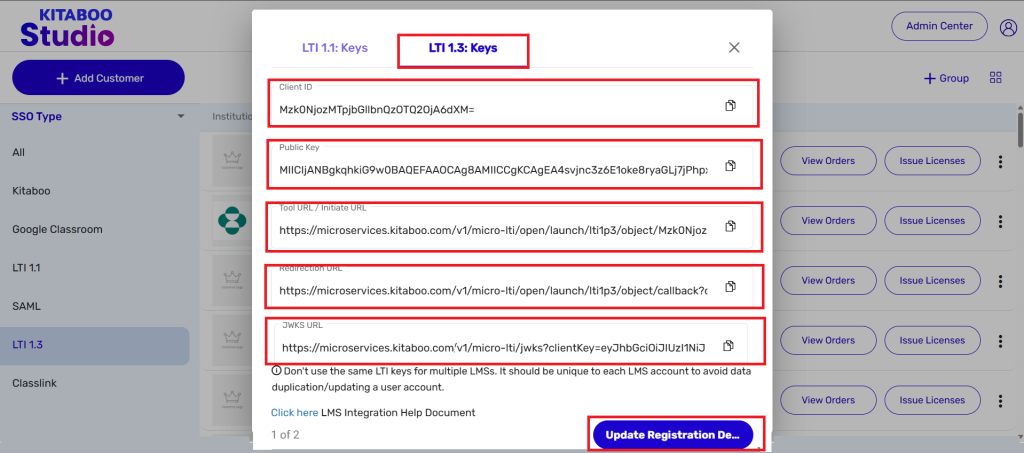
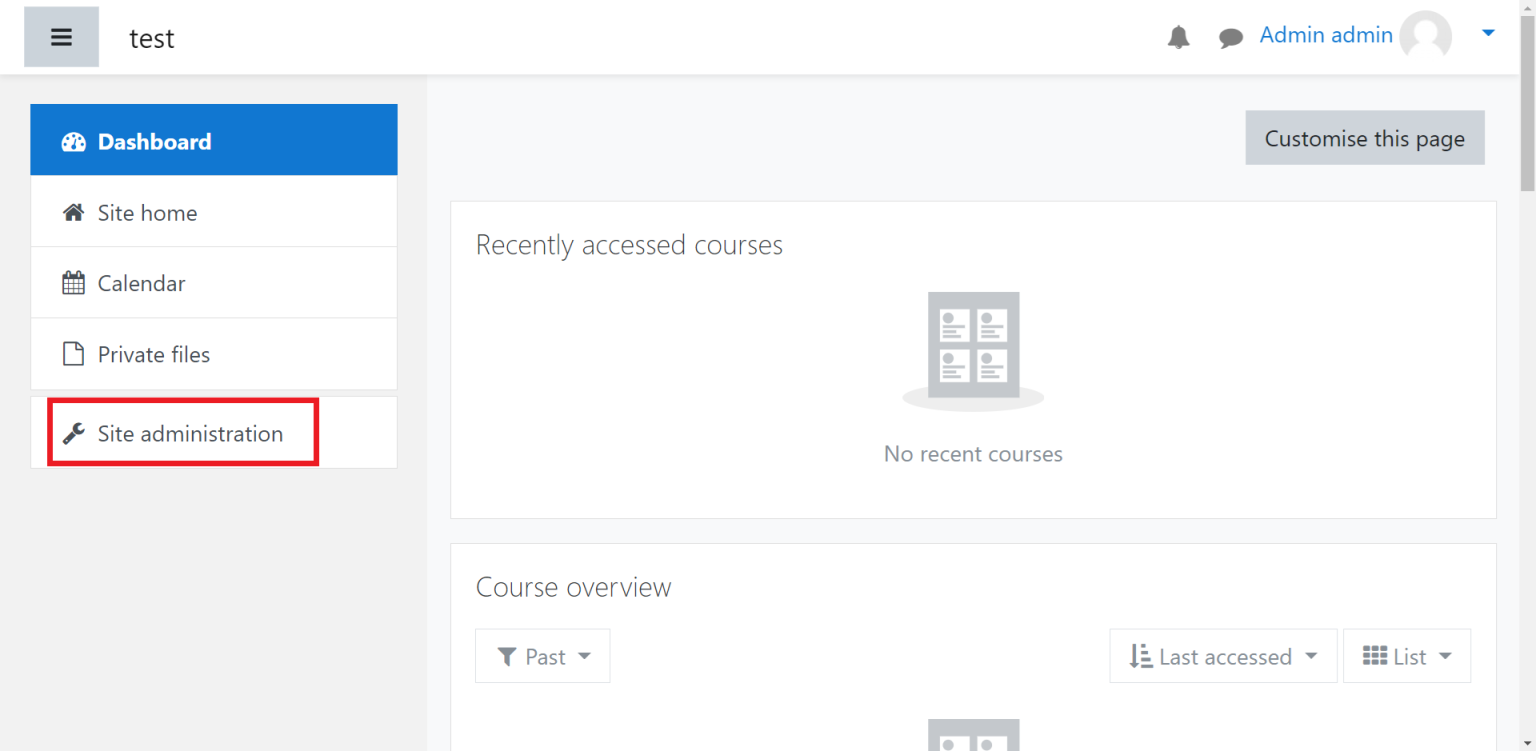
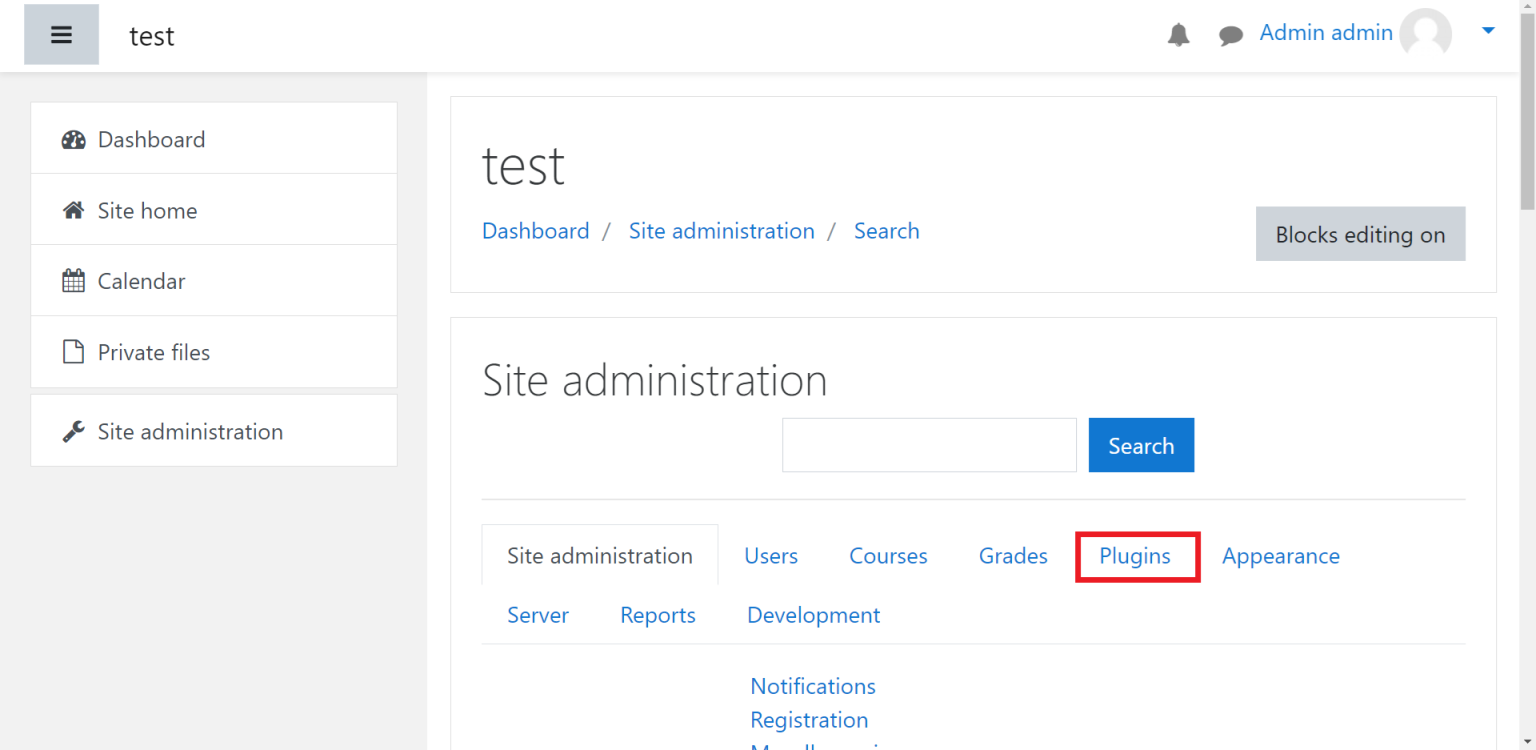
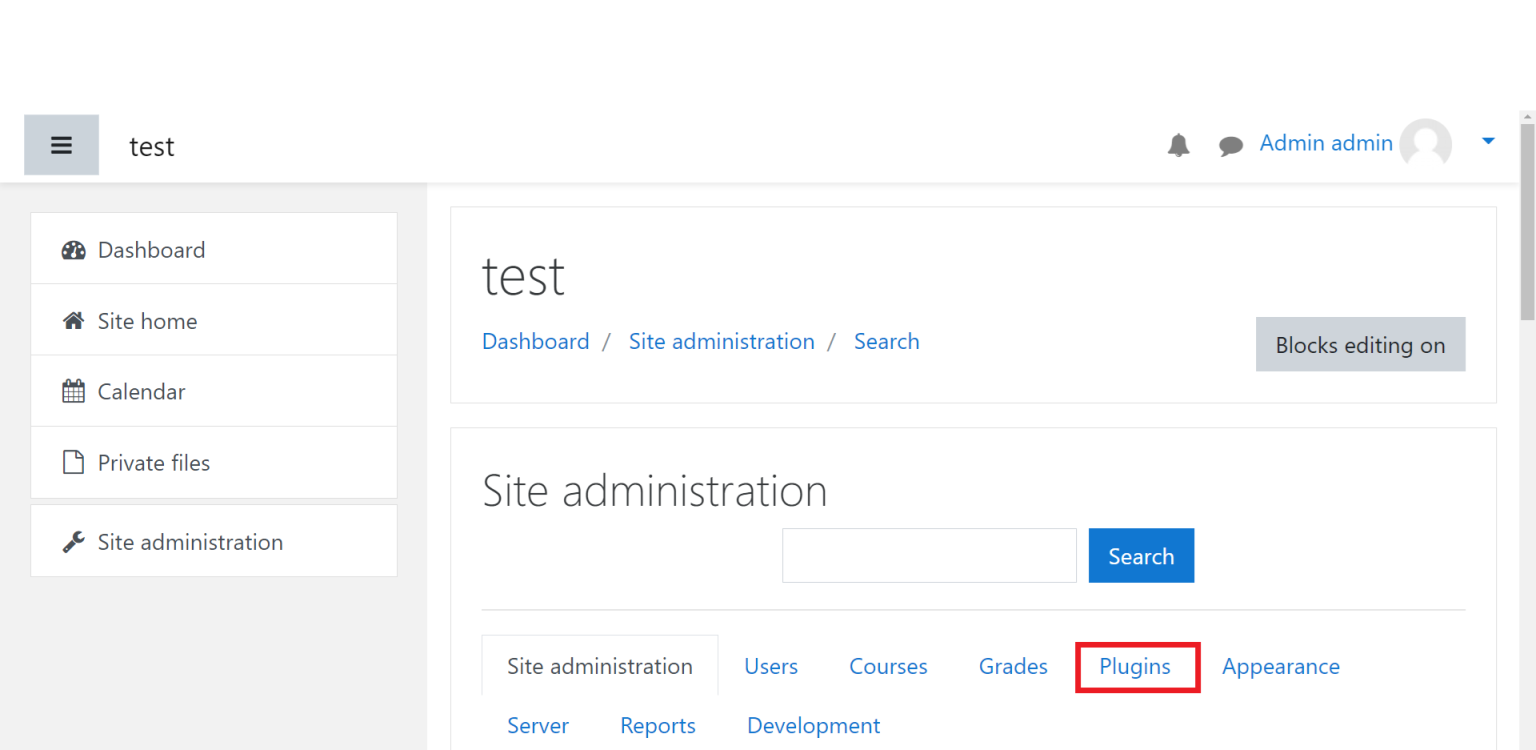
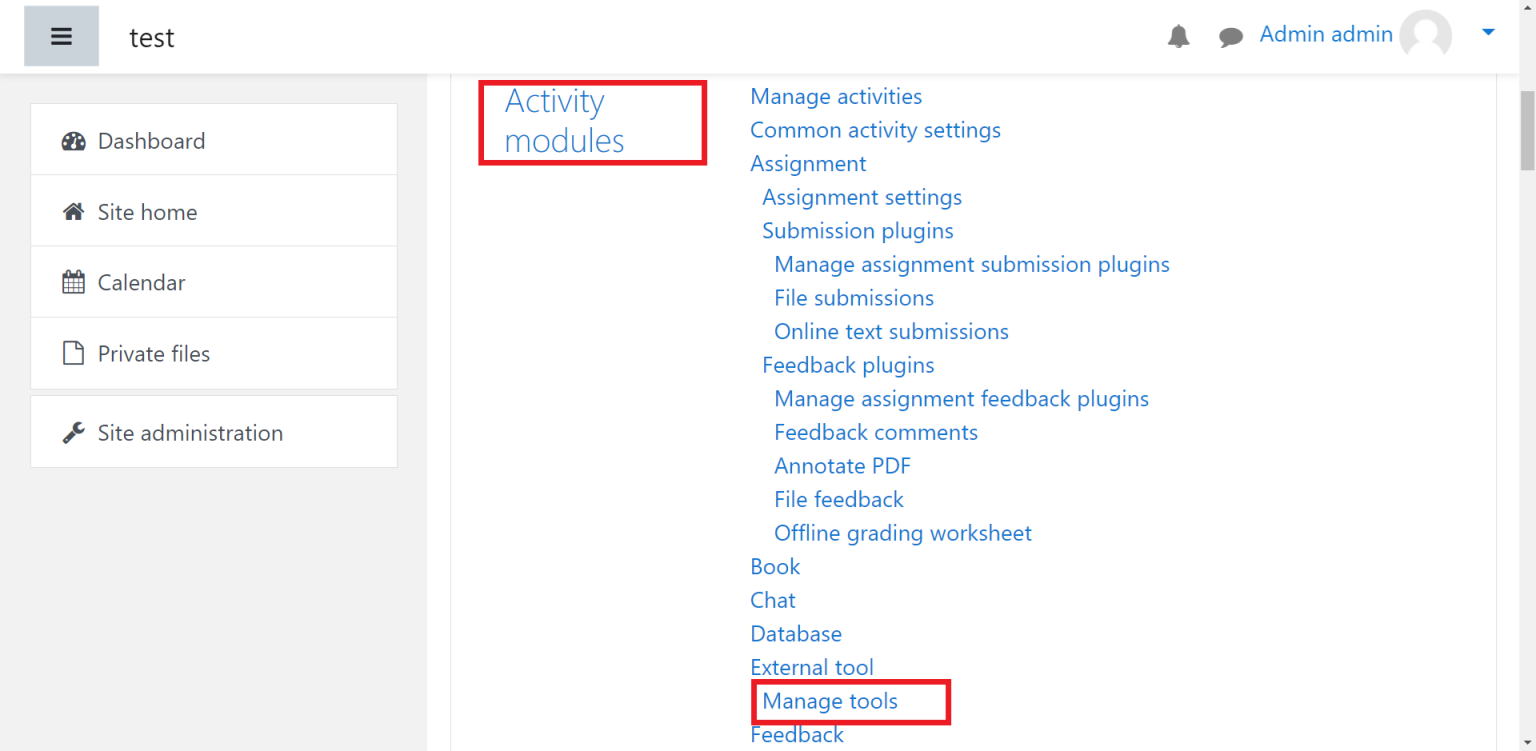
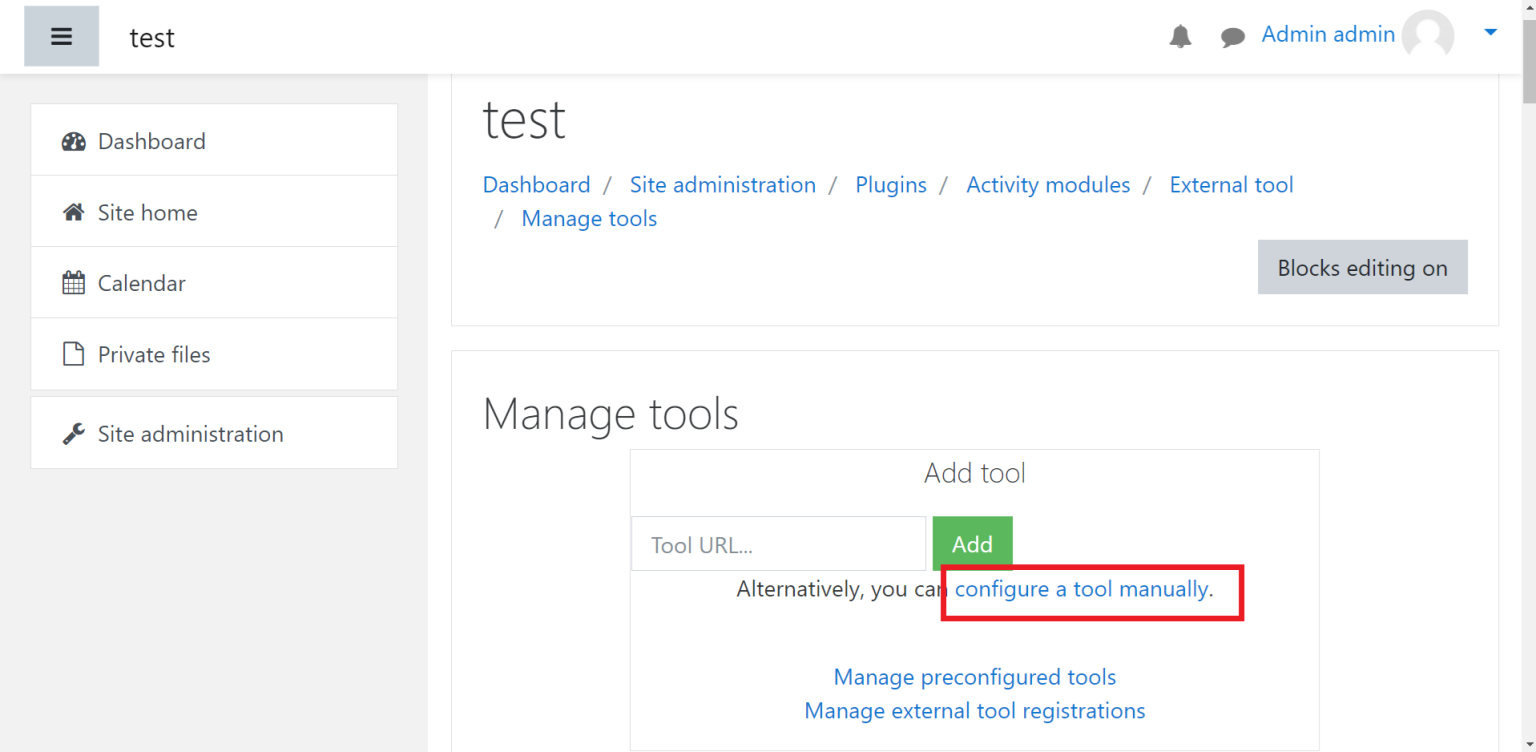
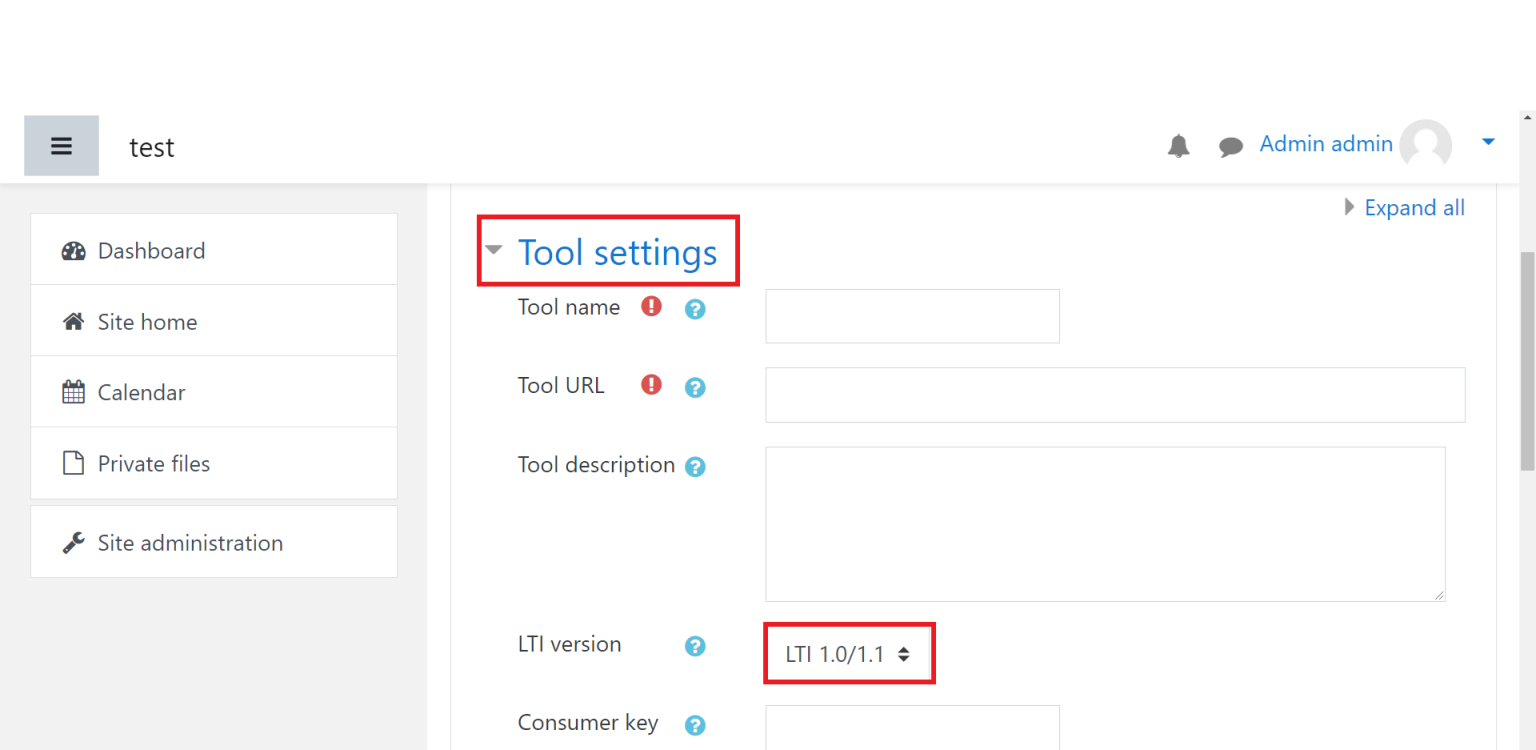
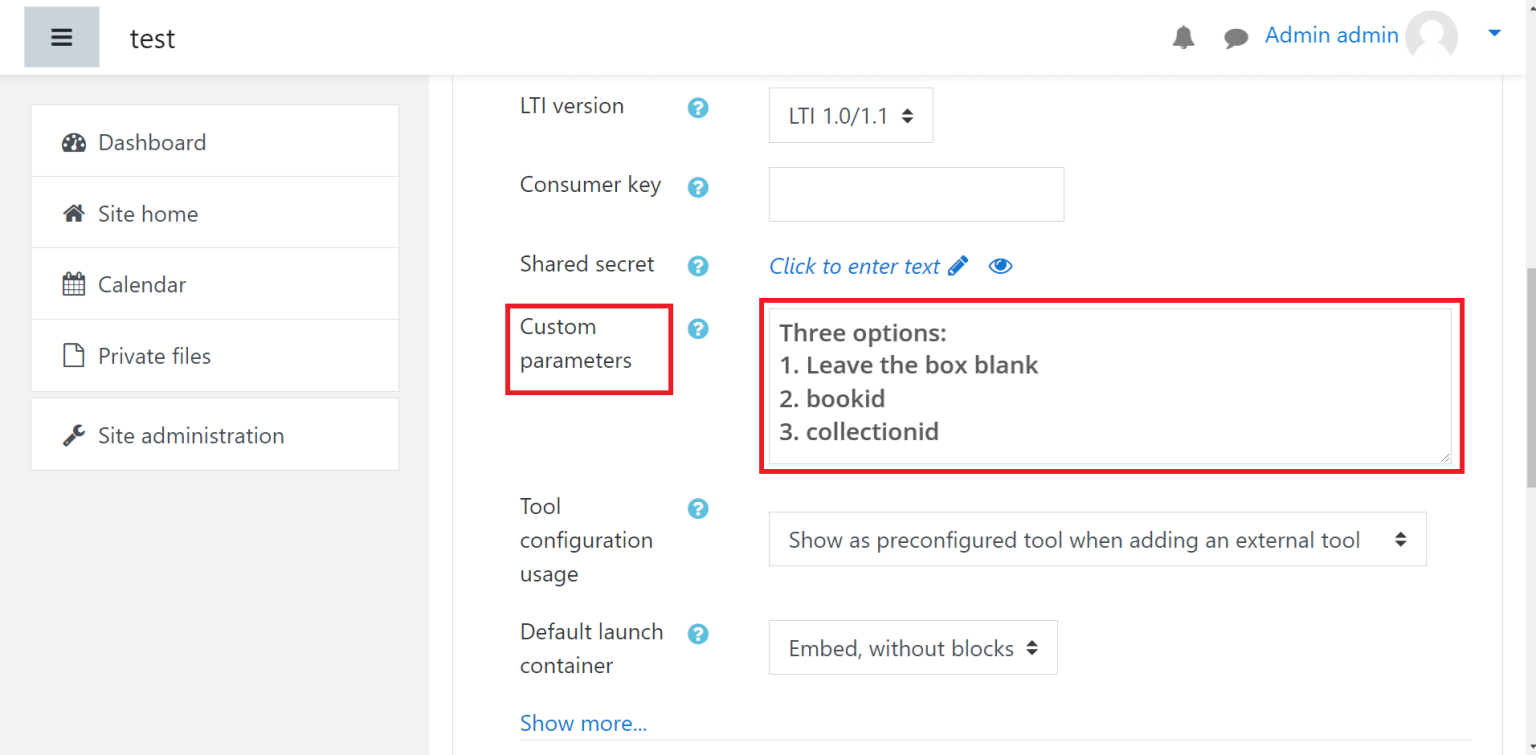
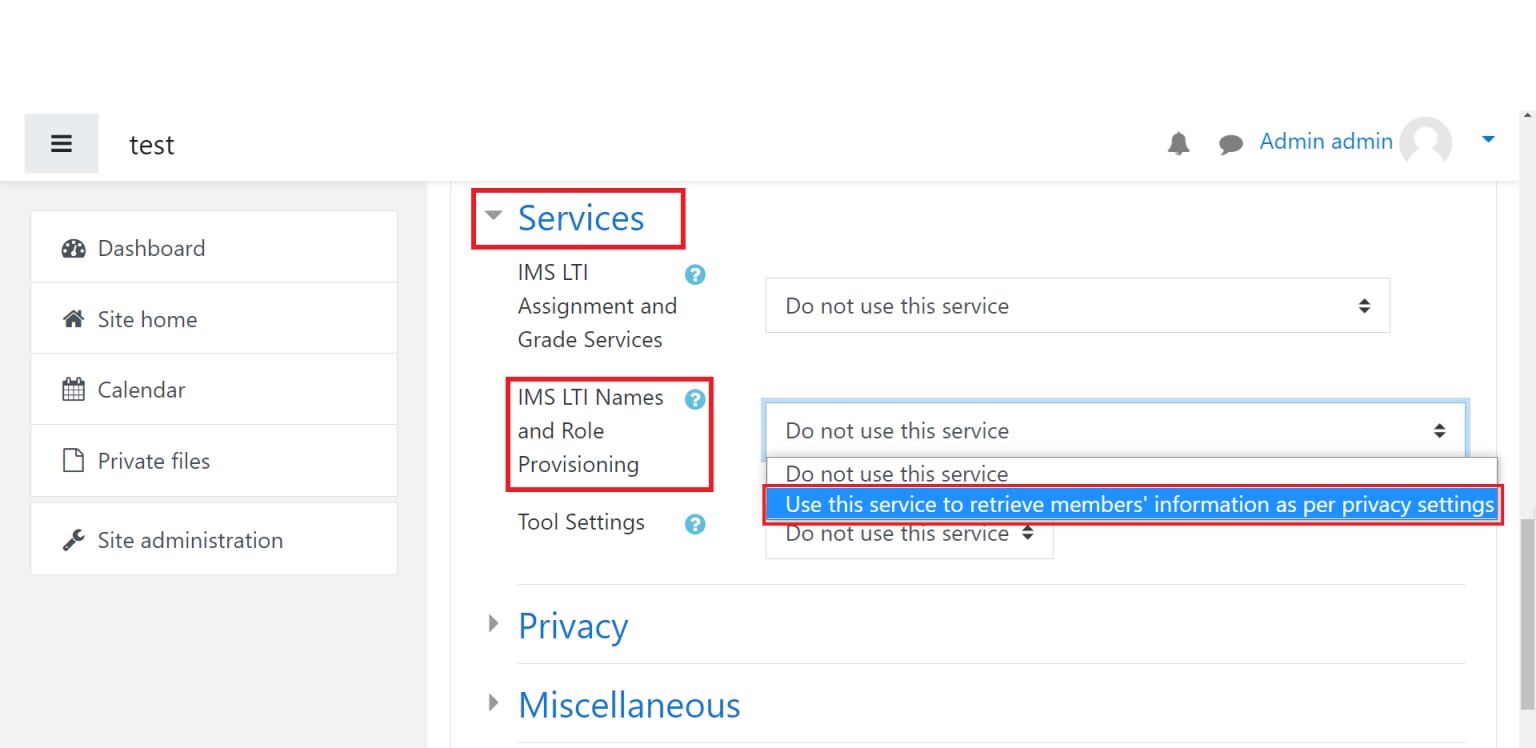
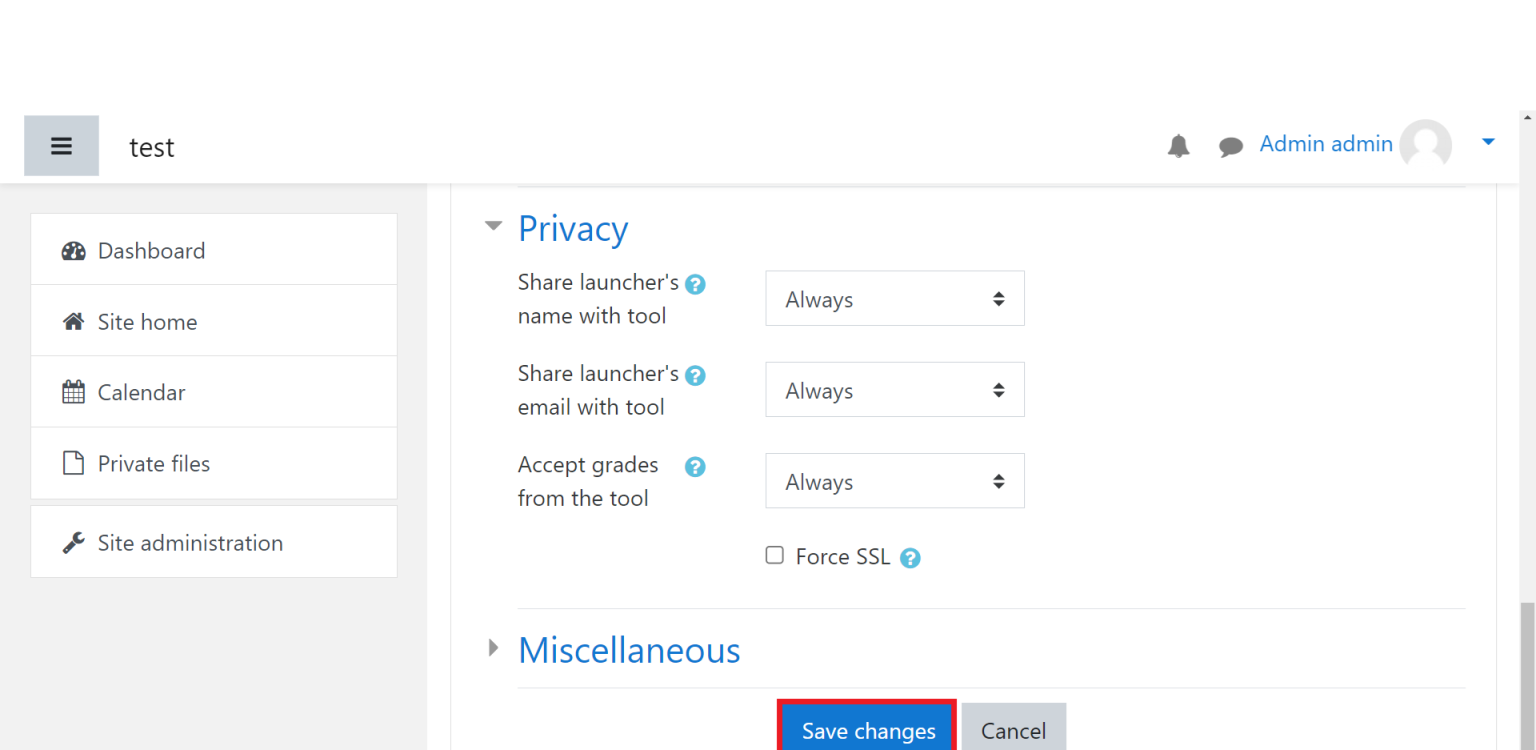
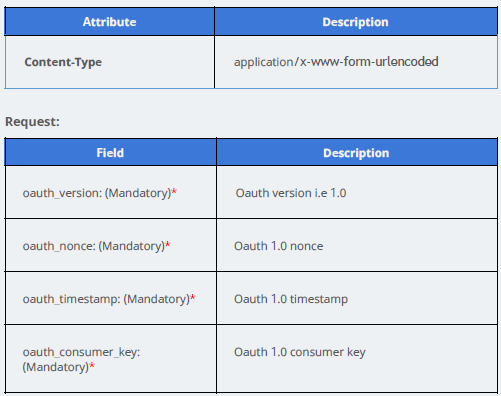
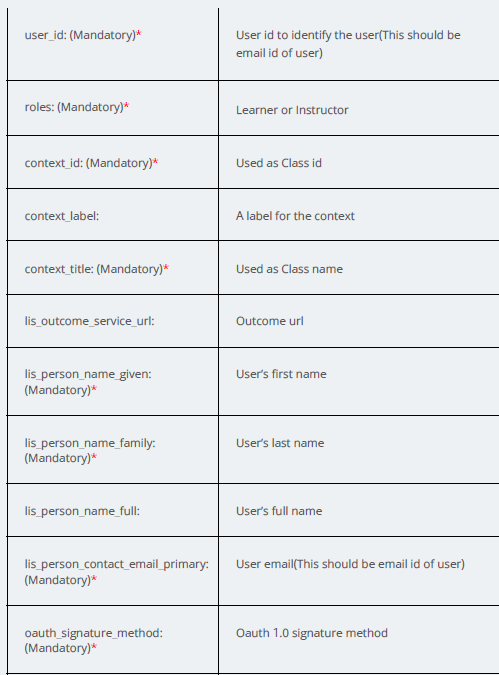
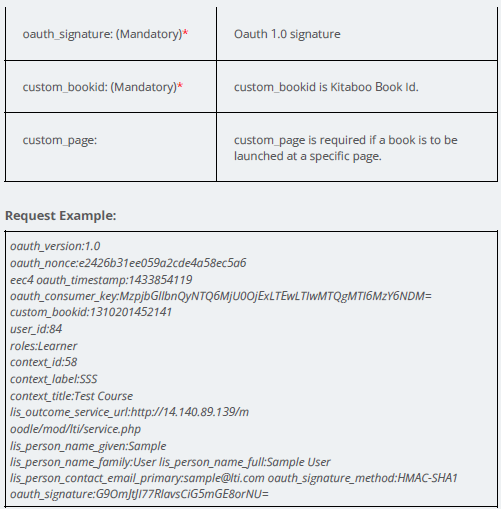
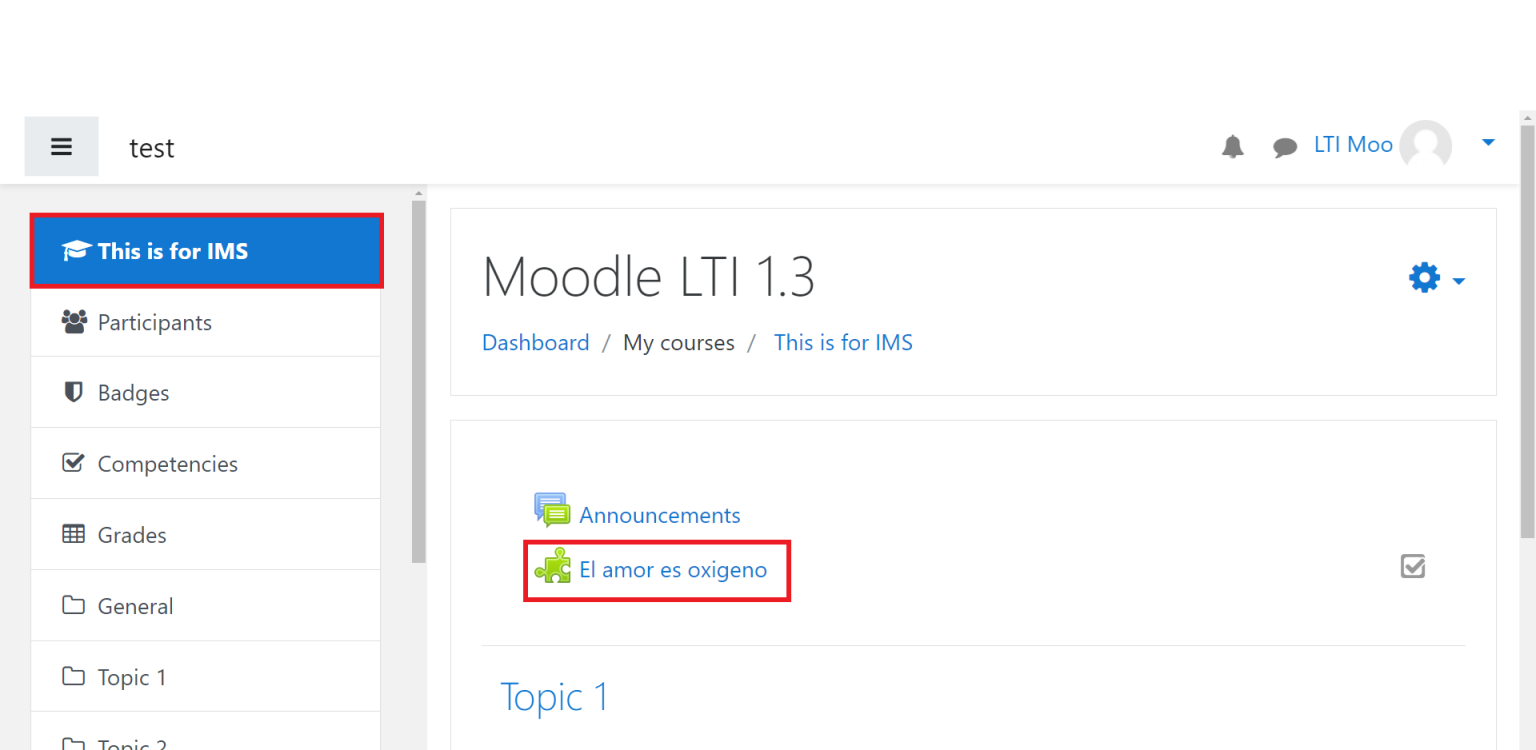
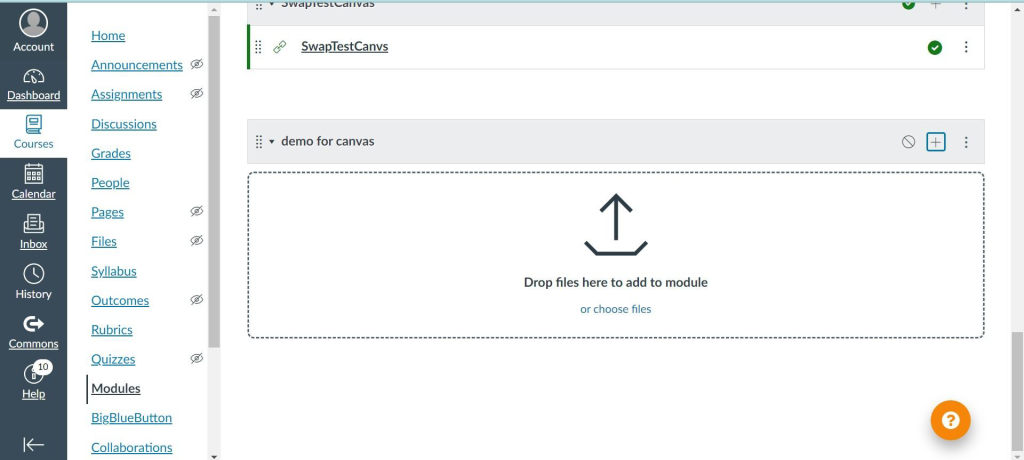
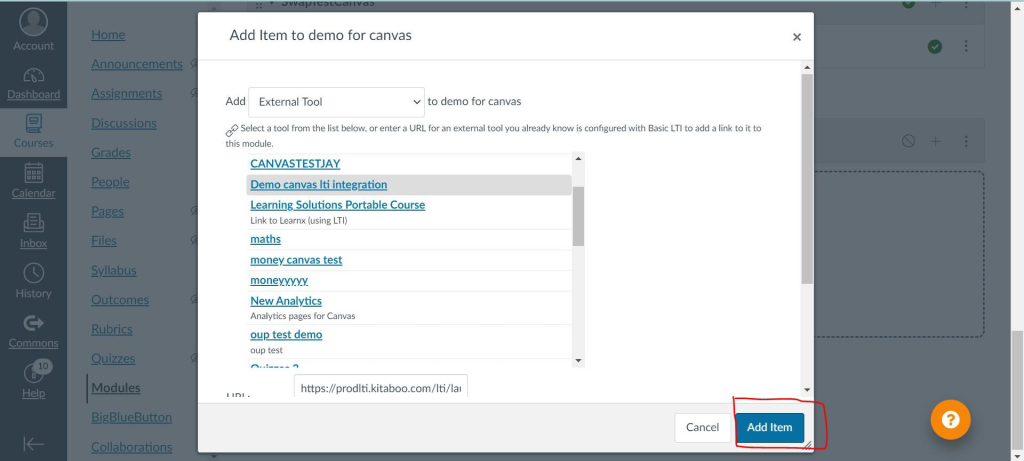
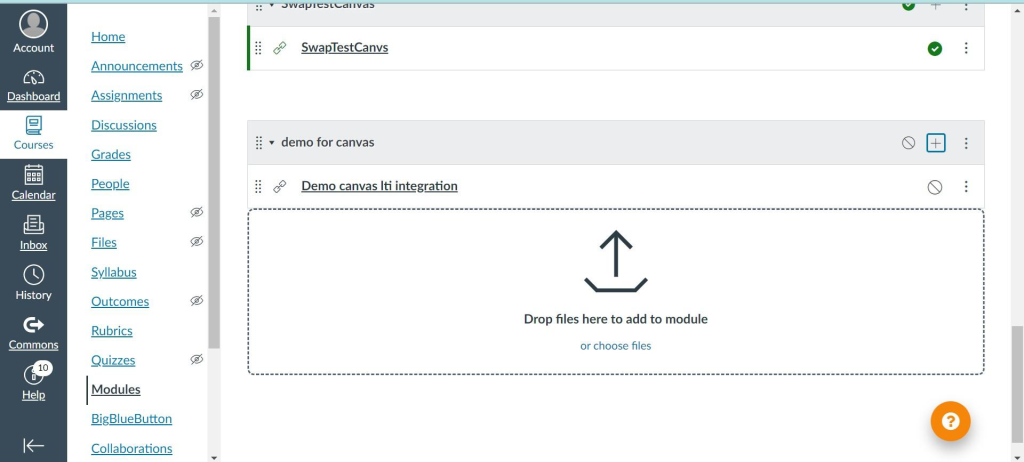
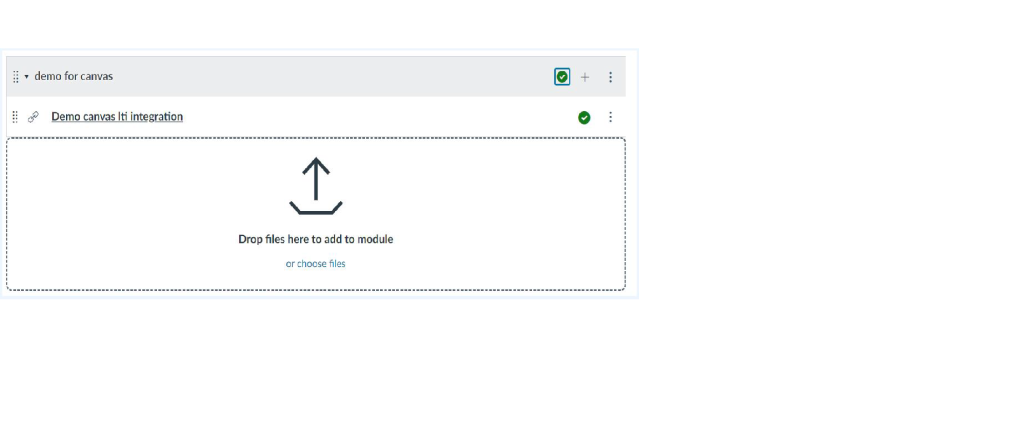
- How to Add External LTI Link (Add-On)
- Auto Book Deletion Process
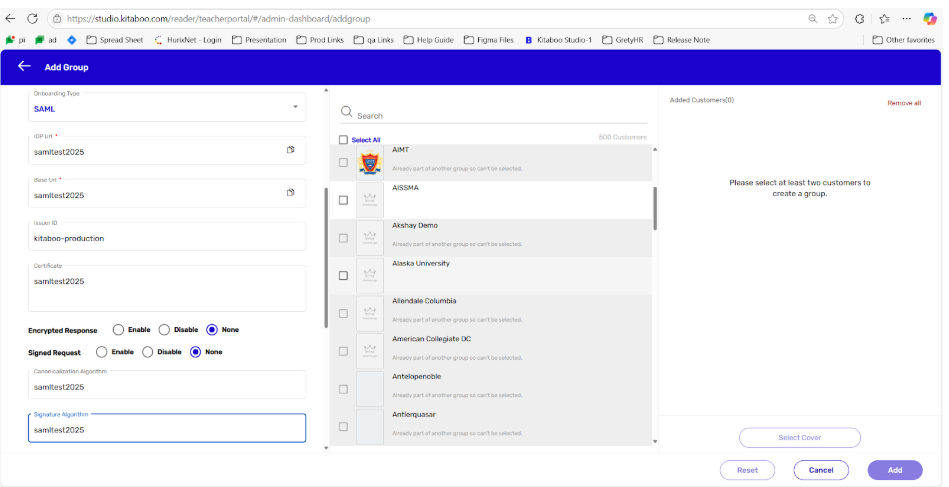
- Adding group with SAML
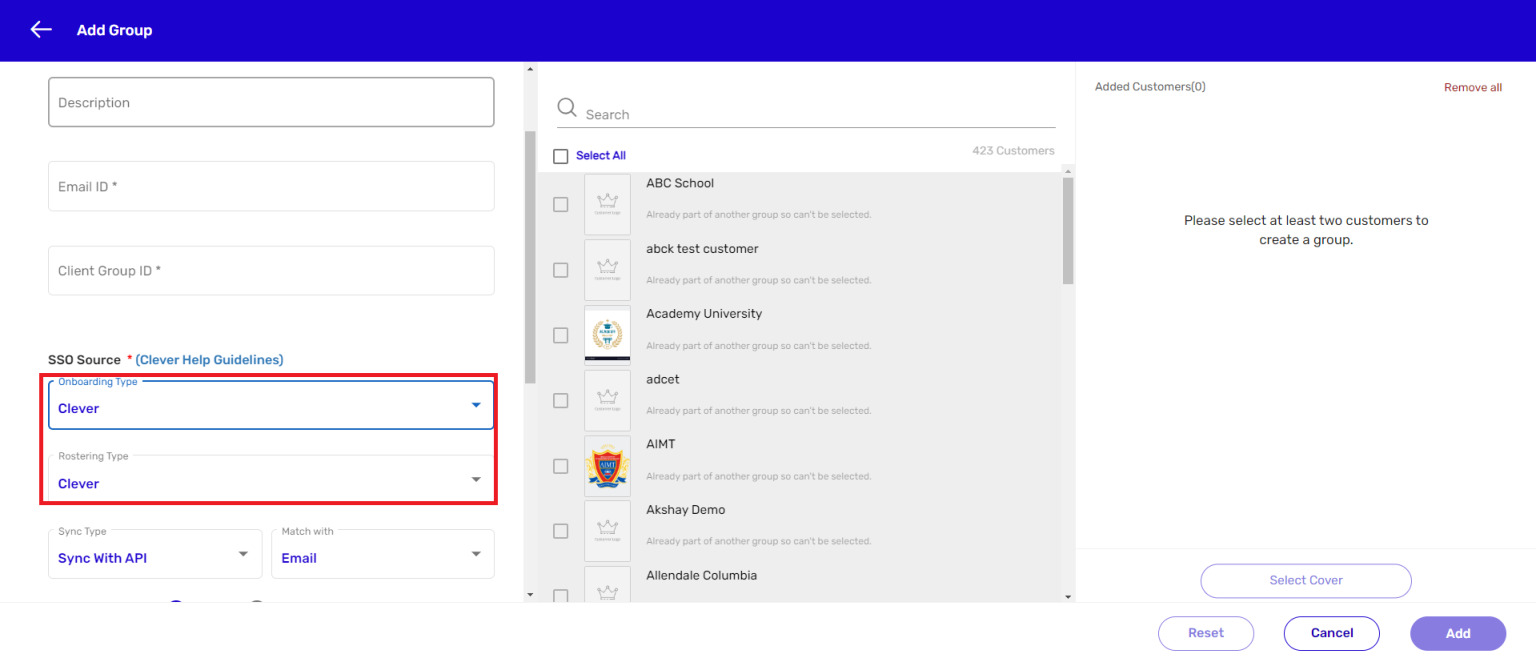
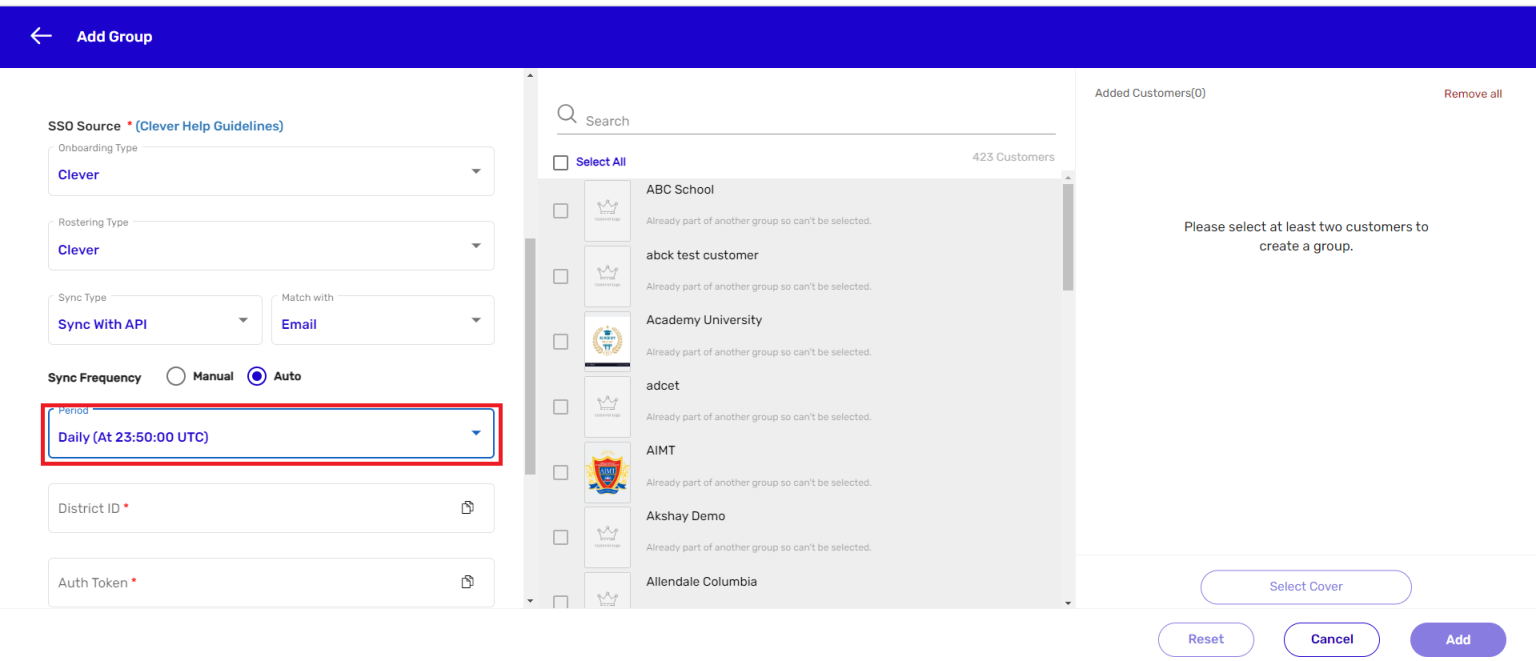
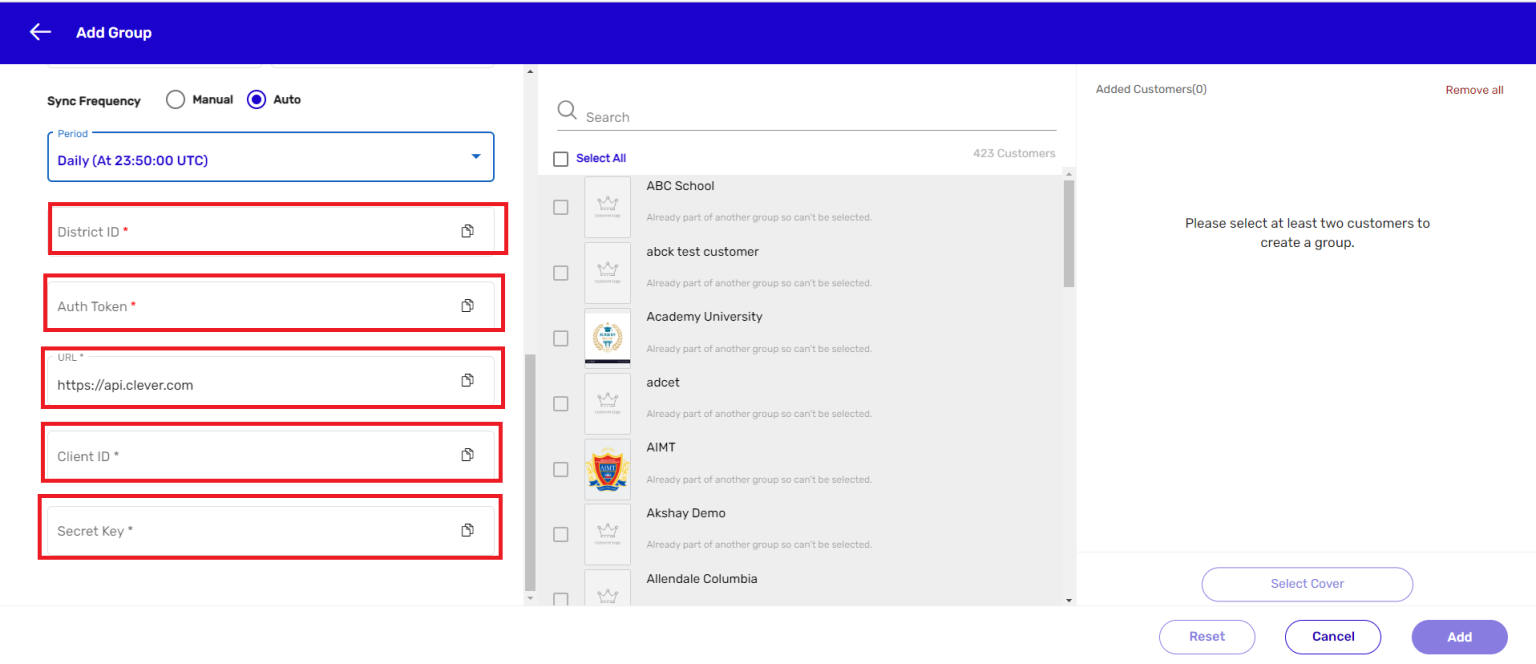
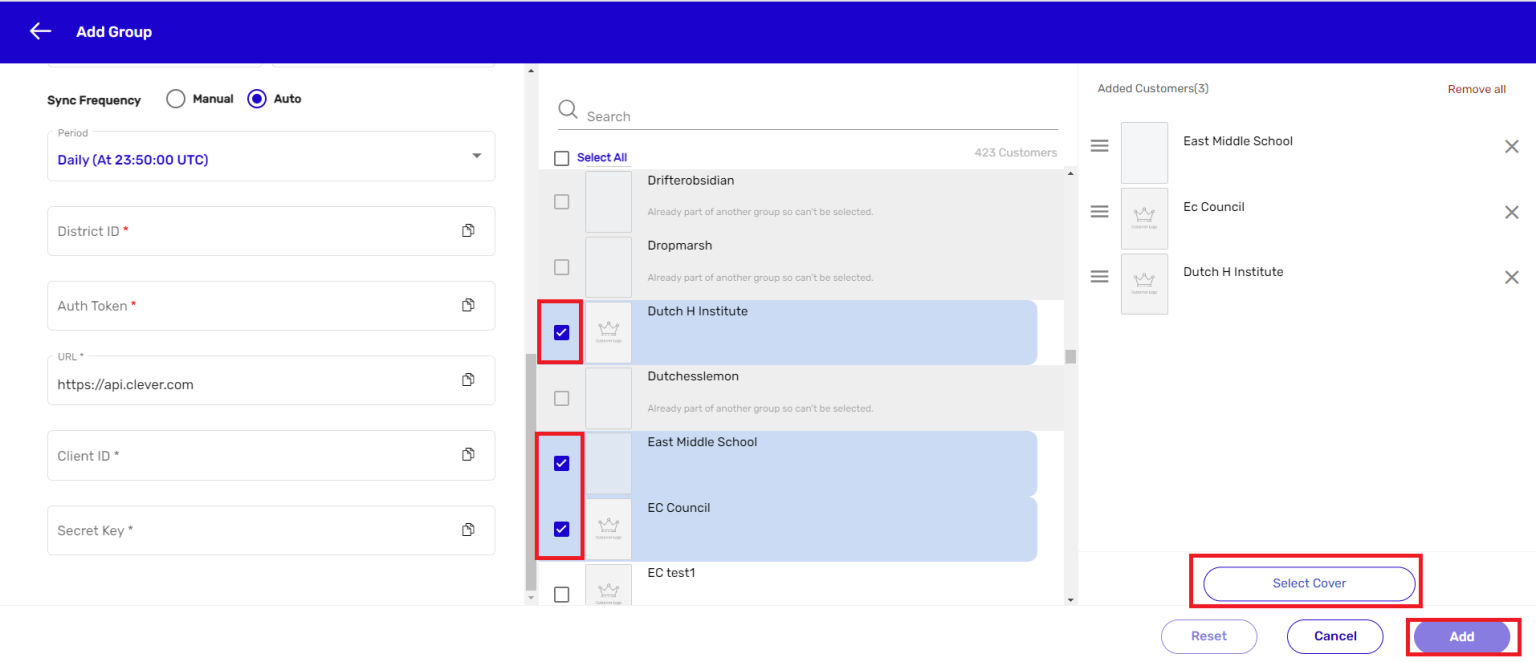
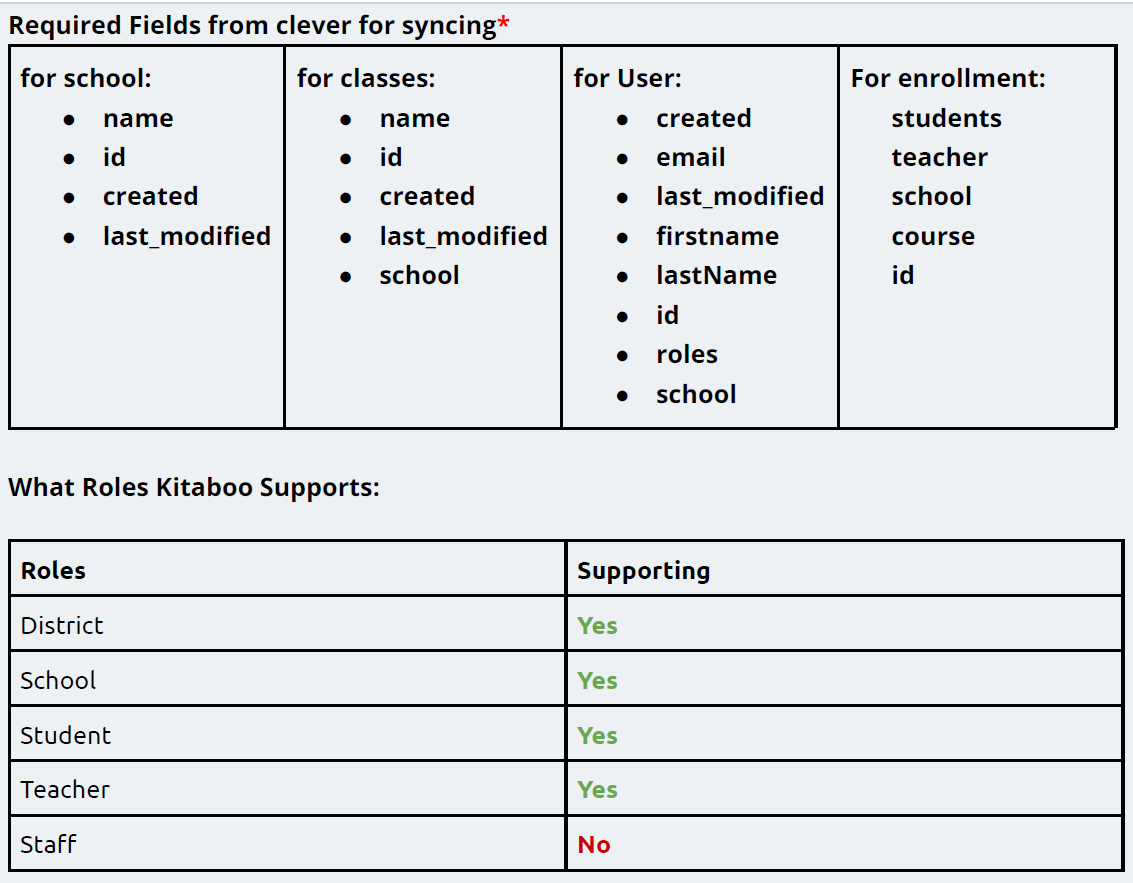
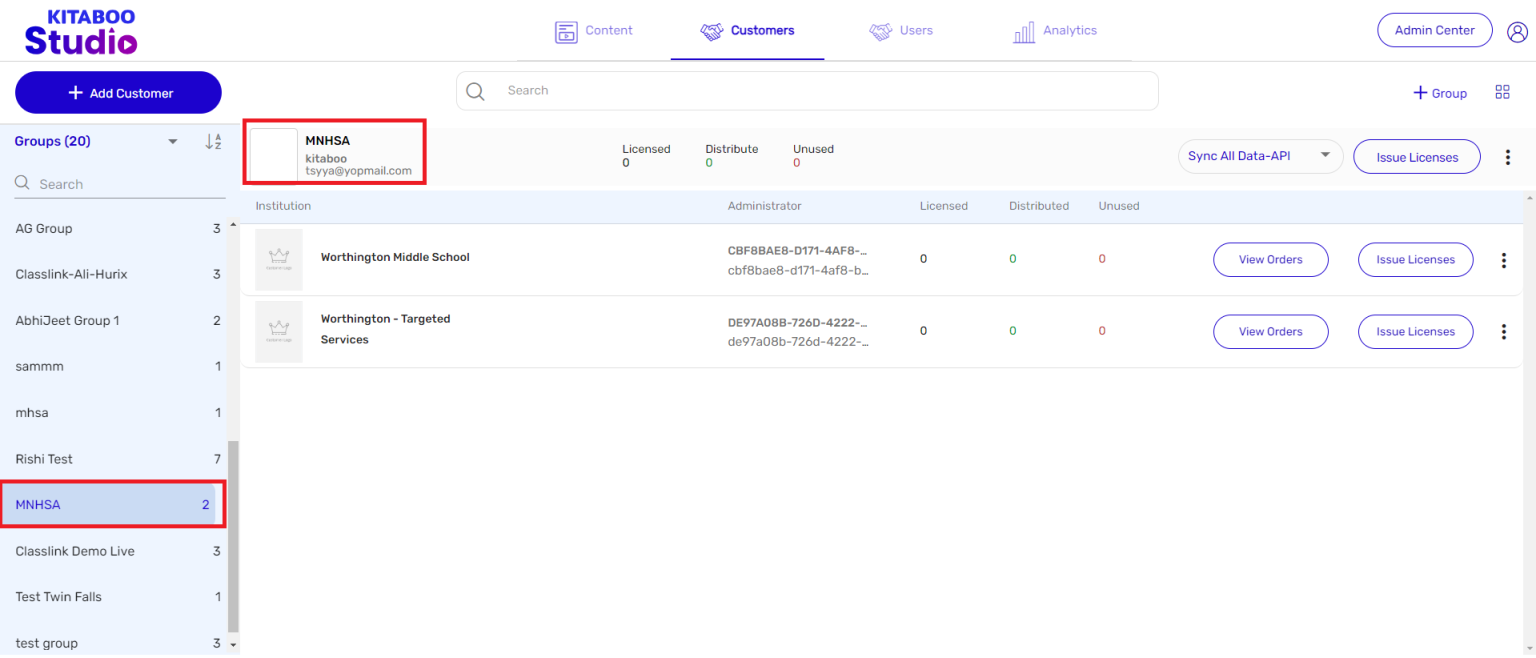
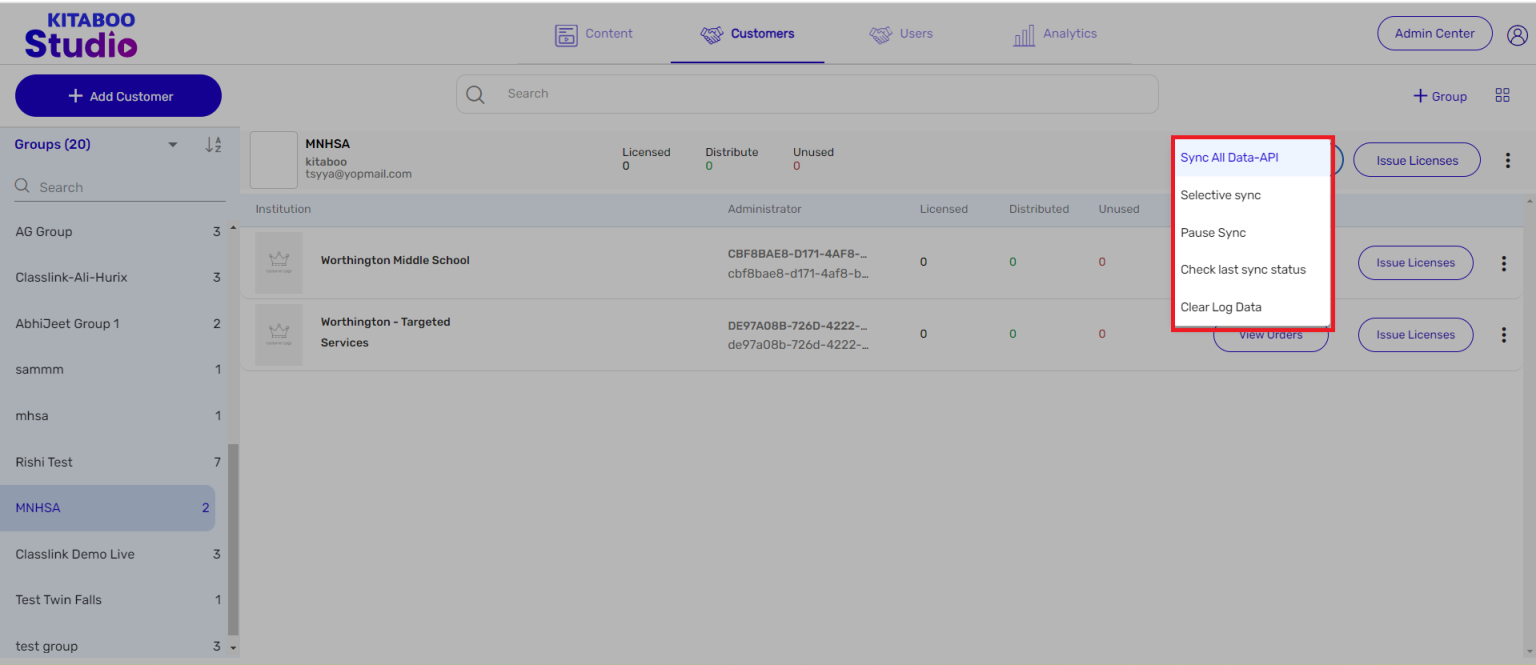
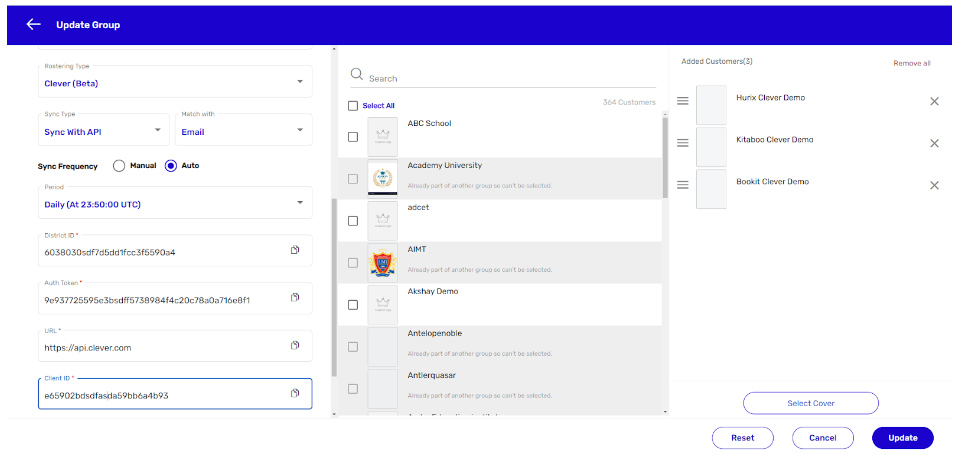
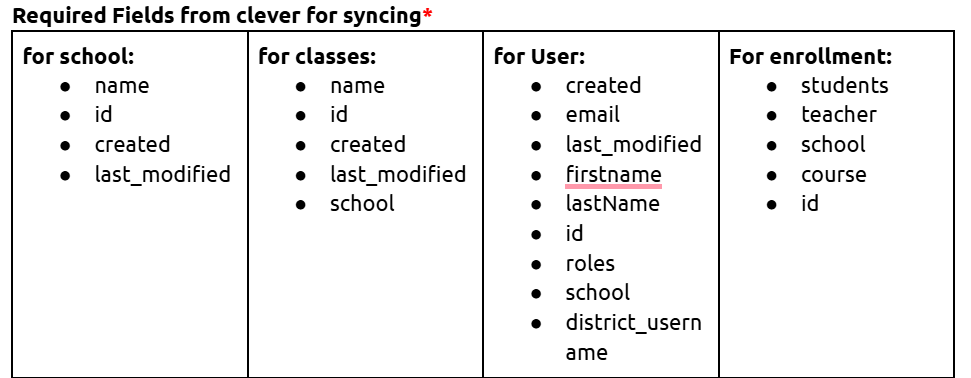
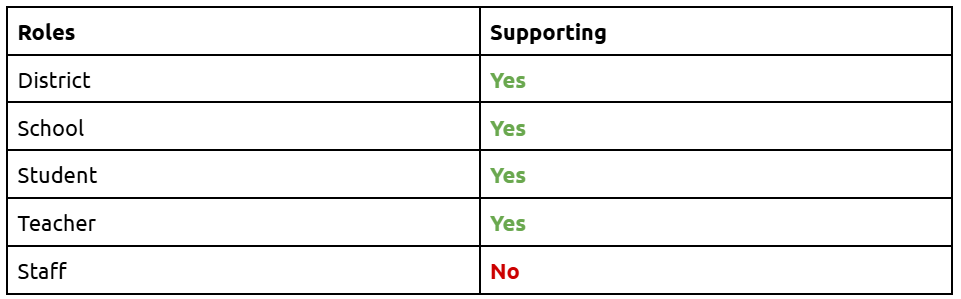
- Syncing Data with Clever
- Selective Oneroster Sync with API/ZIP/SFTP
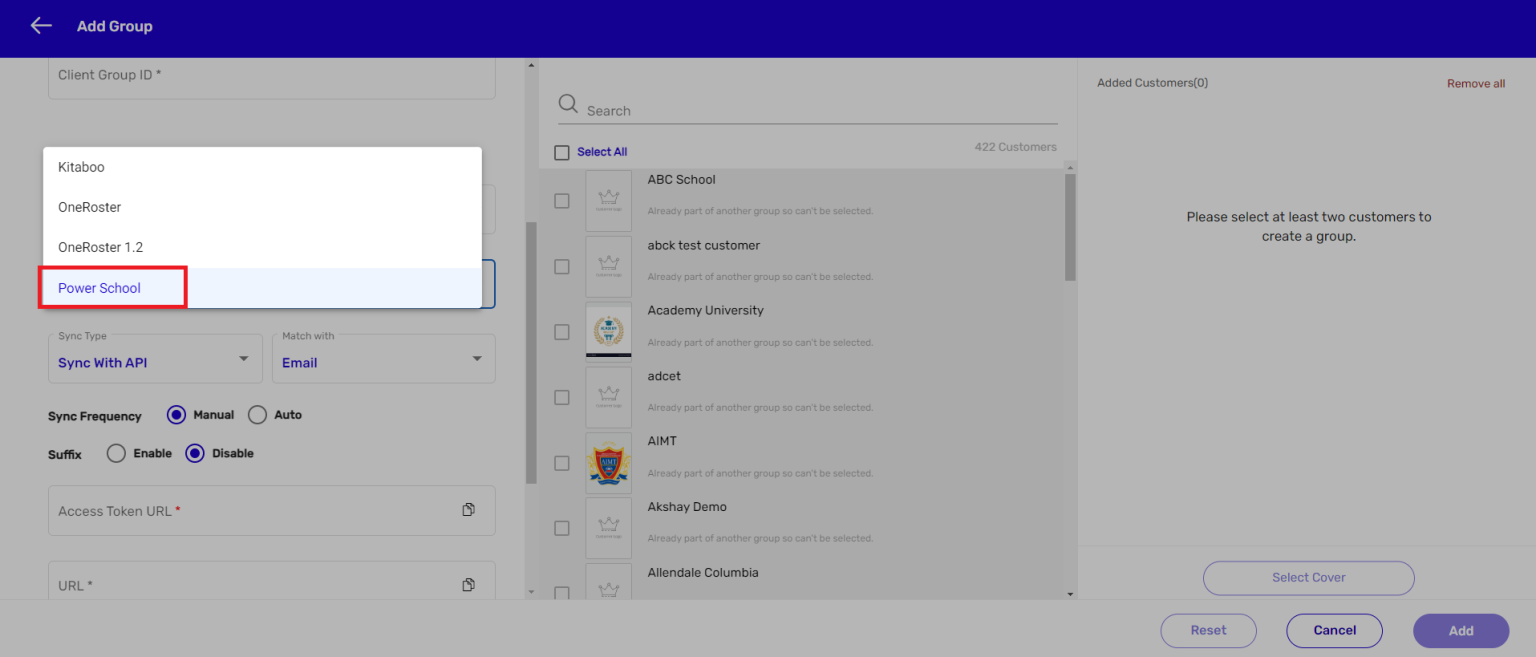
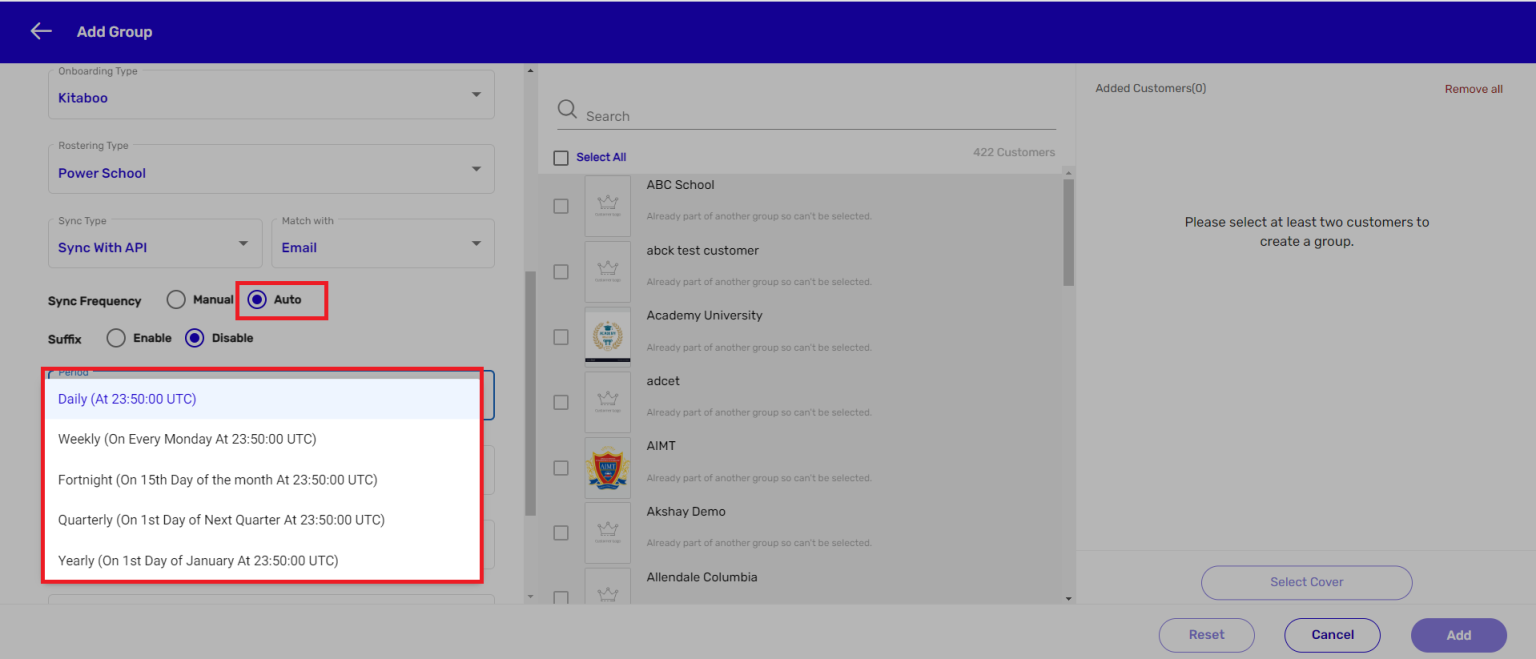
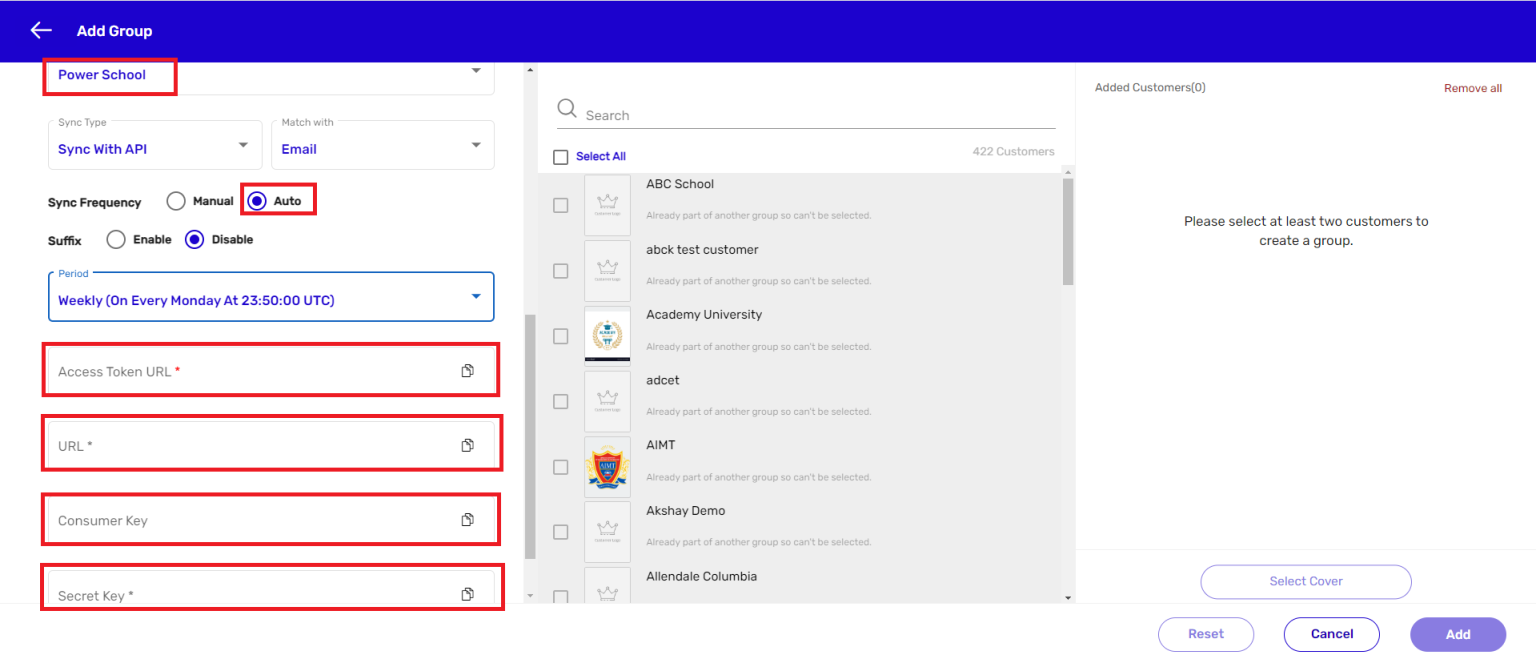
- Syncing Data with PowerSchool
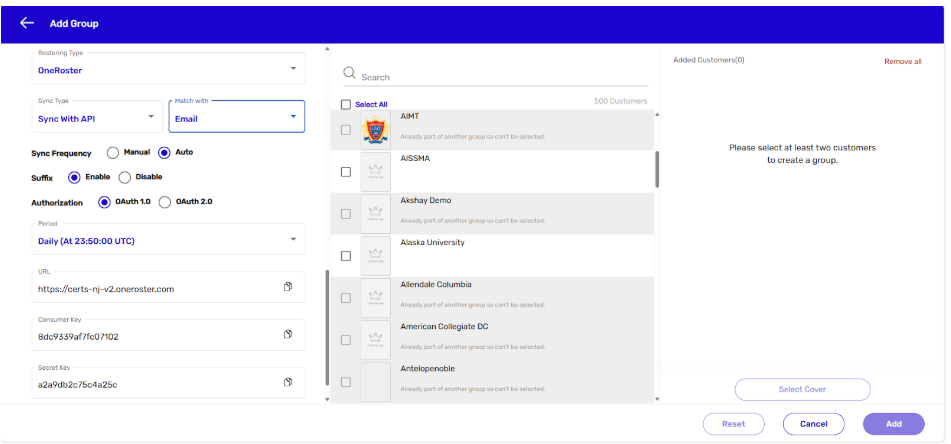
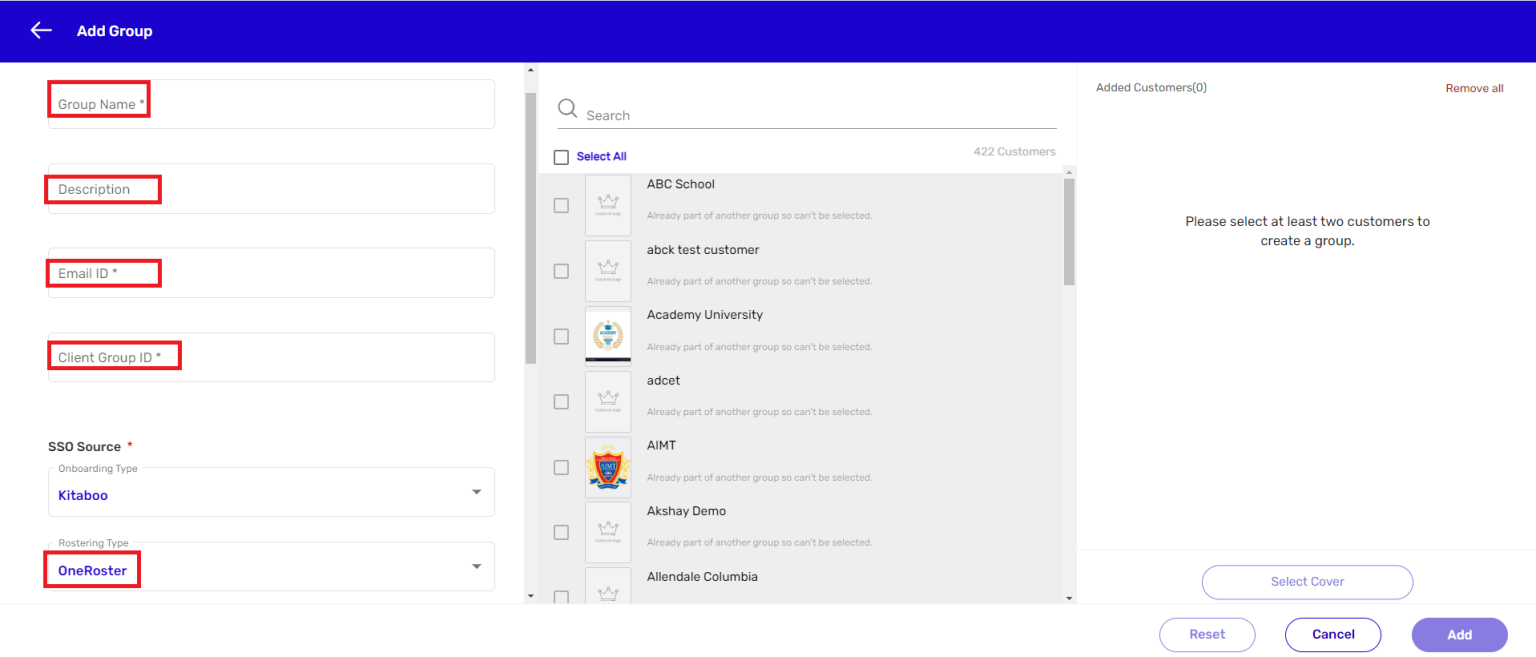
- Syncing Data with OneRoster
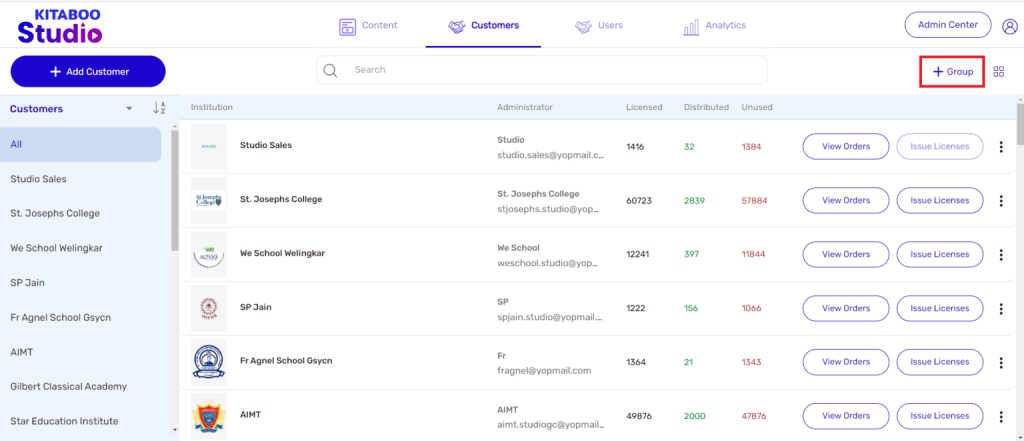
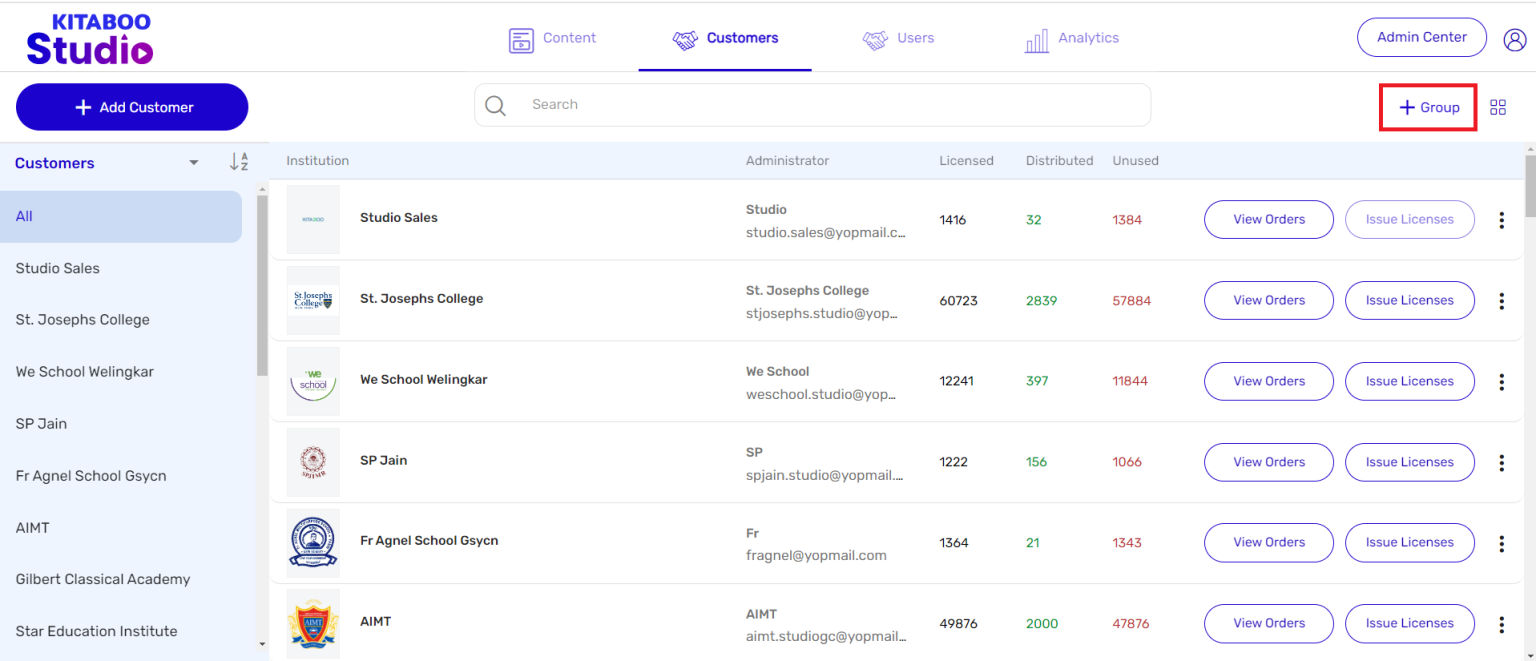
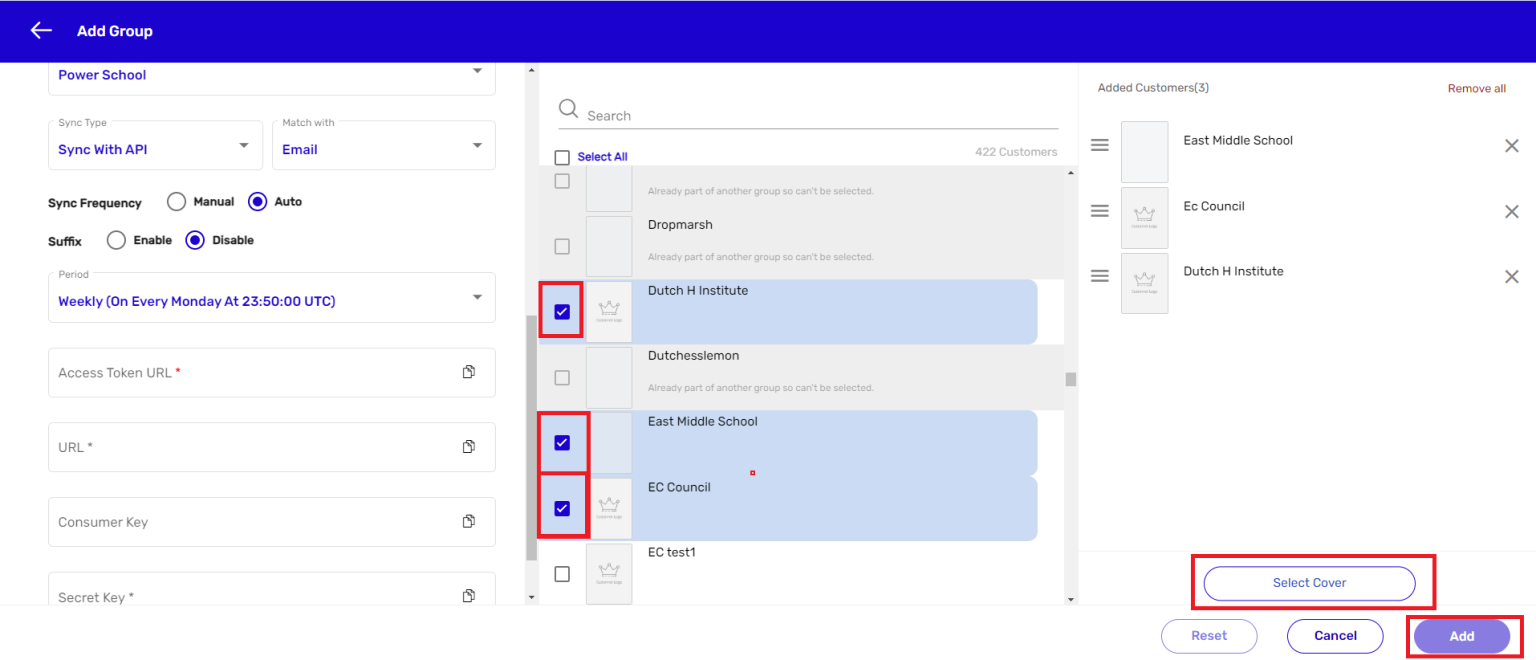
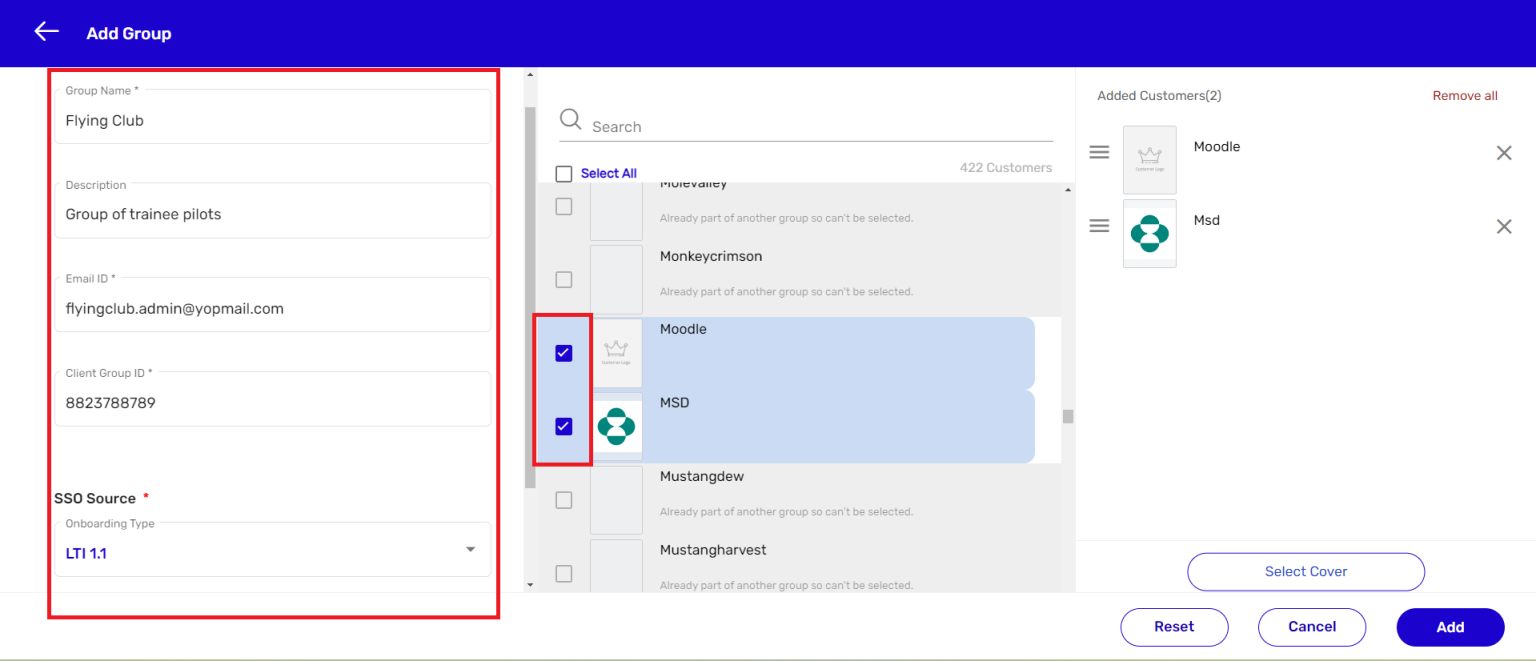
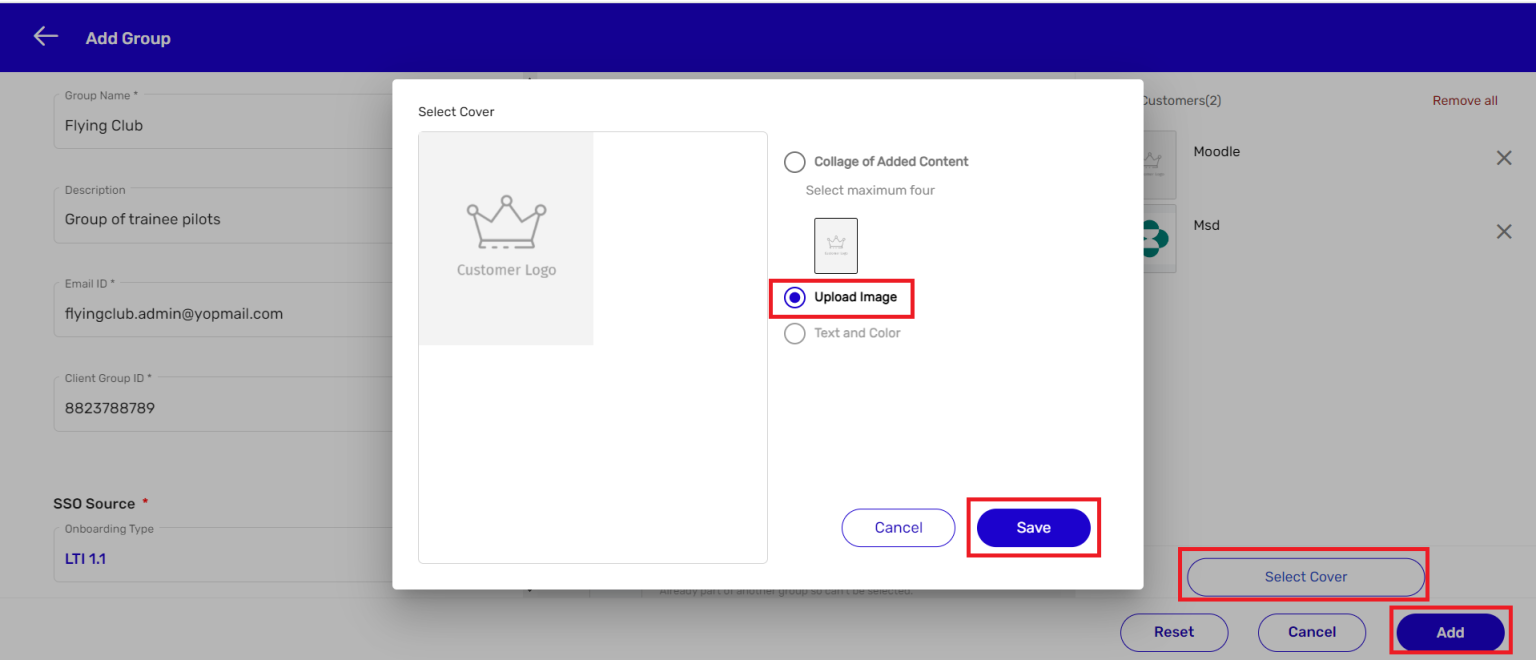
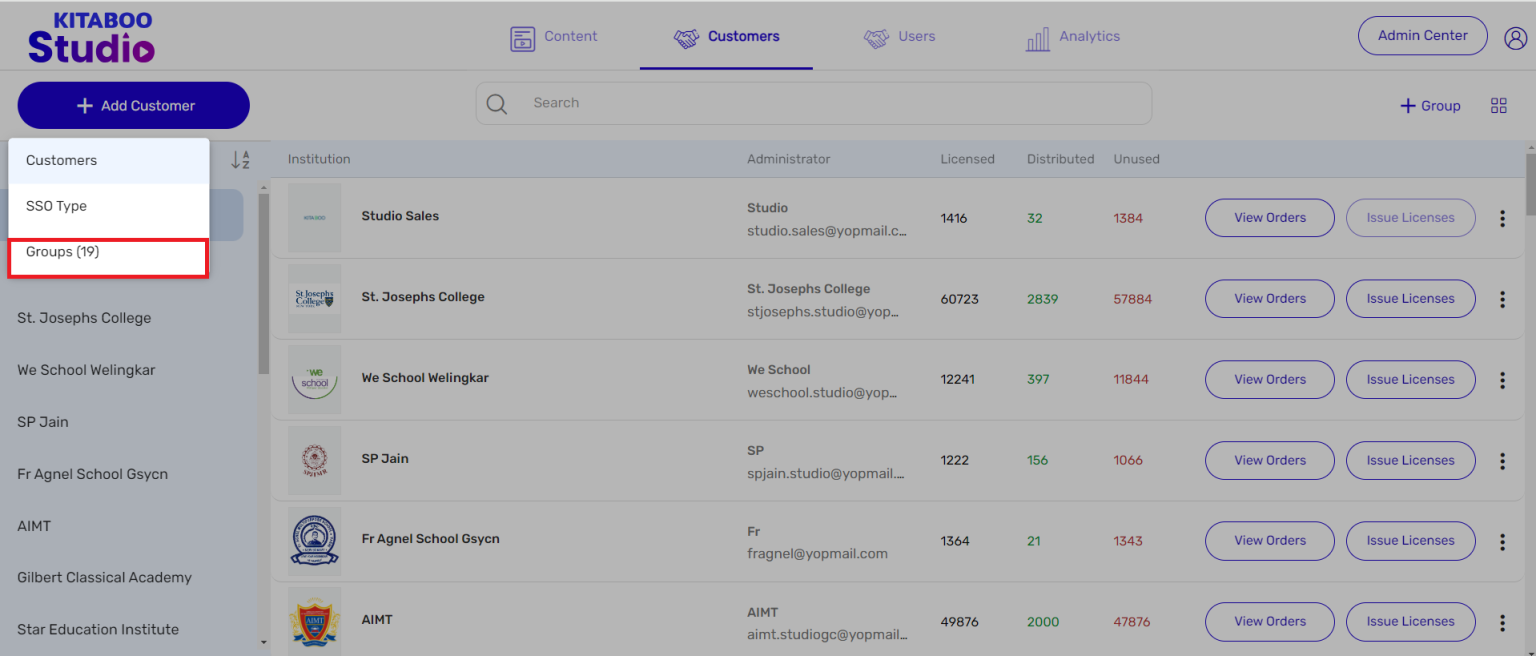
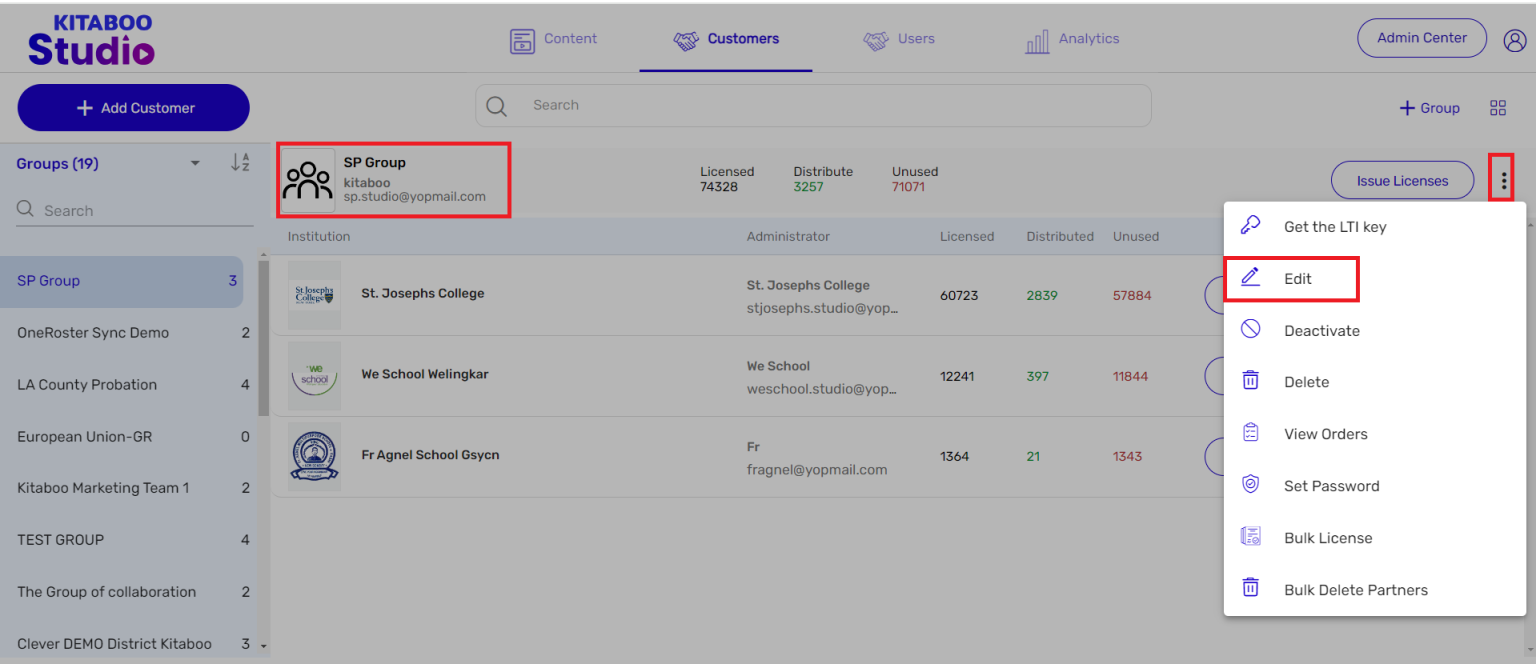
- Adding a Group
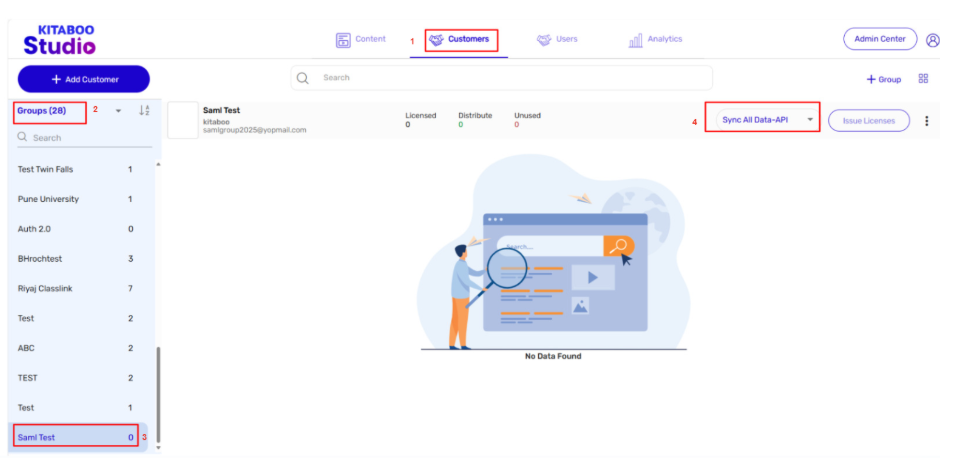
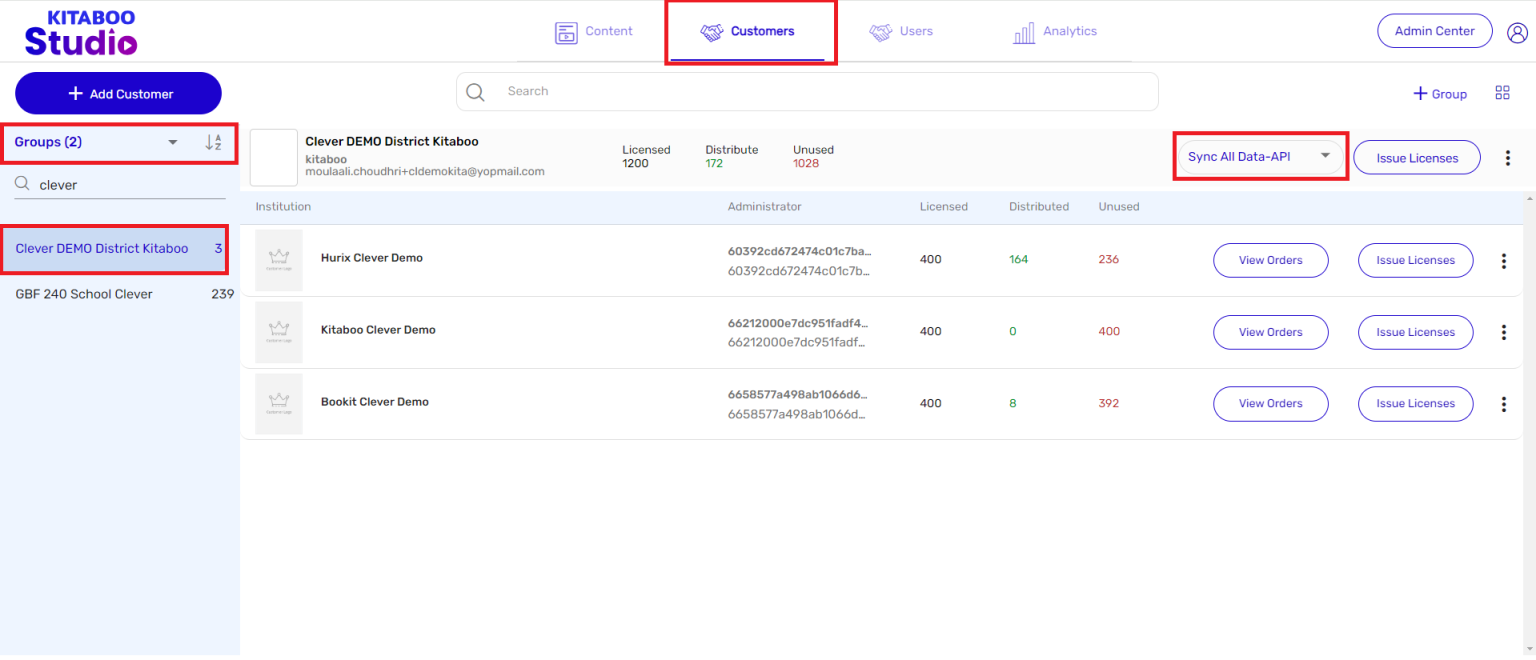
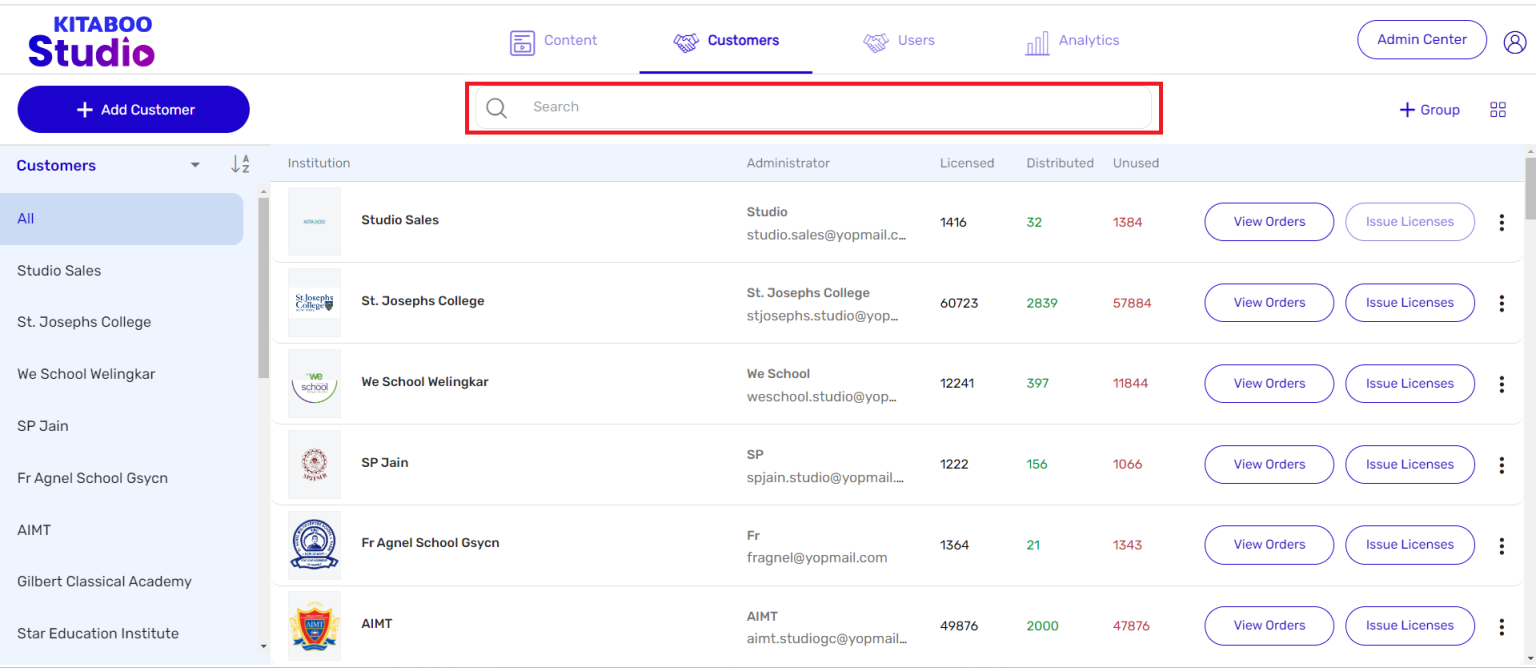
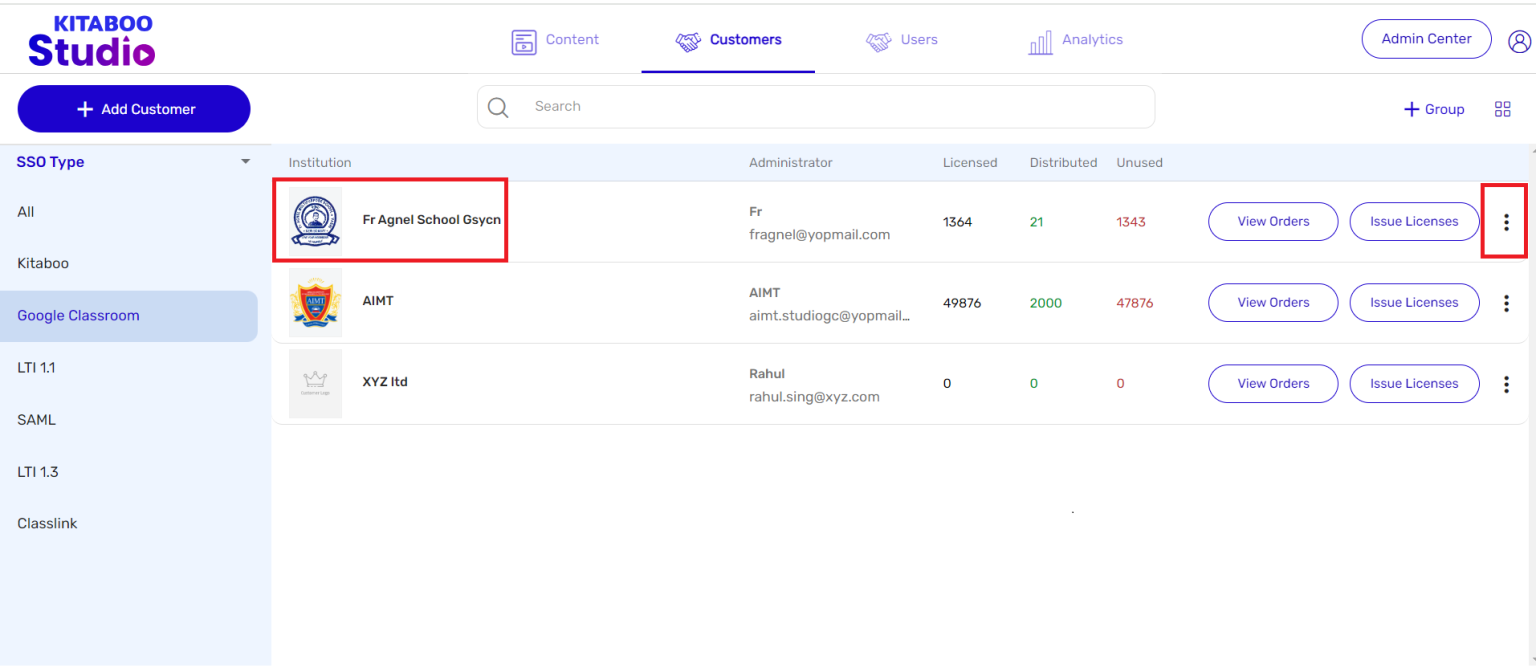
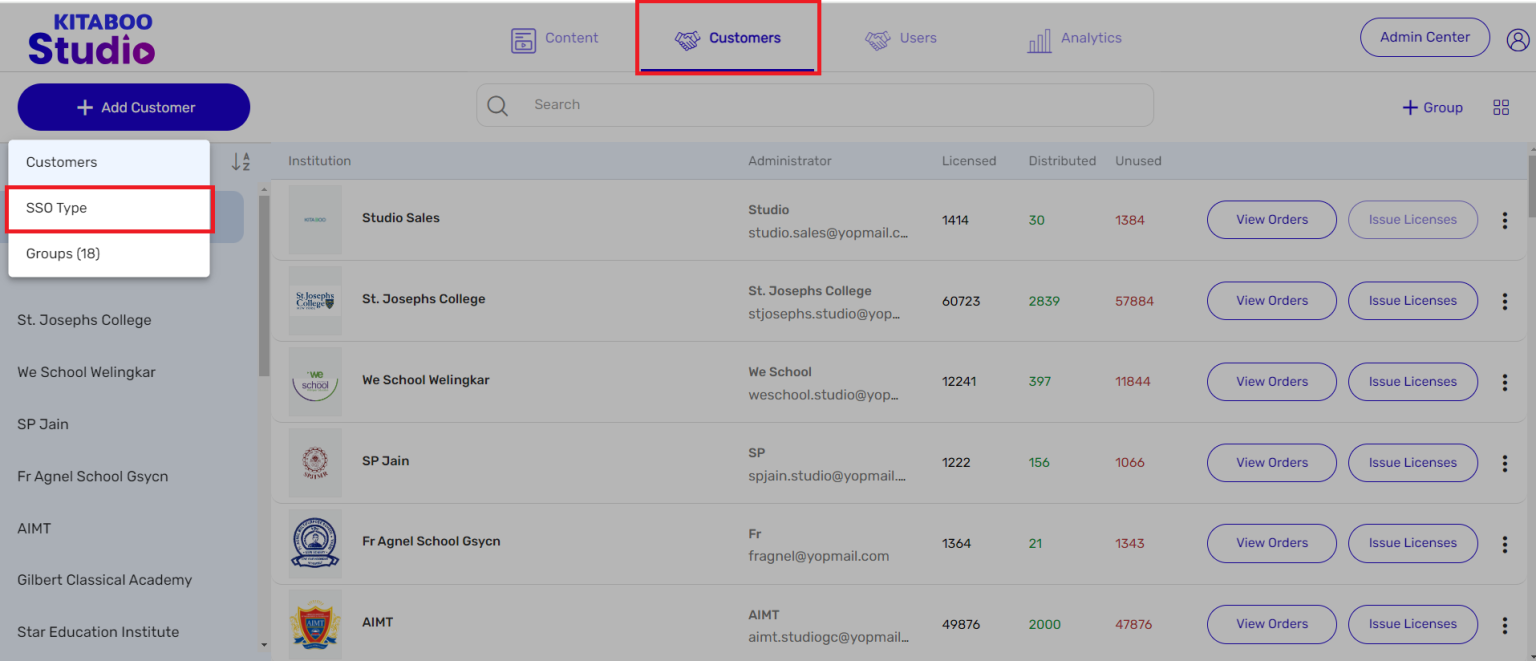
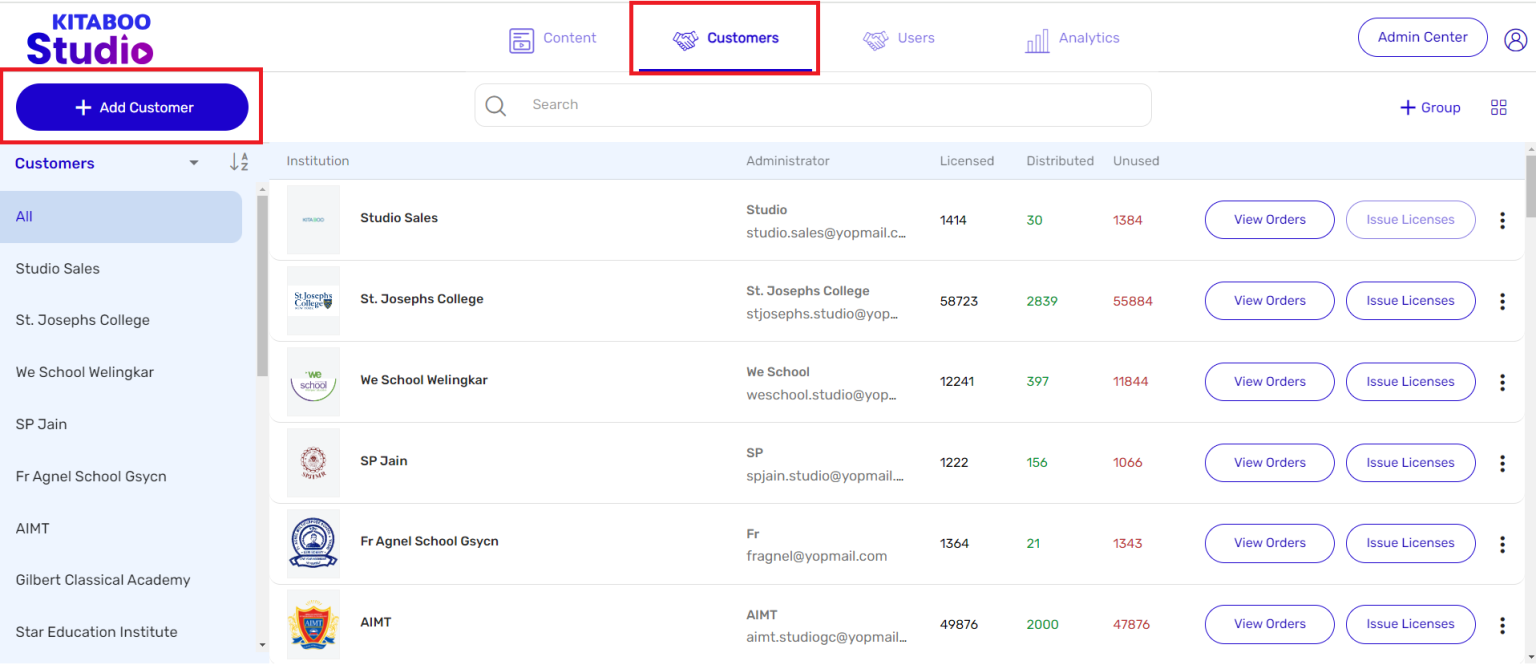
- Searching a Customer
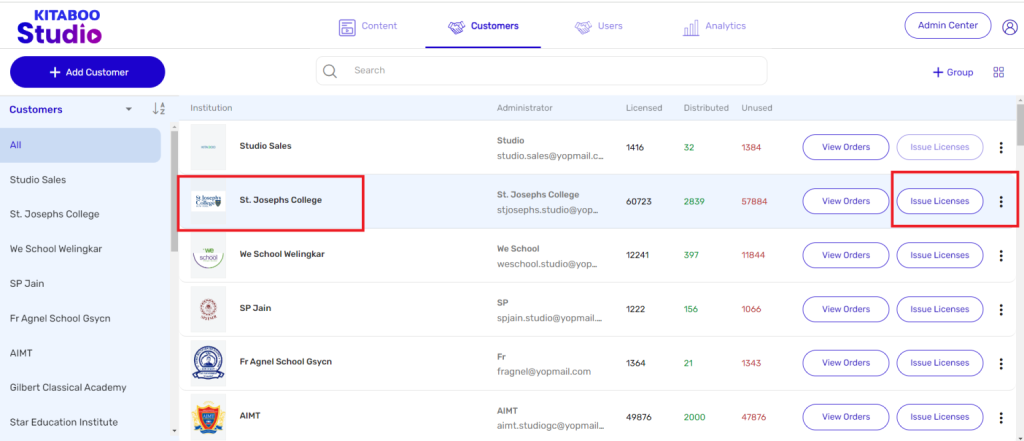
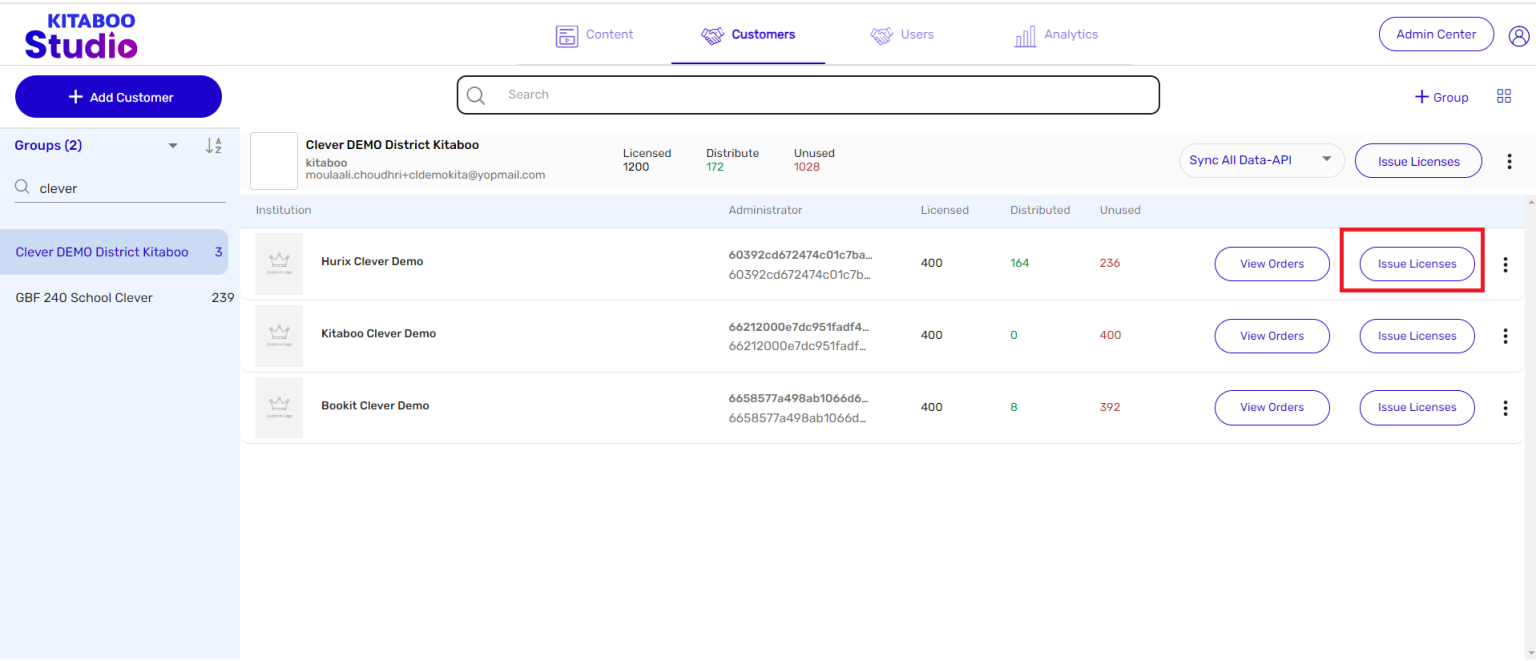
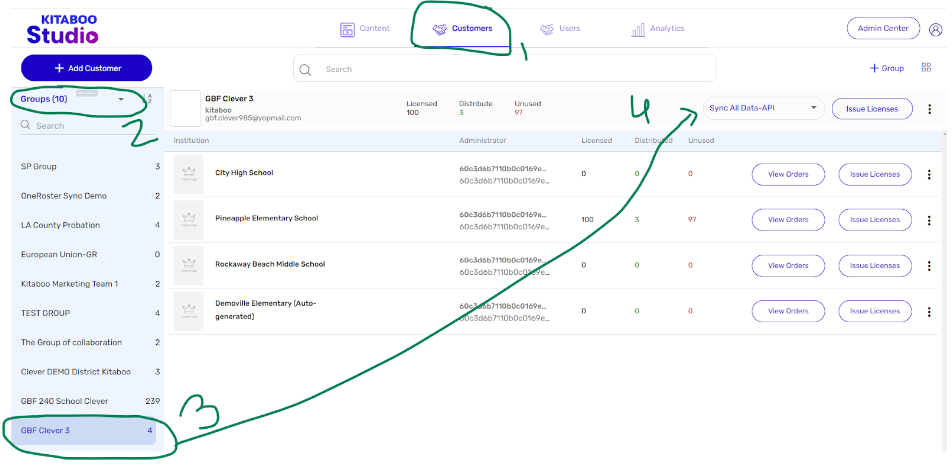
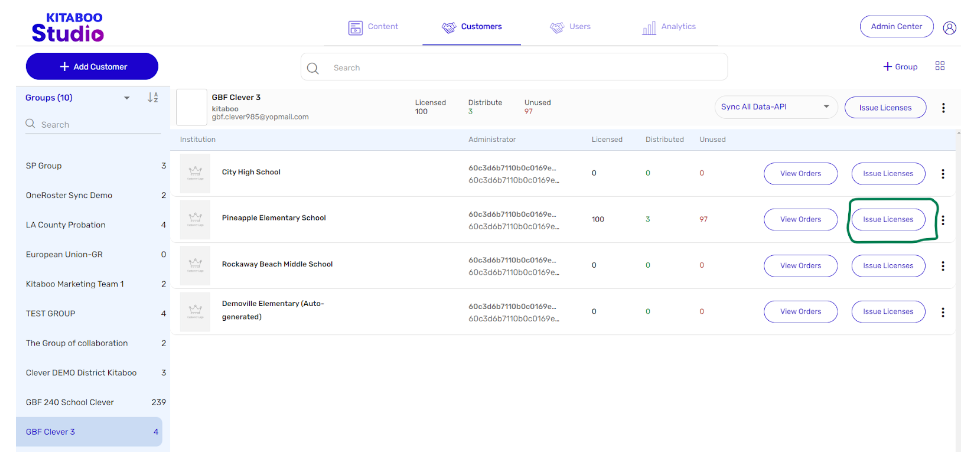
- Issuing Licenses
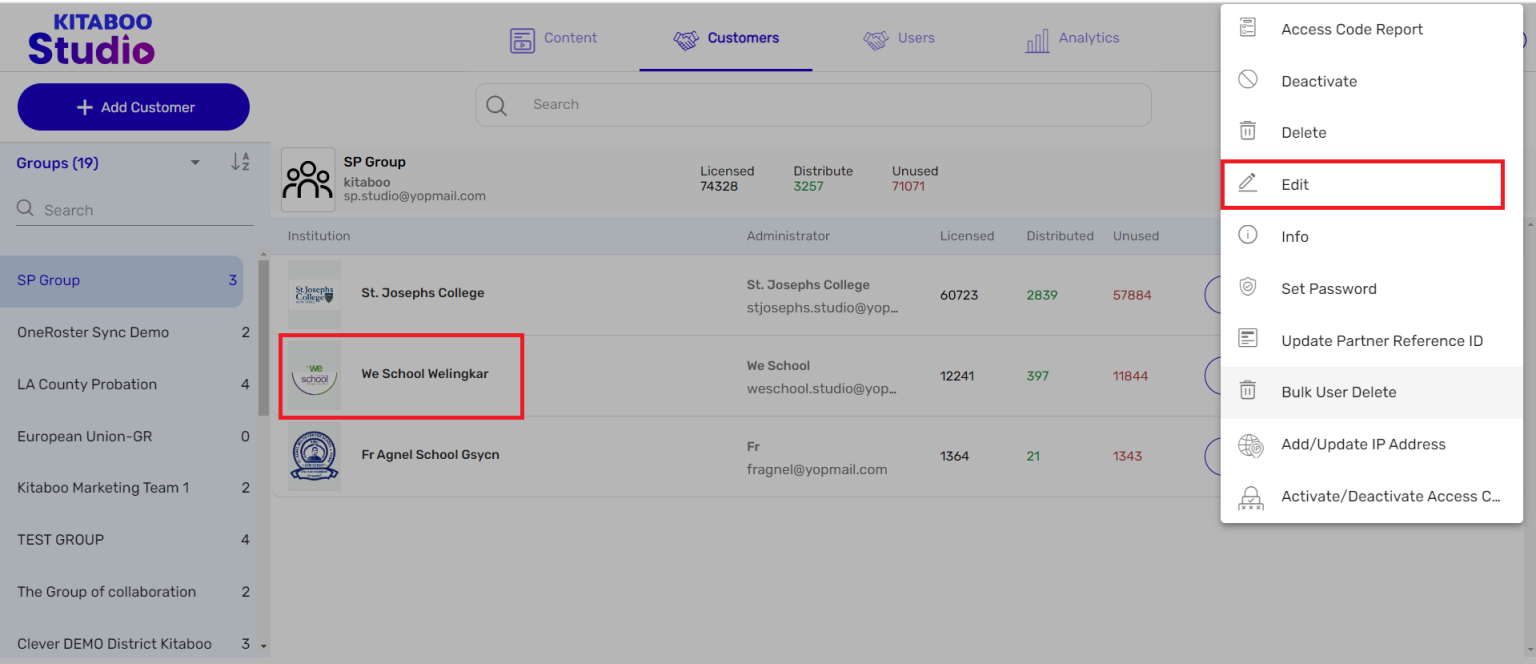
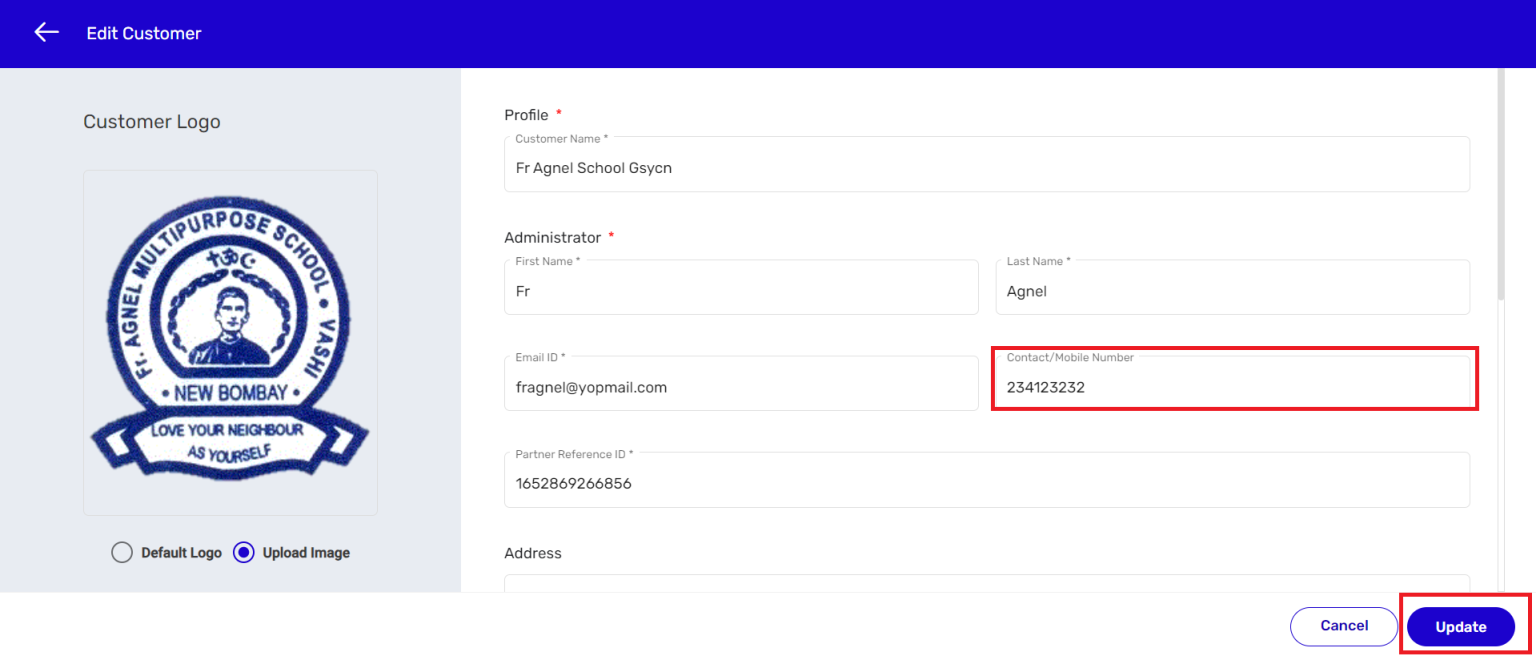
- Editing a Customer
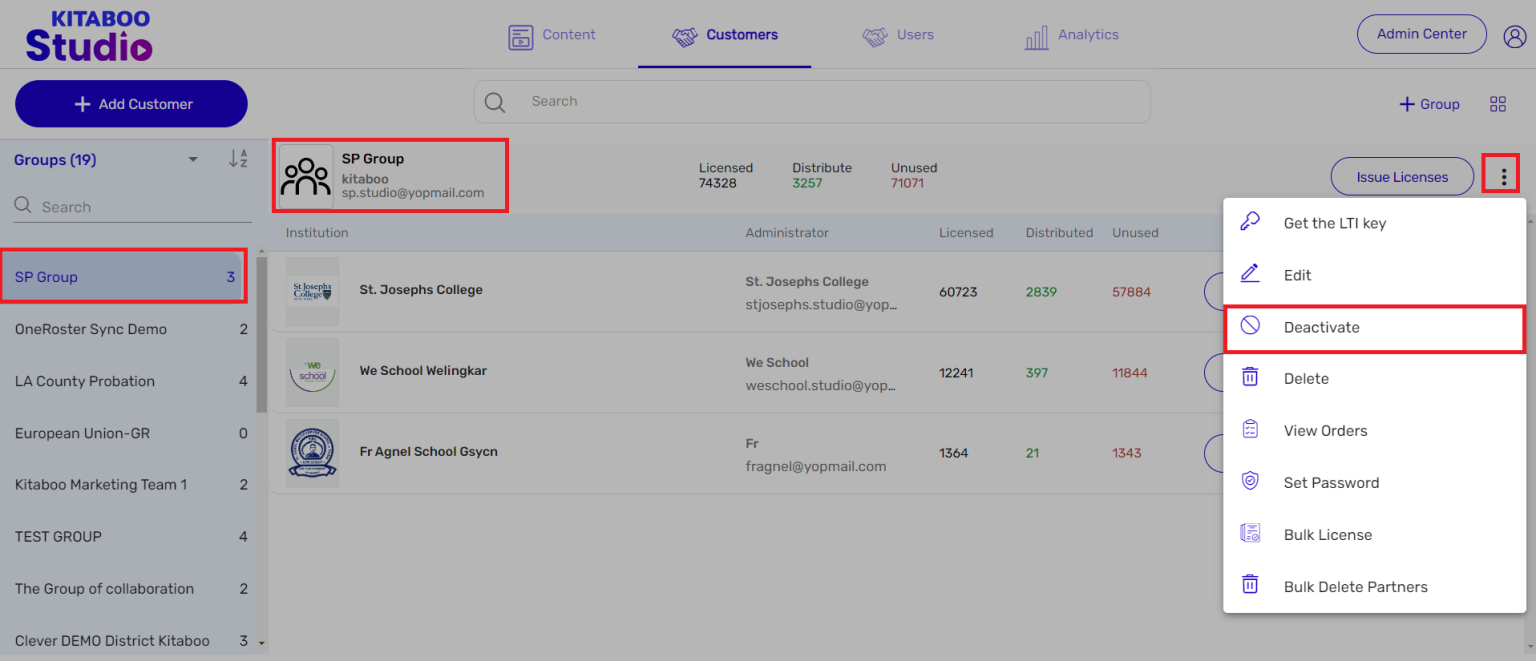
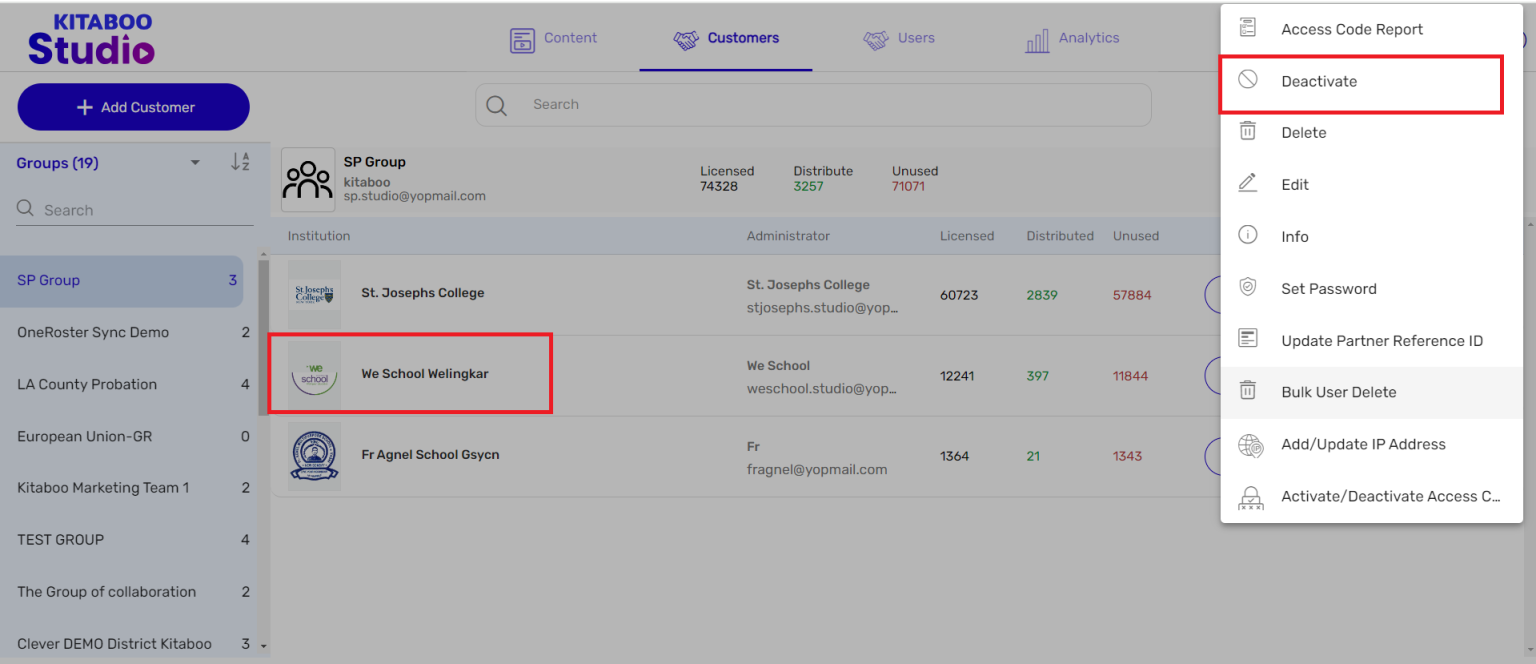
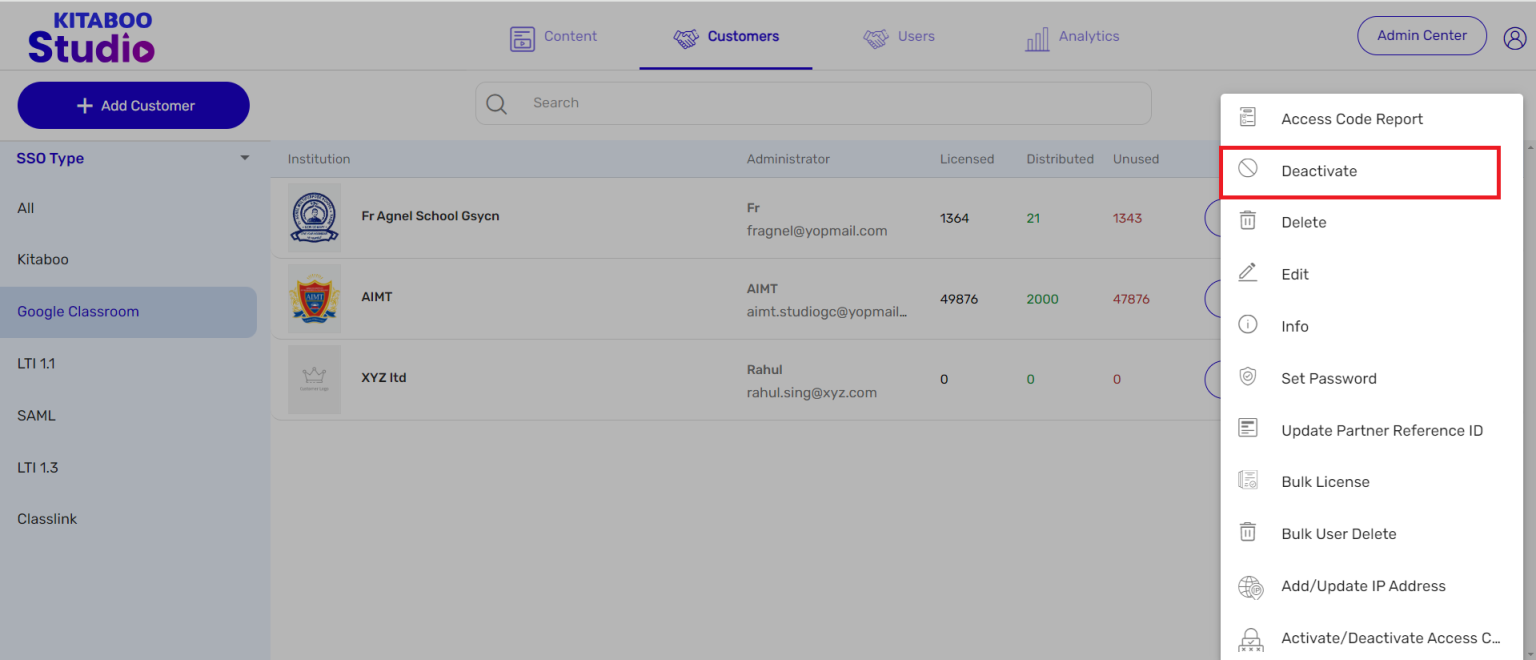
- Deactivating a Customer
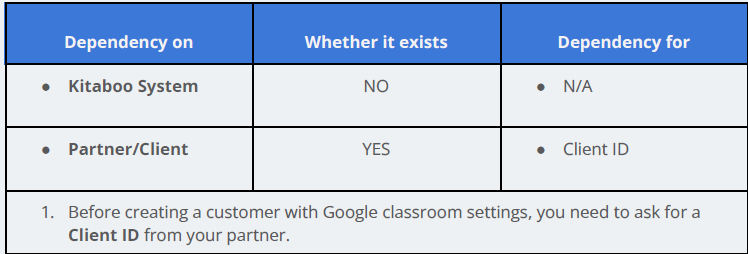
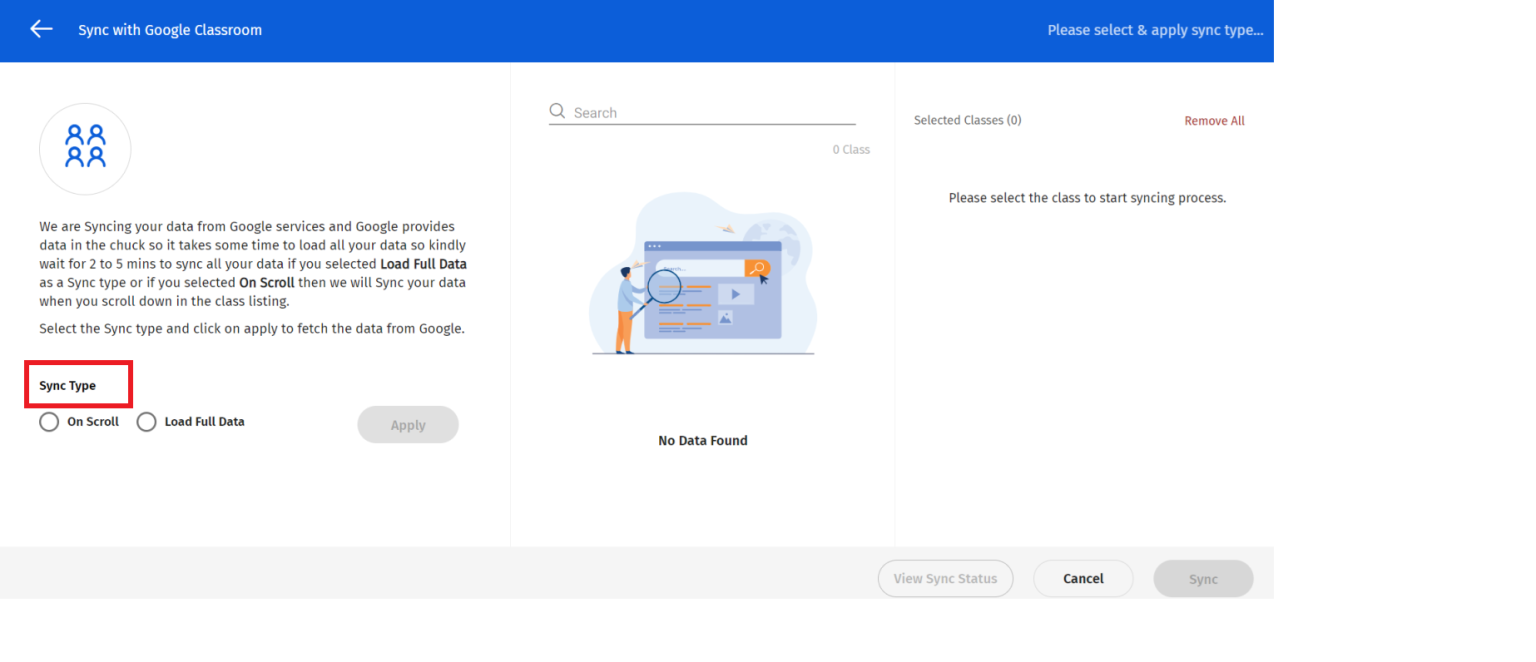
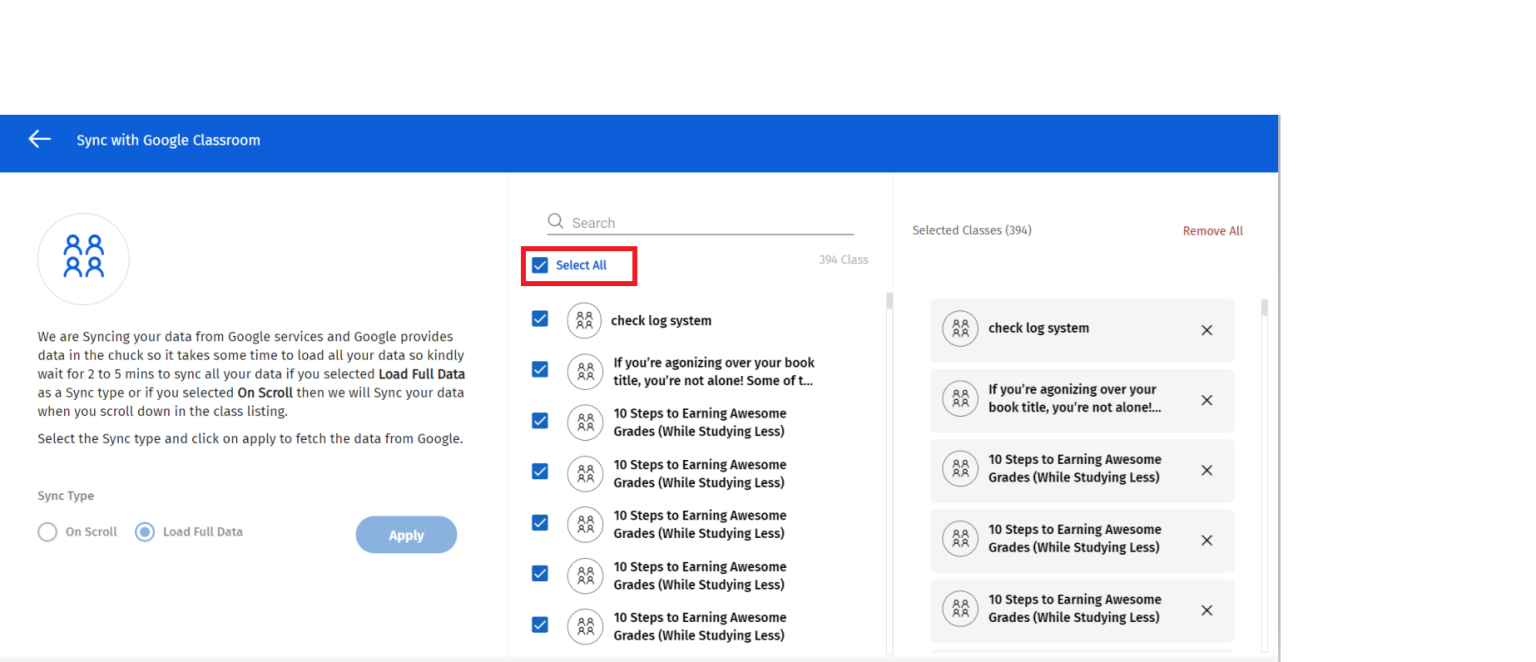
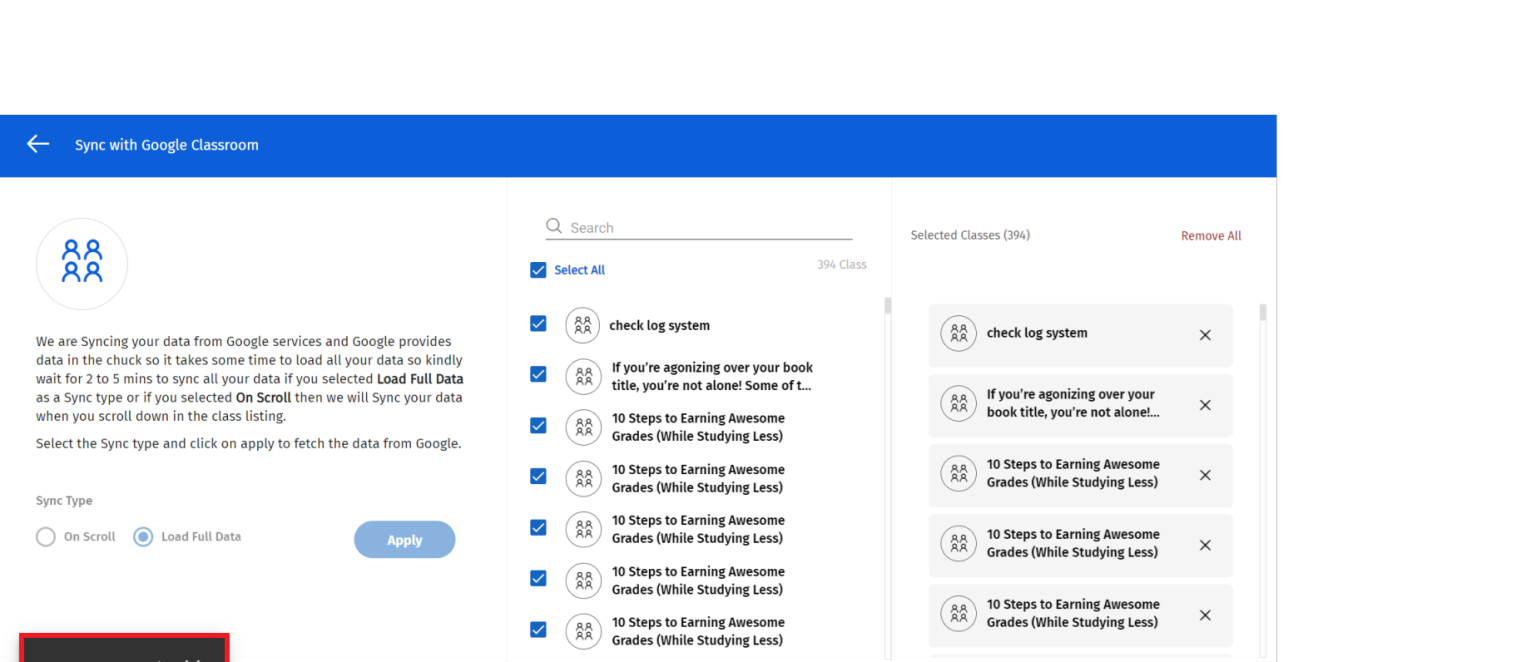
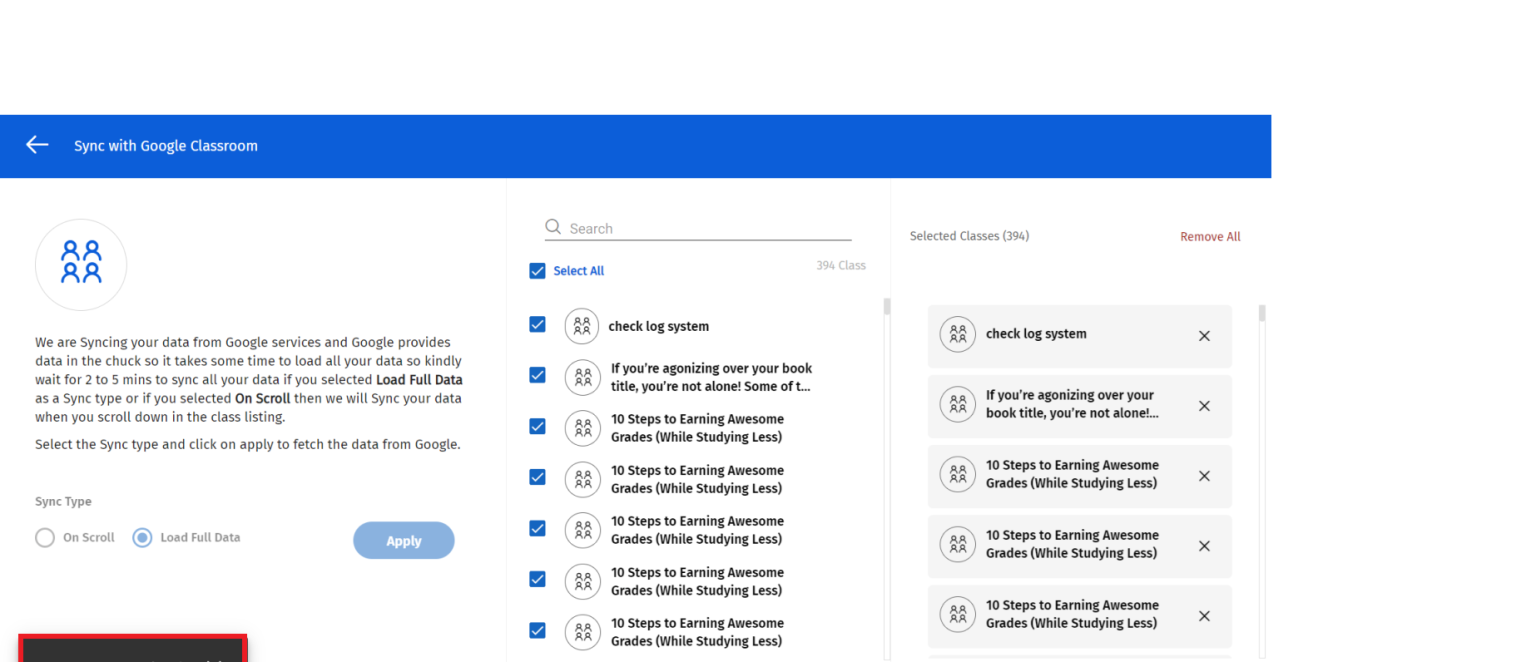
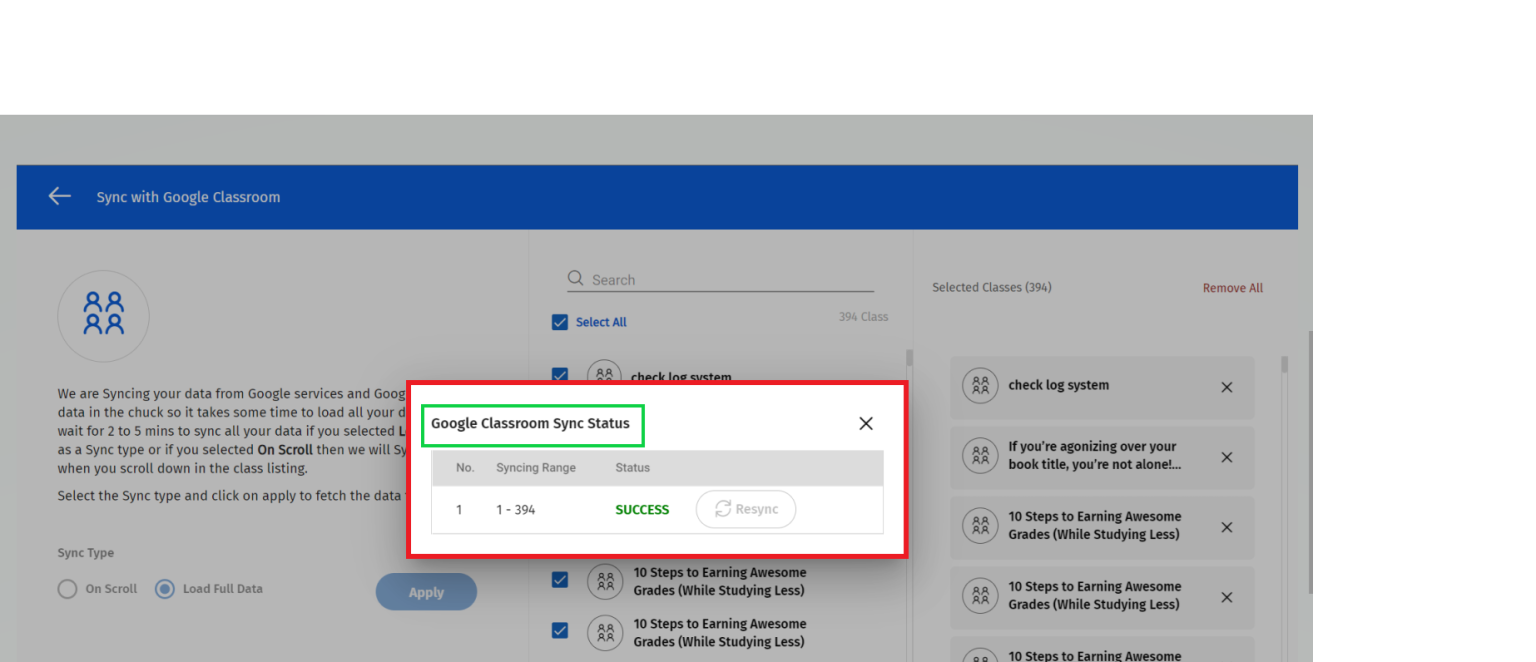
- Adding a Google Classroom Customer
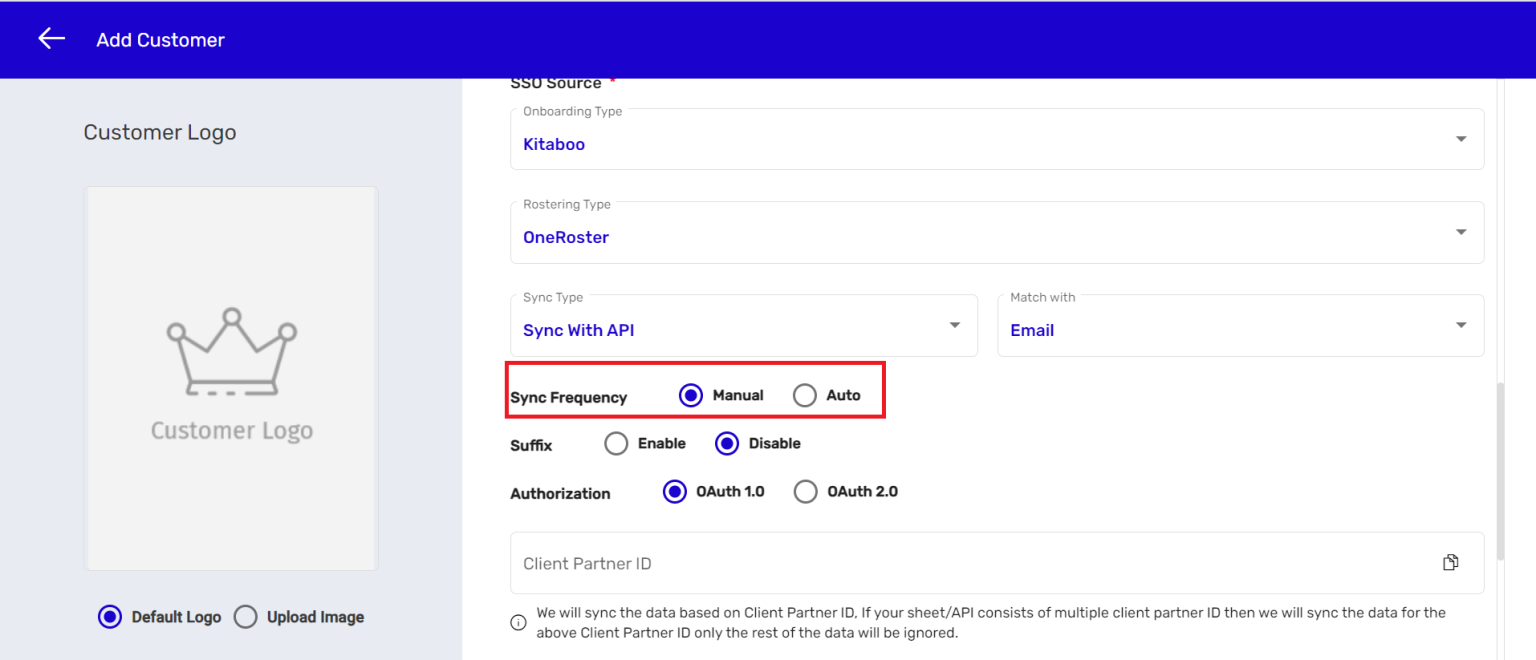
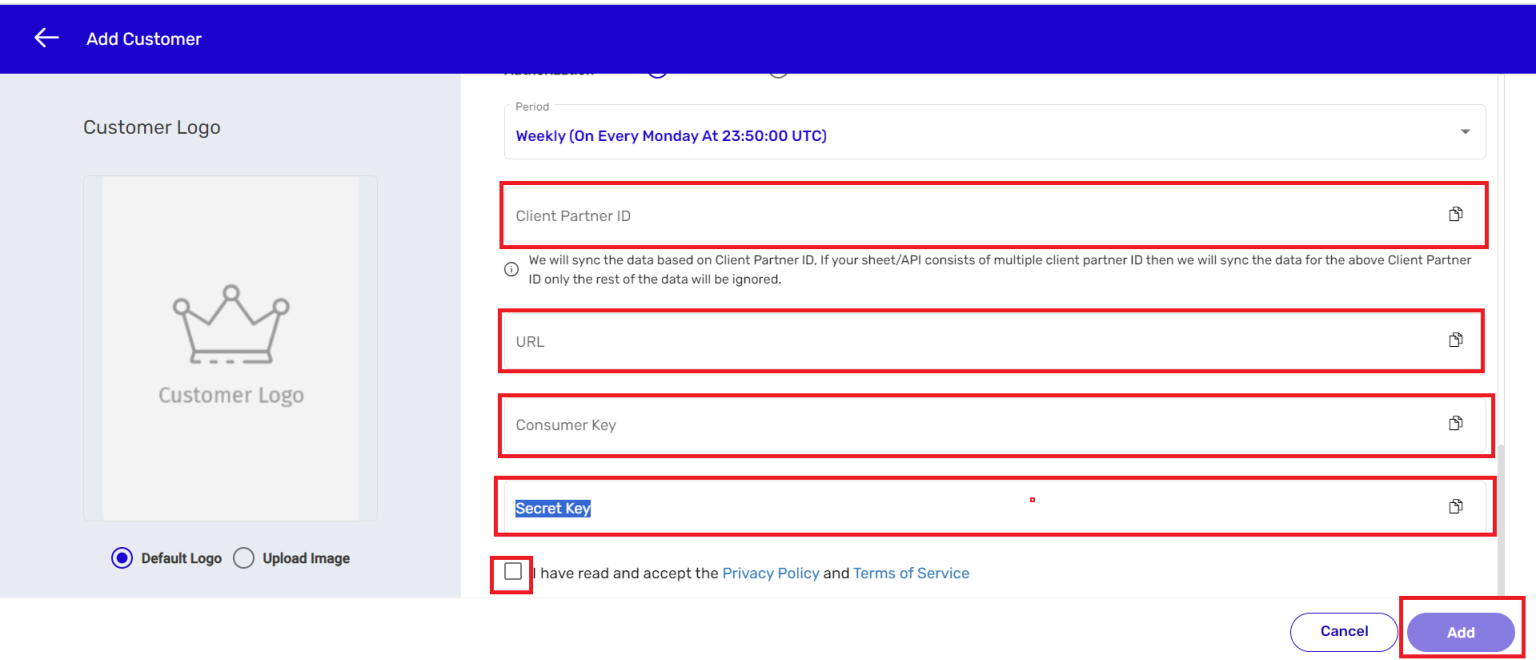
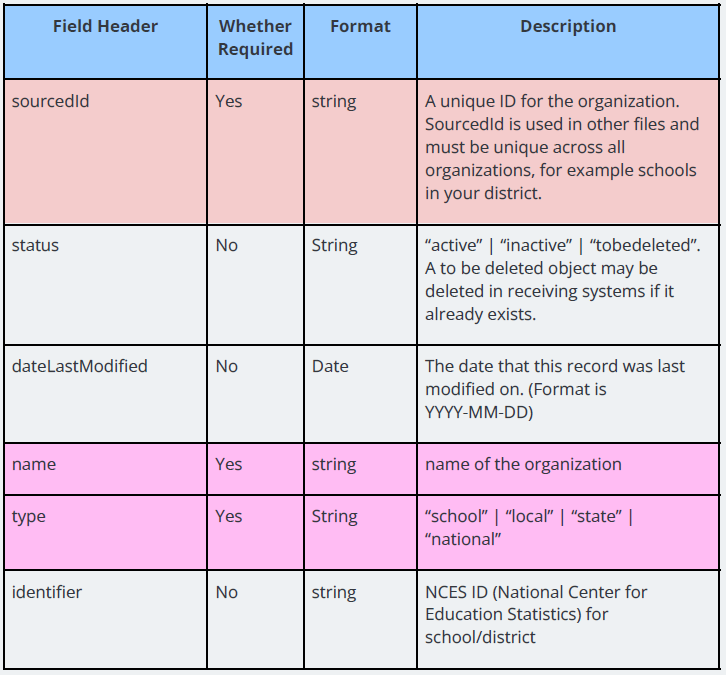
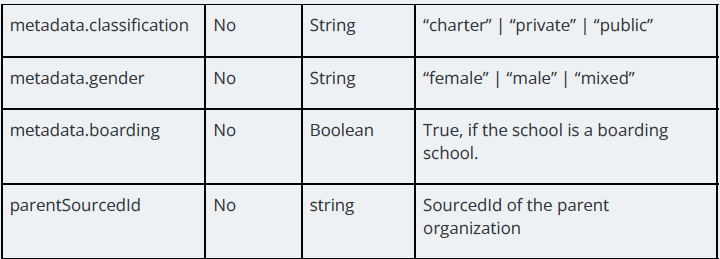
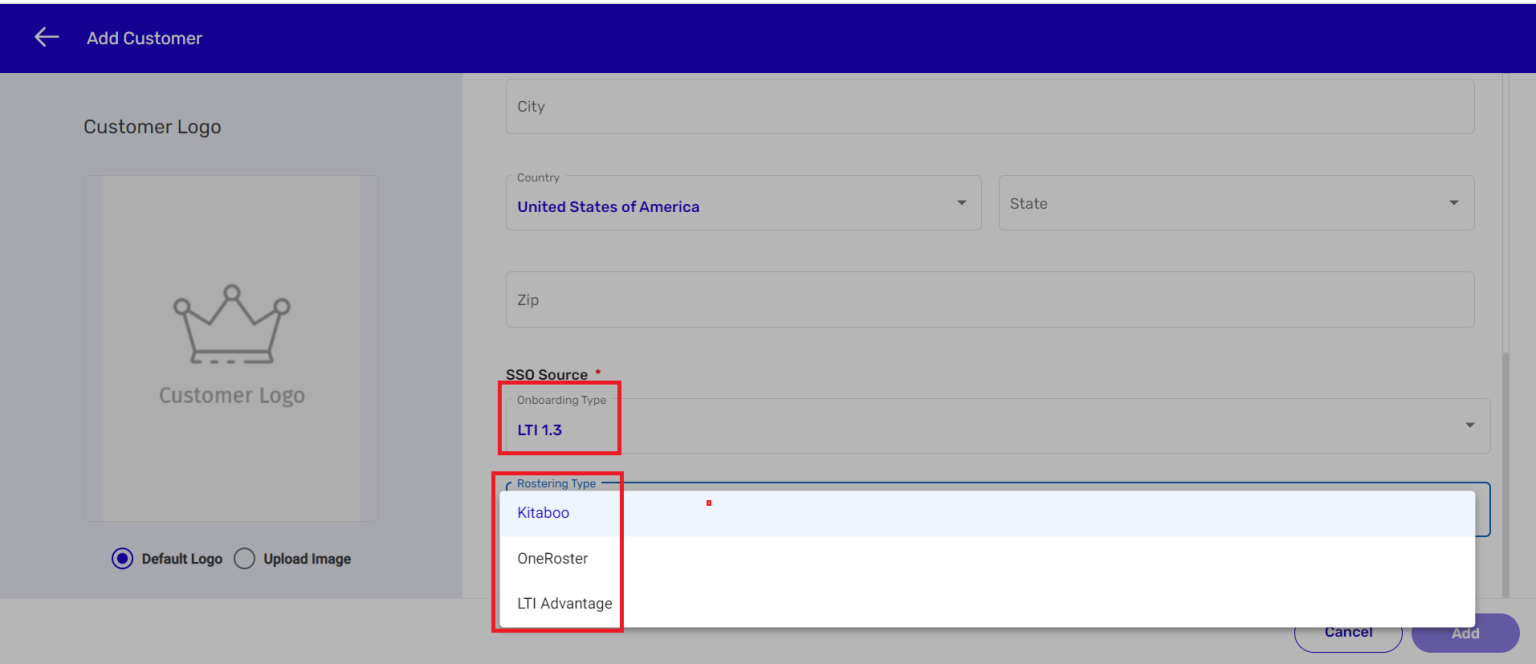
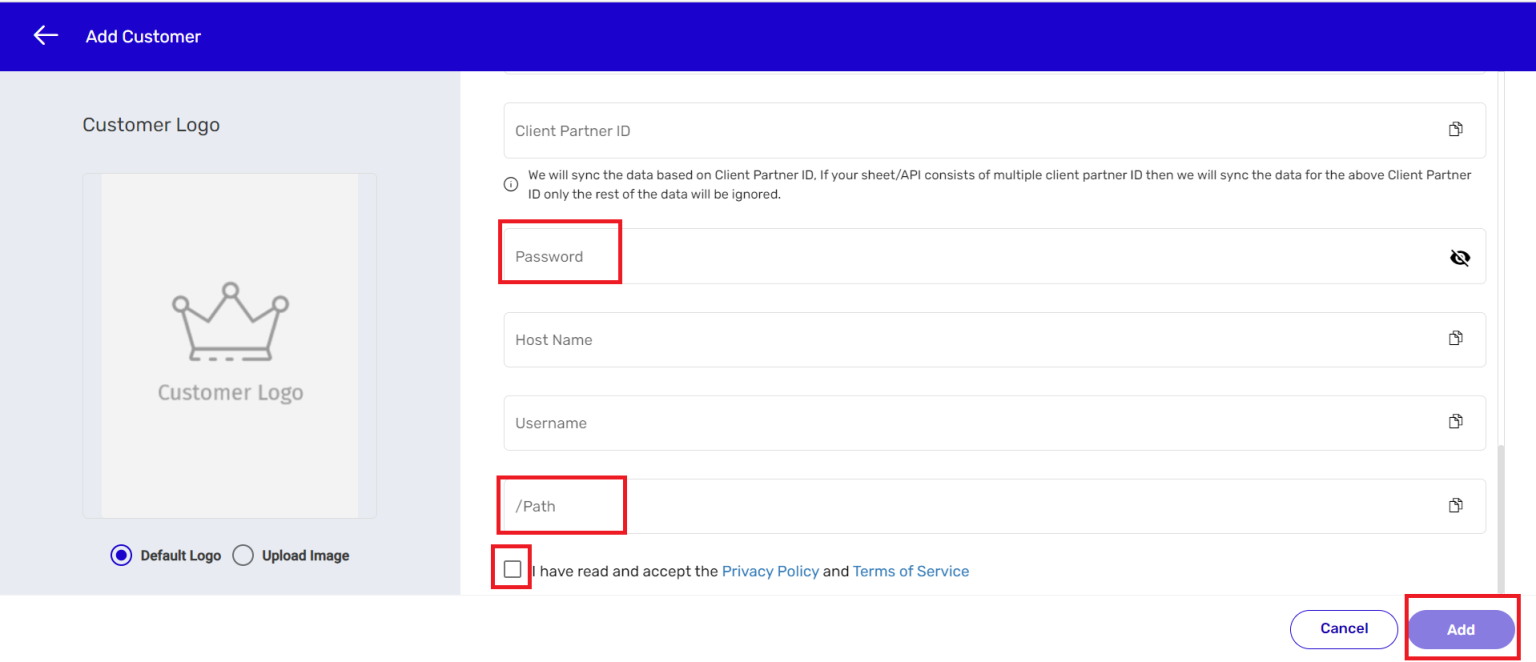
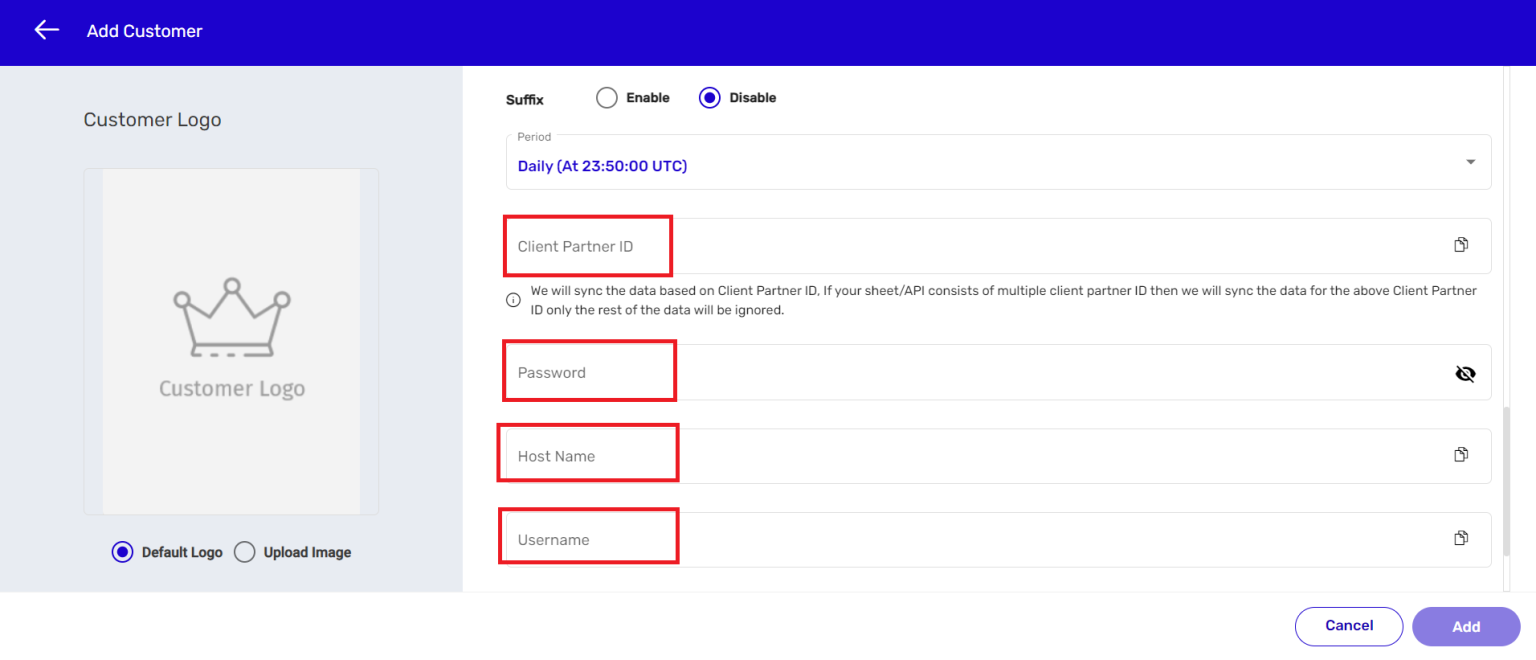
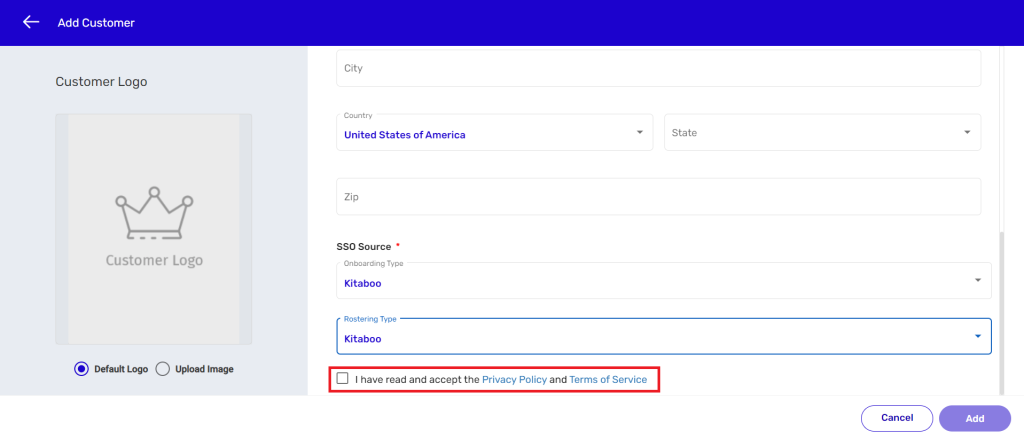
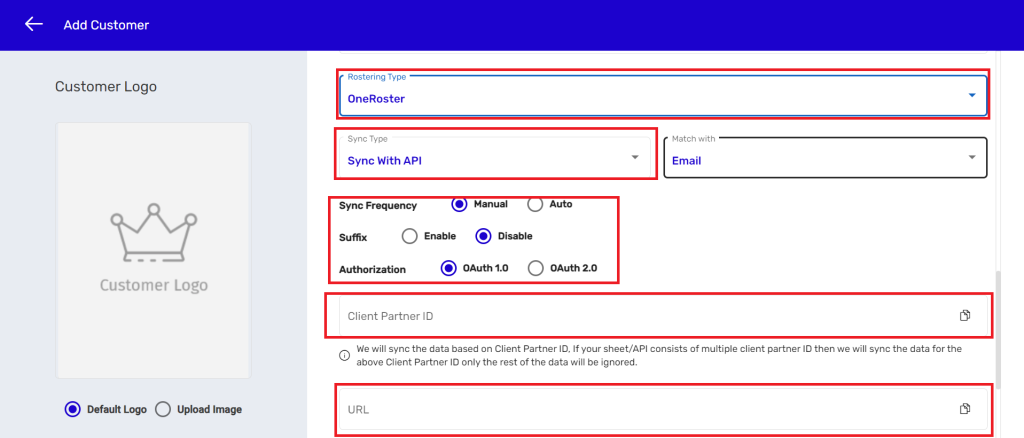
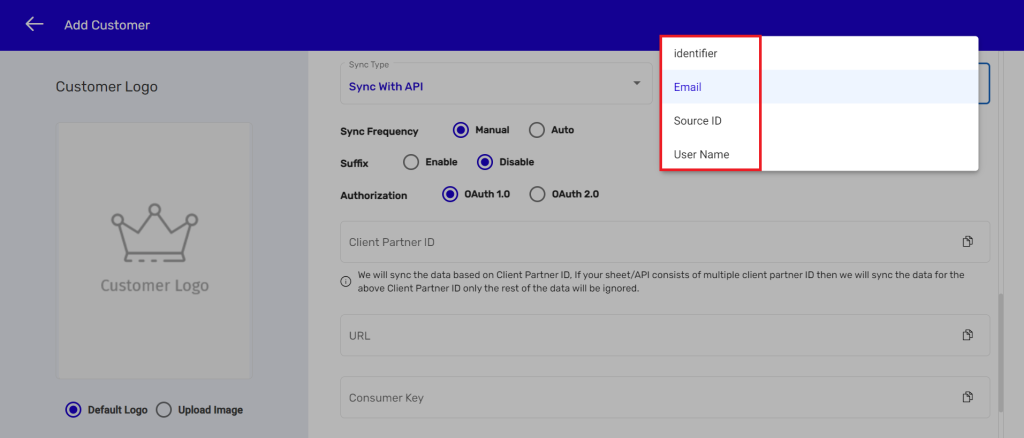
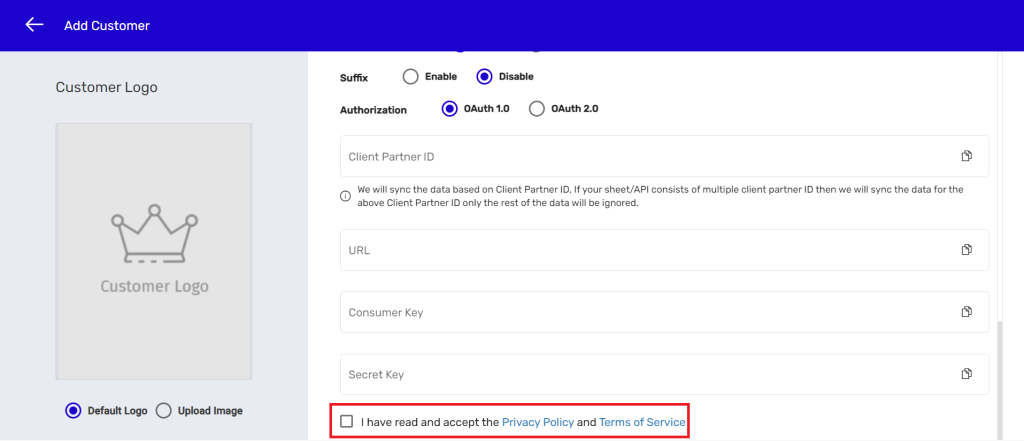
- Adding a OneRoster Customer
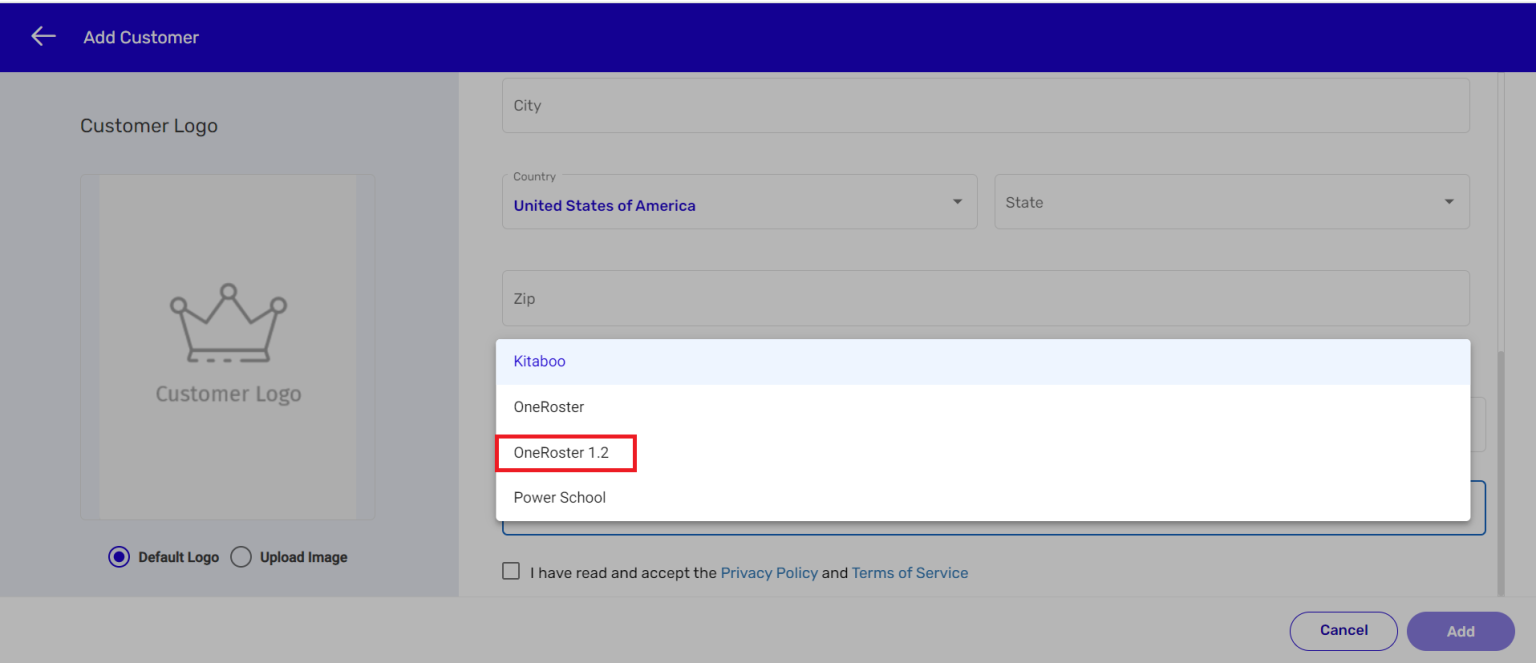
- Adding One roster 1.2
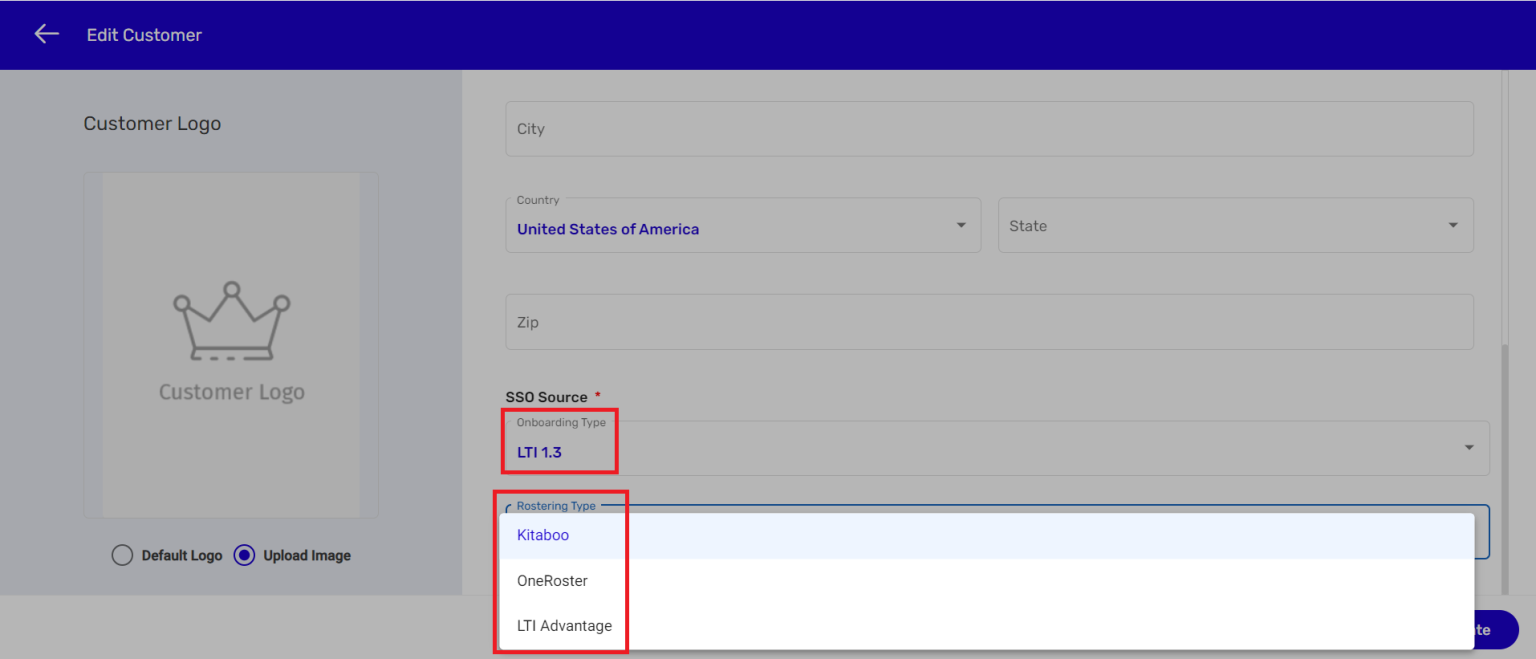
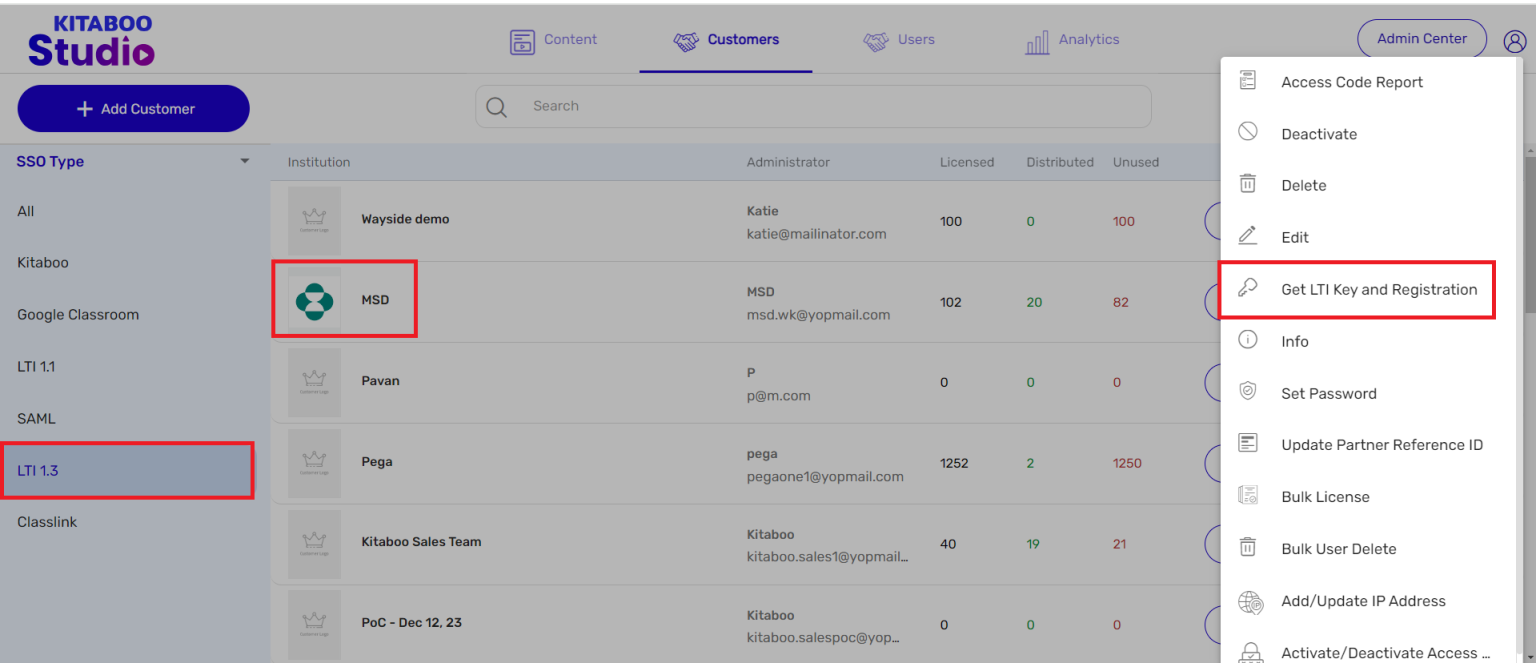
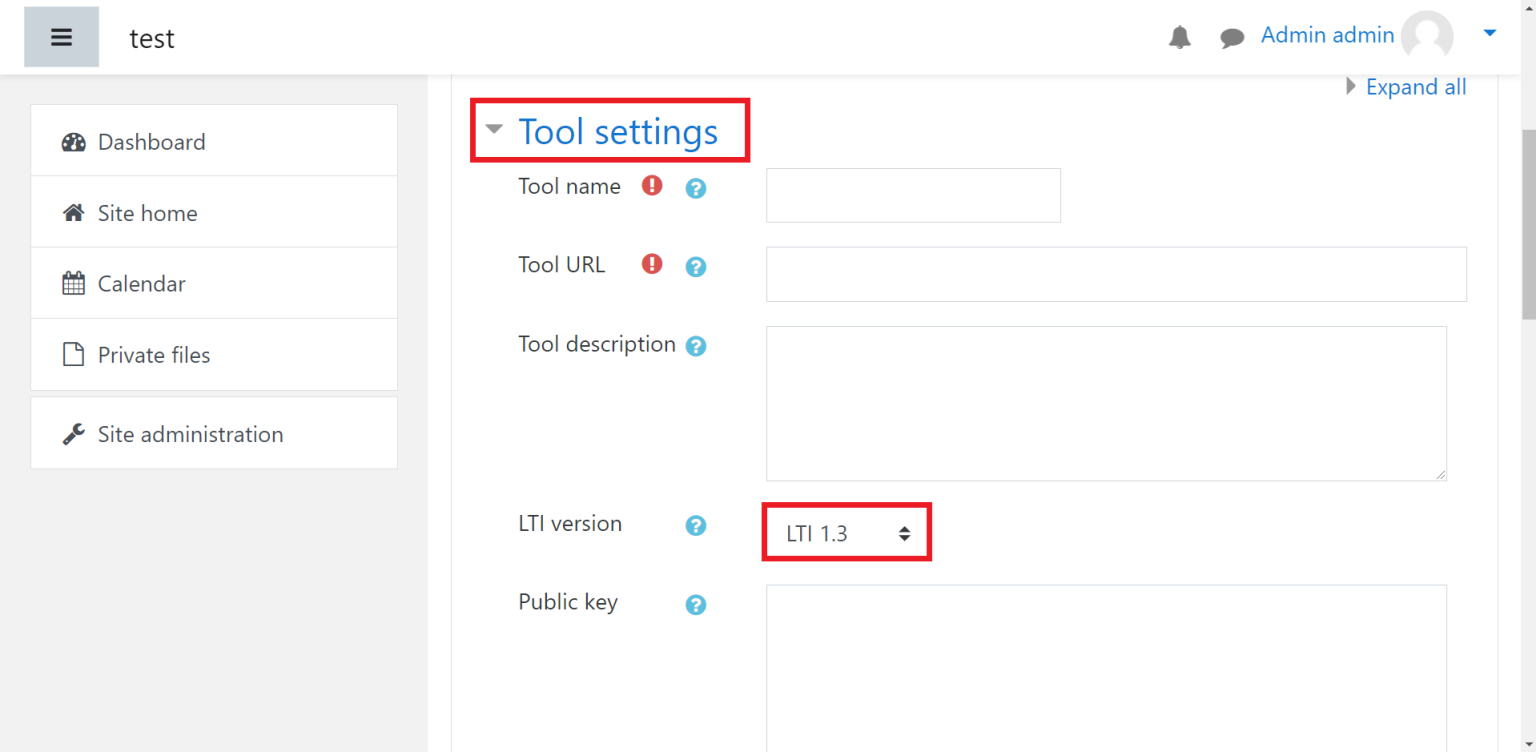
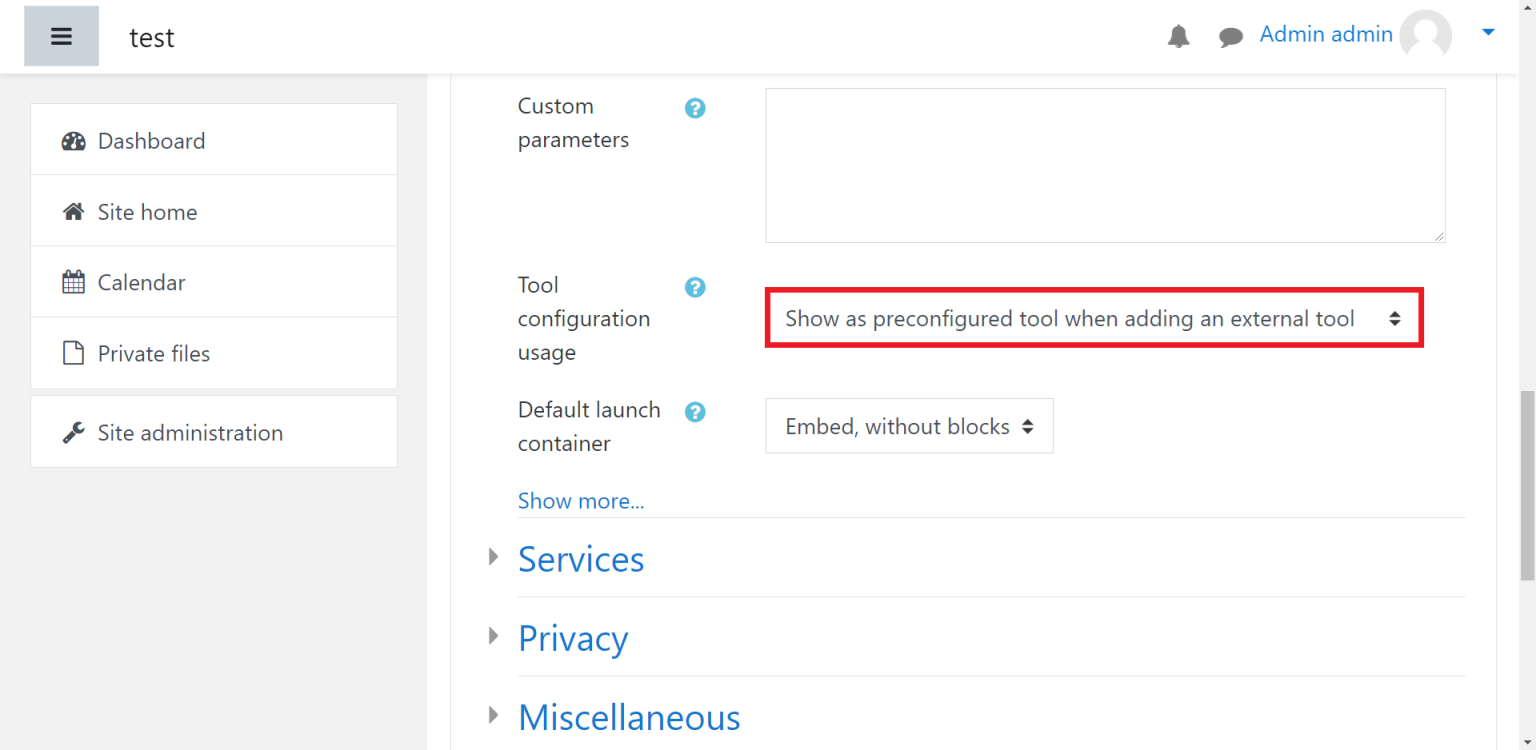
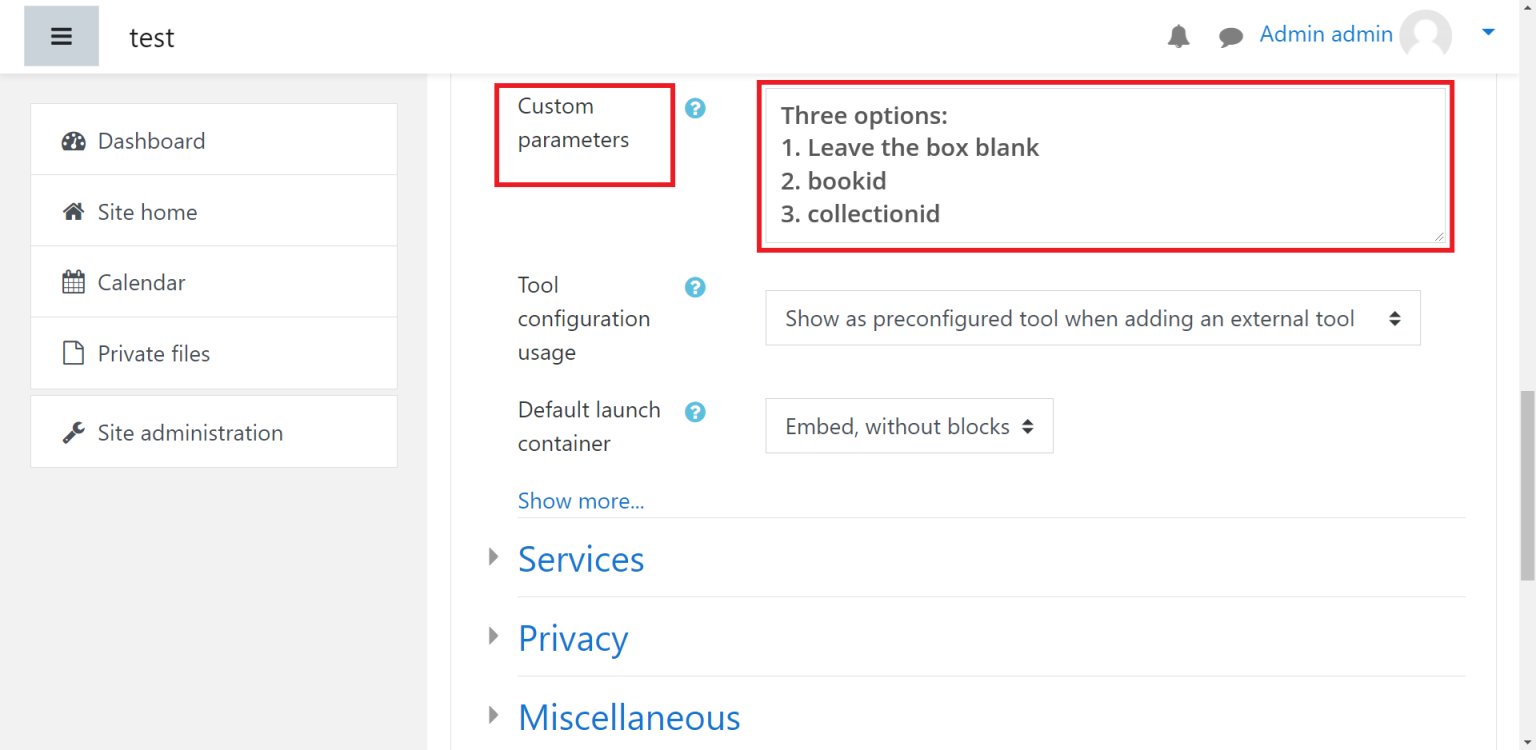
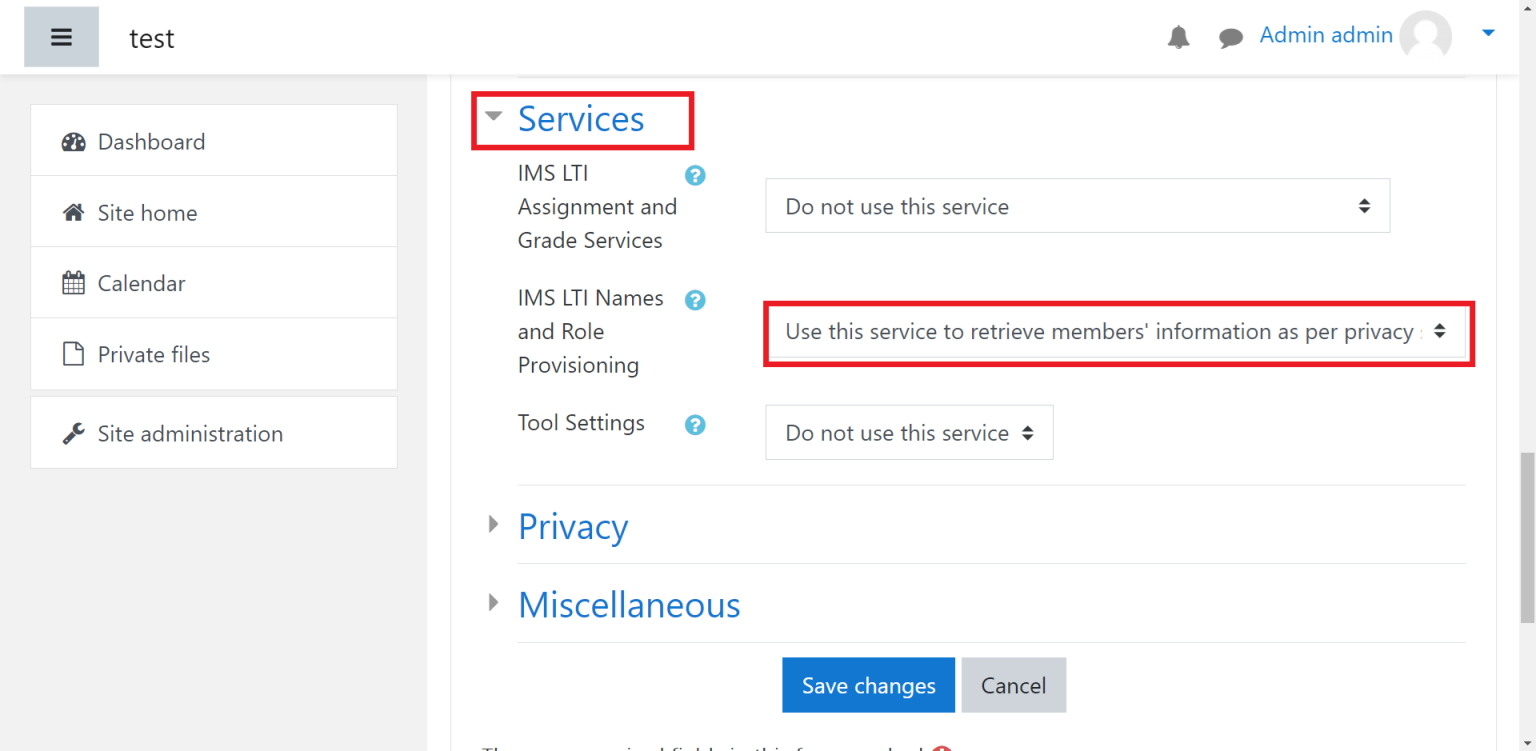
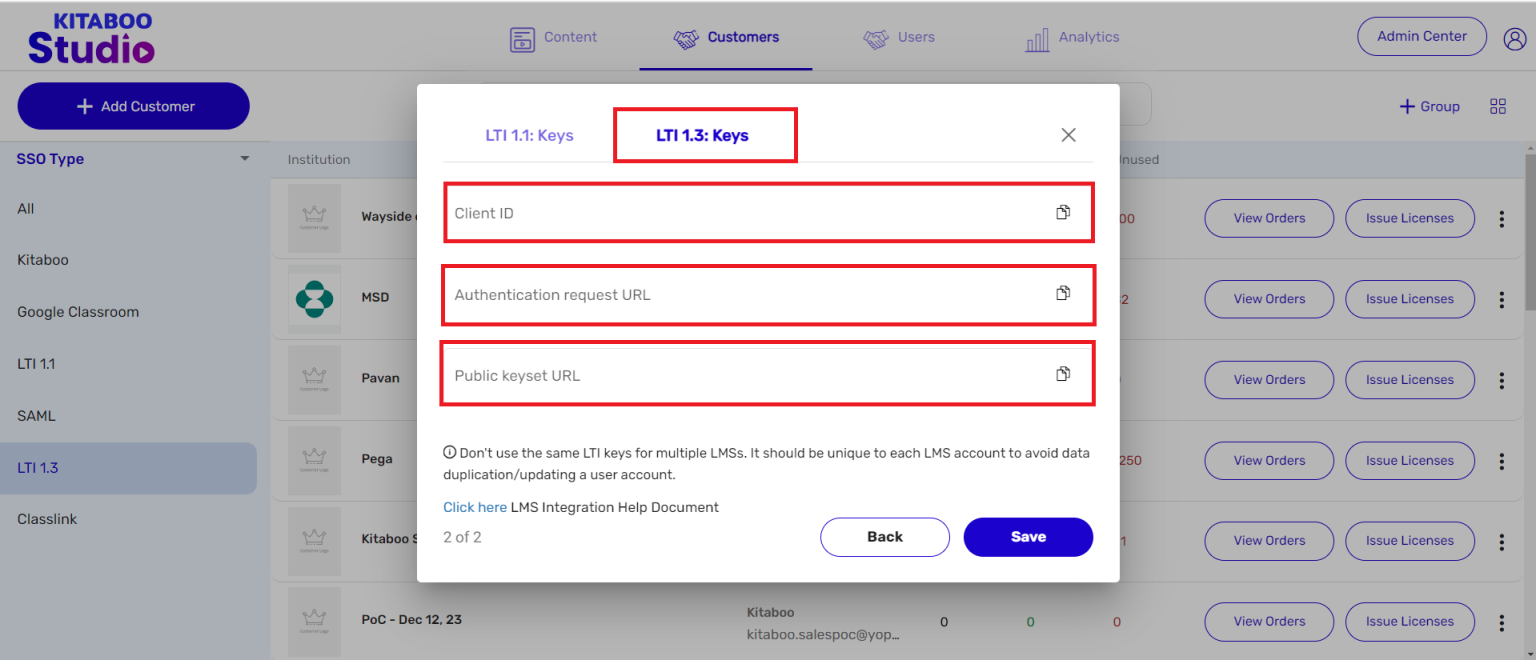
- Adding a LTI 1.3 Customer with OneRoster
- Adding a LTI 1.3 Customer
- Adding an LTI 1.1 Customer with OneRoster
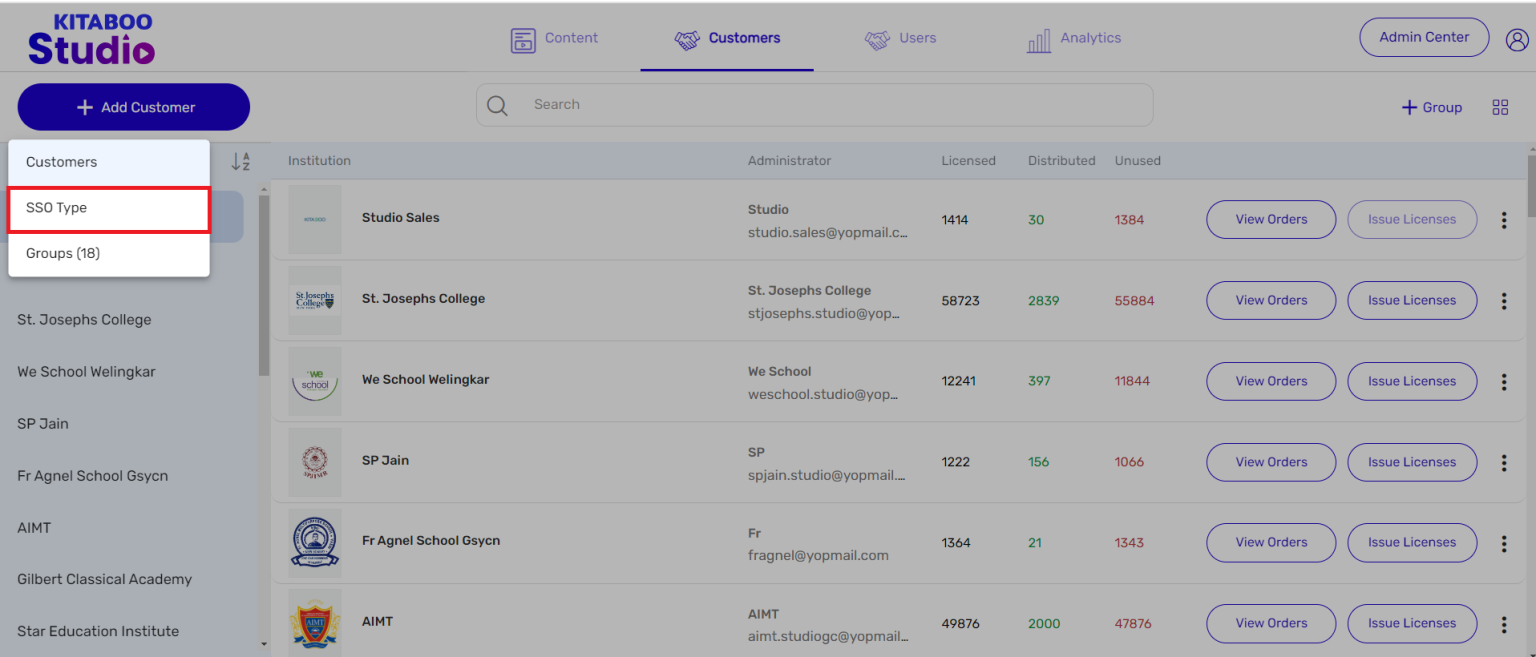
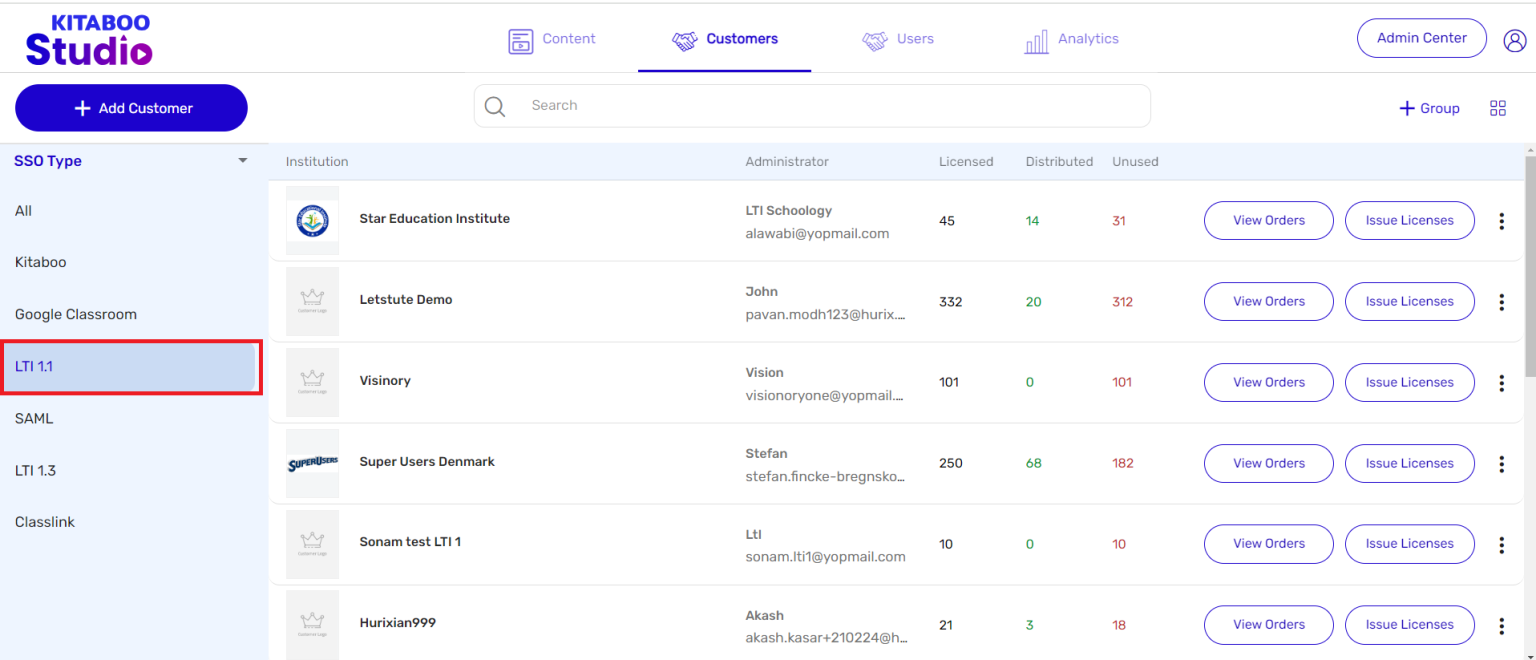
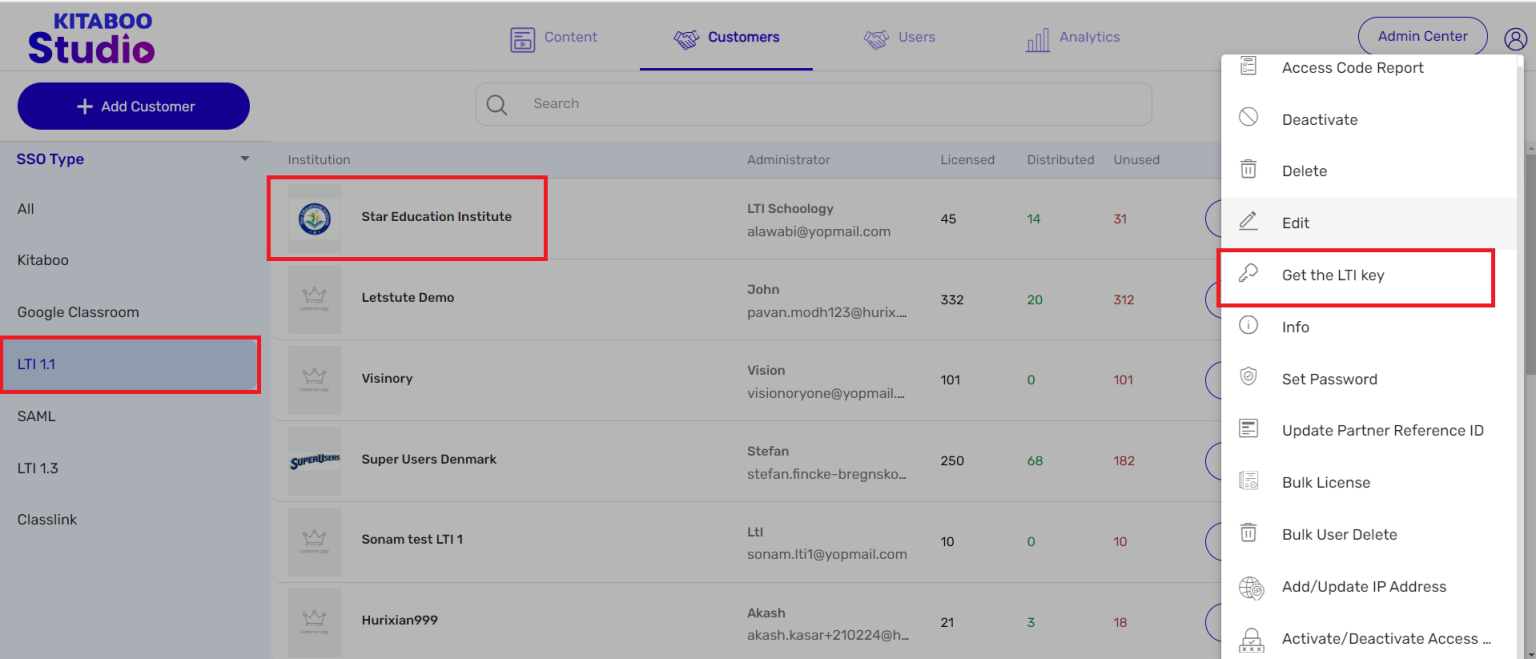
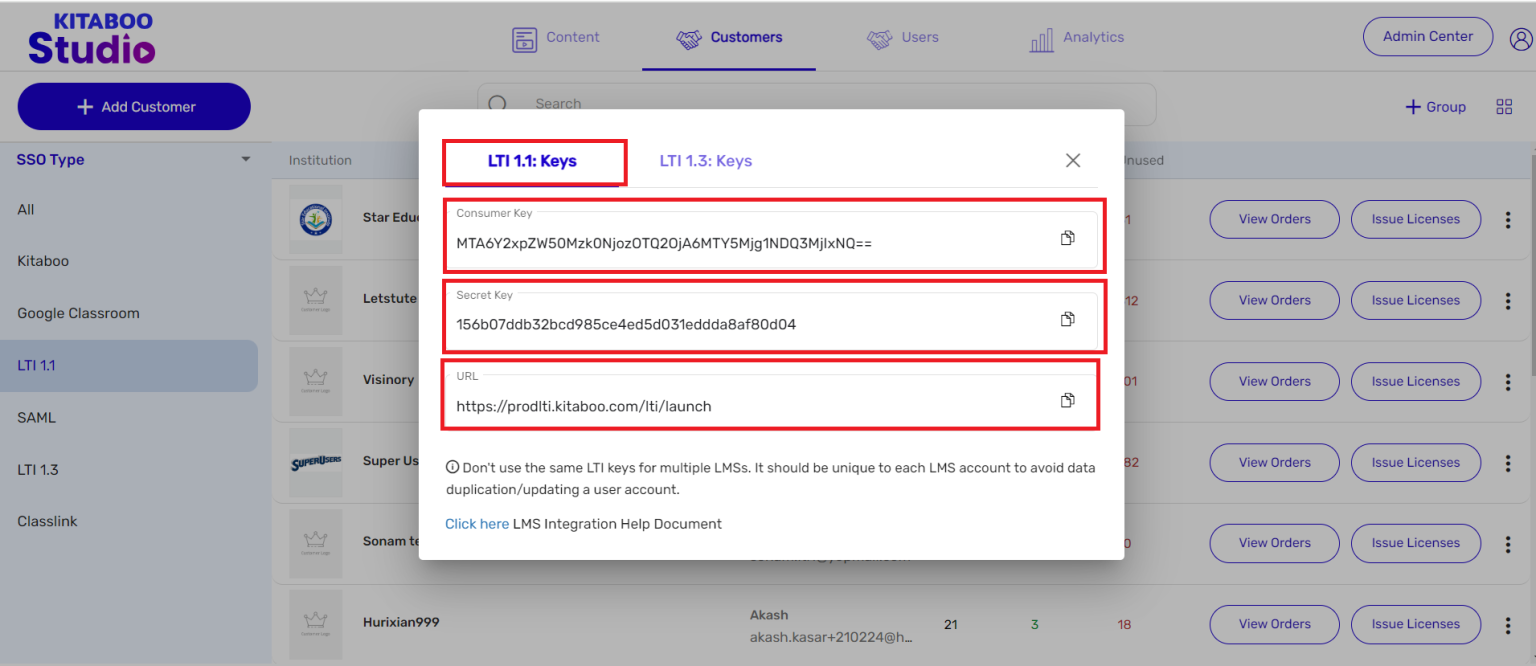
- Adding LTI 1.1 Customers
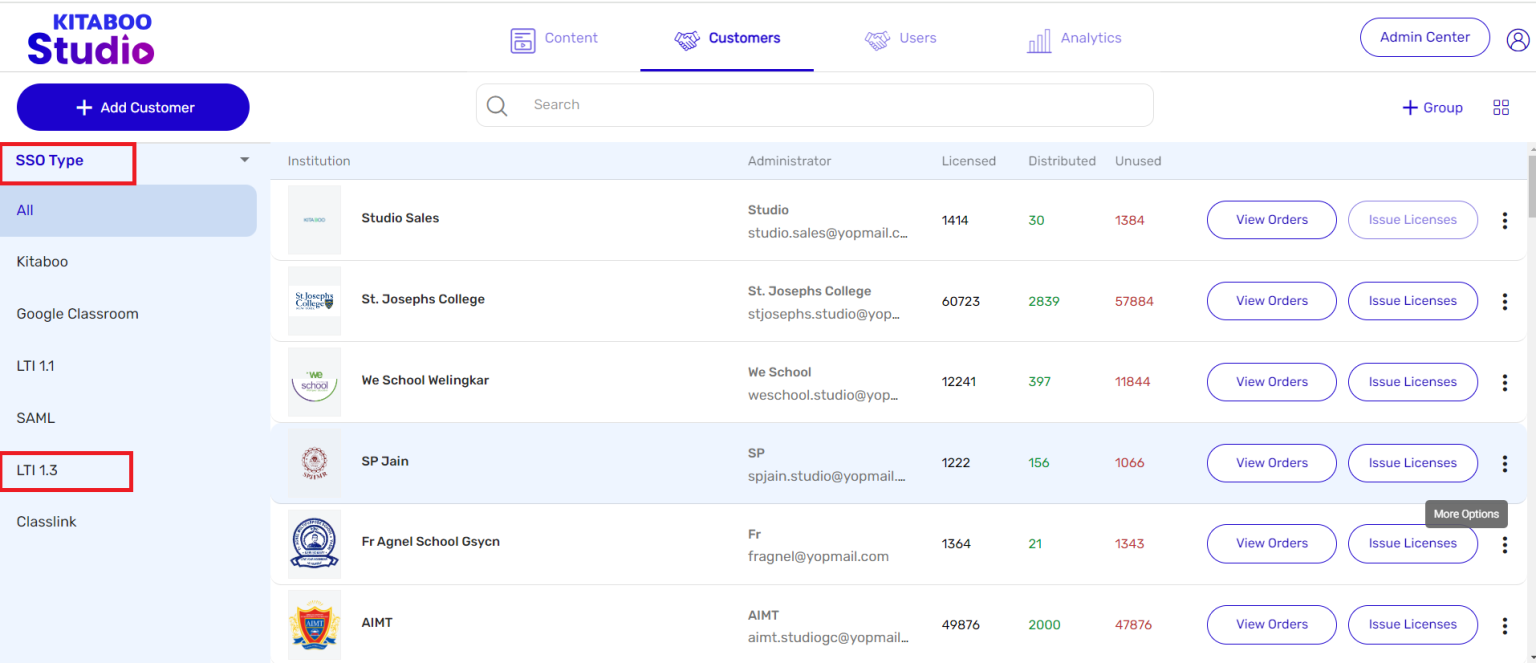
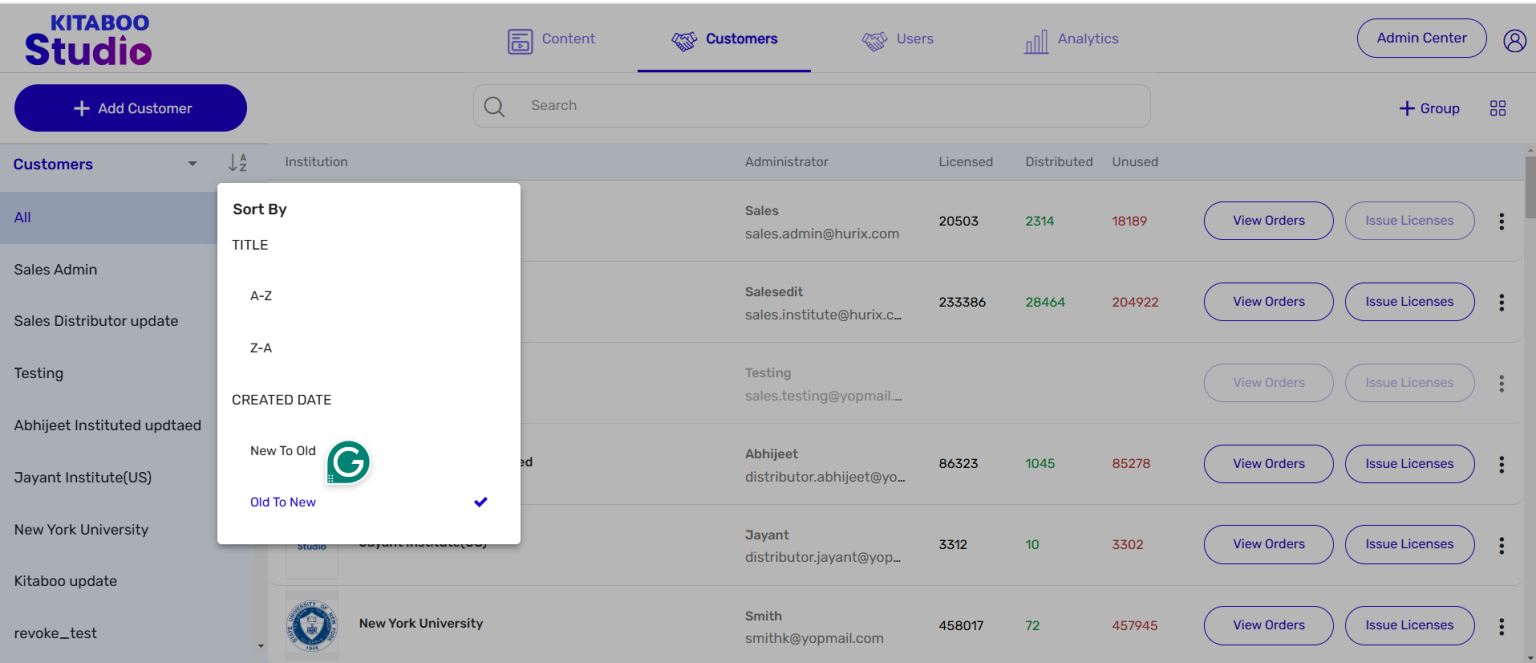
- Sorting Customer and Group
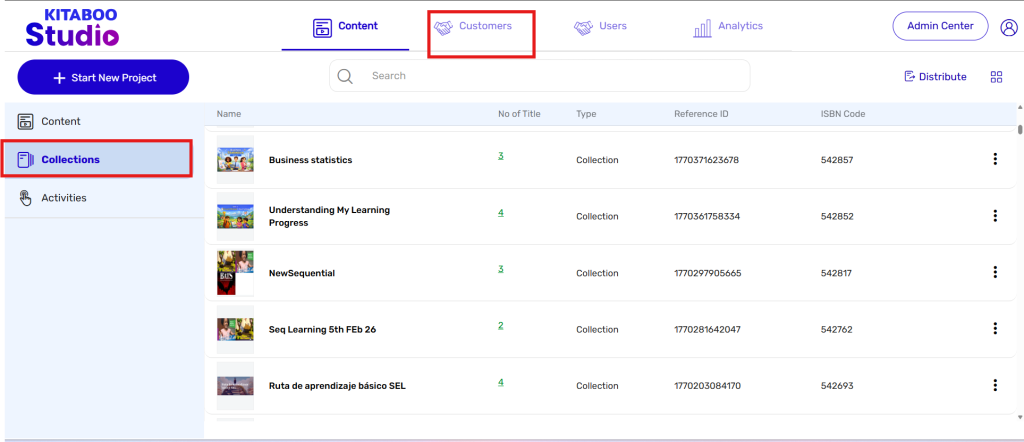
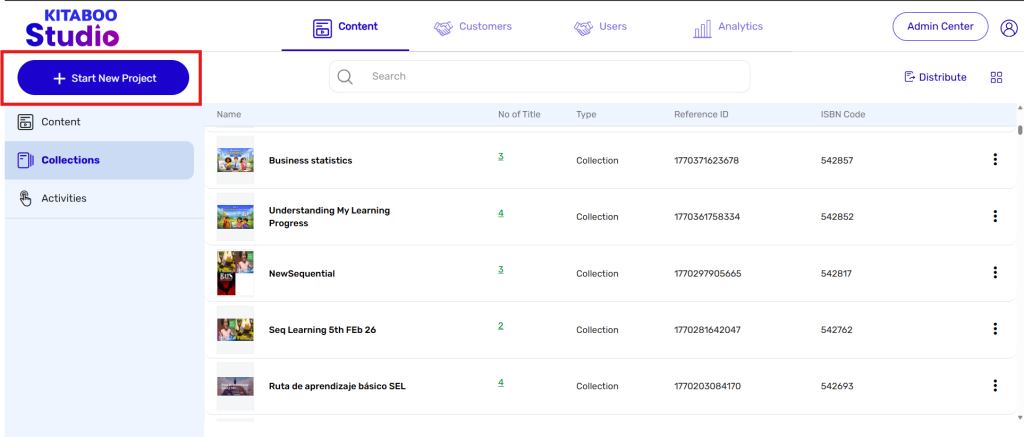
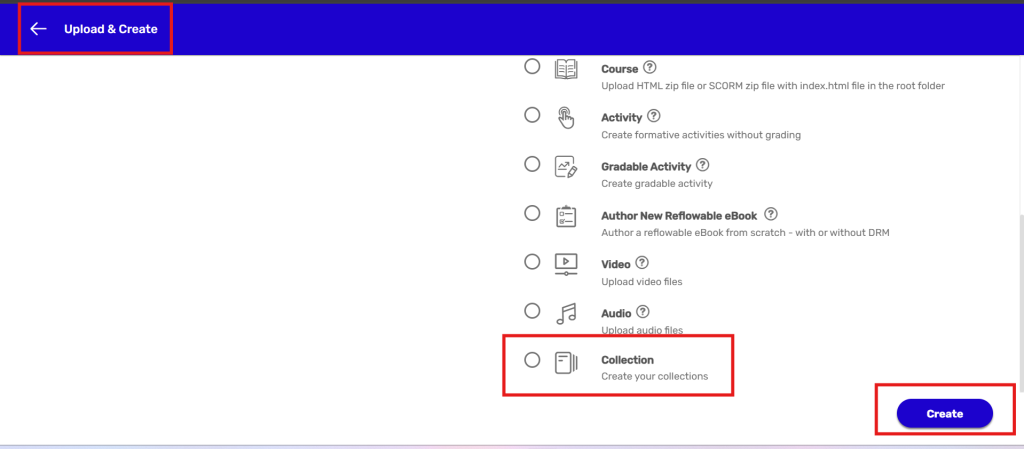
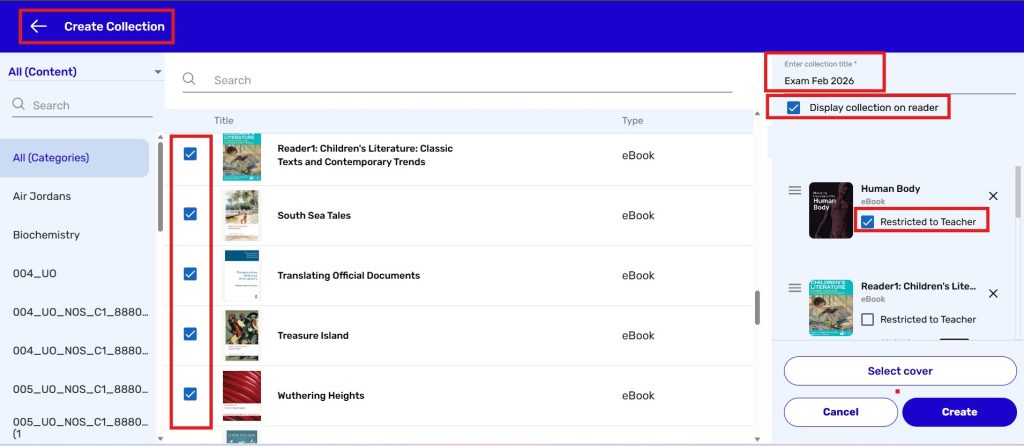
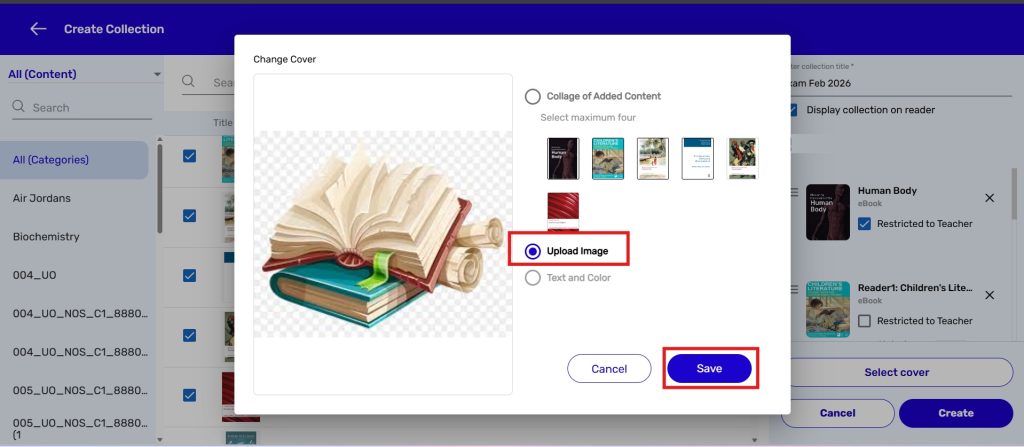
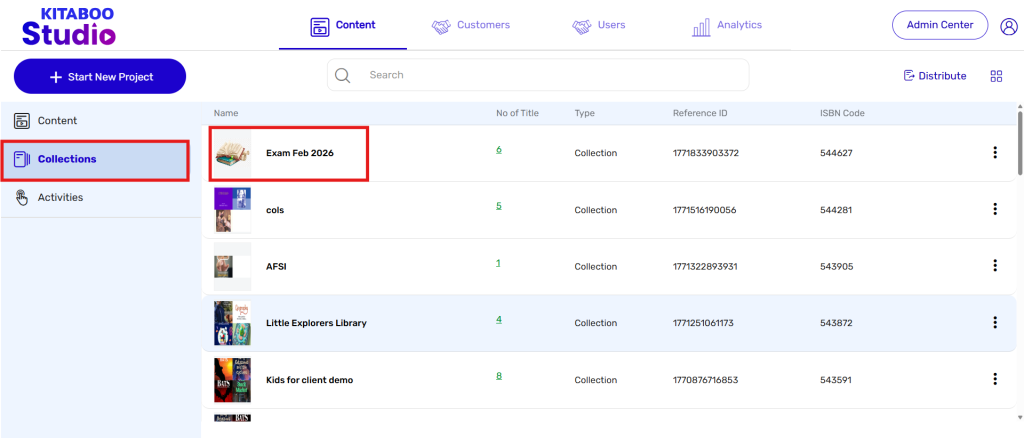
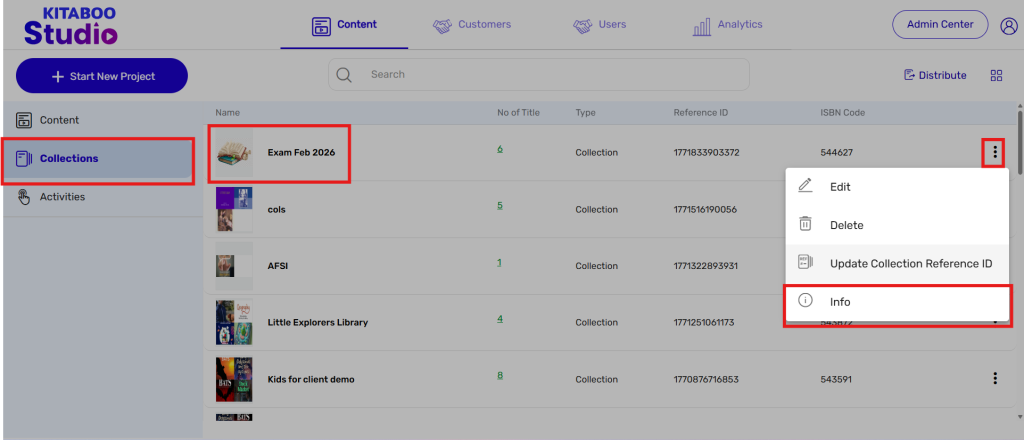
- Creating a Collection
- Enable K-AI at the content level
- Content Lifecycle Stages in Kitaboo for eBooks
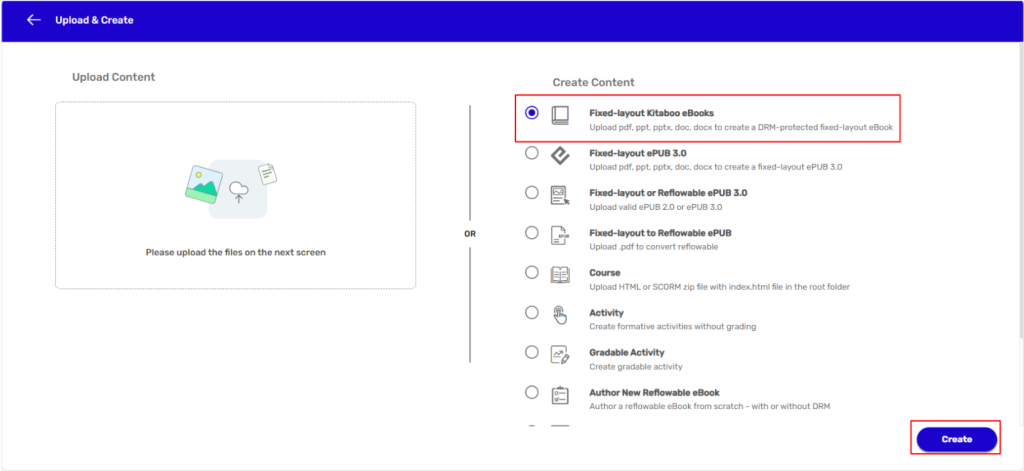
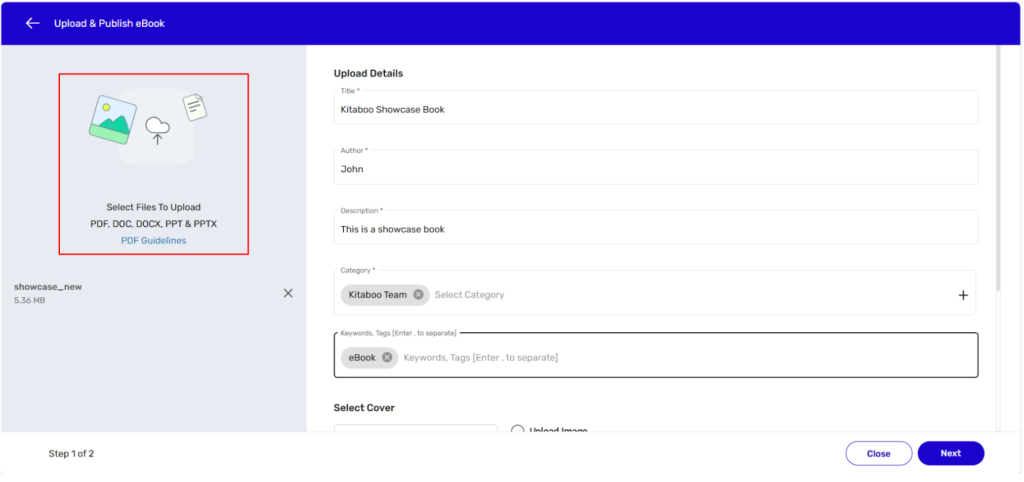
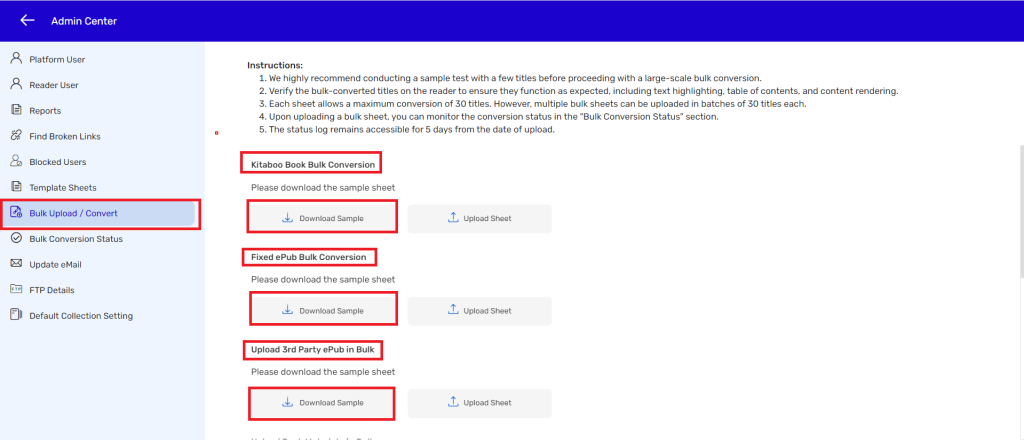
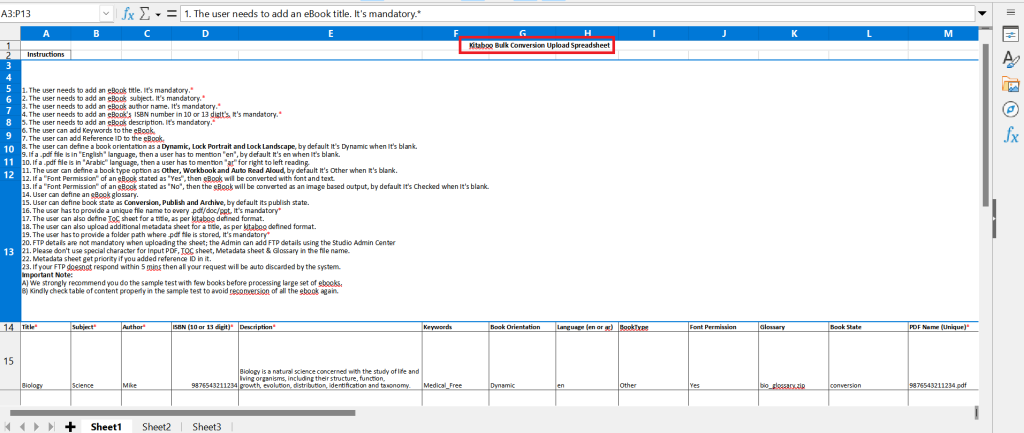
- Creating a Fixed-layout Kitaboo eBooks
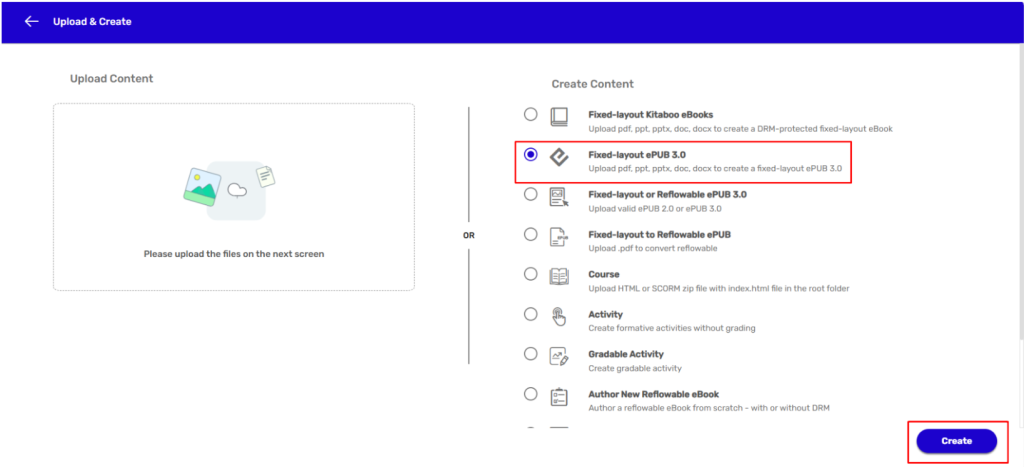
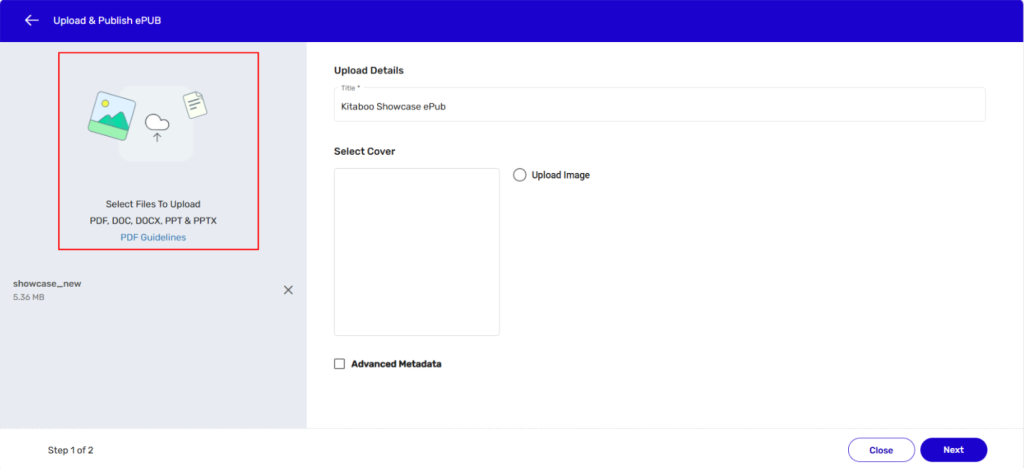
- Creating Fixed-layout ePub 3.0
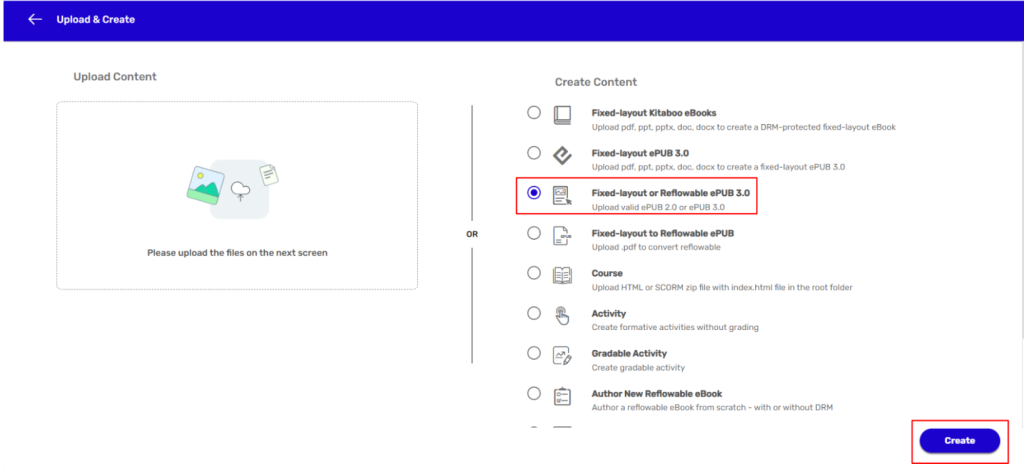
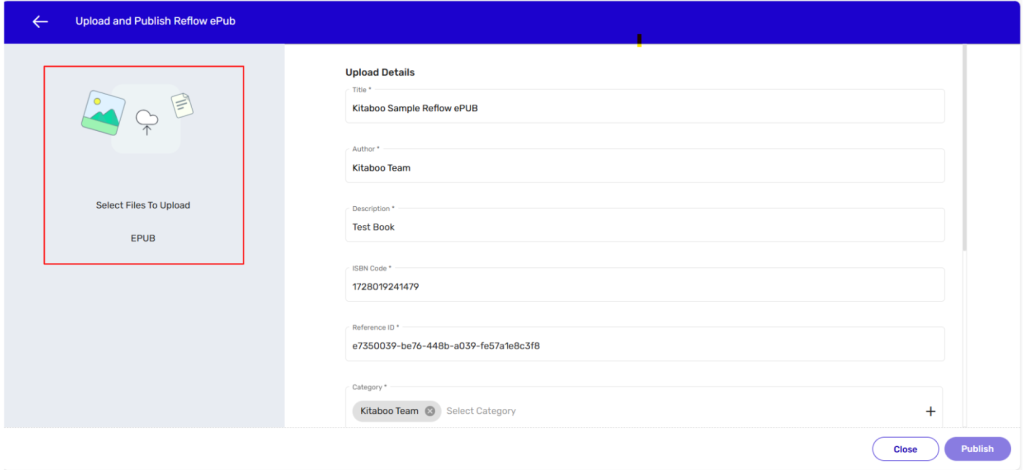
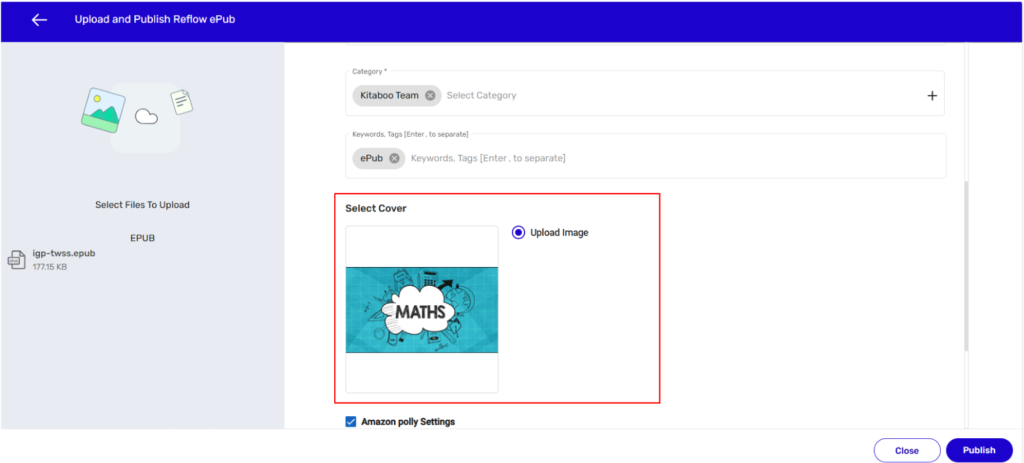
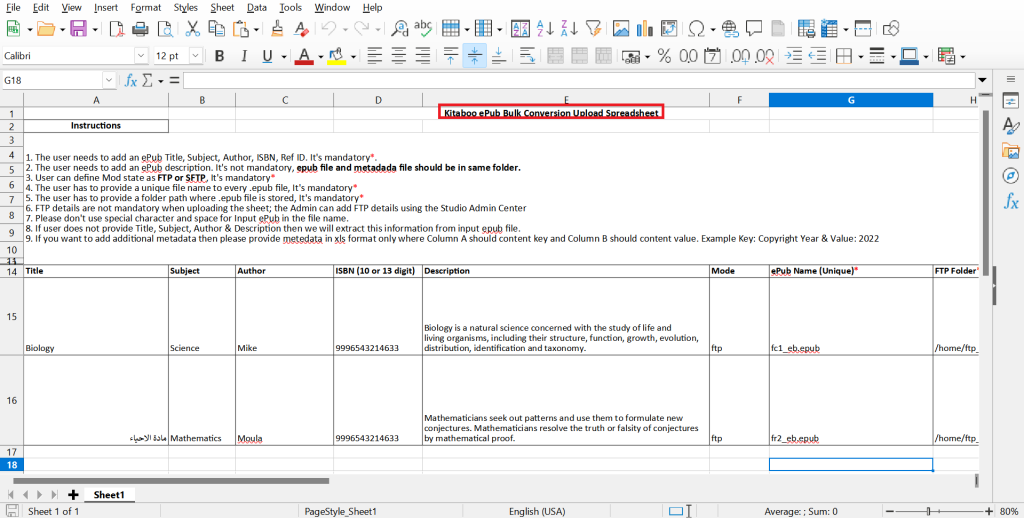
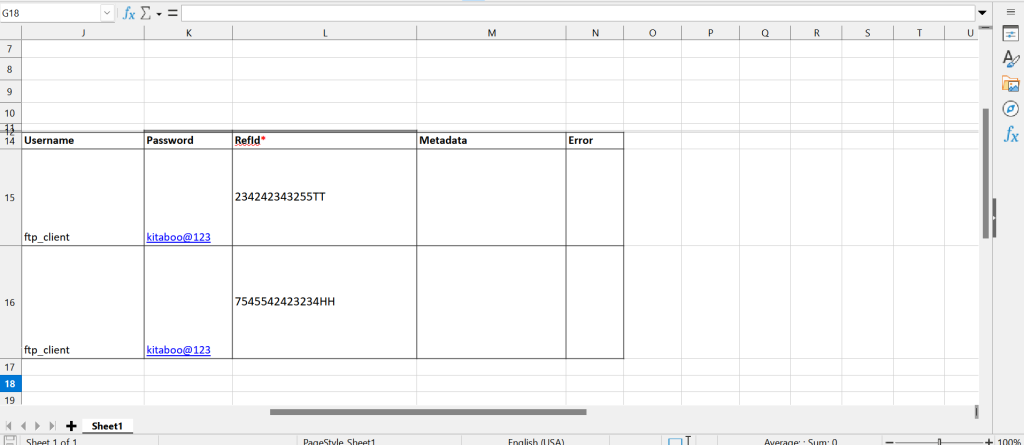
- Upload 3rd Party ePub 2.0/3.0
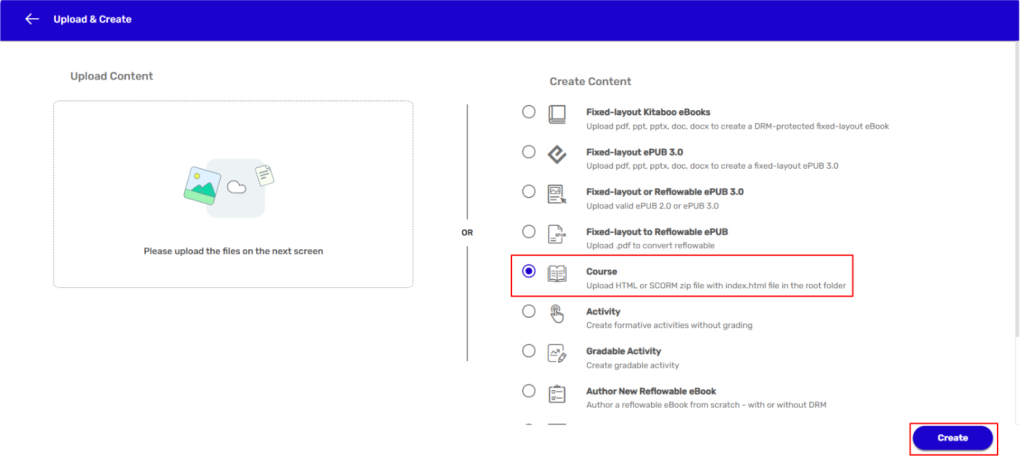
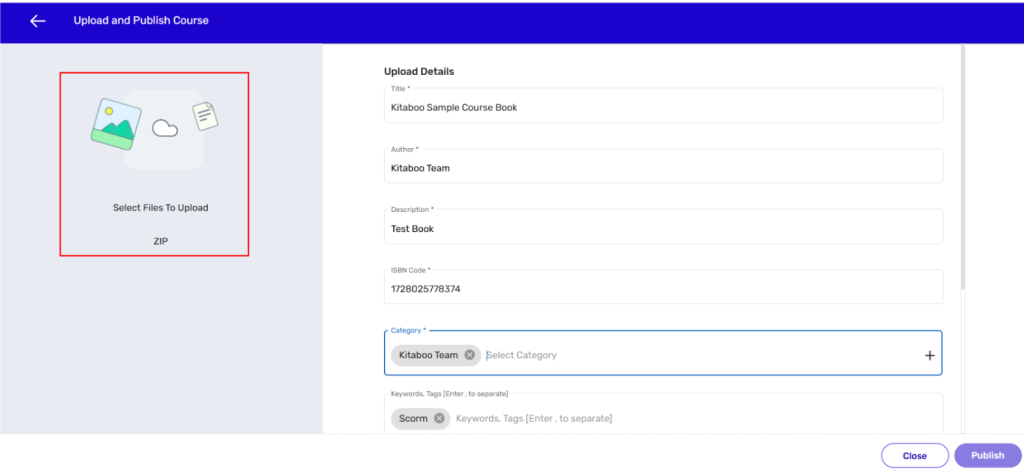
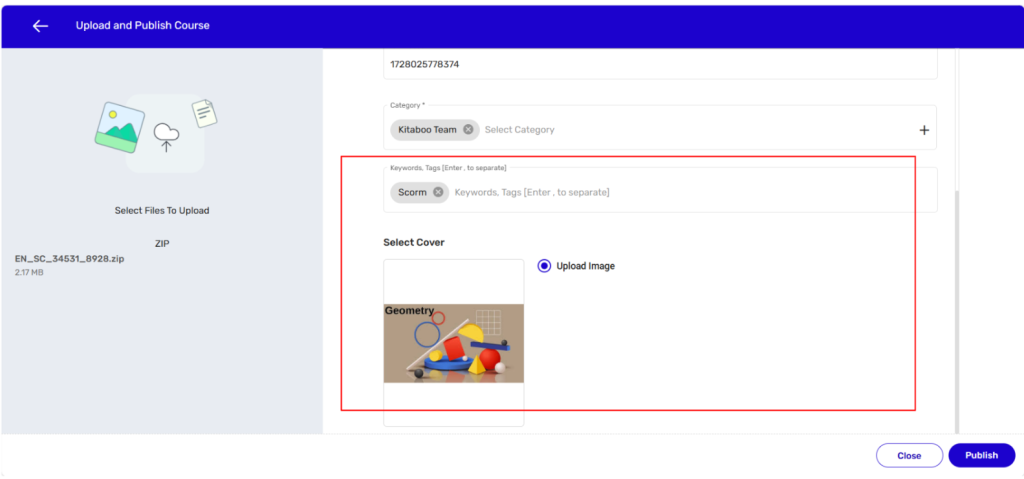
- Creating a Course or Uploading Scorm
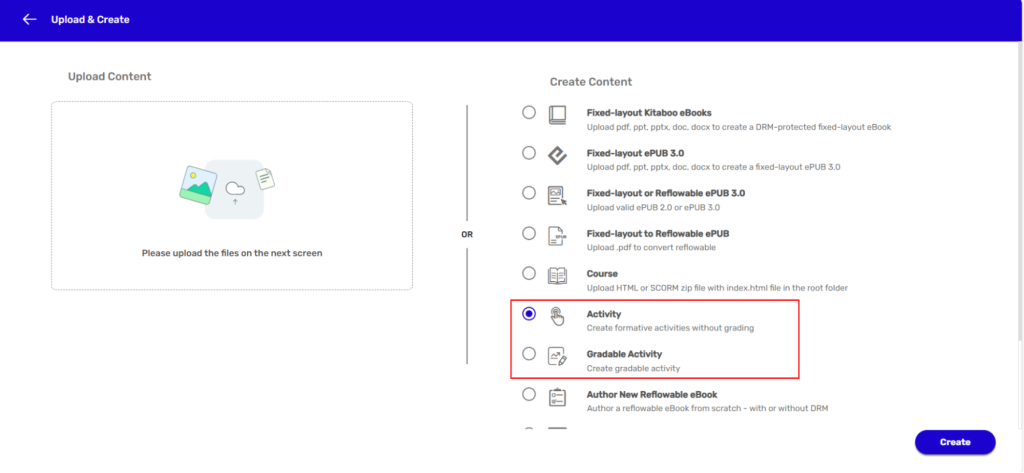
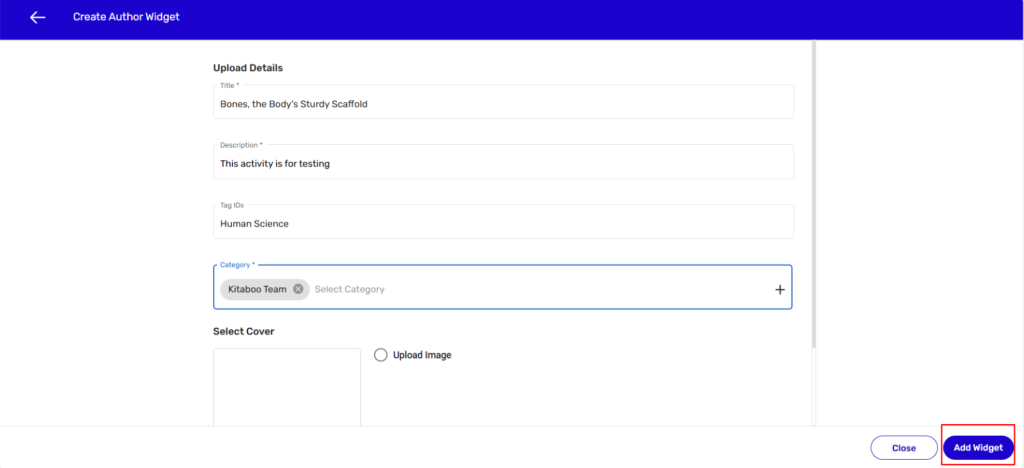
- Activity or Gradable Activity Creation
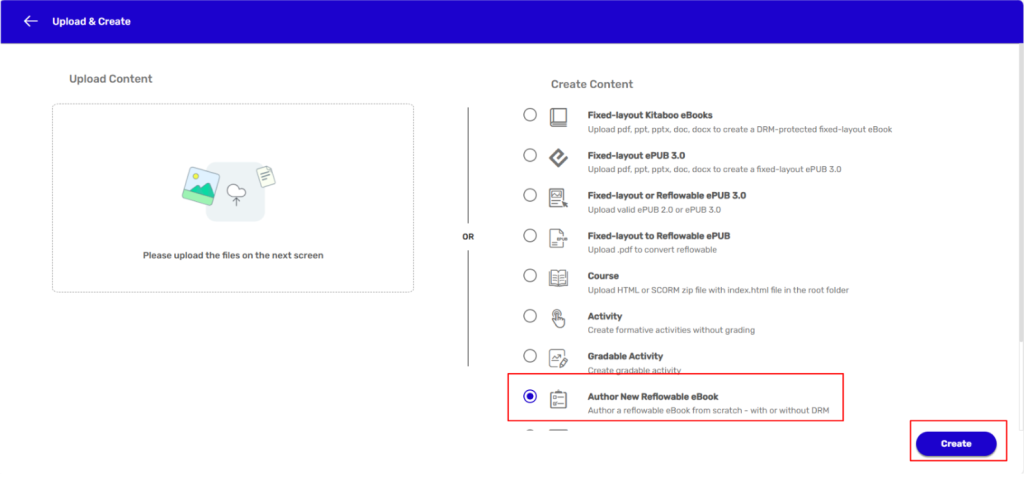
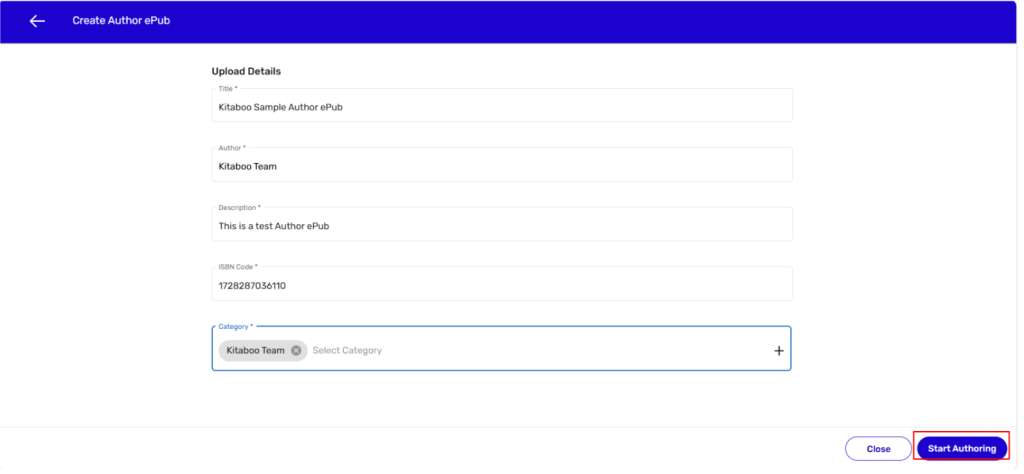
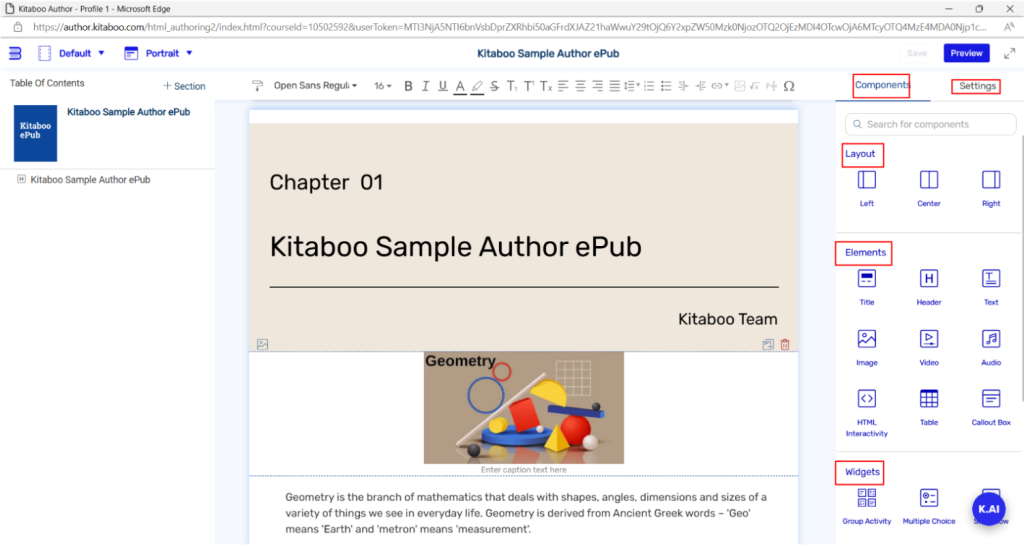
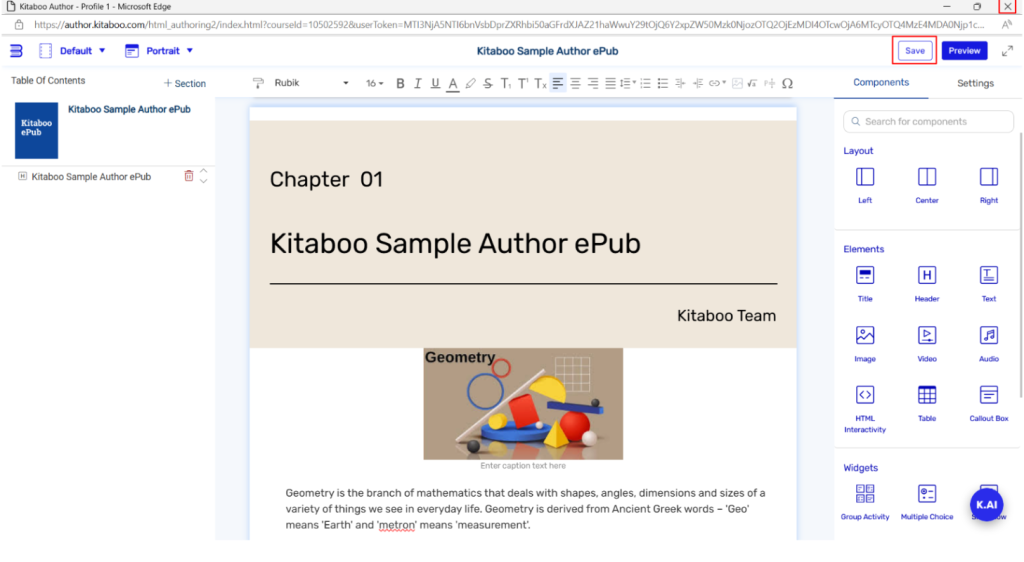
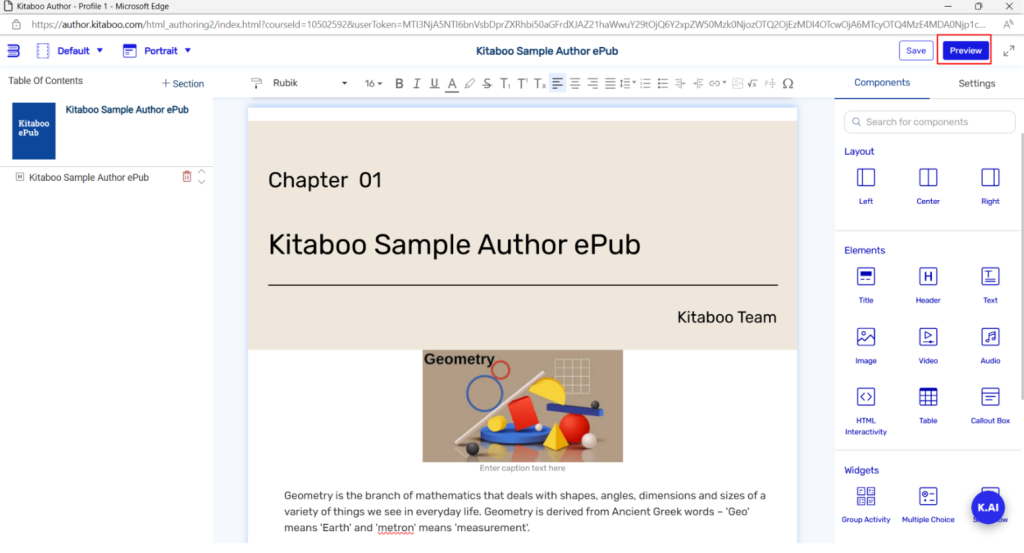
- Authoring an ePub
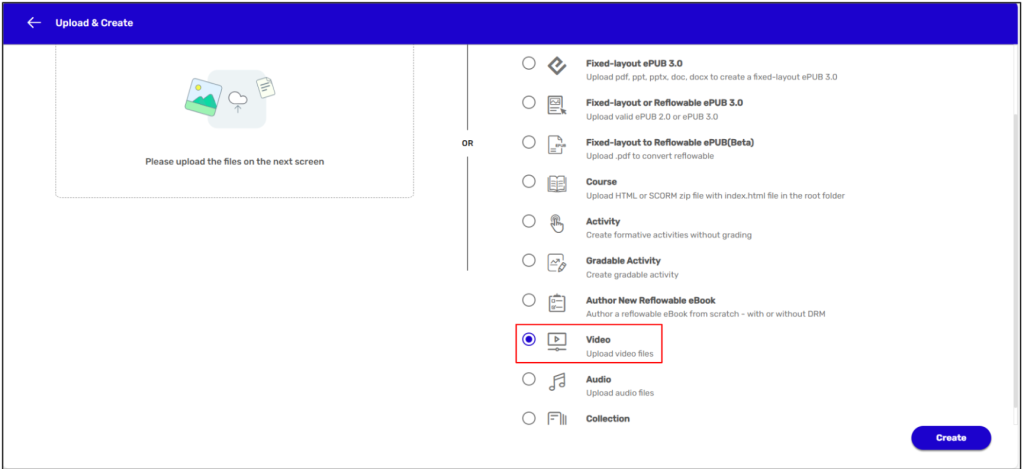
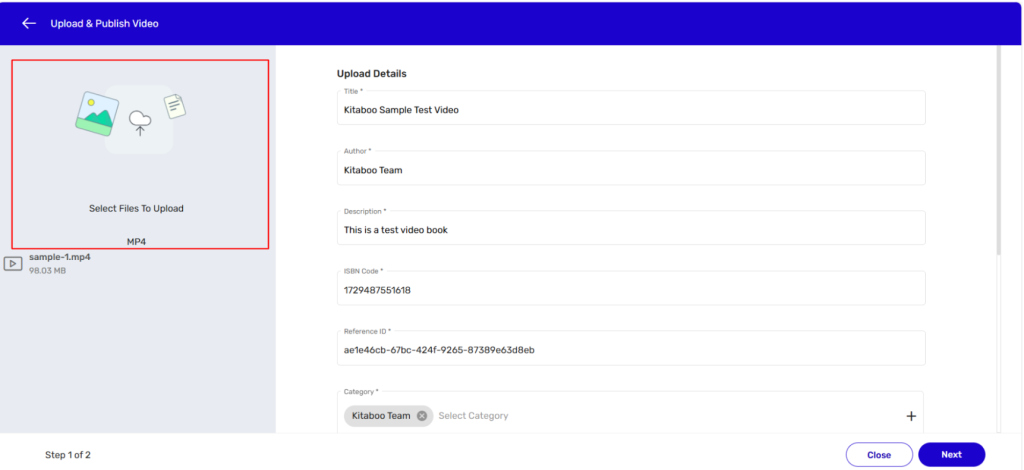
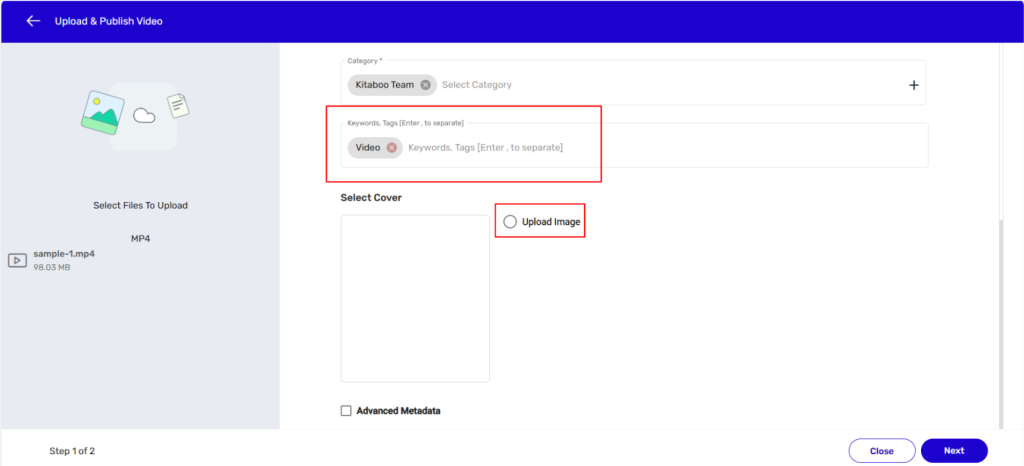
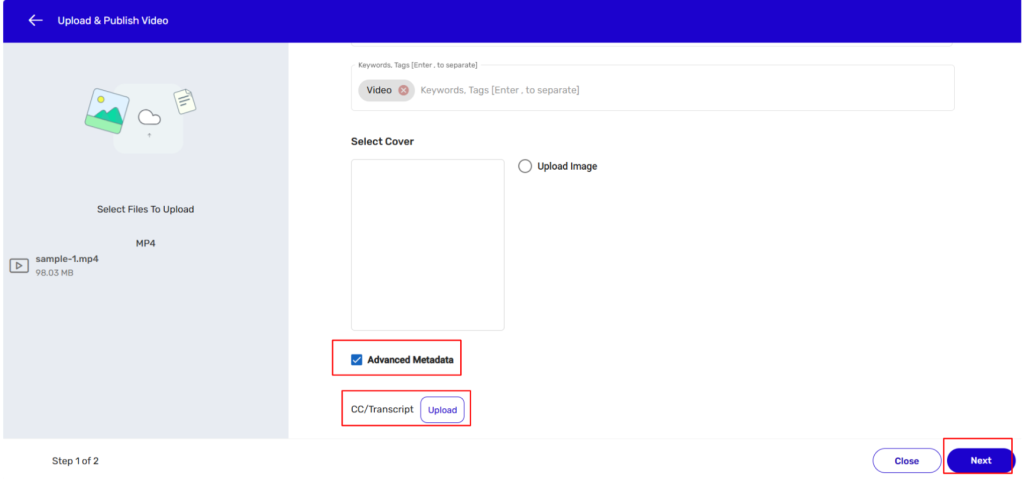
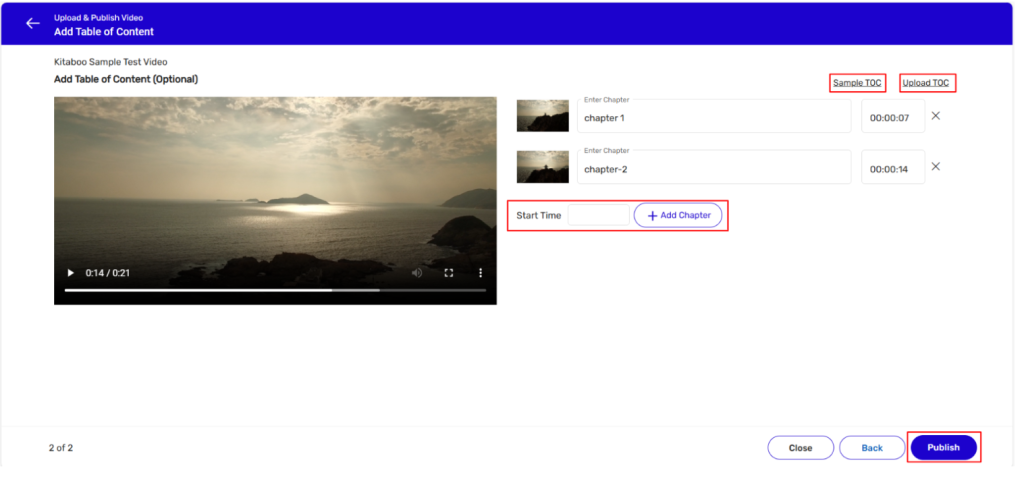
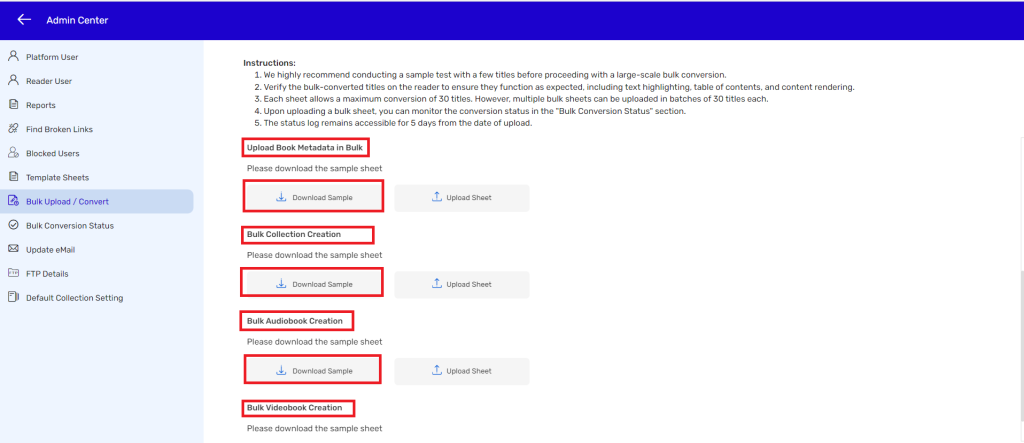
- Creating a Video Book
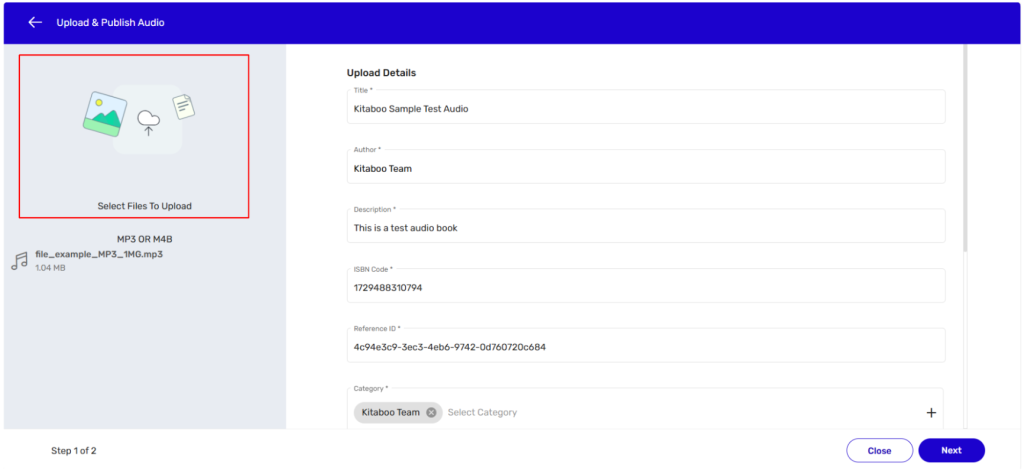
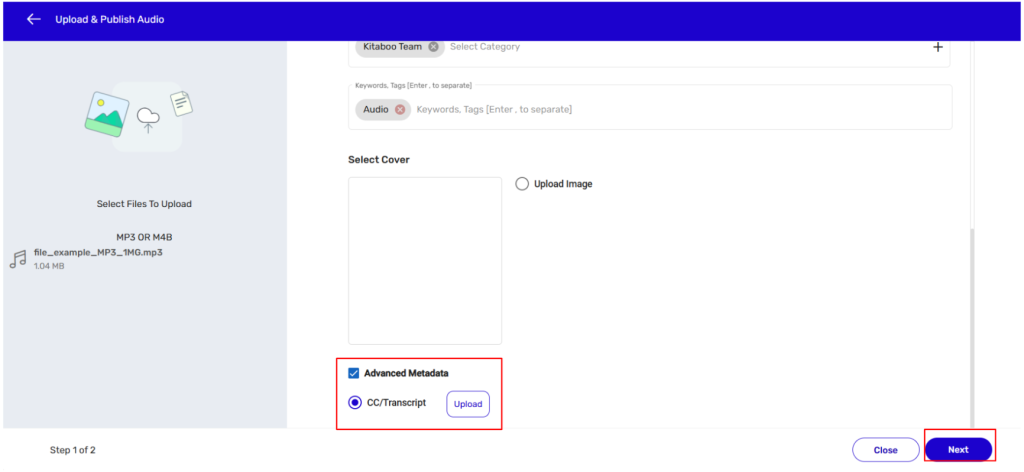
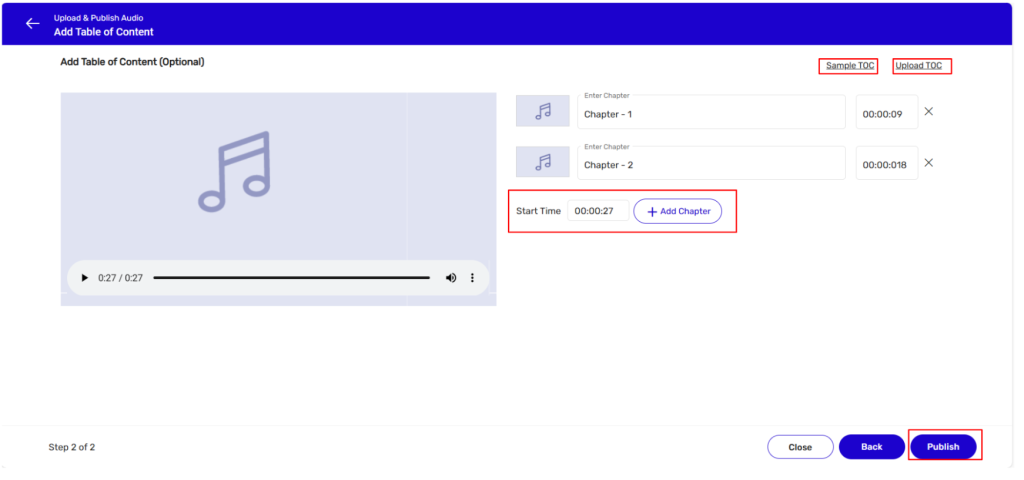
- Creating an Audio Book
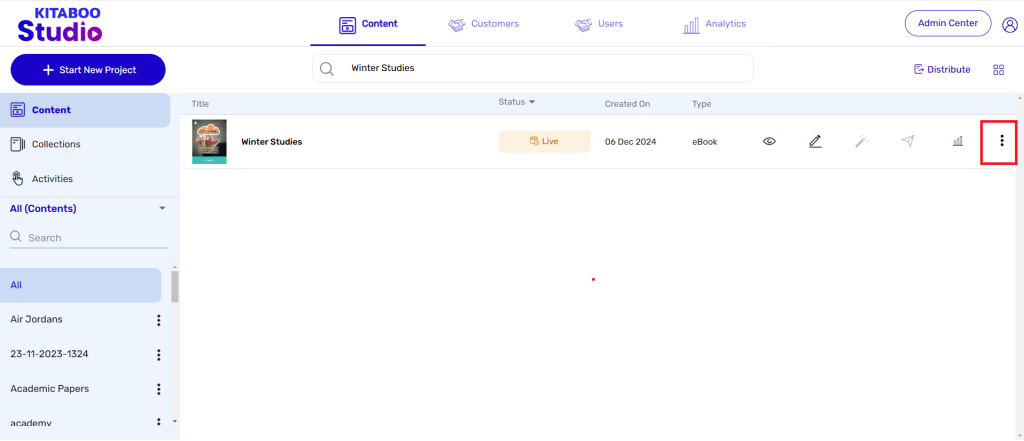
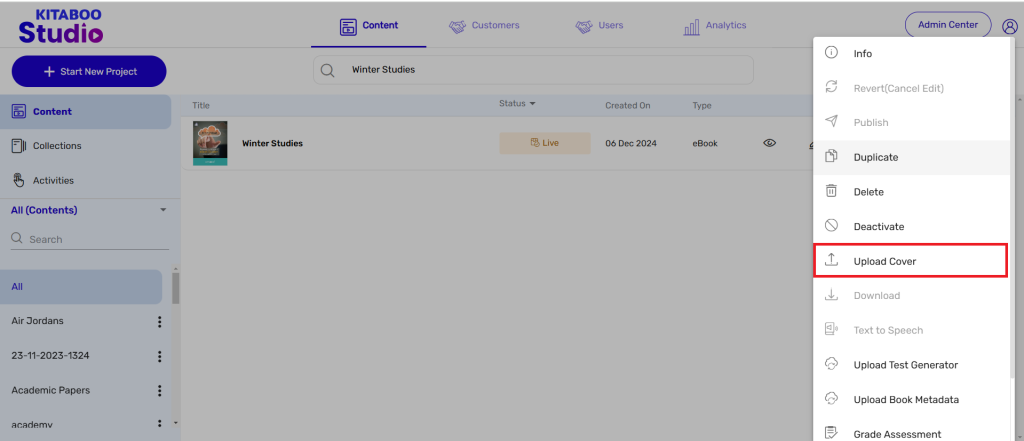
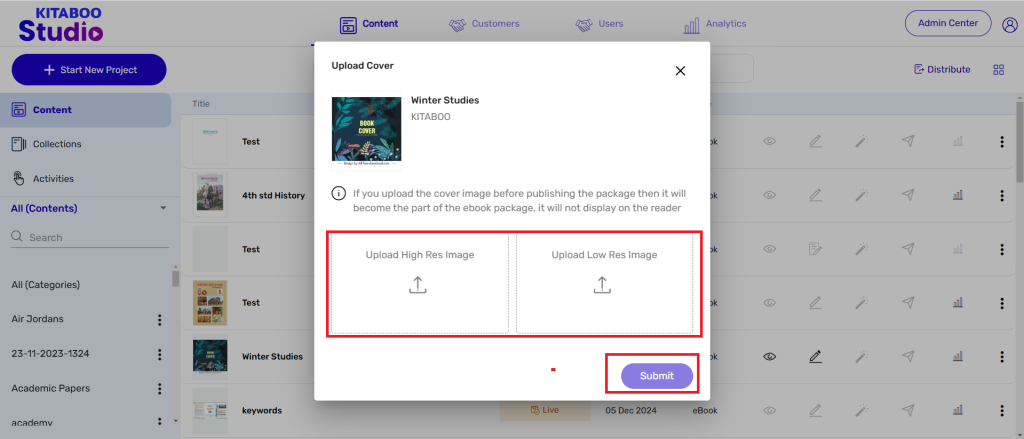
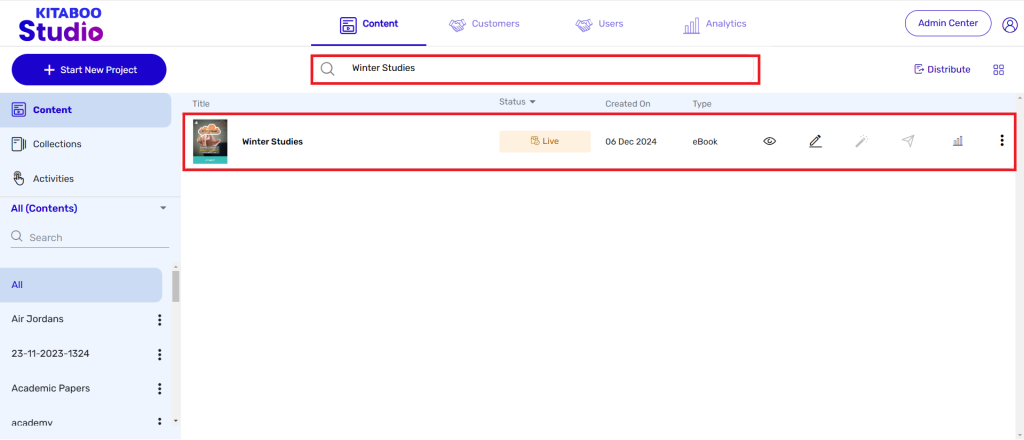
- Updating the Cover Image
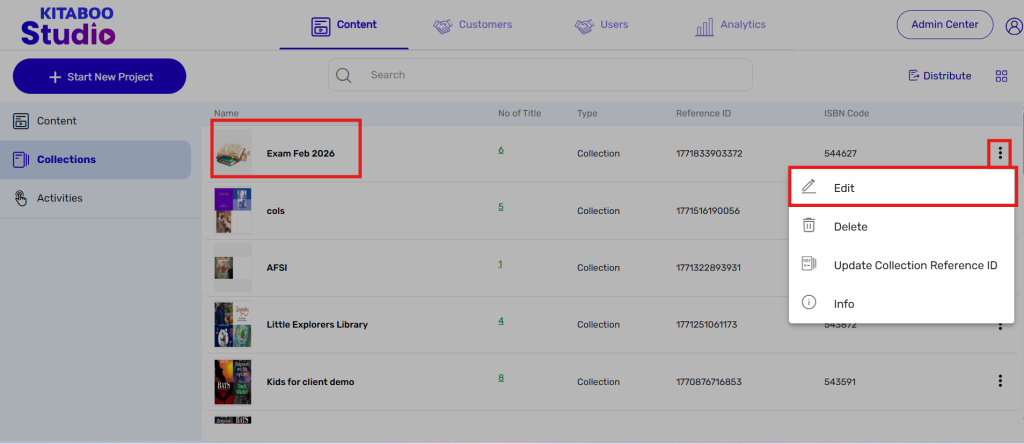
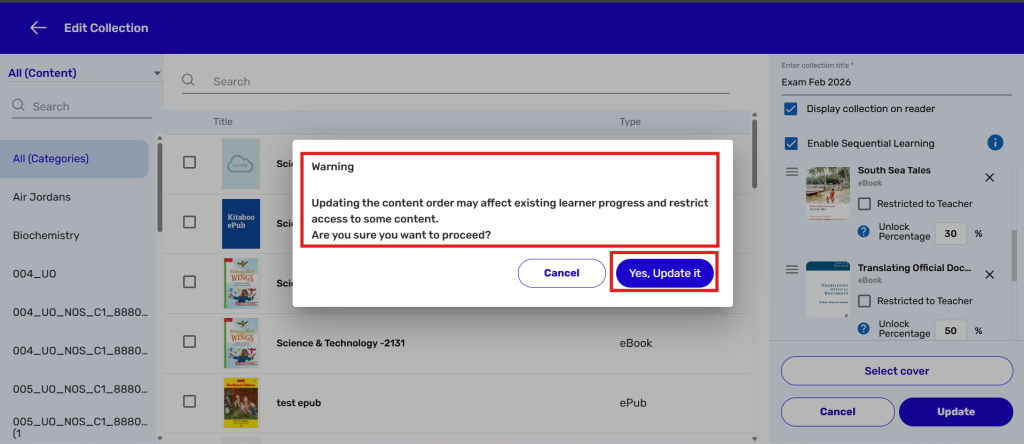
- Editing a Fixed eBook
- Deleting and Deactivating Content
- Users Tab
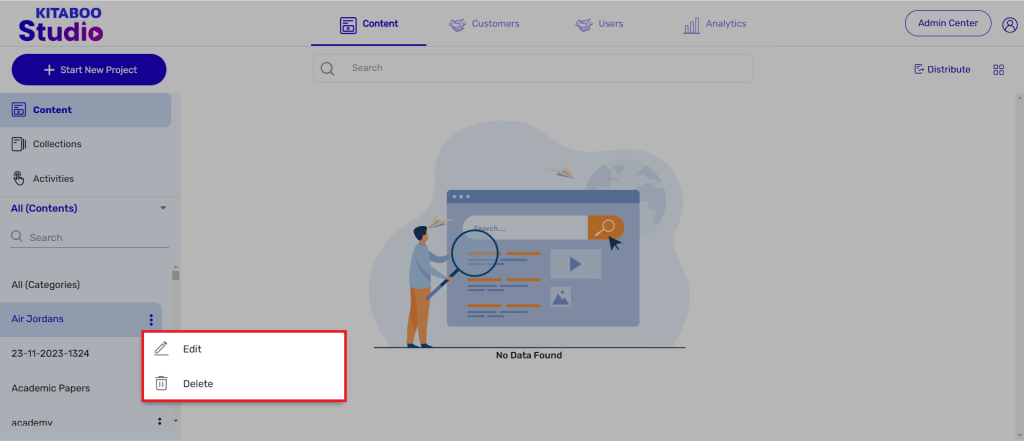
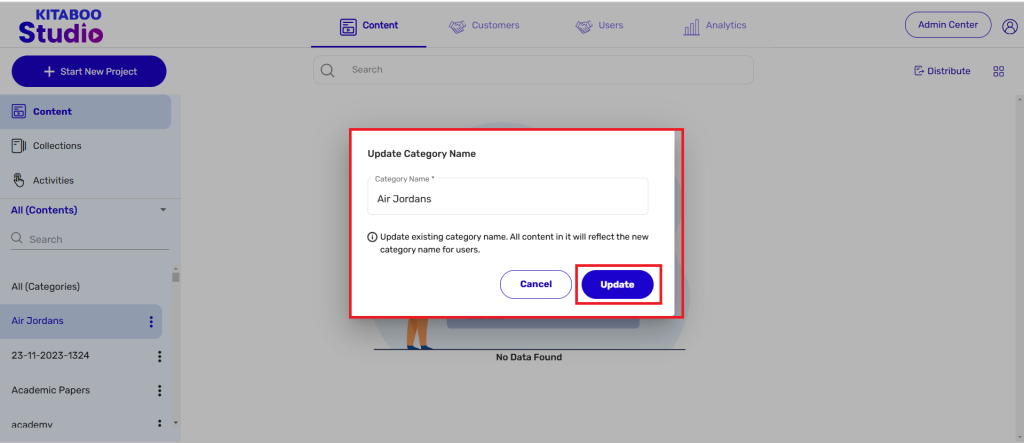
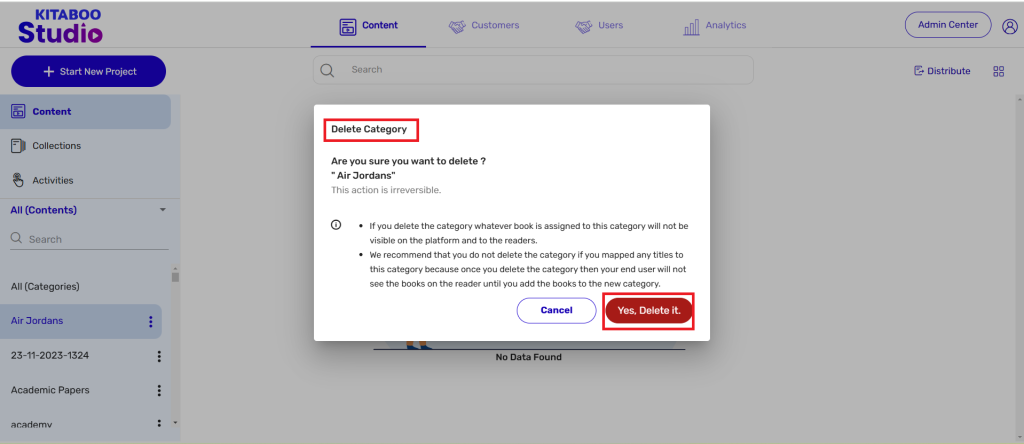
- How to Edit and Delete a Category
- Clever Integration
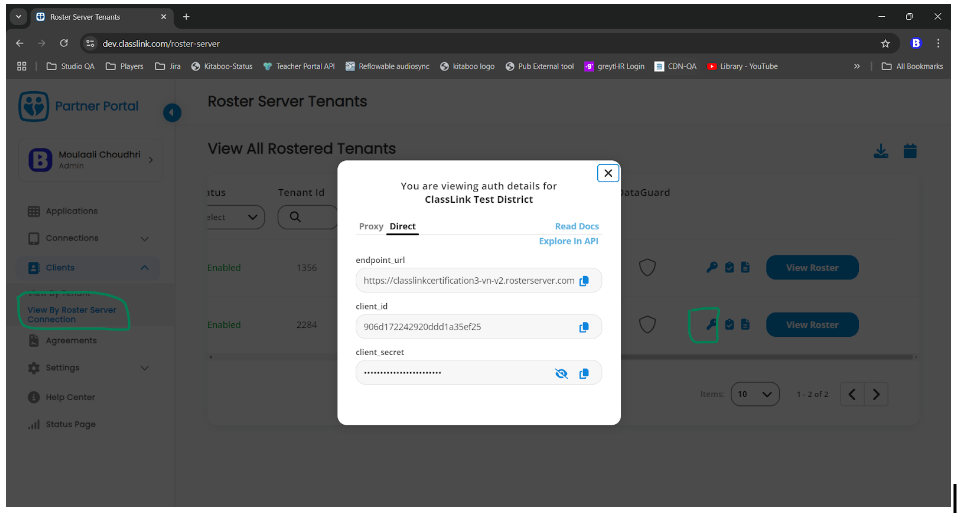
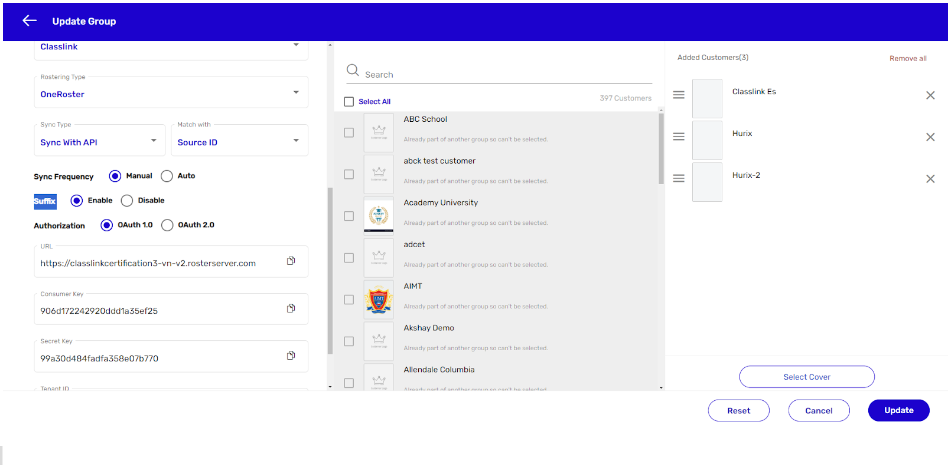
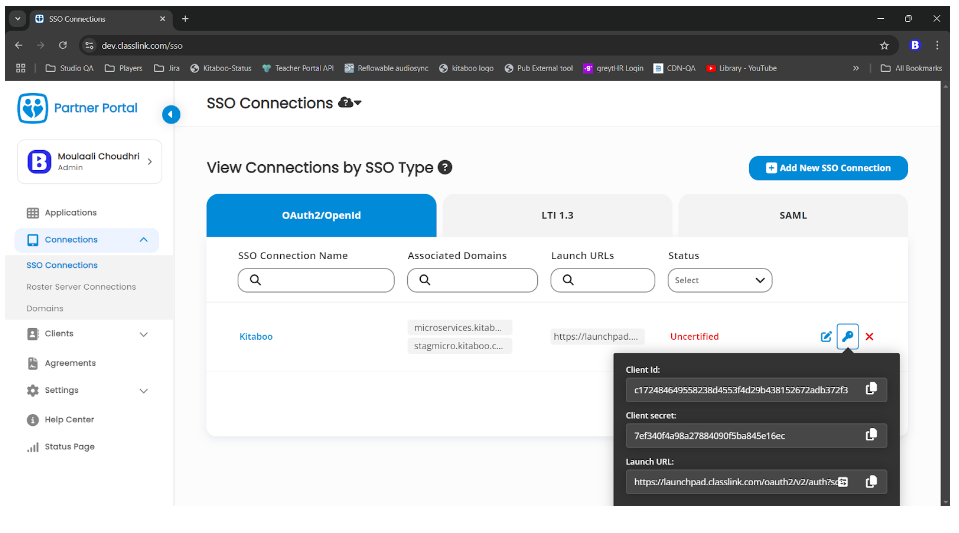
- Classlink Integration
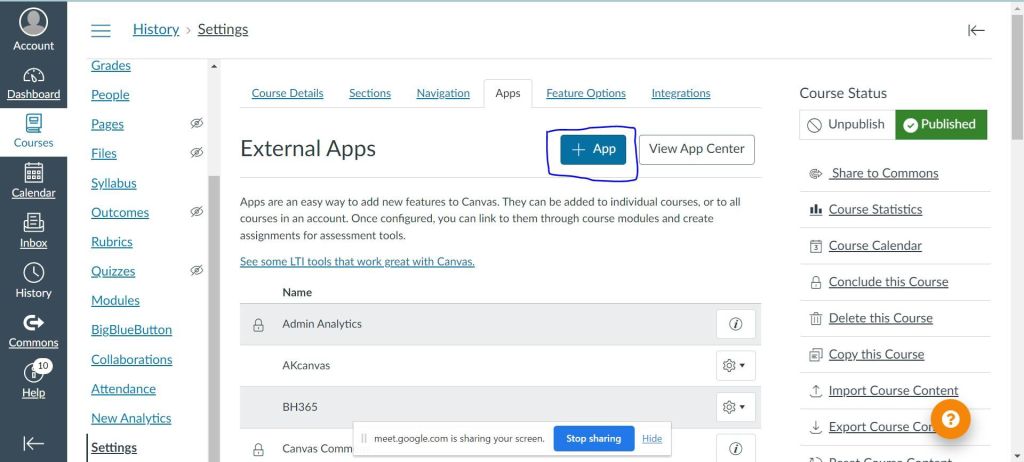
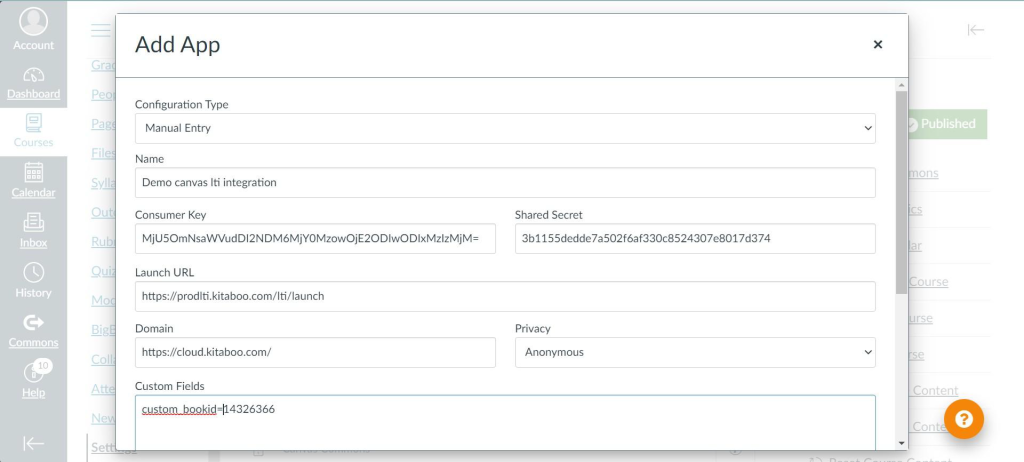
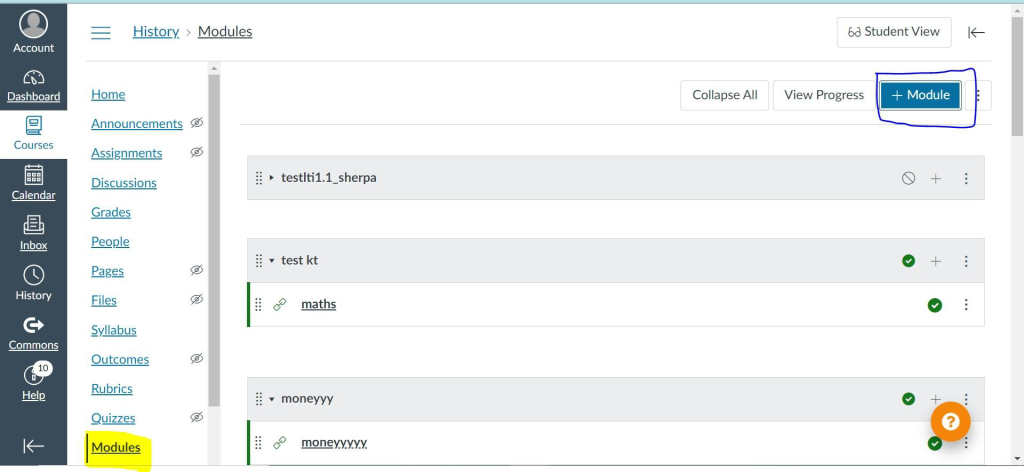
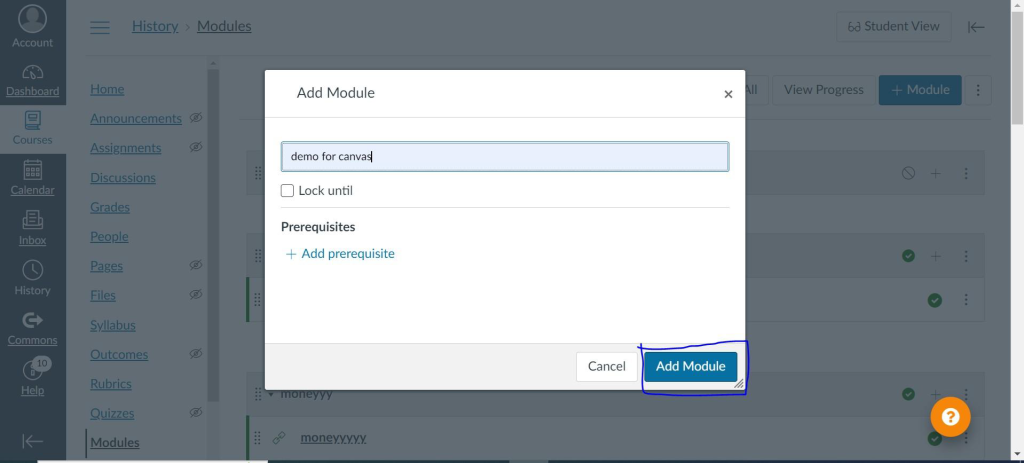
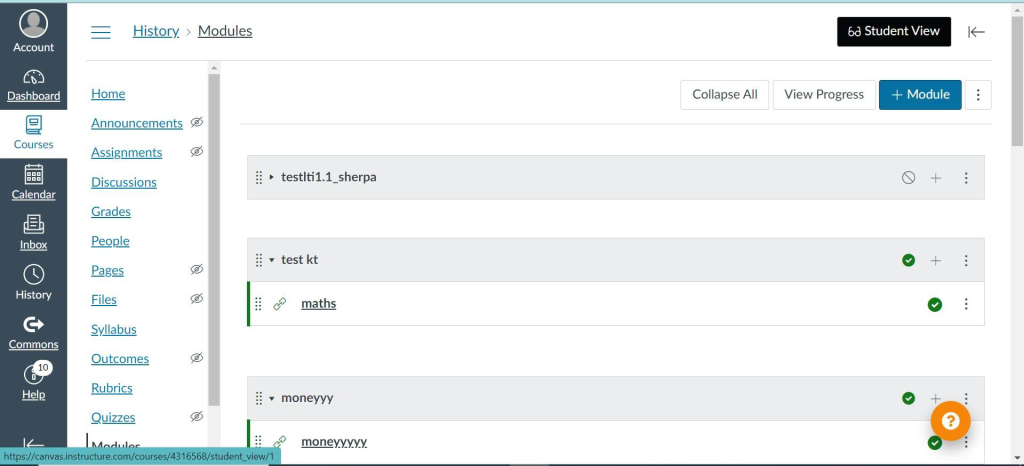
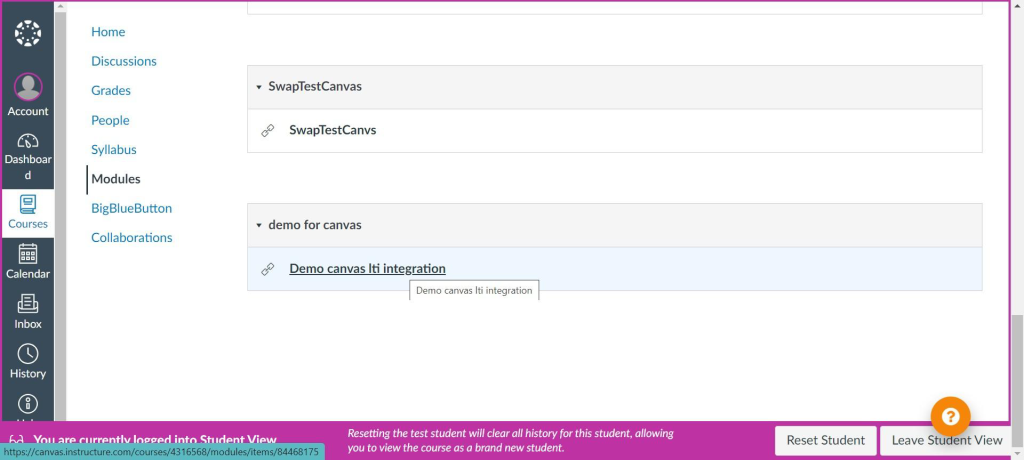
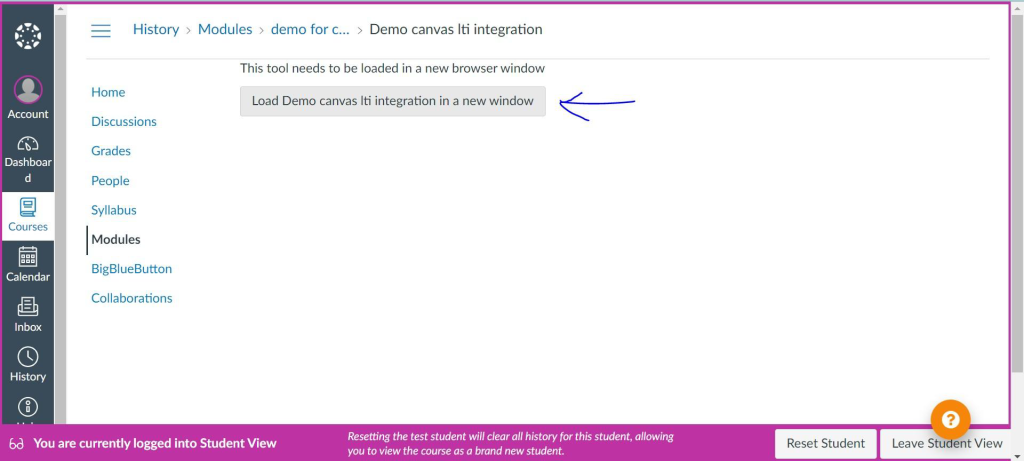
- Canvas LTI Integration
- Admin Center
- Analytics Tab
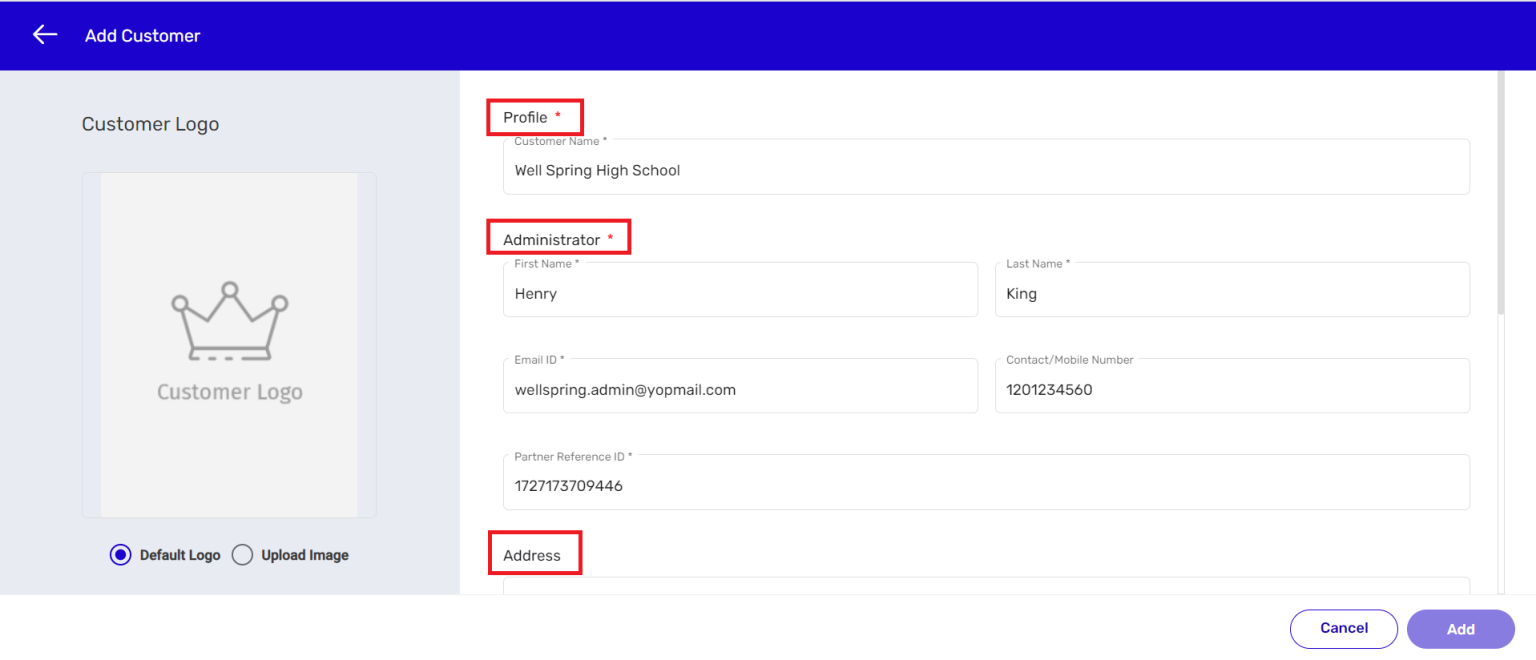
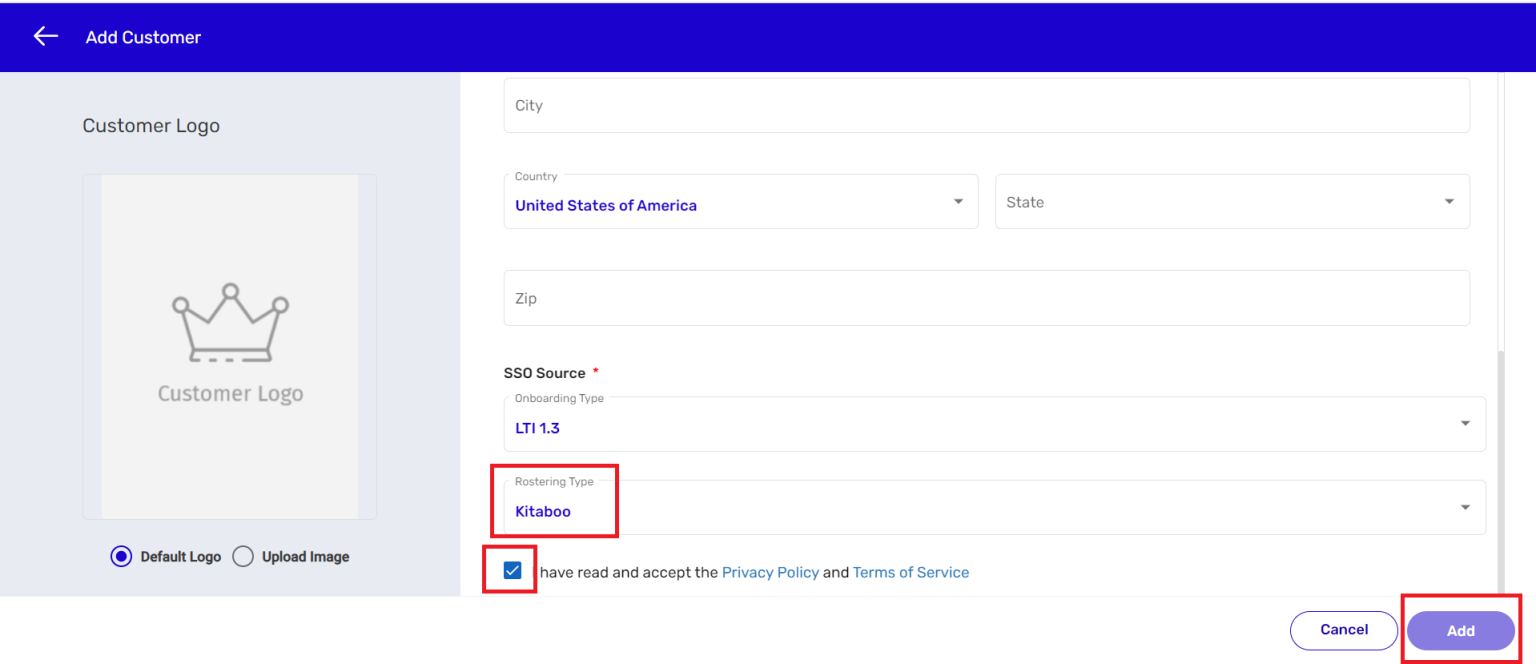
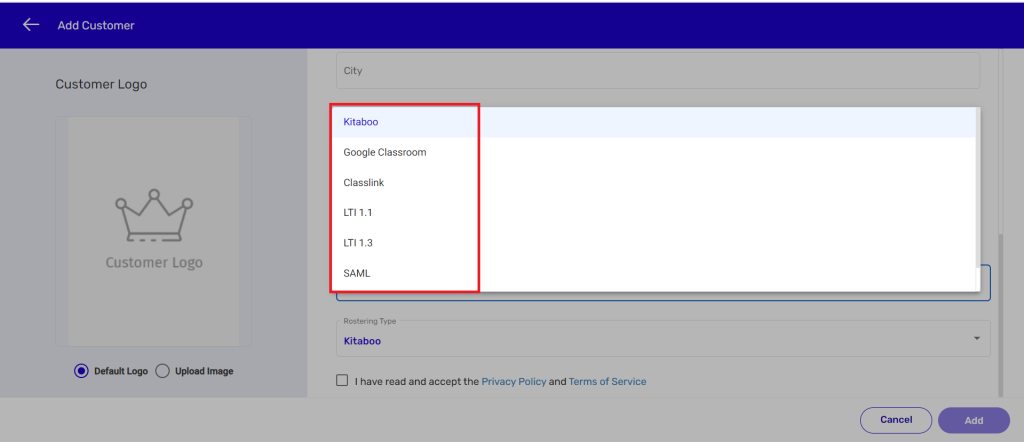
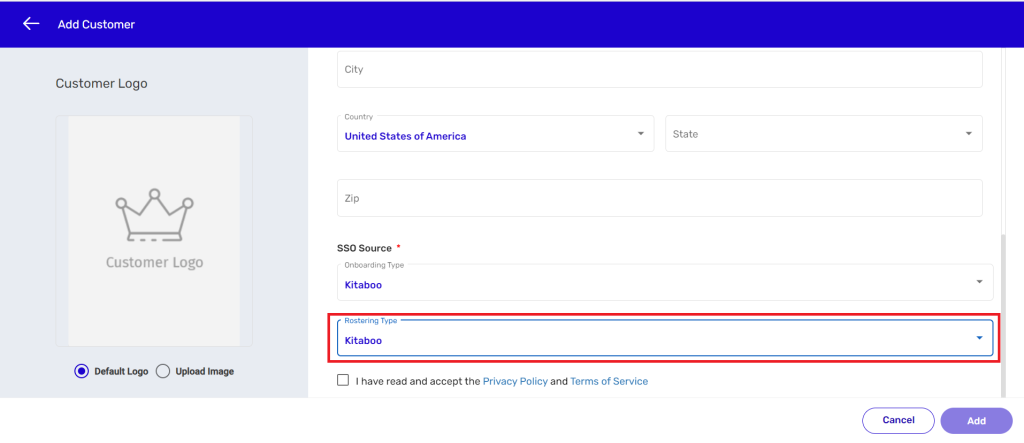
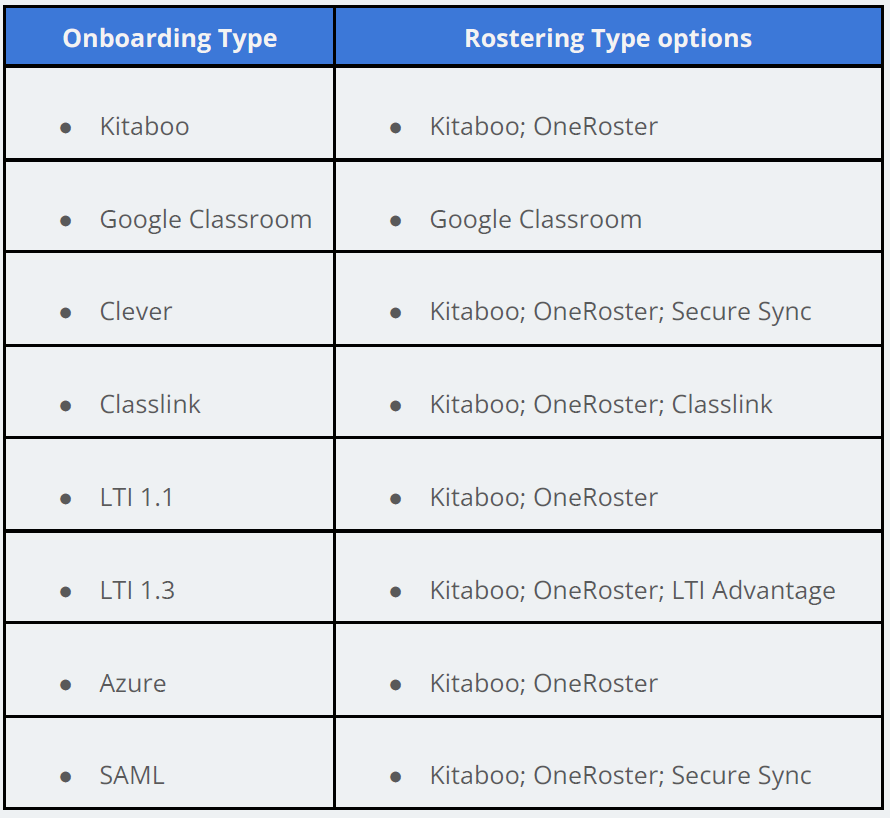
- Adding a Customer
- Creating Admin Accounts


The auto-deletion process for books in the “In Progress” state:
- All books in the “In Progress” state that have not been modified for one month should be automatically deleted from the “In Progress” section.
- The archived, updated eBook will be reverted to its previous version in the archive section.
- Users will receive a notification pop-up only in the “In Progress” section upon logging into the system.
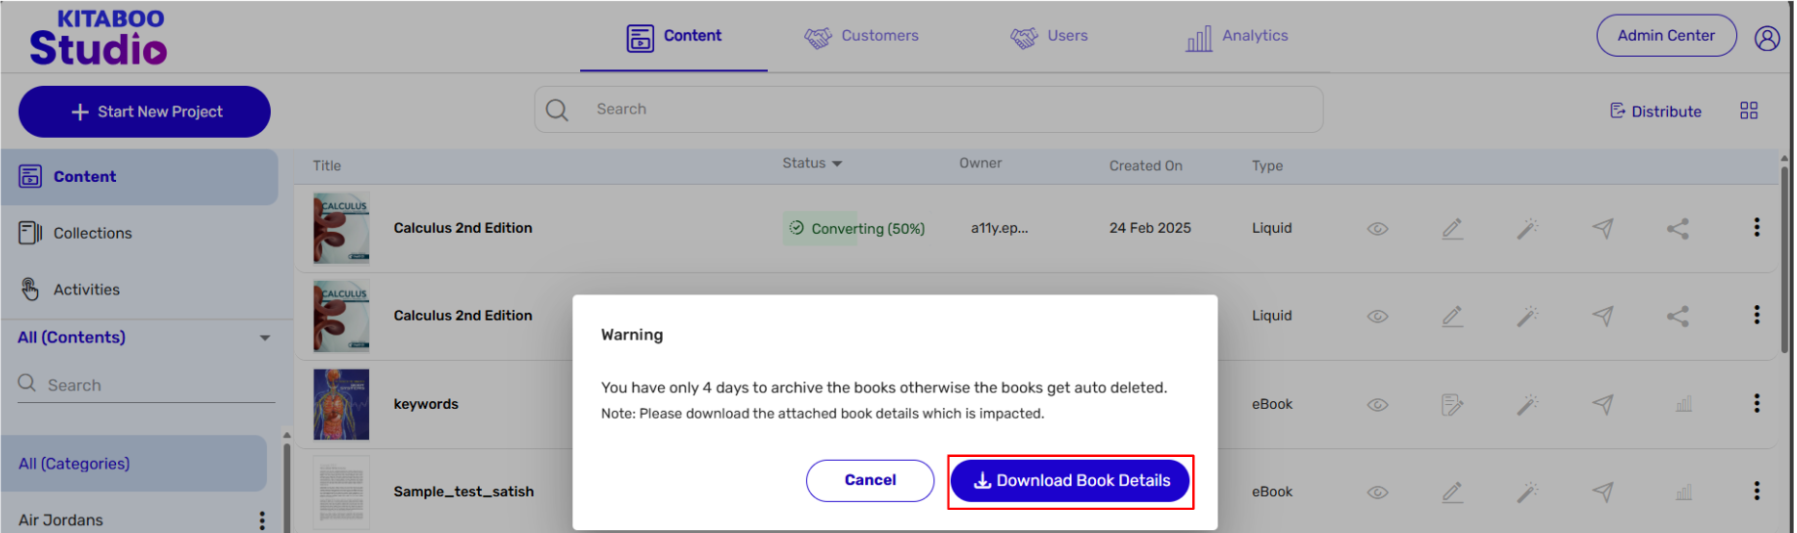
- Users will receive a notification pop-up in the following cases:
Case 1: On the 15th of every month – If the user has not logged in for 15 days, they will receive a notification warning upon their next login after 15 days.
Case 2: On the 22nd of every month – If the user has not logged in for 22 days before the end of the month, they will receive a notification warning upon their next login after 22 days but before 27 days.
Case 3: On the 27th of every month – If the user has not logged in for 27 days before the end of the month, they will receive a notification warning upon their next login after 27 days but before 28 days.
Case 4: On the 28th of every month – If the user has not logged in for 28 days, the books will be automatically deleted, and an email notification will be triggered.
Additional Notes:
- Notifications will be triggered according to the scheduler (on the 15th, 22nd, 27th, and 28th of every month).
- The user must either archive or modify the eBook to prevent auto-deletion. If no modifications are made, the book will be automatically deleted from the Kitaboo portal.
- If the user edits any book, the auto-deletion date will be adjusted to one month from the last edited date of that particular book.


Enable K-AI at the content level, configurable per user –
- Create a content Fixed-Layout Kitaboo eBook from Studio Platform and make it Live/Archive
Note:
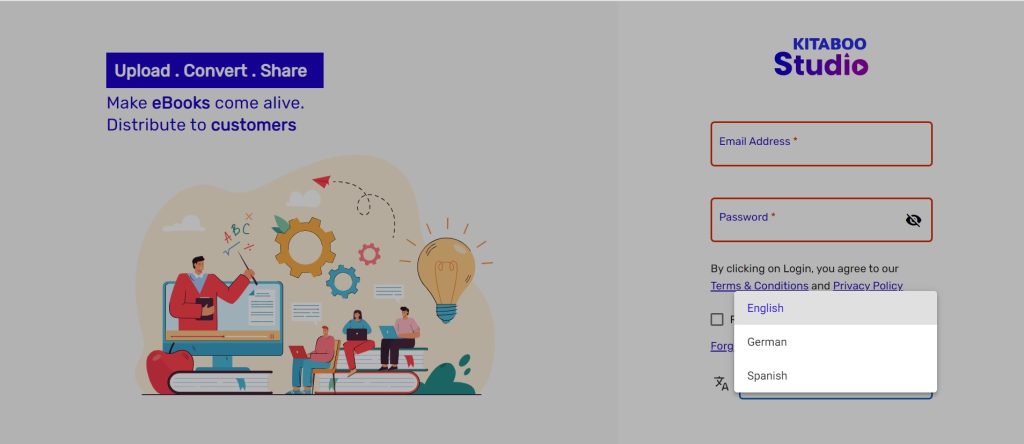
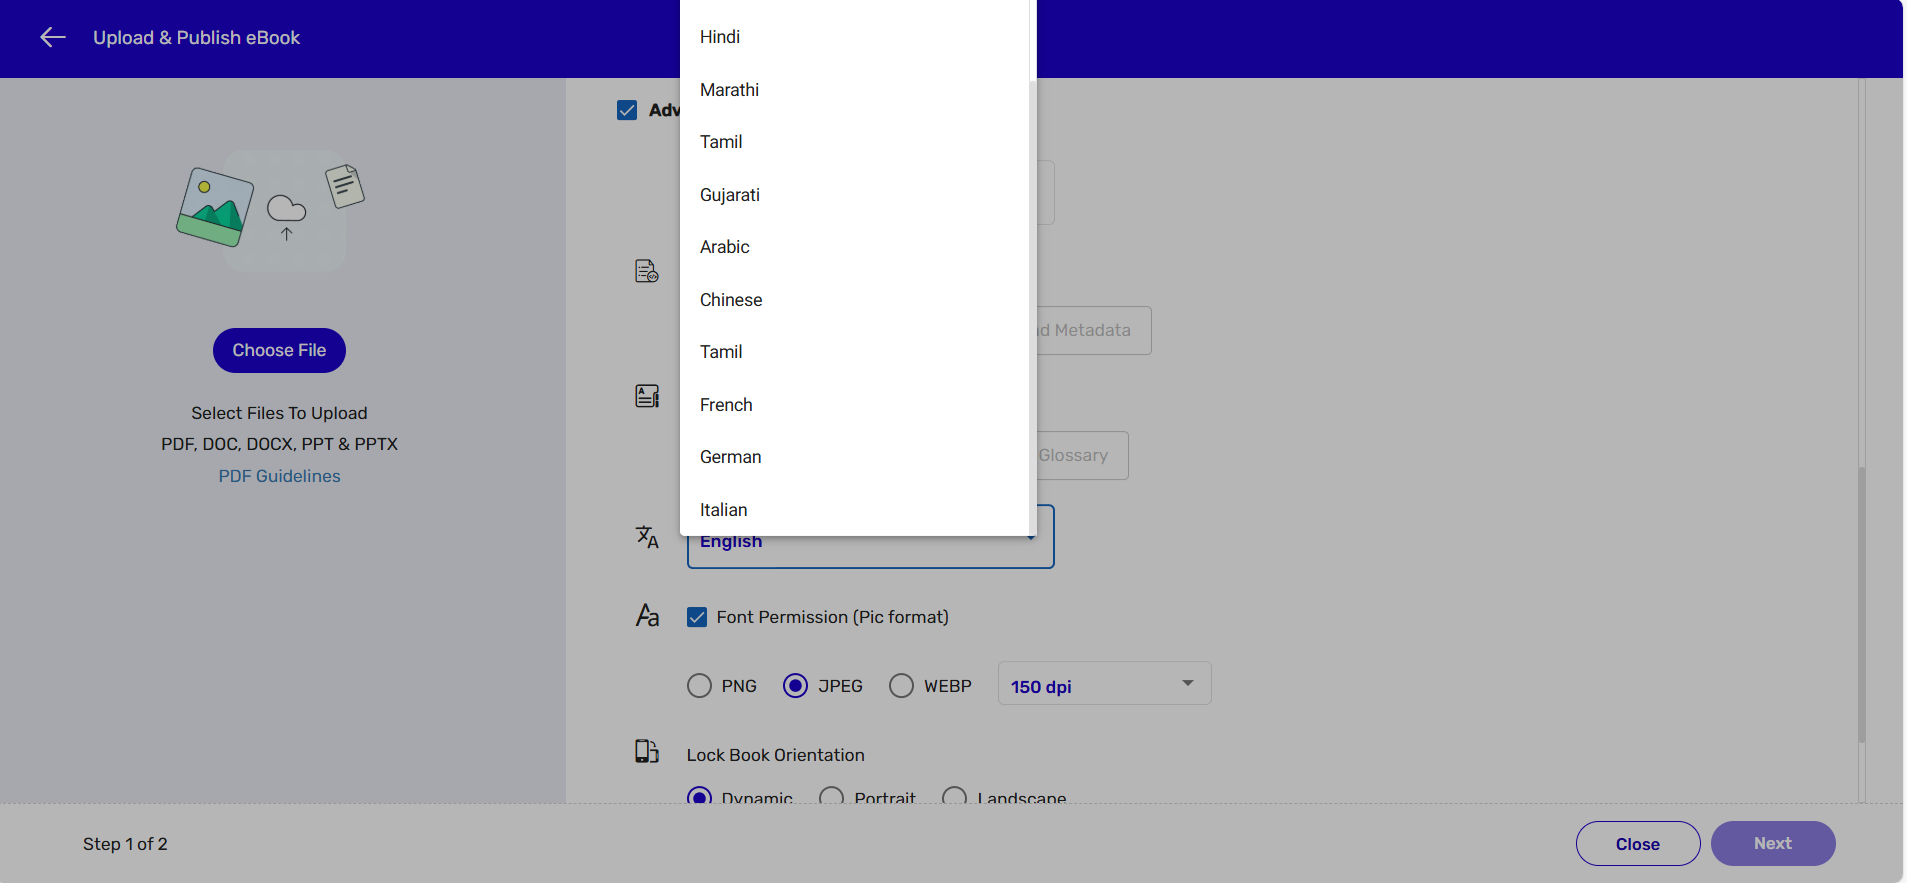
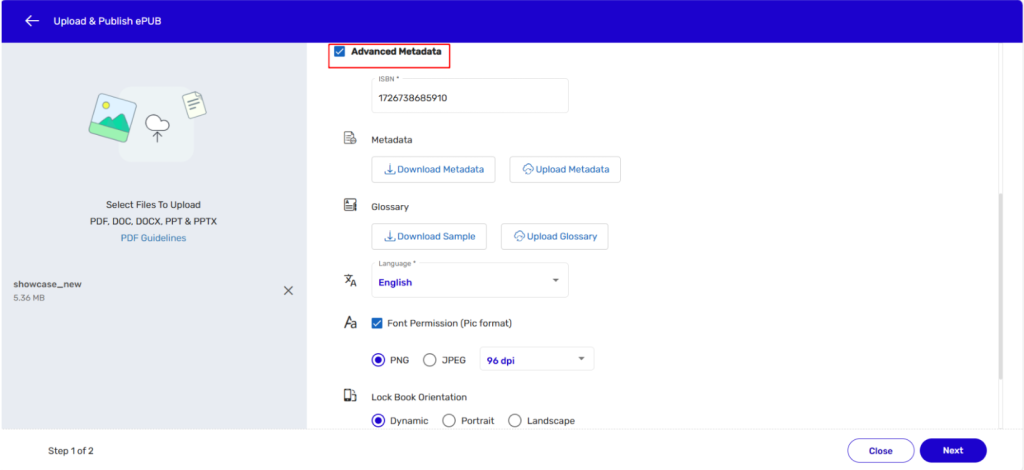
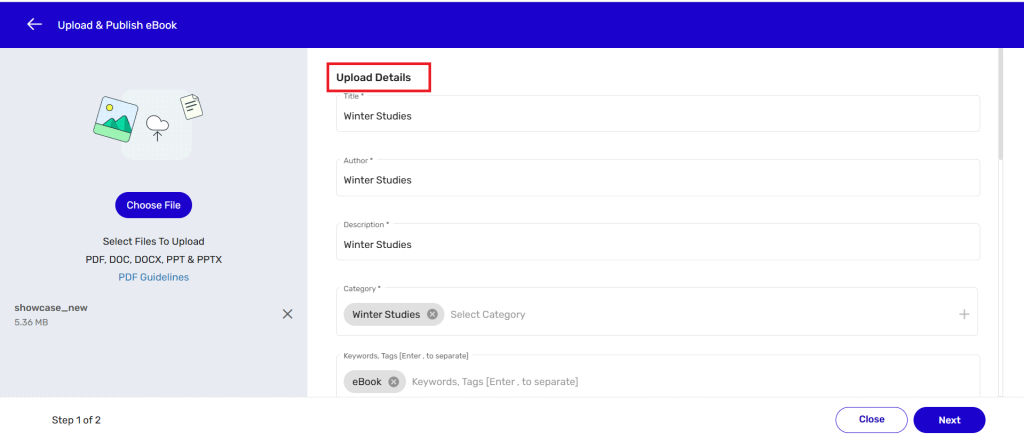
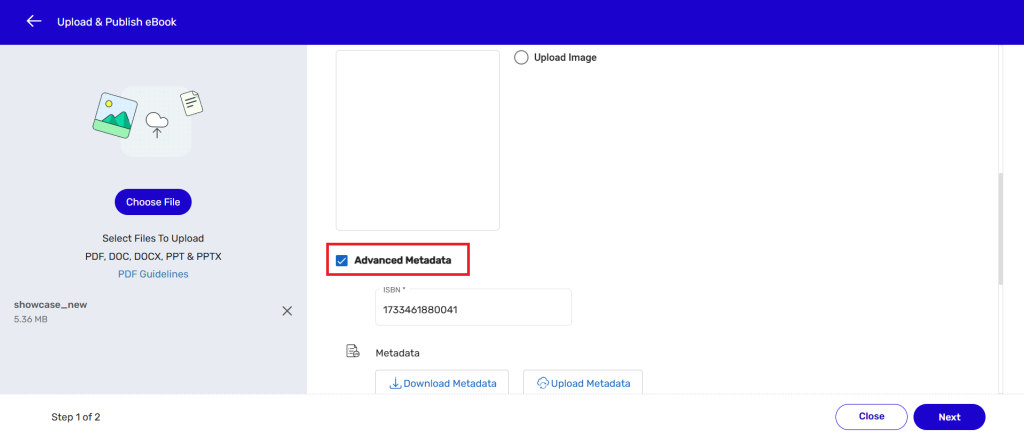
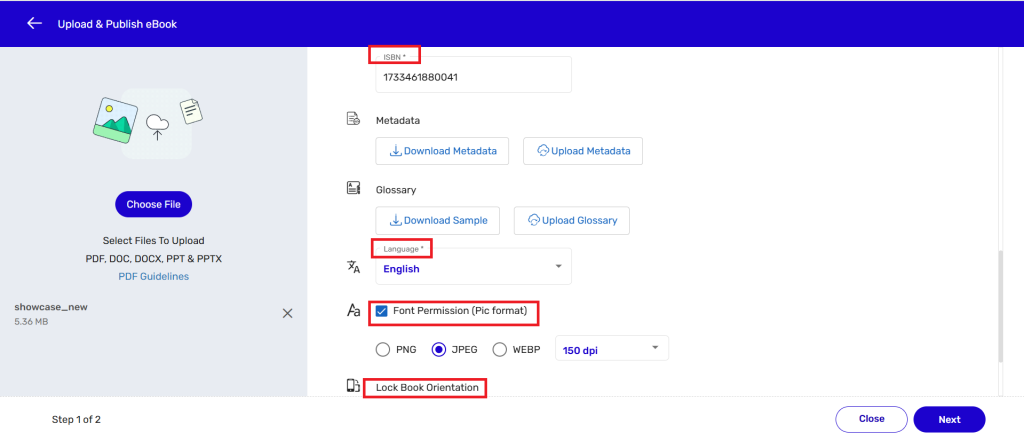
While creating the content, make sure to select the appropriate language. For example, if the PDF is in German, you should select “German” from the language dropdown during the content creation process.
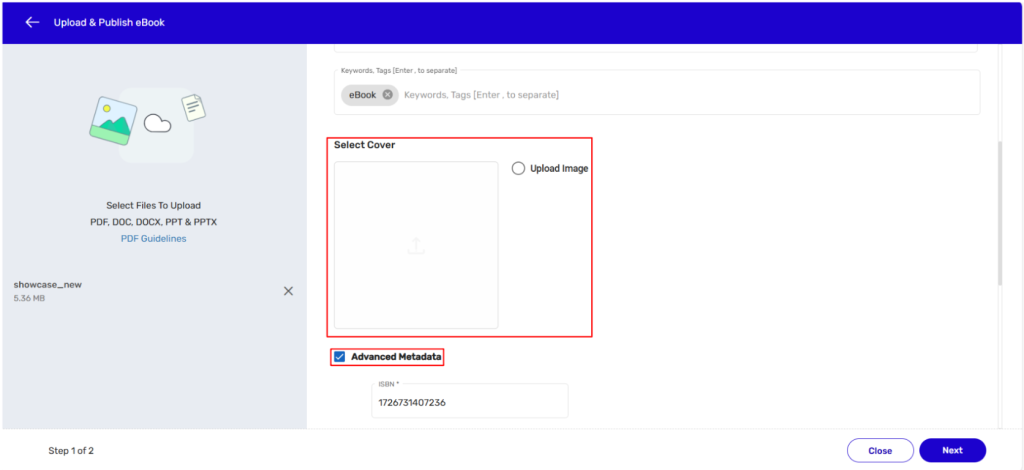
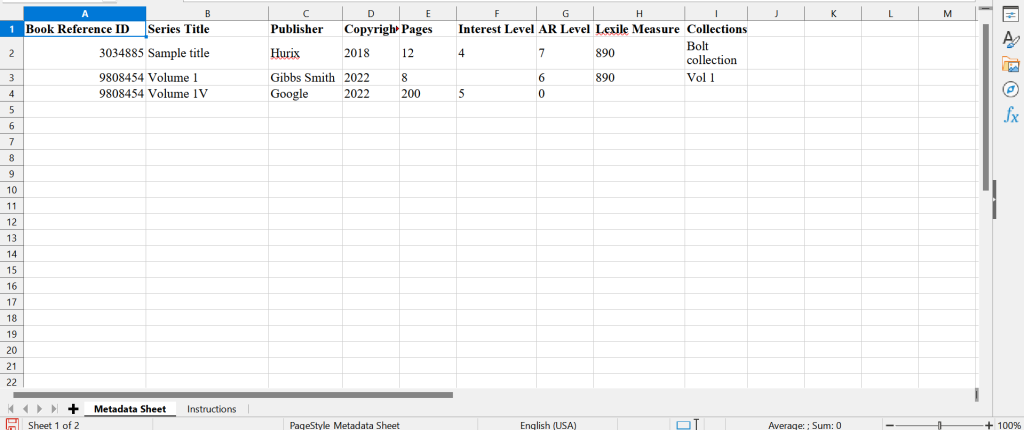
To select the language, click on the “Advanced Metadata” option. You will then see a “Language” dropdown, where you can choose the language based on the PDF.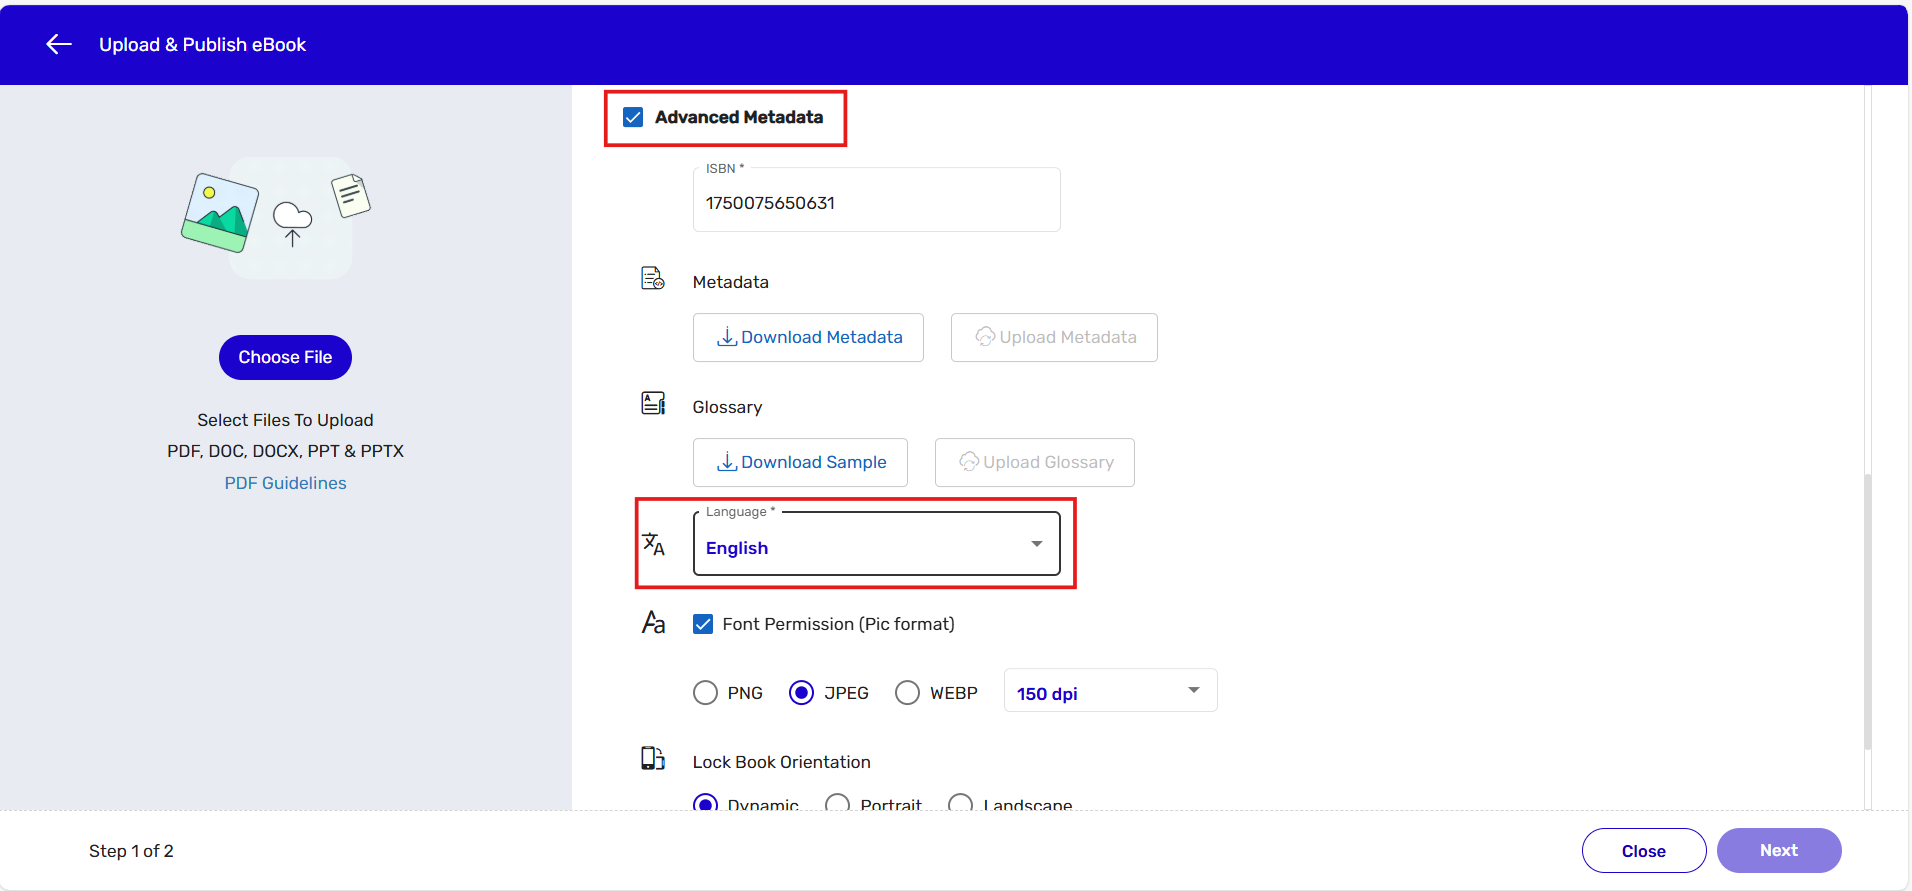
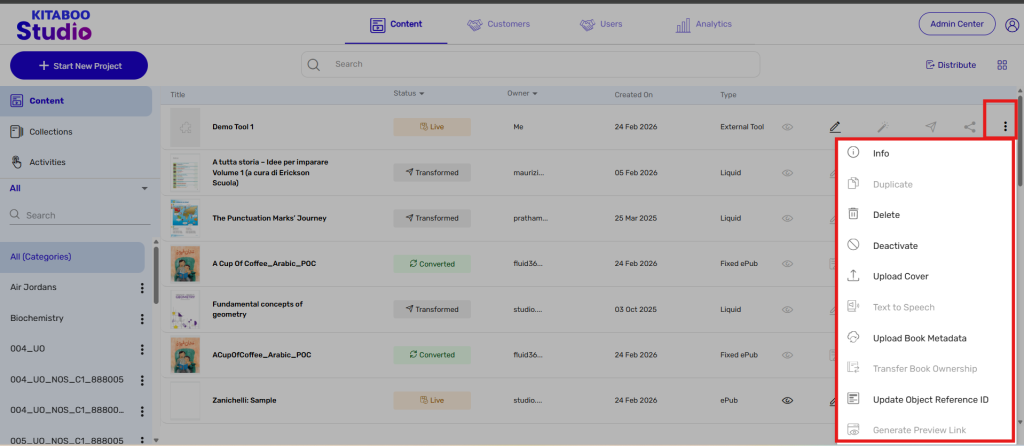
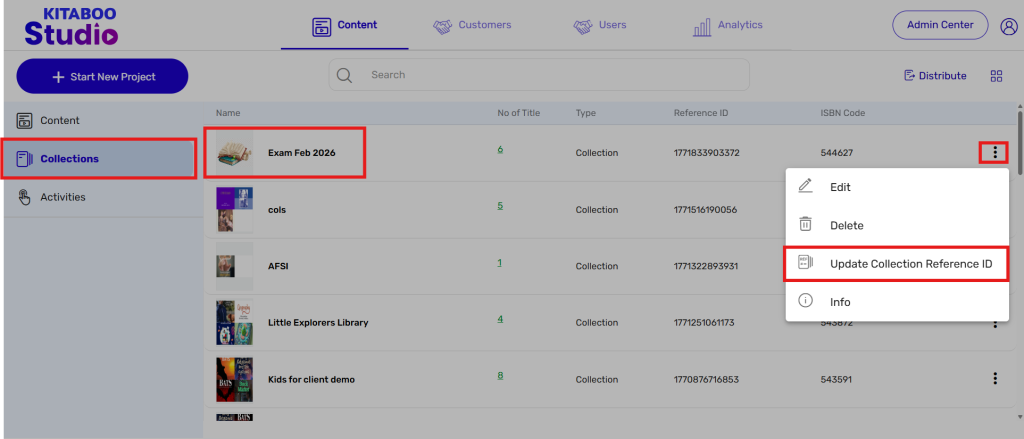
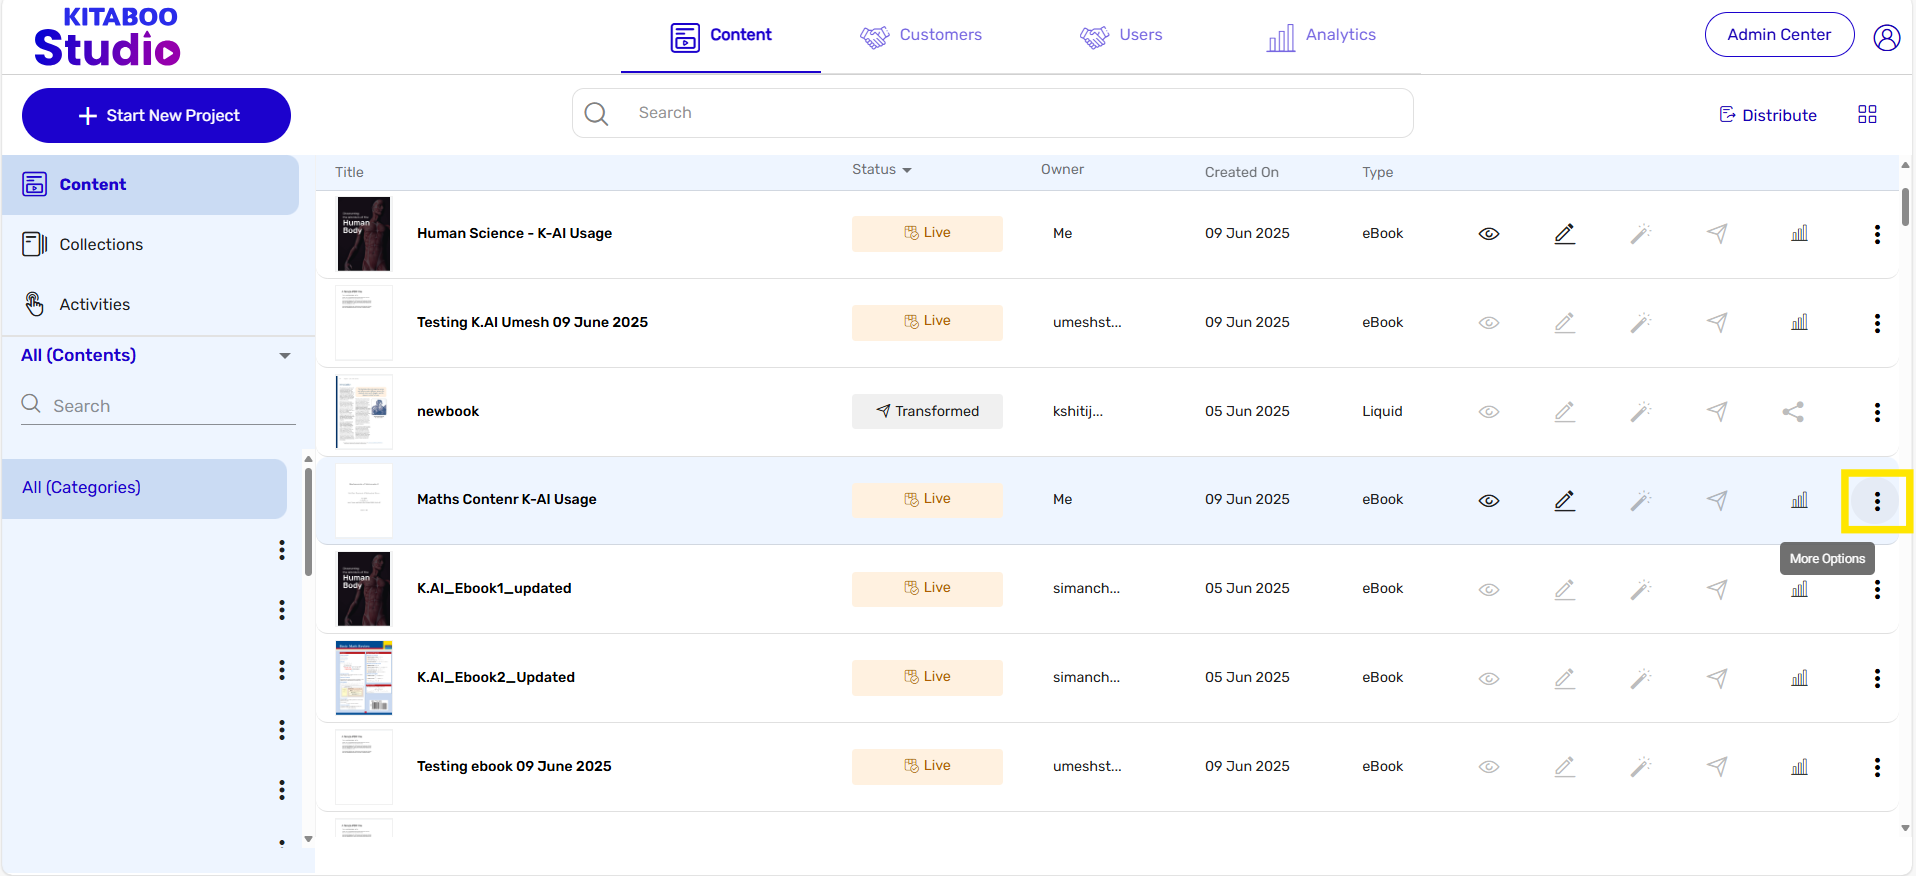
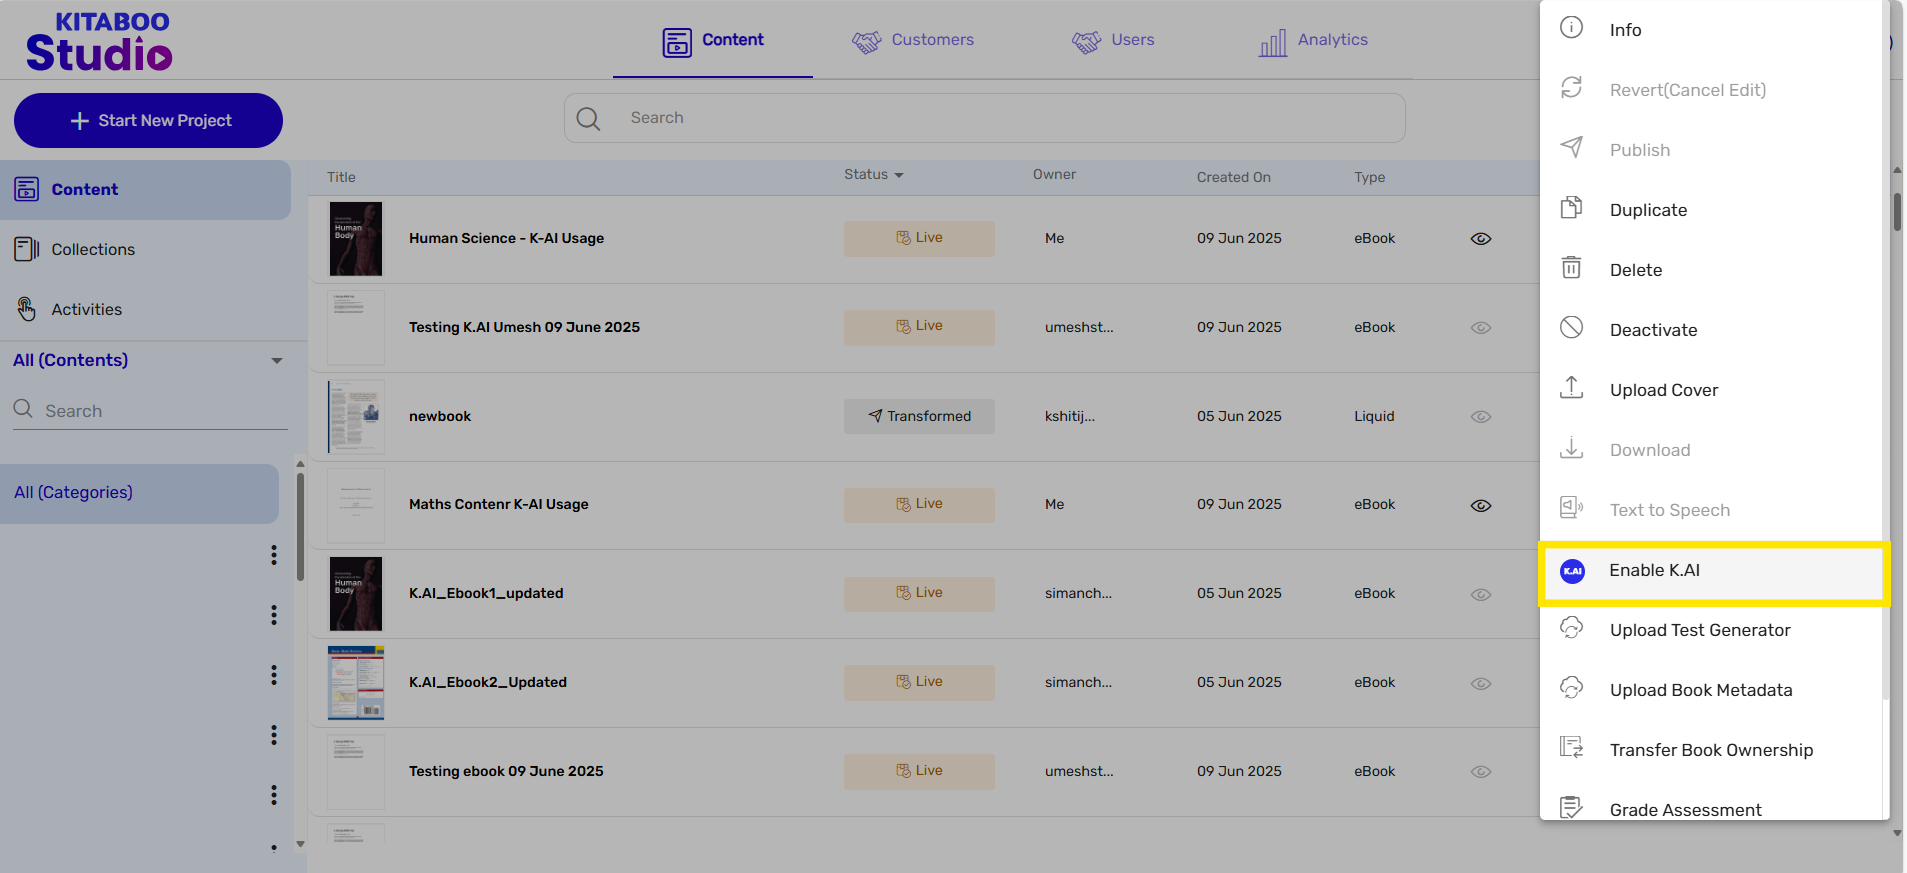
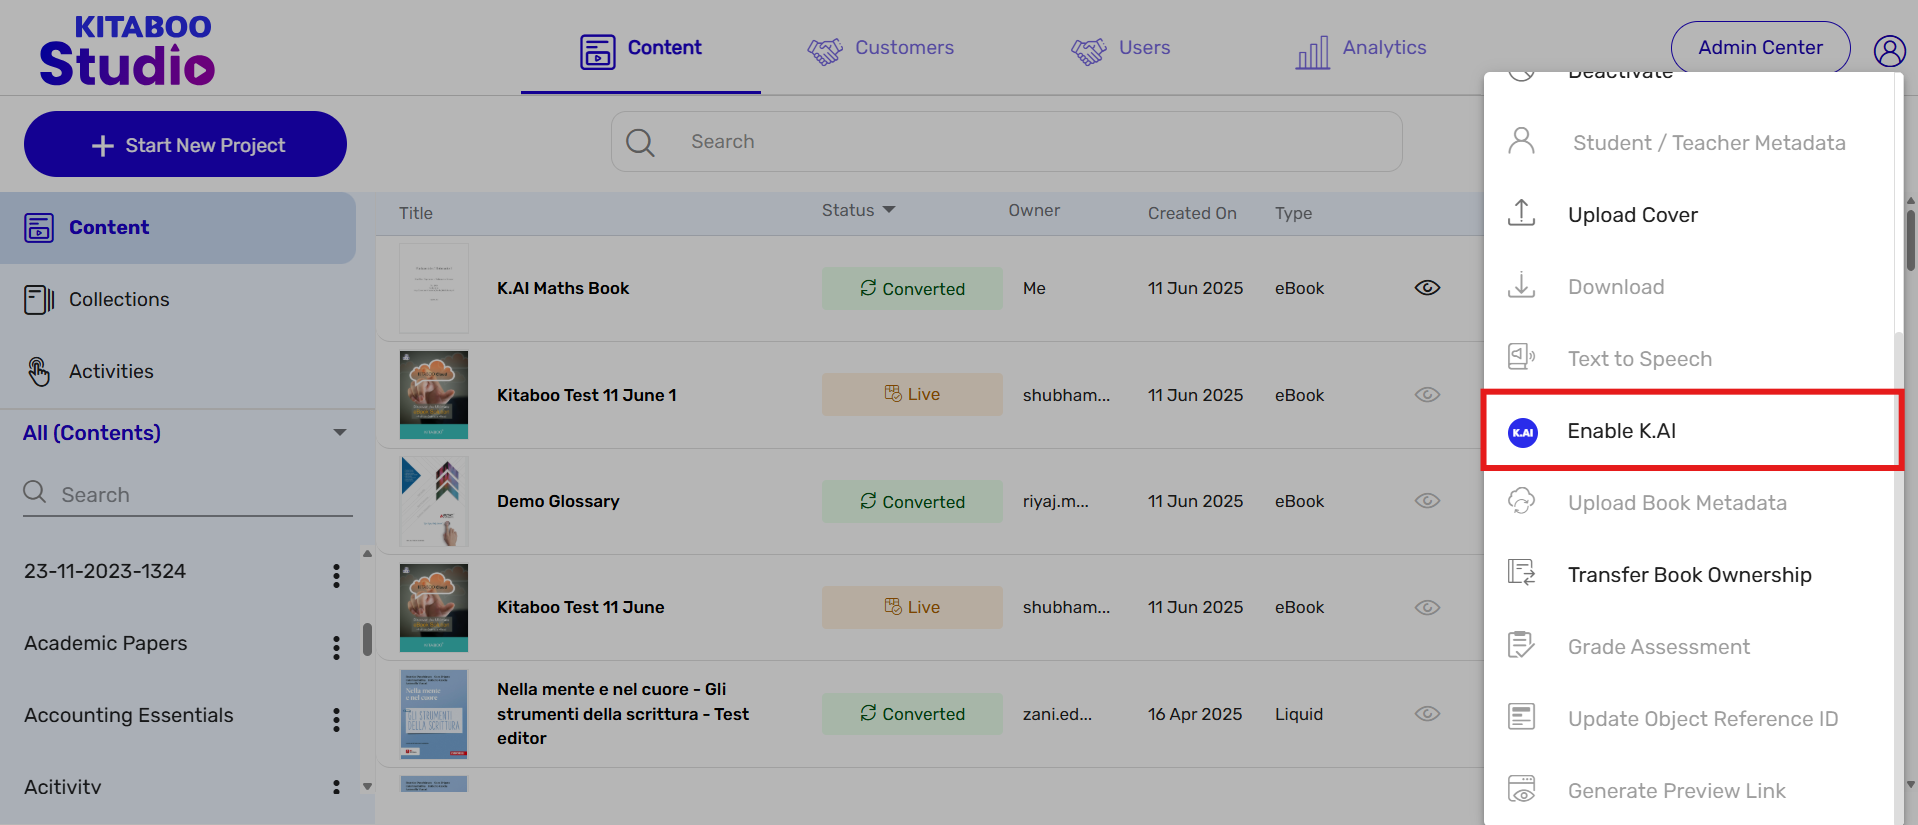
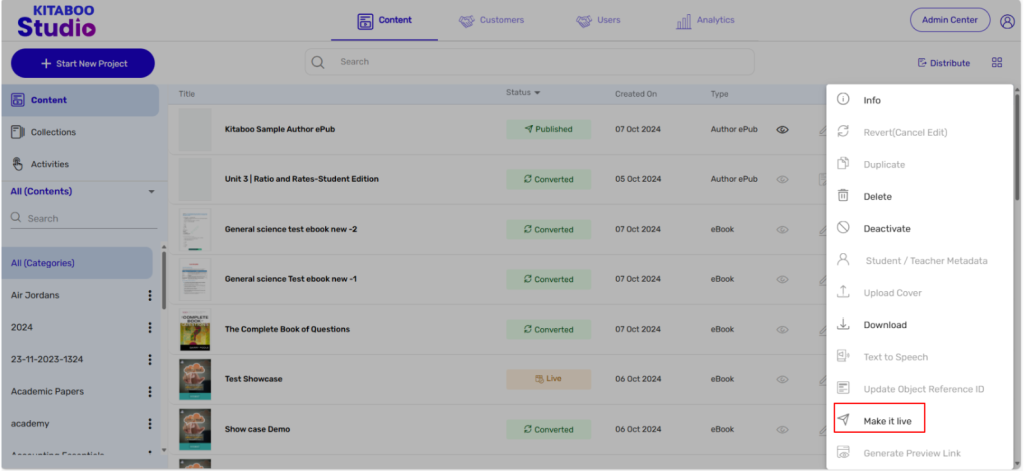
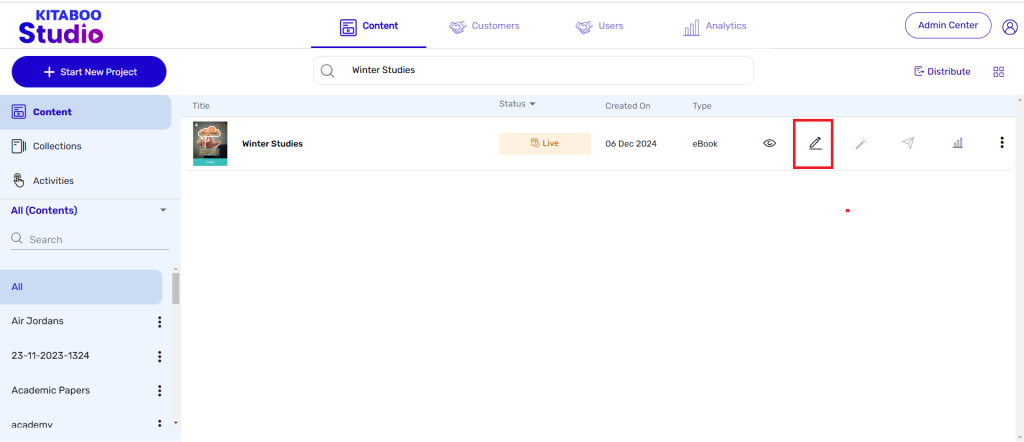
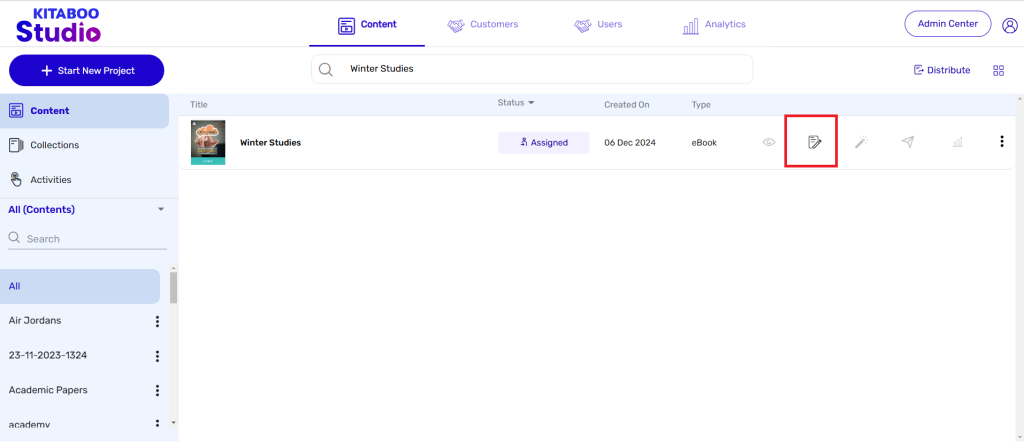
- Once the content is archived then click on the More option and select the “K.AI Enable” option from the list –
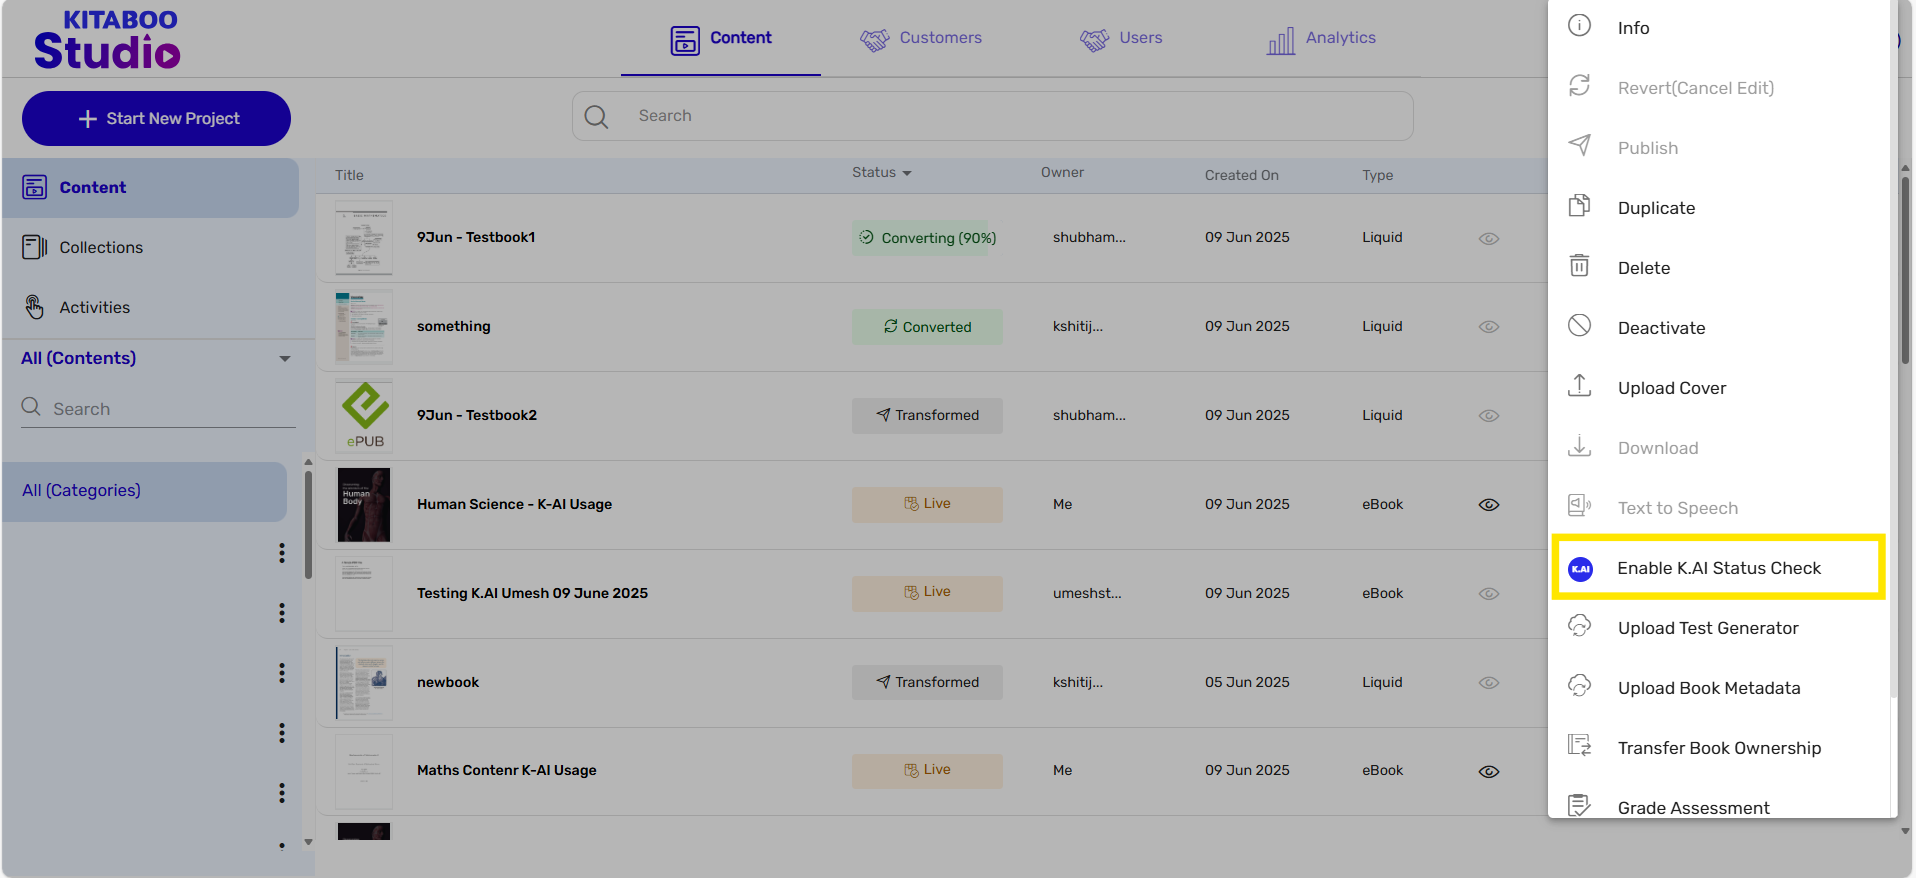
- You can check whether K-AI is enabled for the selected content by clicking on the “More” option again and then selecting “Enable K.AI Status Check.”
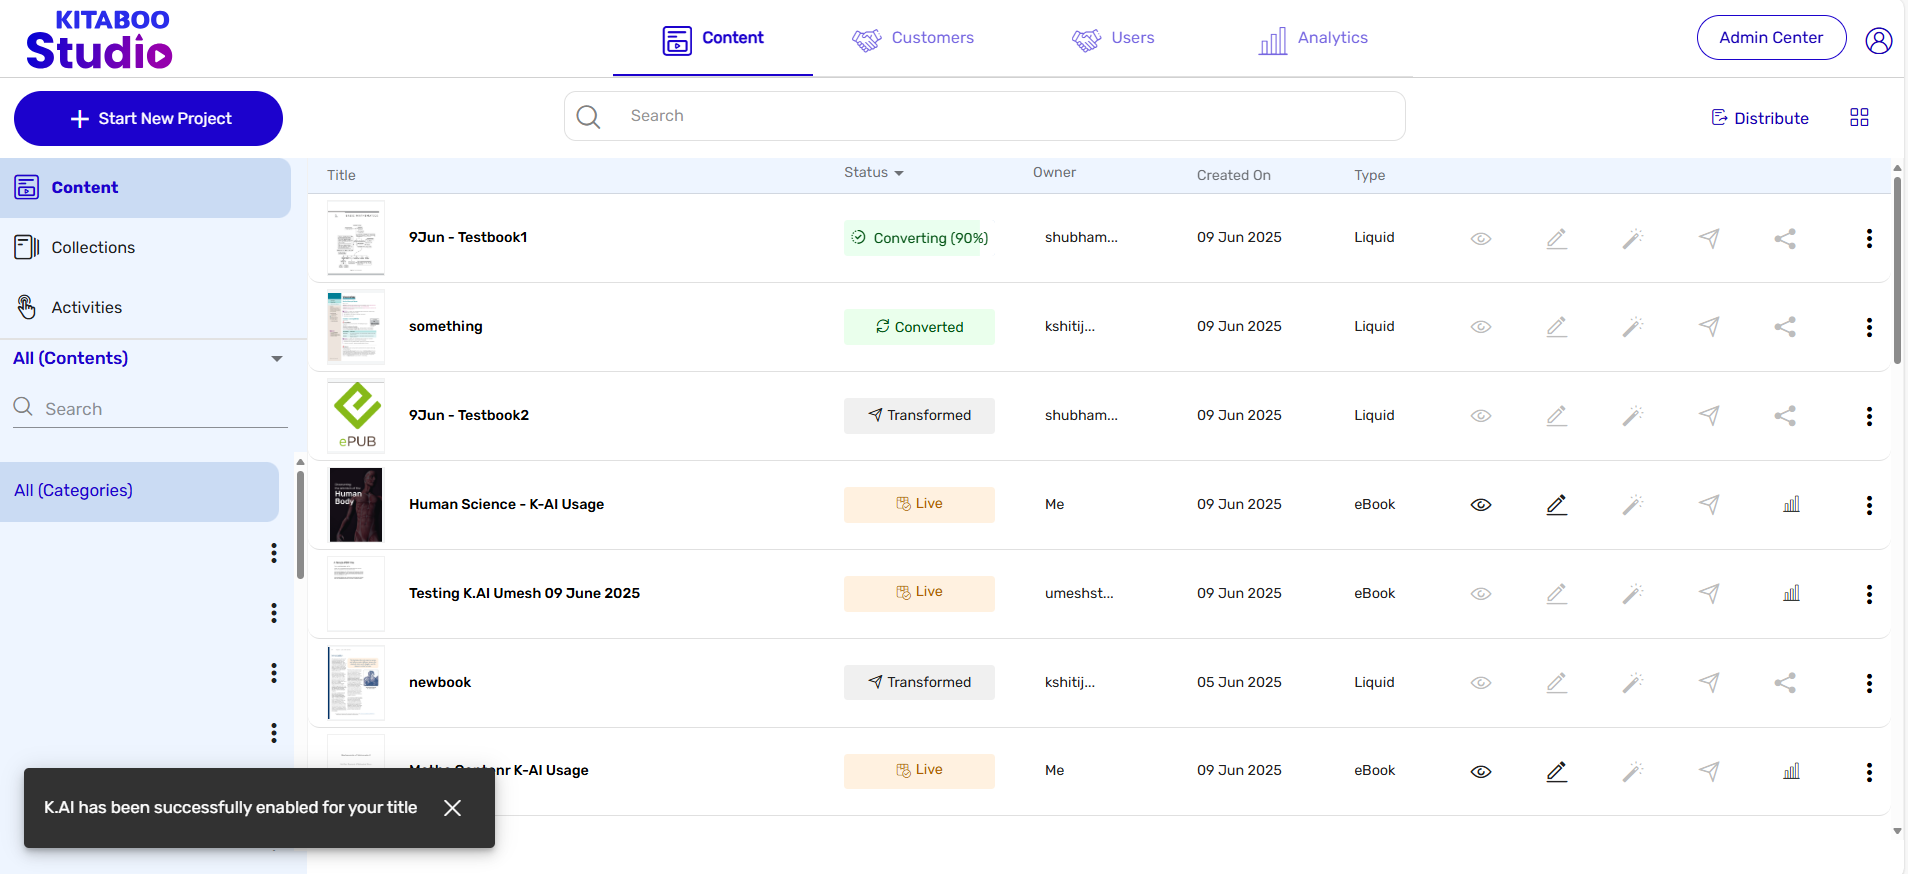
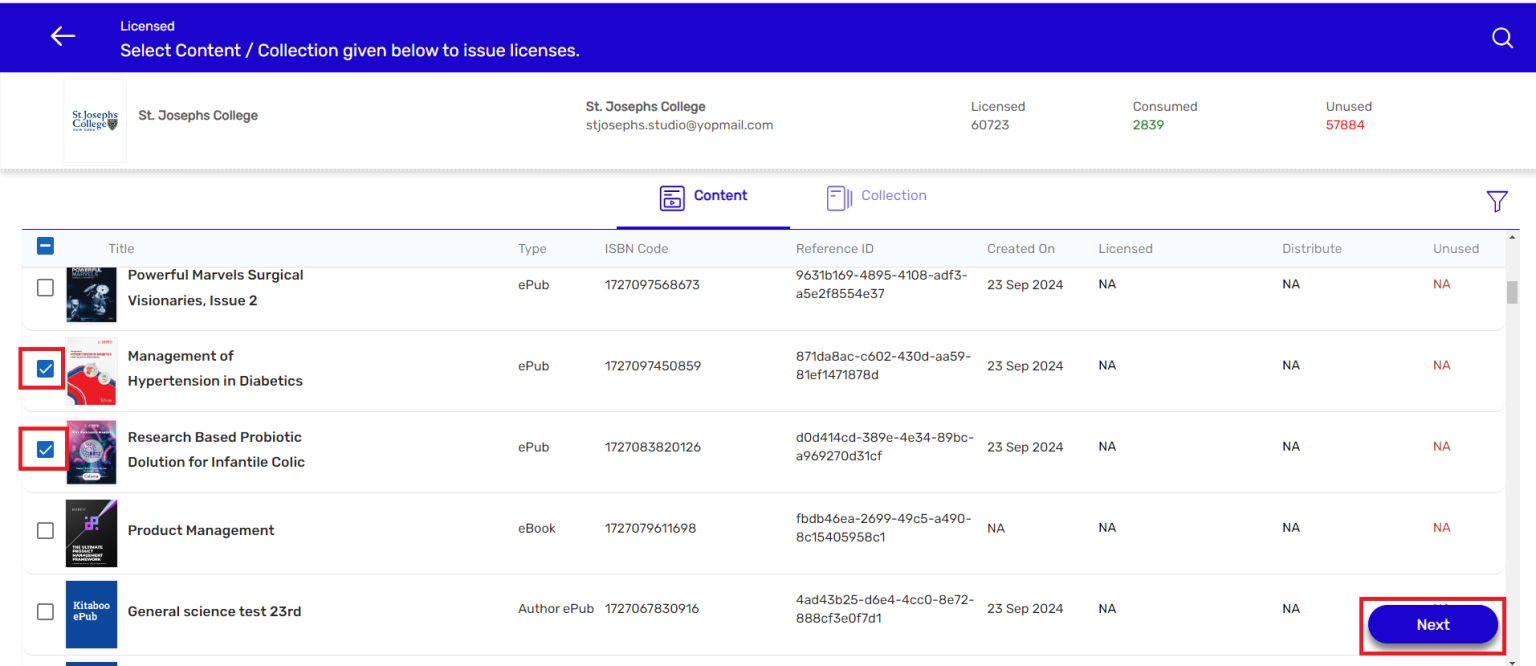
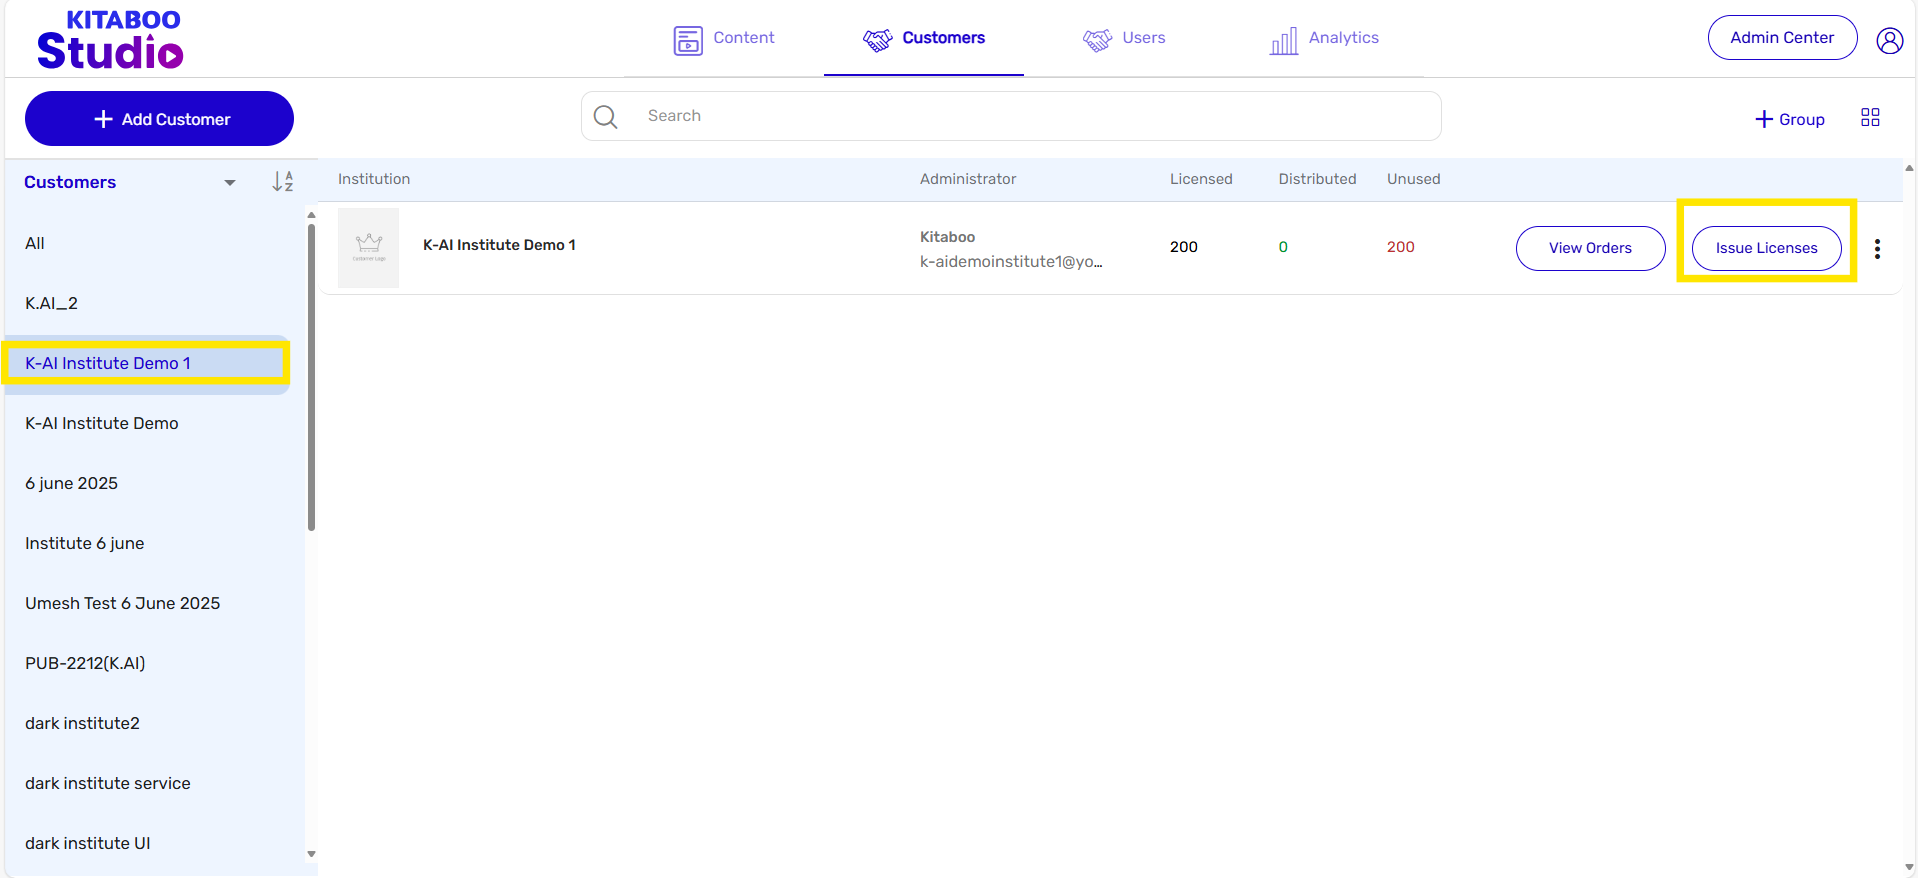
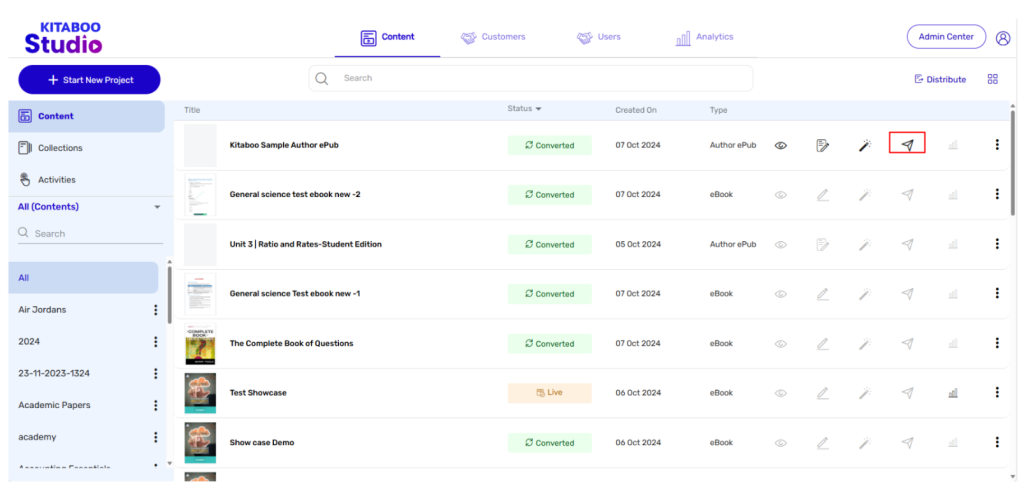
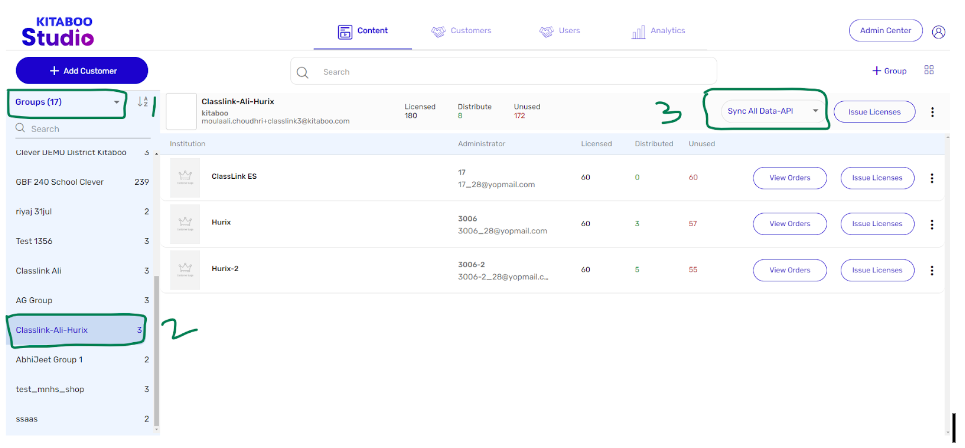
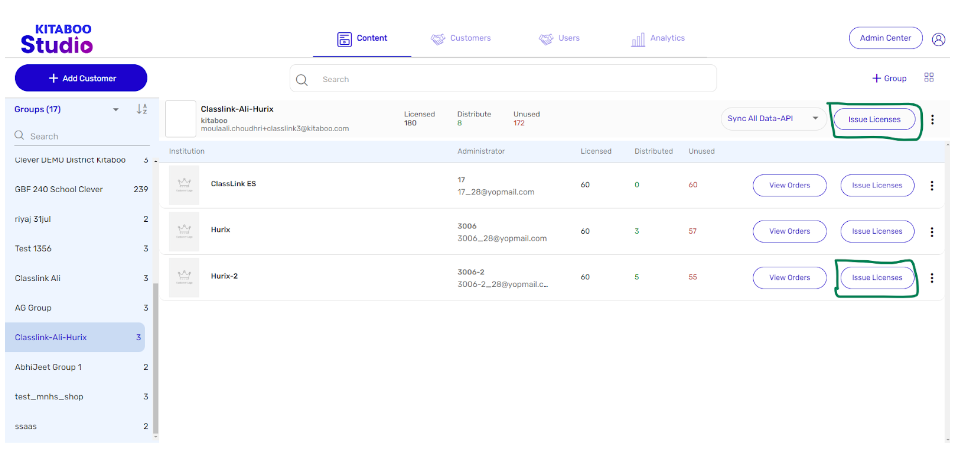
- Now distribute this content to customers or institutes by clicking on “Issue License” for the content with K.AI enabled.
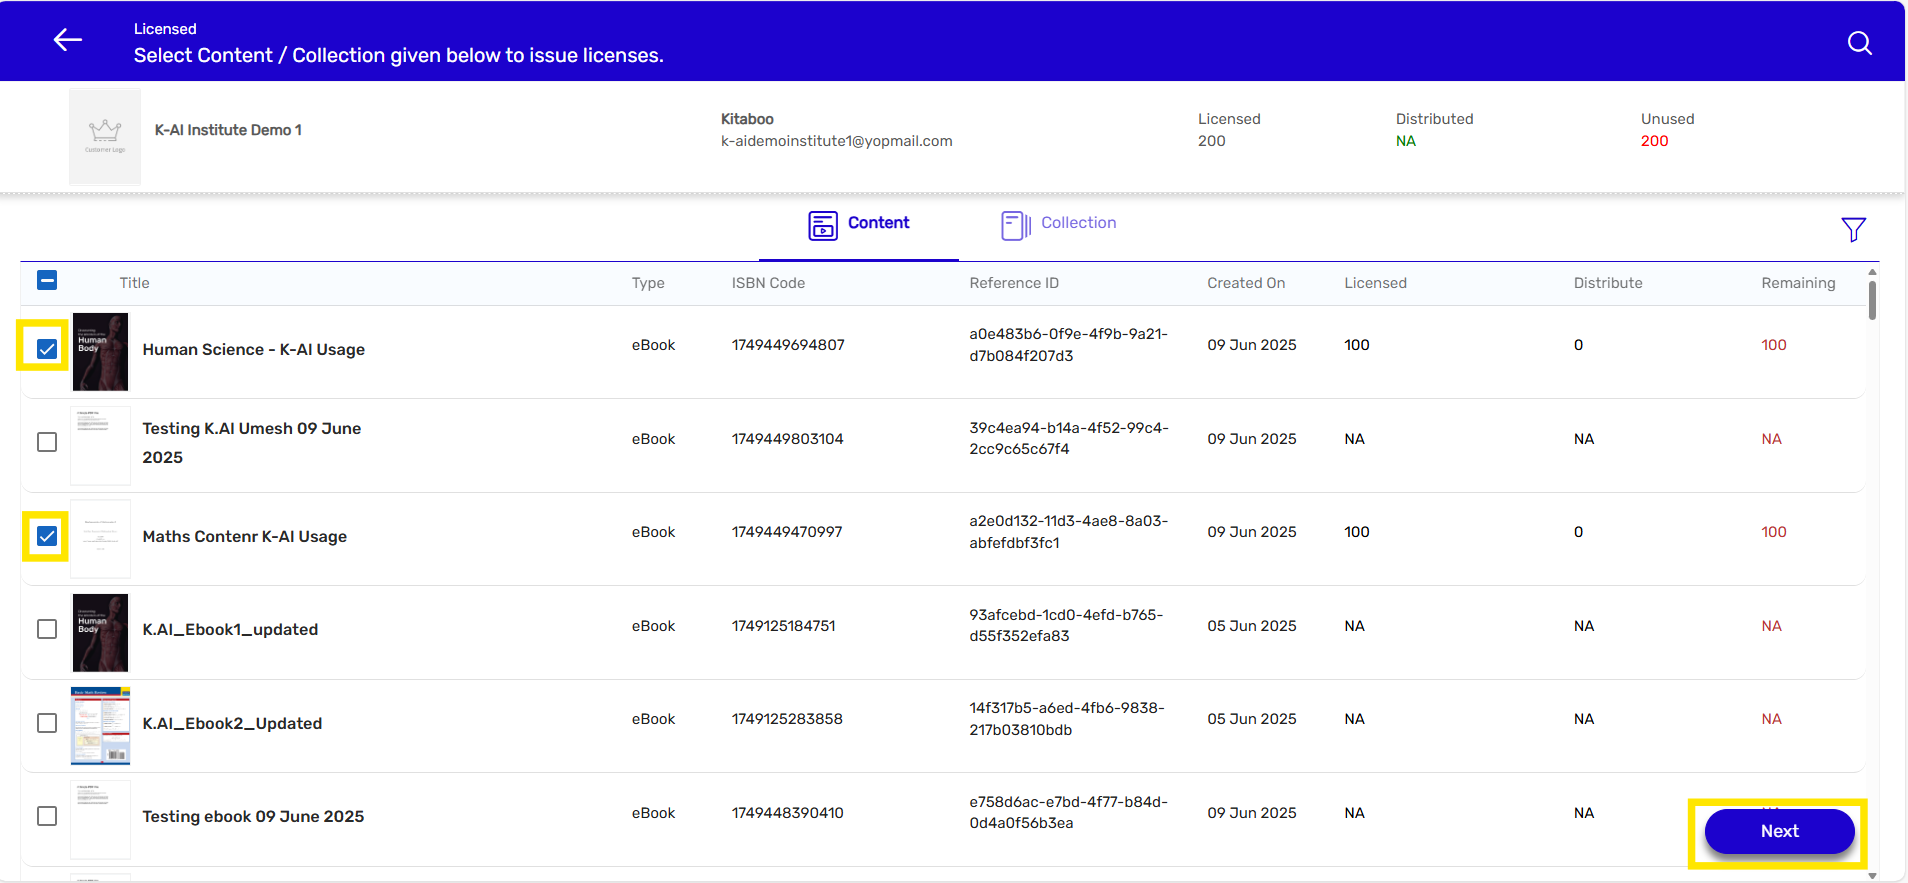
Select the content for which you have enabled K.AI from the list, then click the “Next” button.
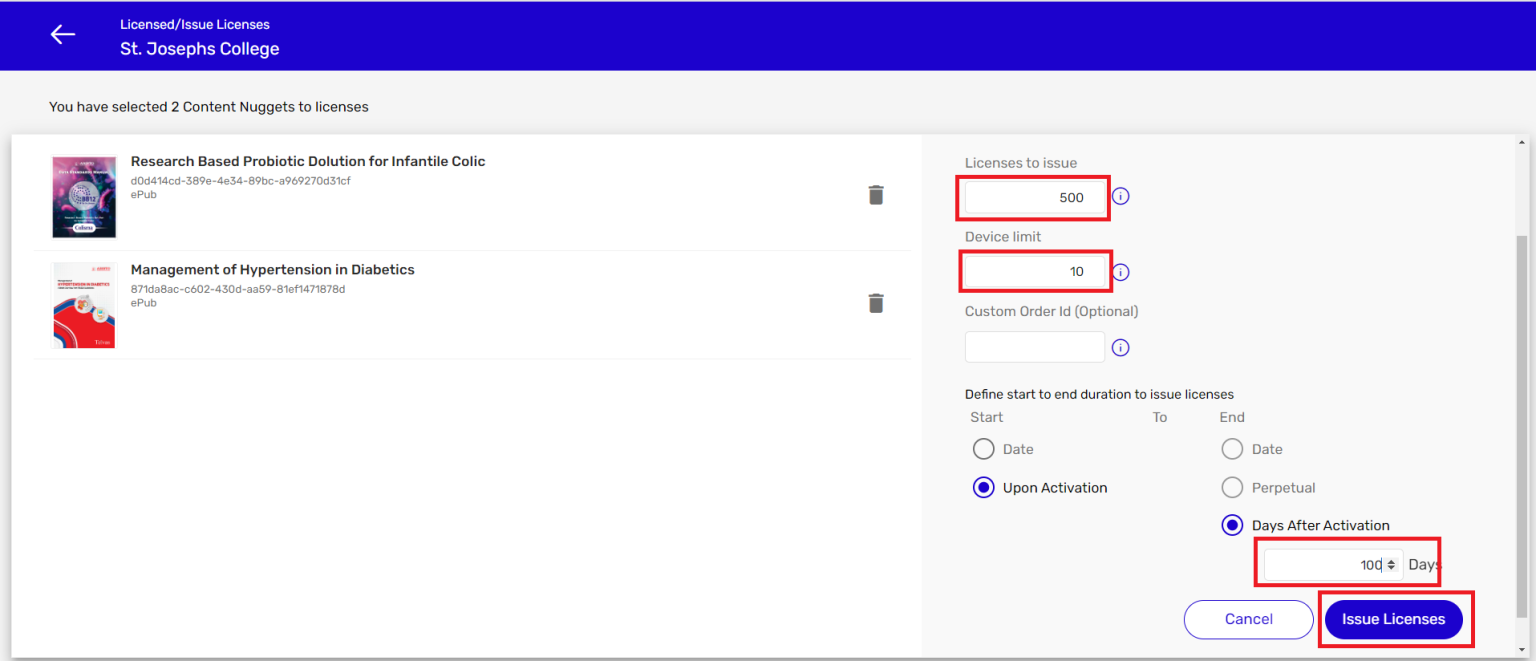
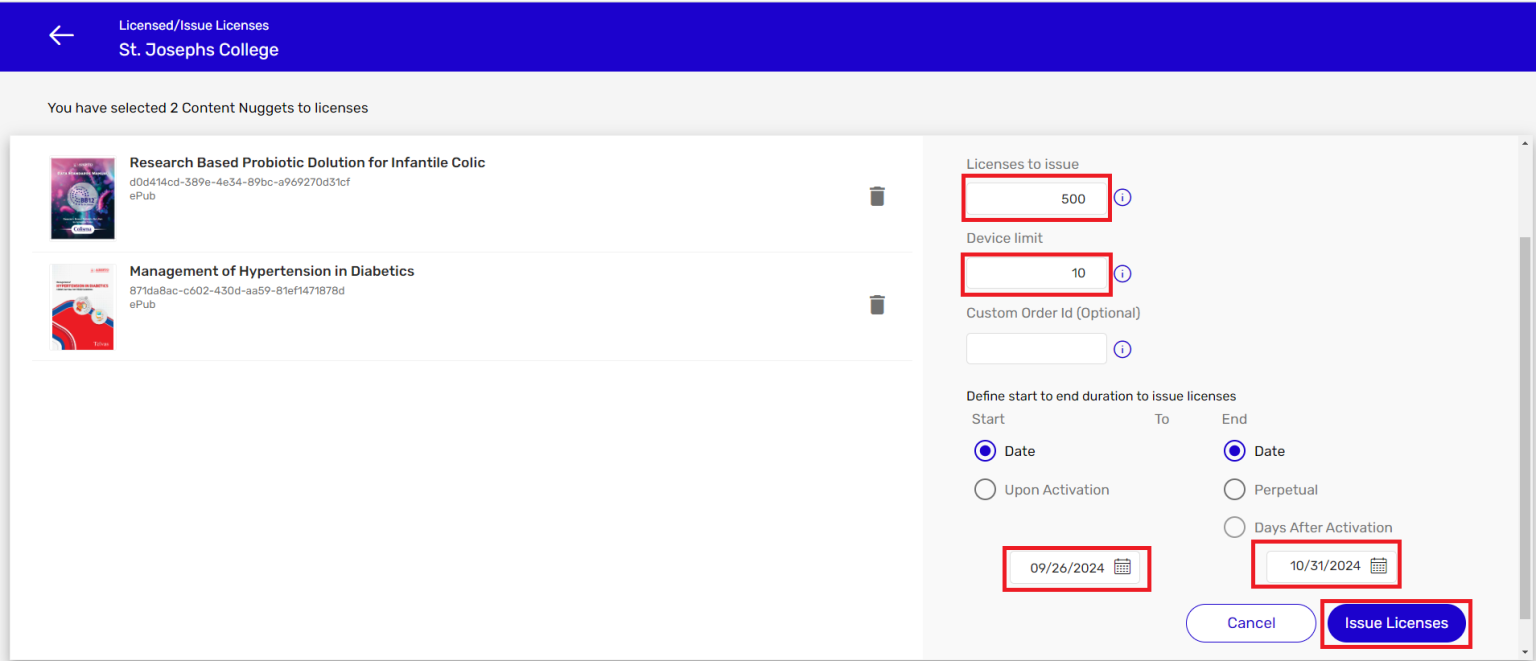
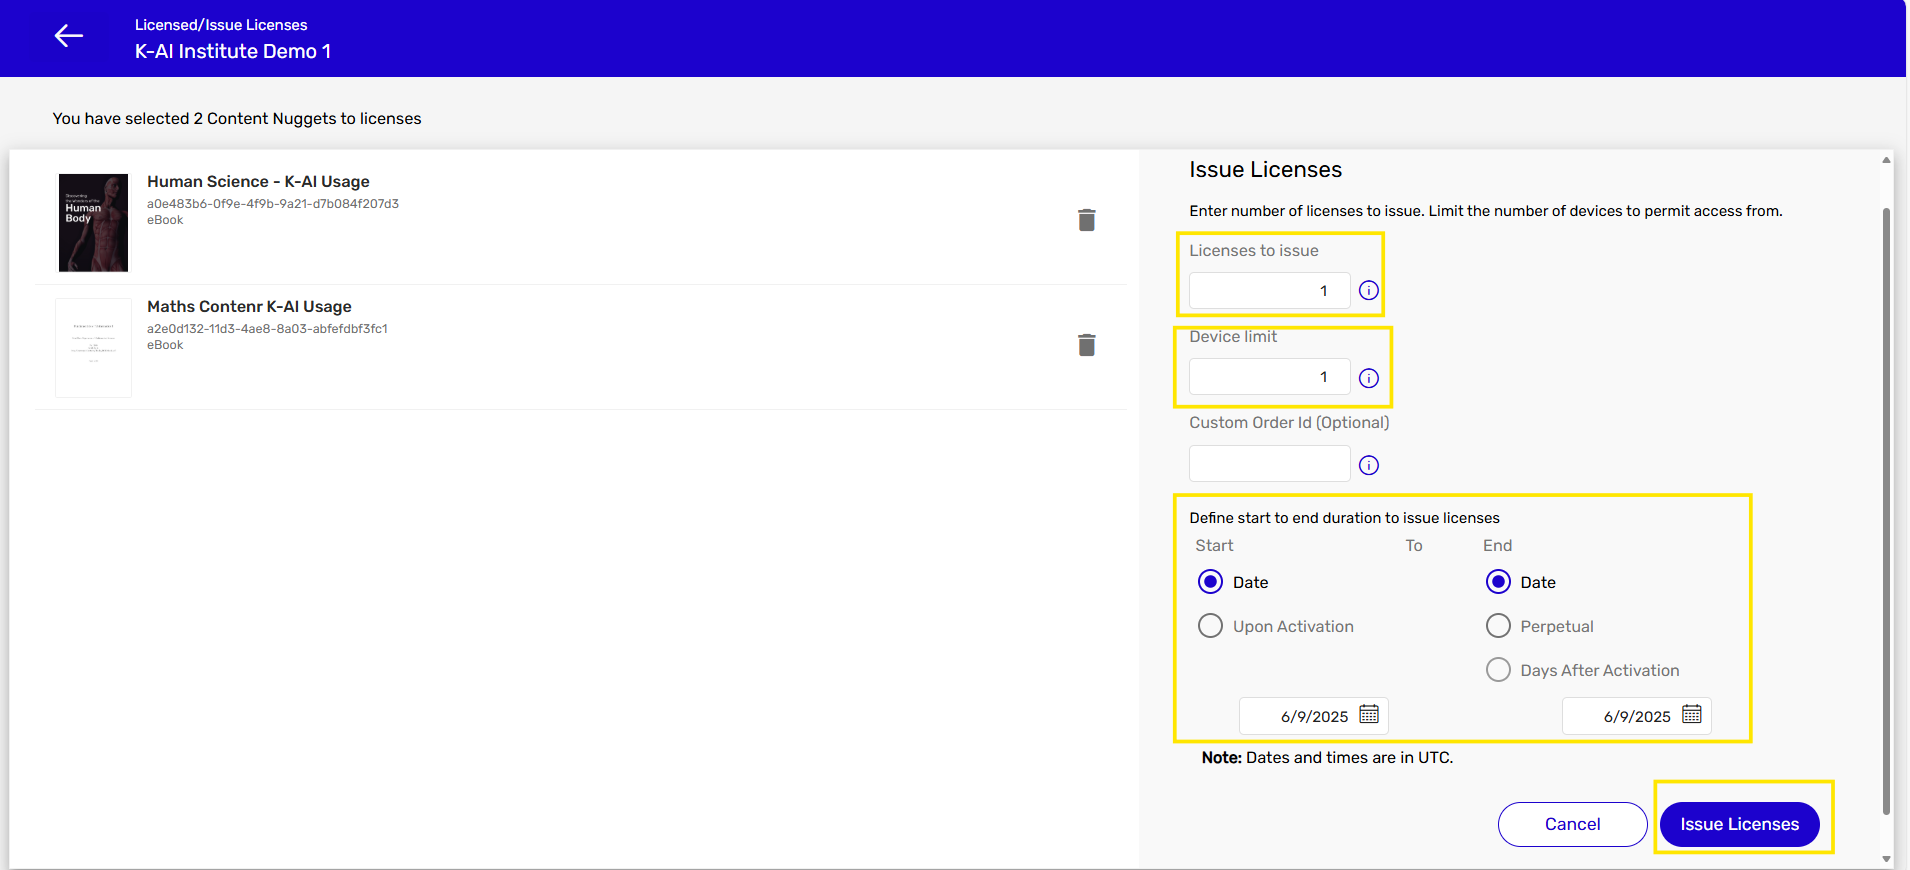
Enter the required details such as:Number of licenses to issue
Device limit
Start and end dates for the license validity
After filling in all the details, click the “Issue Licenses” button.
Now log in to the institute account for which you have issued licenses for K.AI-enabled content. Go to the “Users” tab, where you will see the list of users associated with the institute. If you want to create a new user and enable K.AI during the creation process, you will see an option to “Enable K.AI“—you can enable it from there.
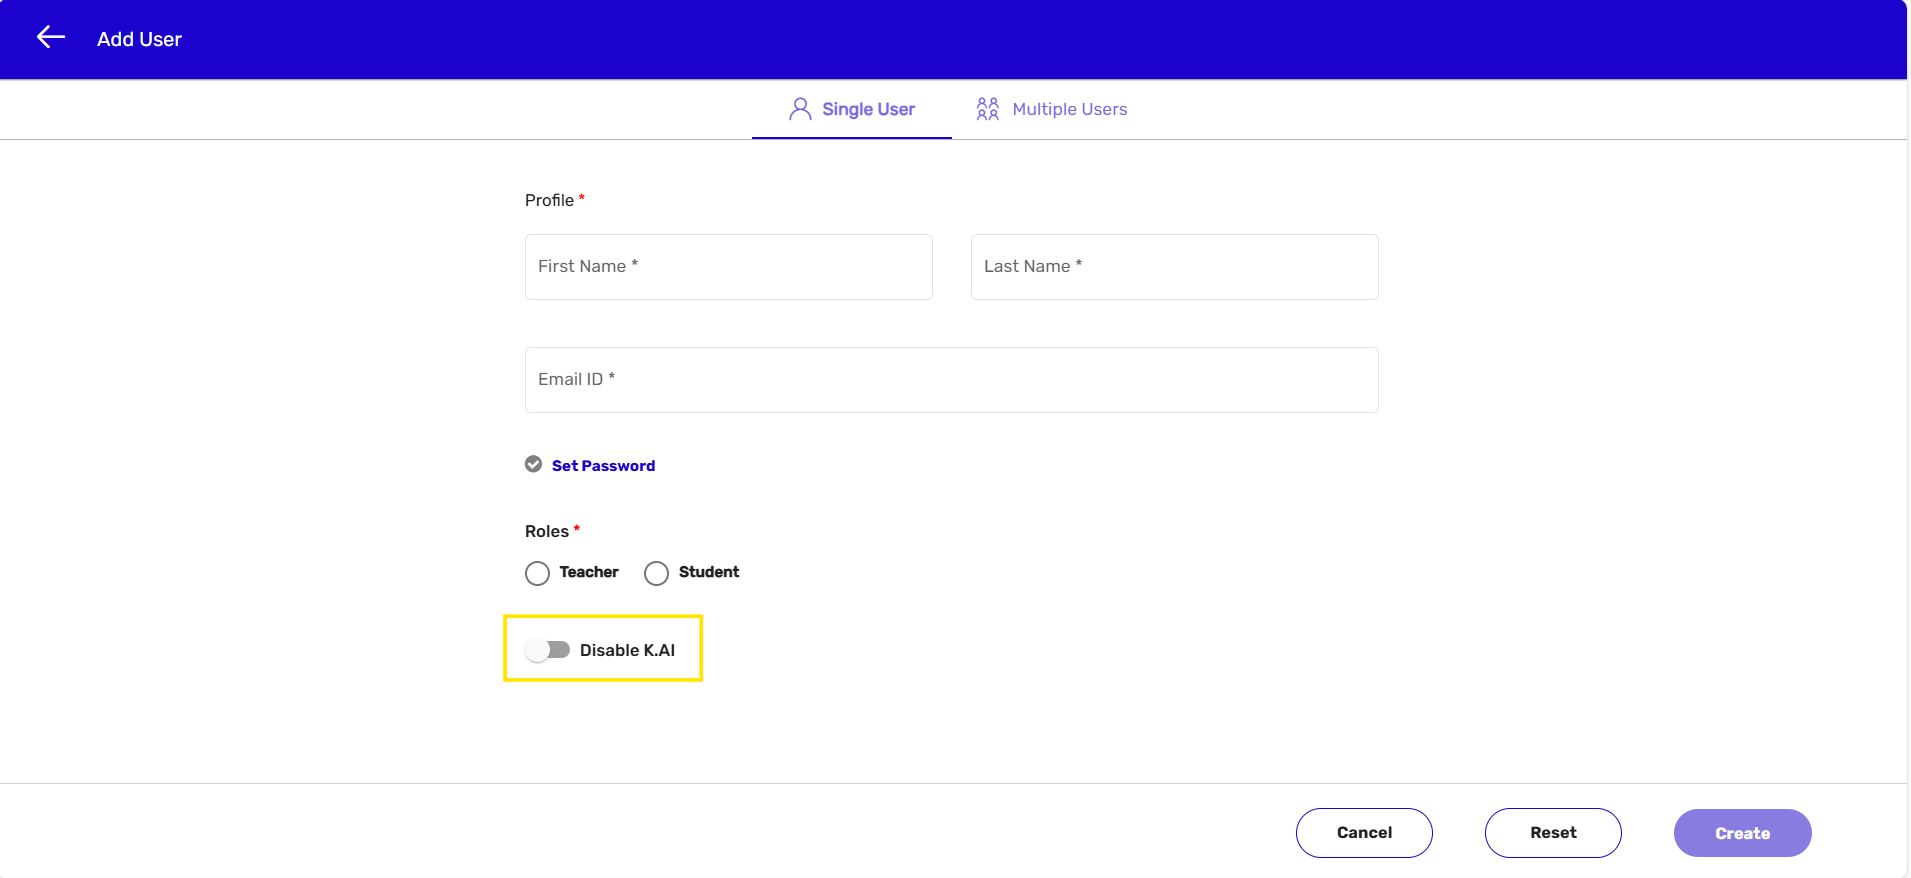
If you want to enable it for an existing user, go to the “User” tab, search for or select the user you want to enable it for, and then click on “Enable K.AI“.
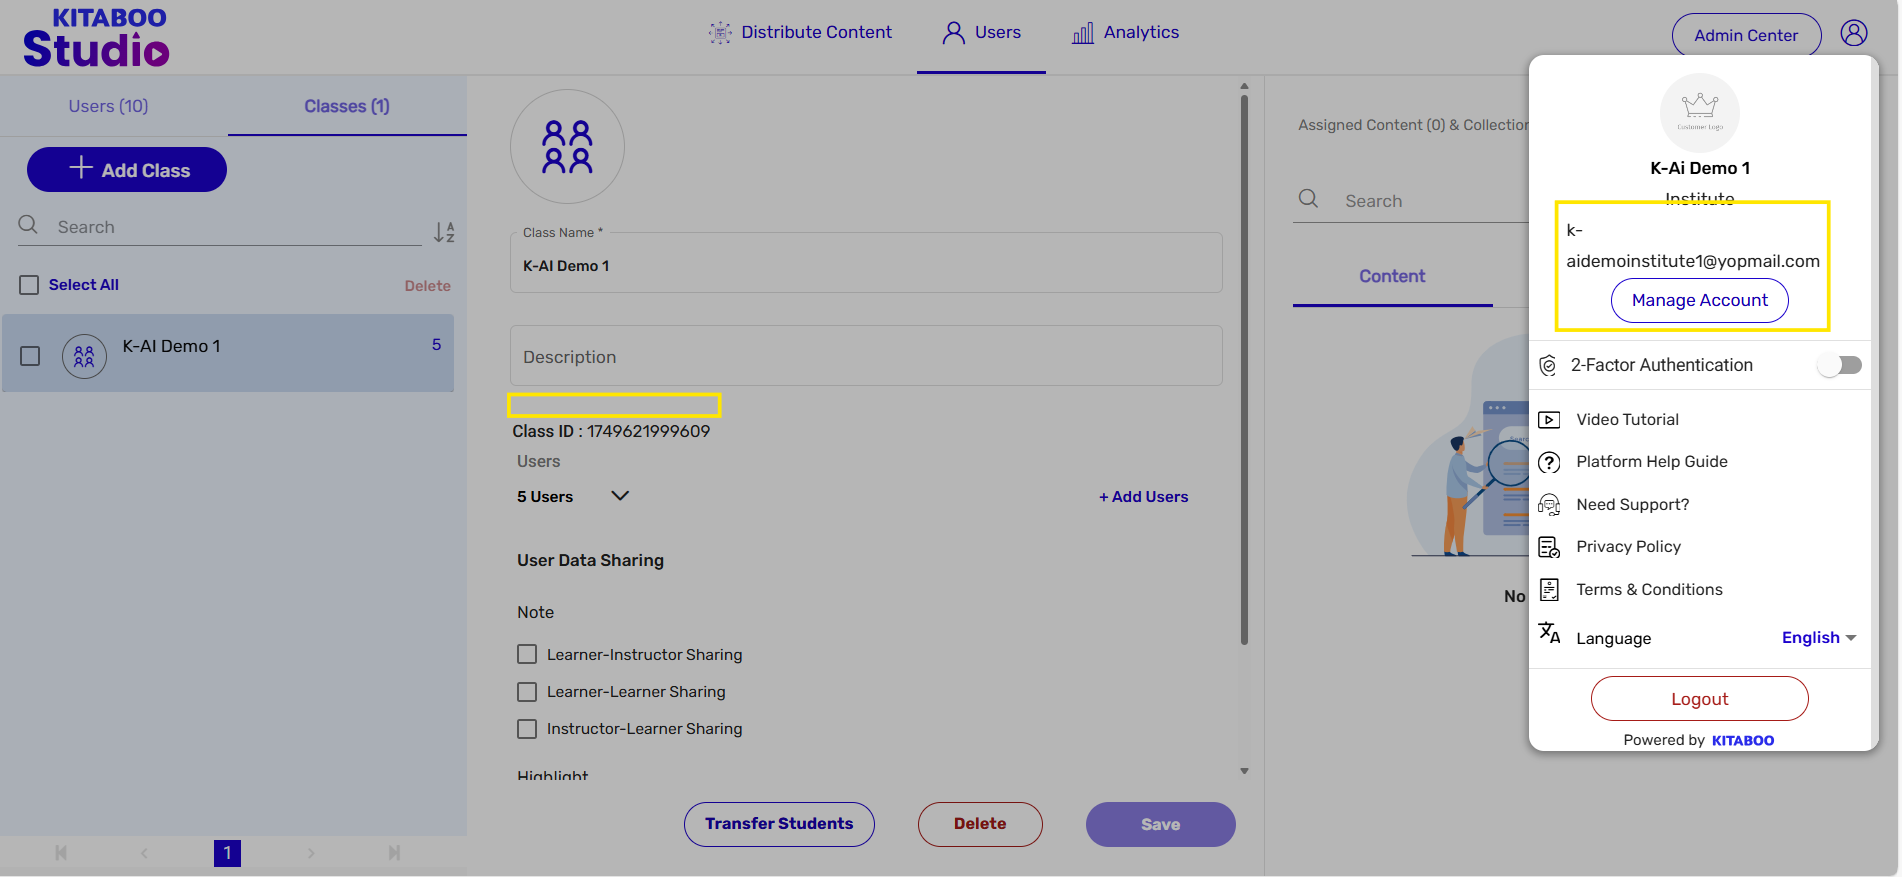
Similarly, if you want to enable K.AI while creating a new class or for an existing class, you need to follow the same steps as explained above for users.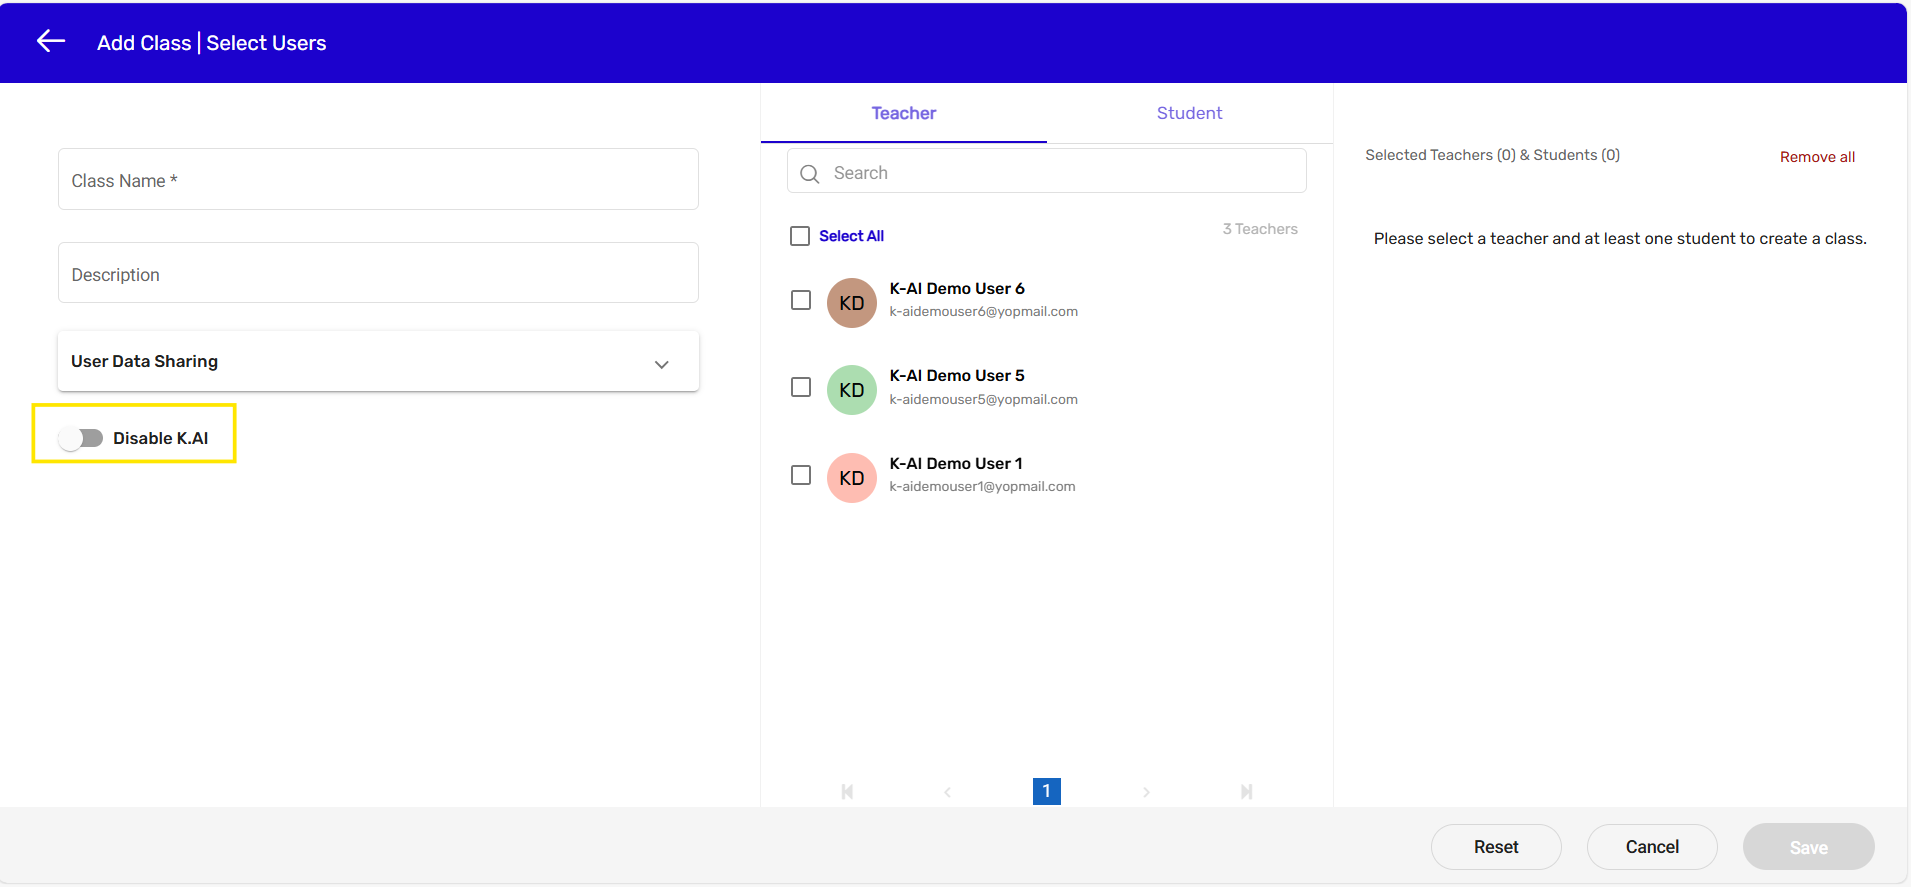
Existing Class –
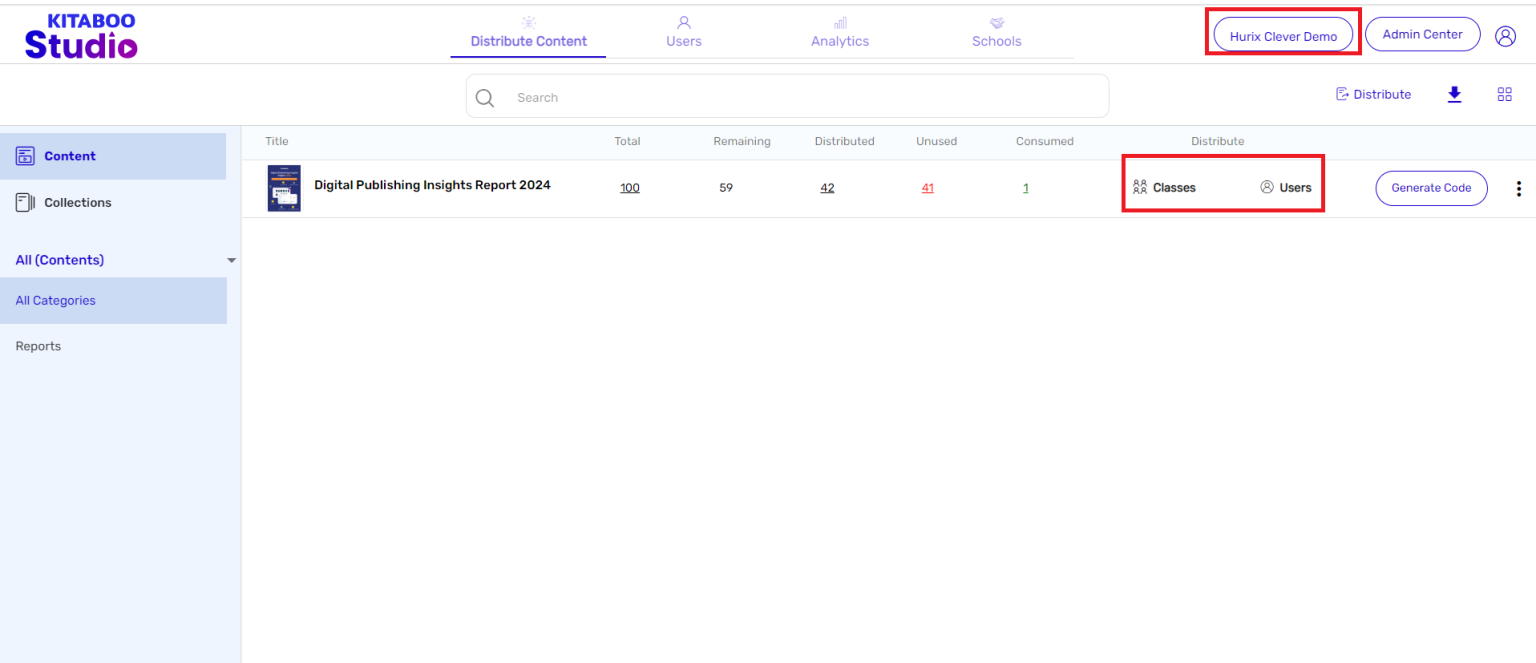
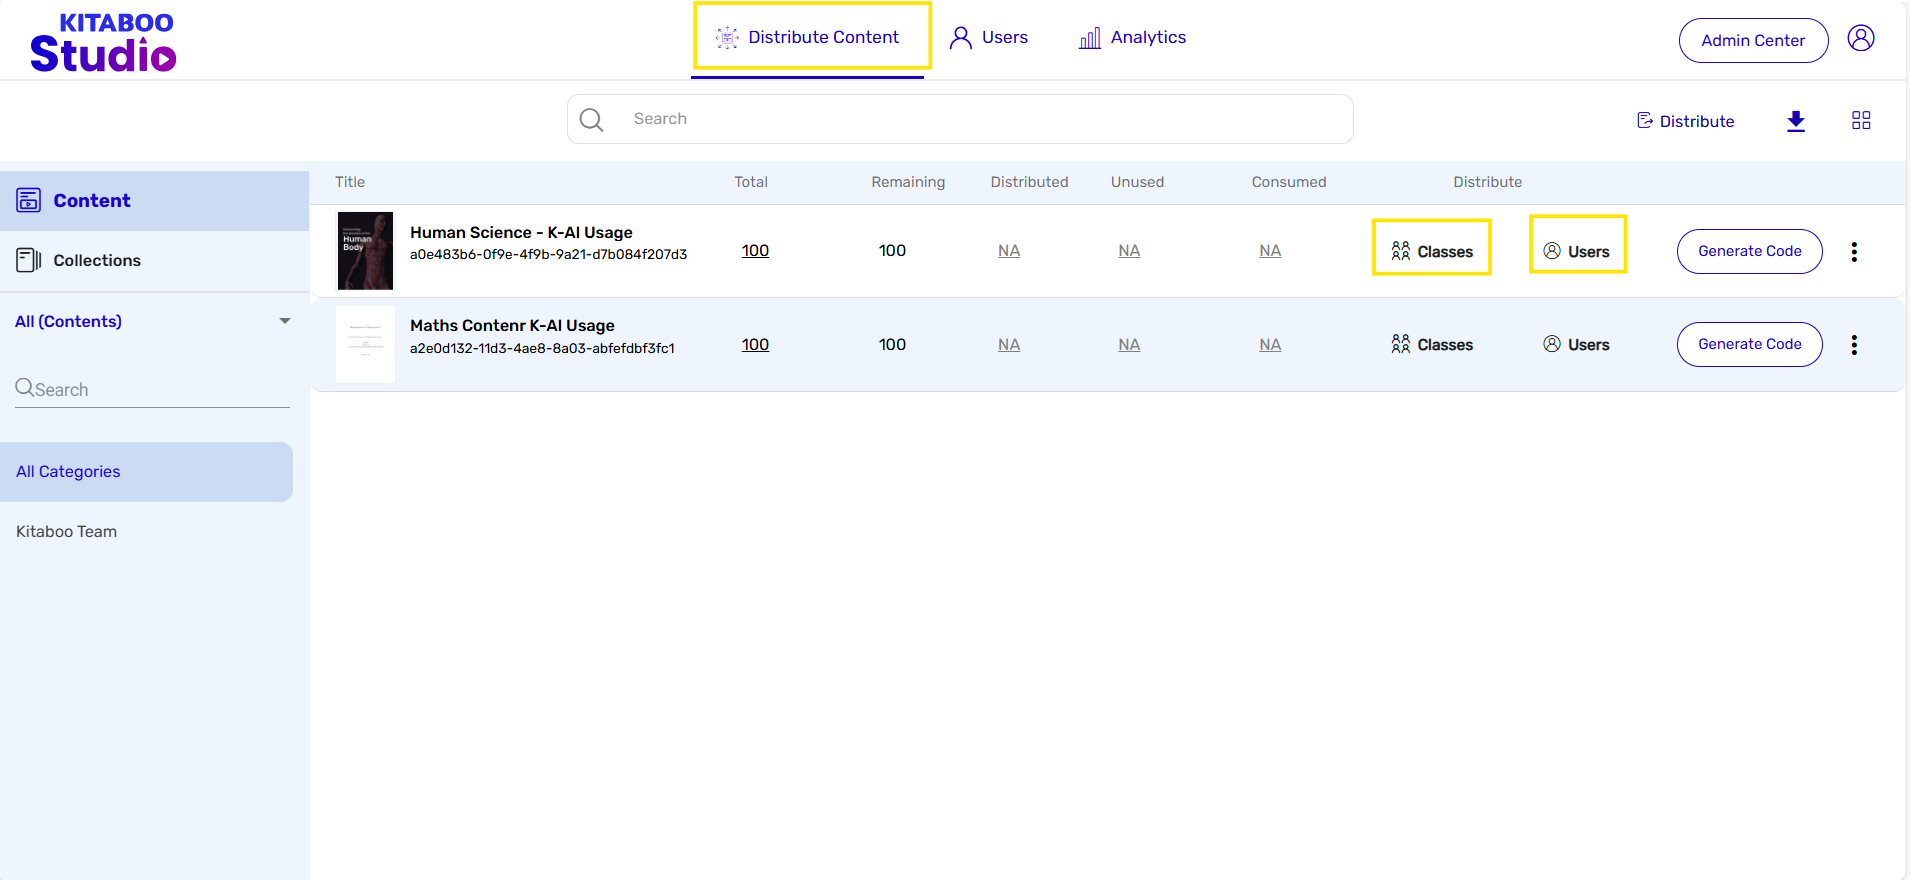
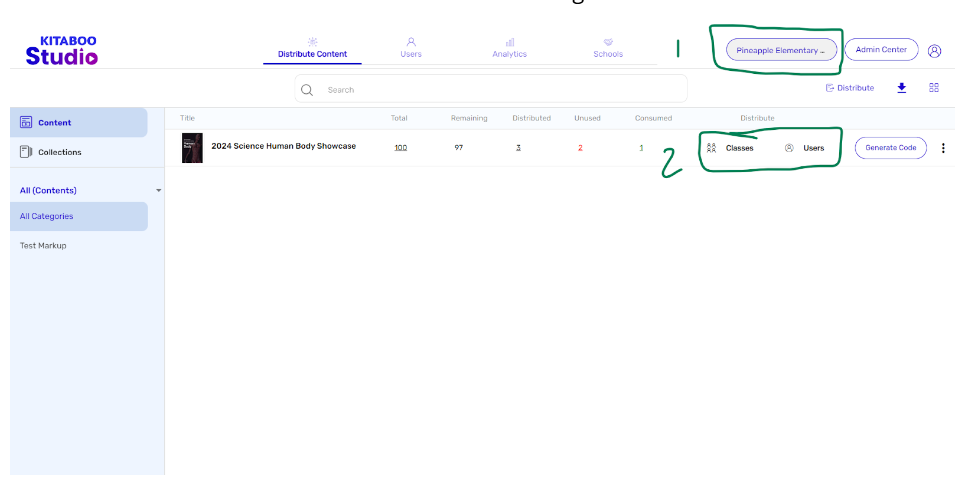
Now that you have enabled K.AI for the users or class, go to the “Distribute Content” tab. Distribute the content for which K.AI is enabled by clicking on either “Users” or “Classes.”
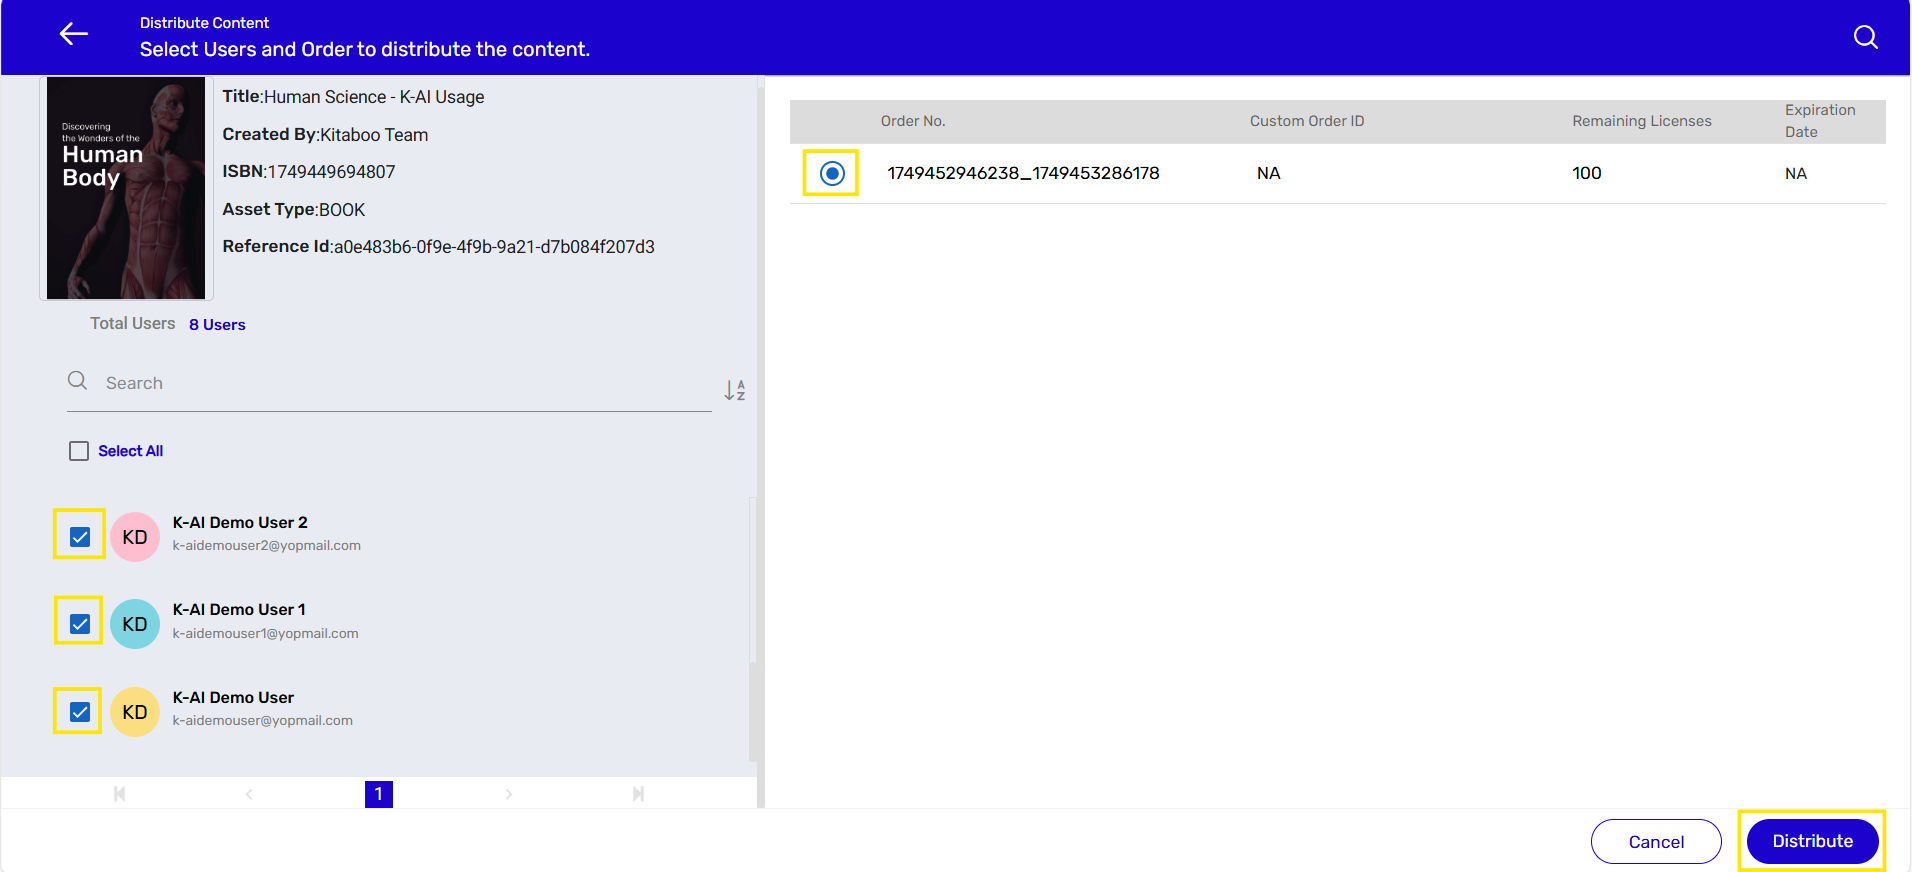
- After that, select the users or classes from the list to whom you want to distribute the content. If there are multiple orders, choose the appropriate one, and then click on “Distribute.”
Now log in to the Reader platform and open the content. You will see the K-AI button—click on it.
K-AI Enable Partner/Customer/Institute level –
The process for enabling K-AI at the content level is the same as described above. However, instead of enabling K-AI individually at the user or class level, you can enable it at the Partner/Institute/Customer level. The steps to do so are shown below:
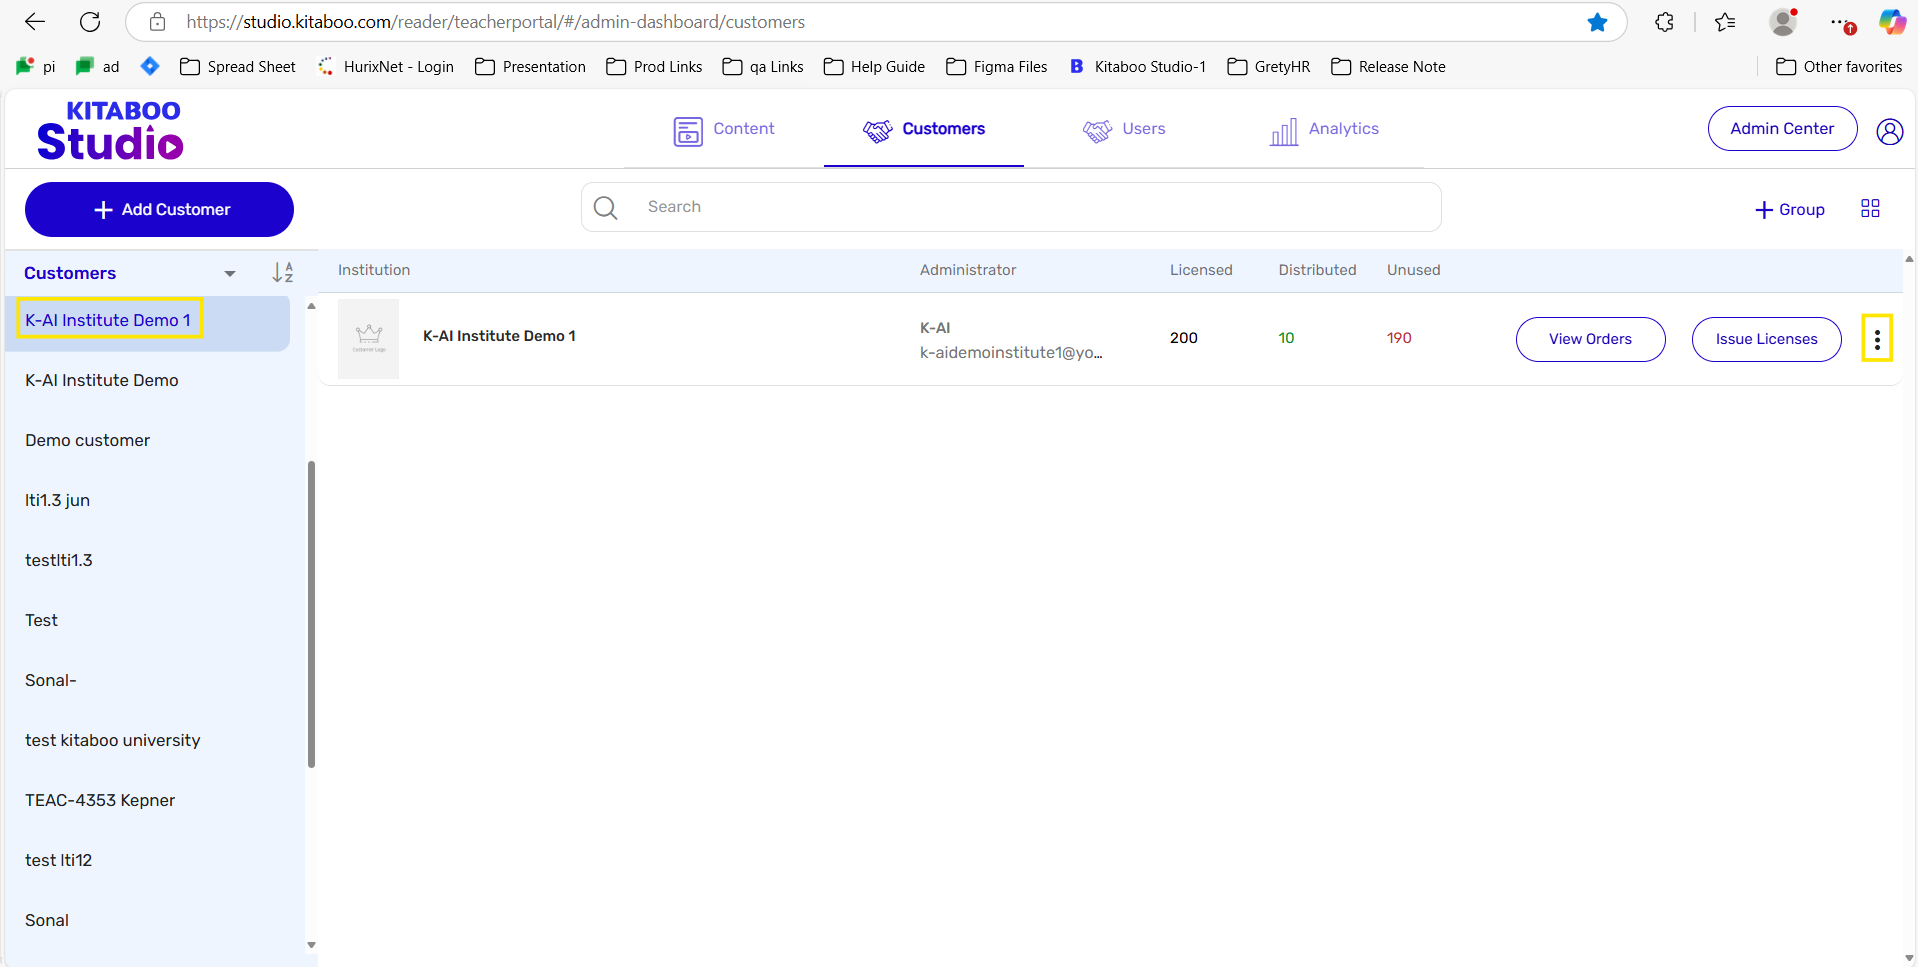
- Log in to your account and navigate to the Customer tab –
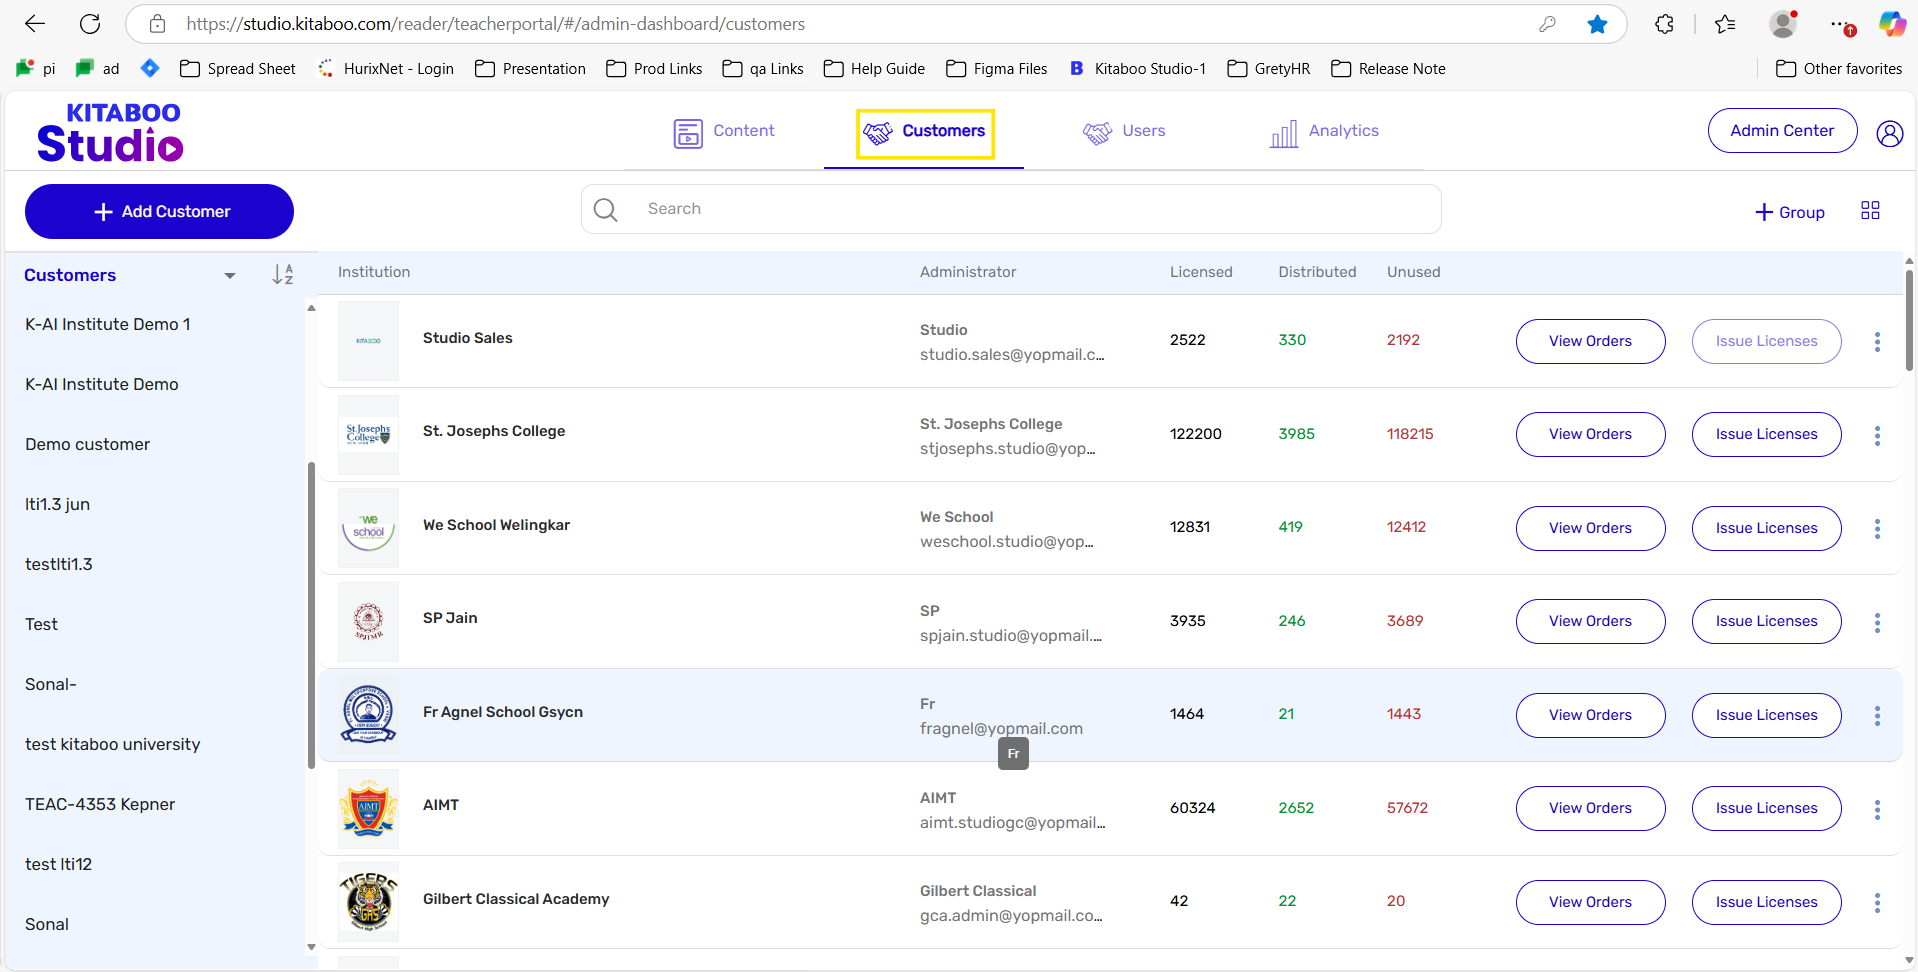
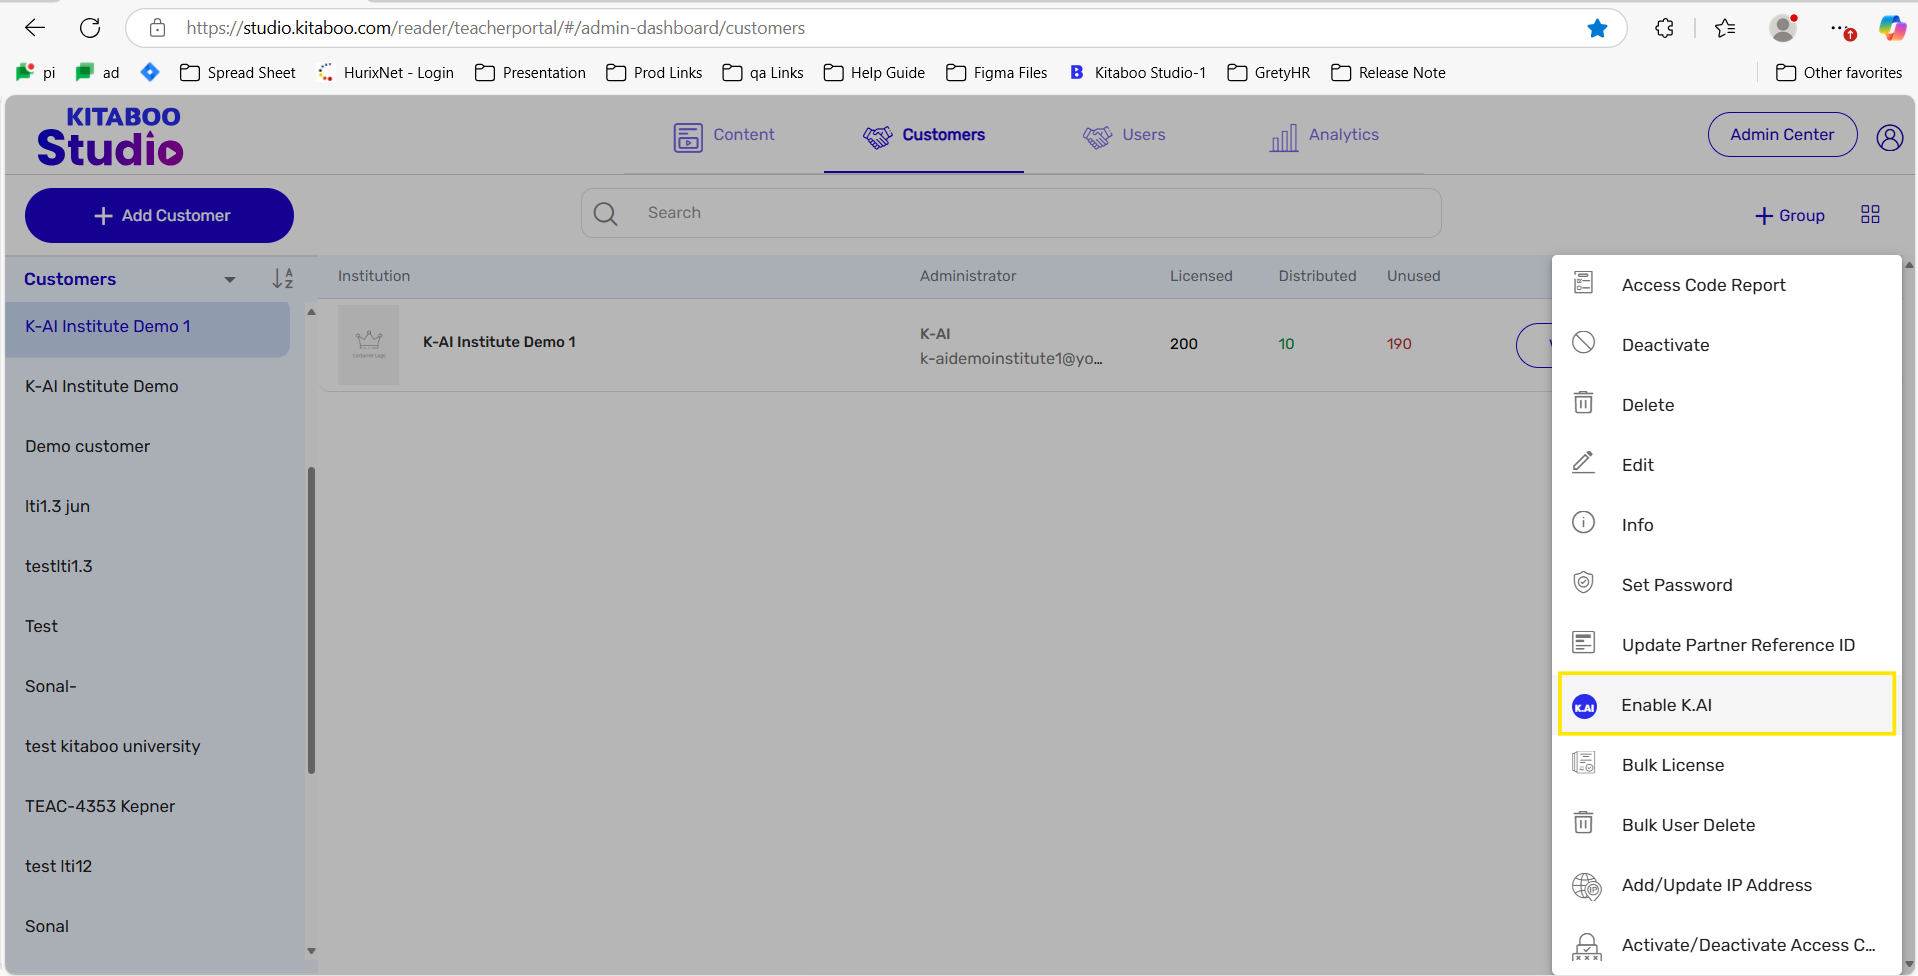
- Locate and select the customer for whom you want to enable K-AI at the Partner, Institute, or Customer level. Once you’ve found the customer, click on “More Options” and then select the “Enable K-AI” button from the dropdown list.

- Once you log in to a Partner/Institute/Customer account where K-AI is enabled, you will no longer see the option to enable K-AI at the user or class level—this applies to both new and existing users/classes.
In this scenario, you simply need to assign the content with K-AI already enabled directly to the end user or class.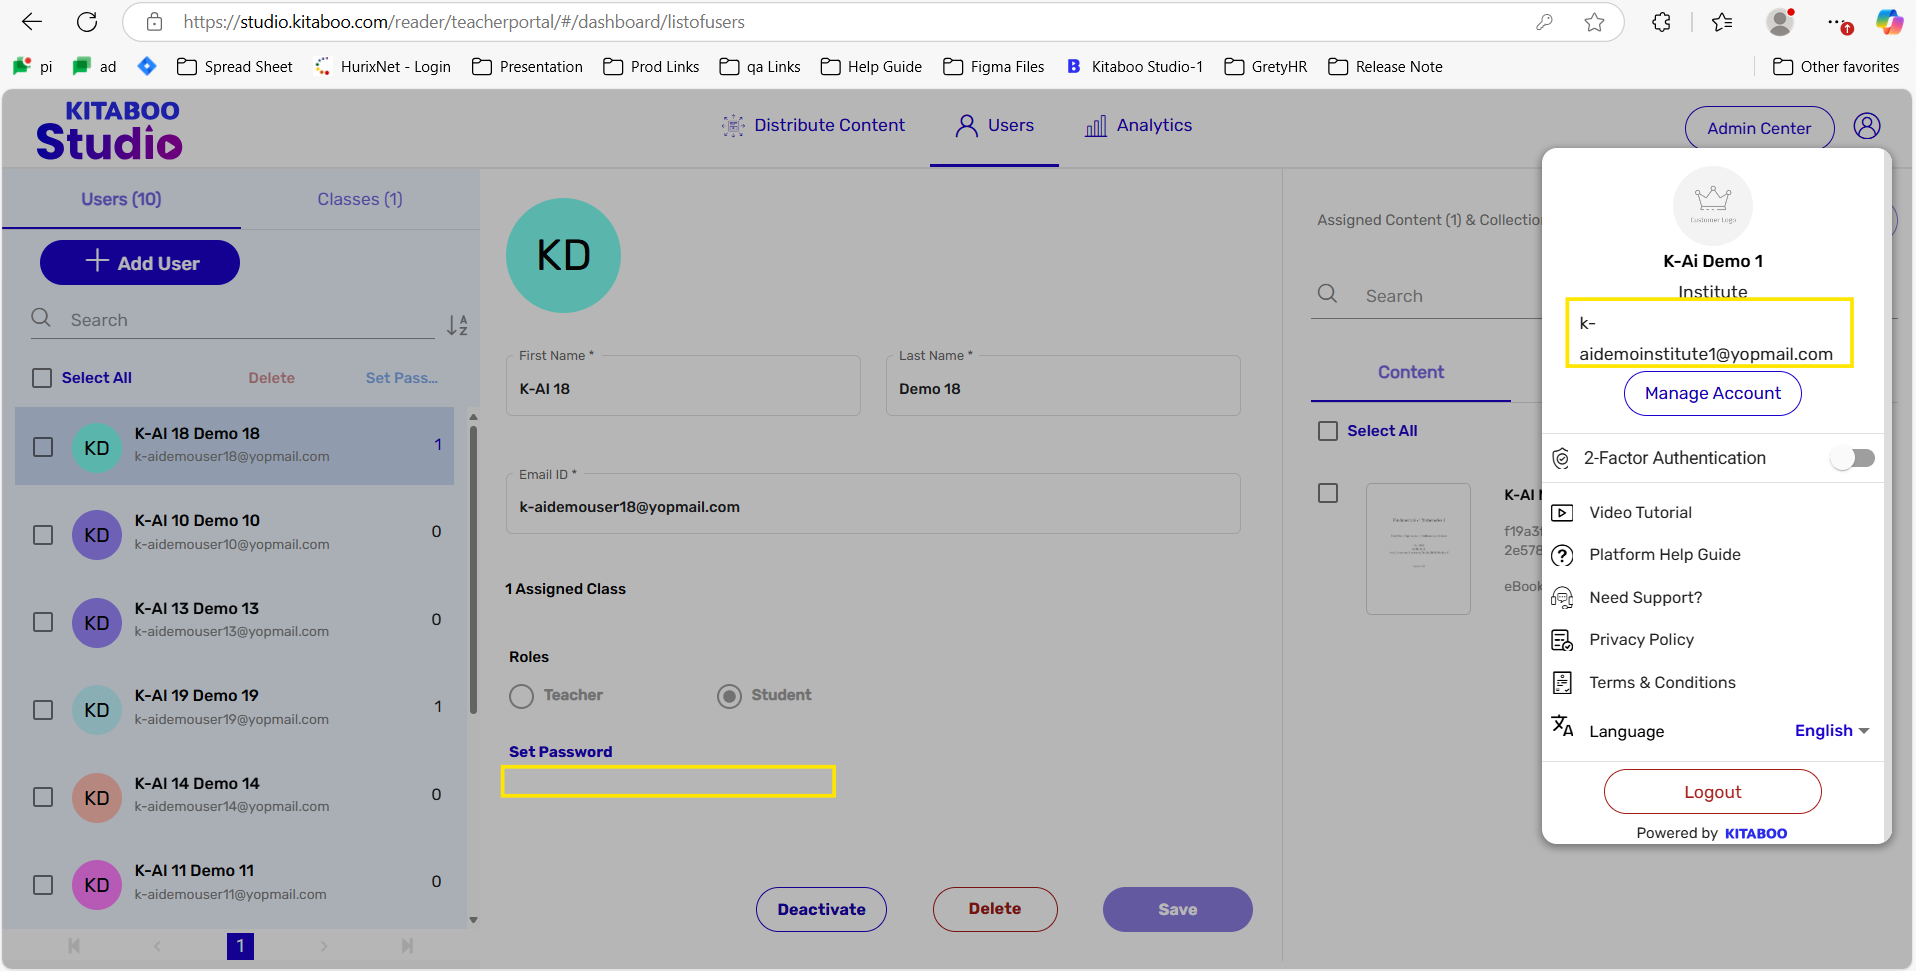
K-AI enabled at the content level during the converted state
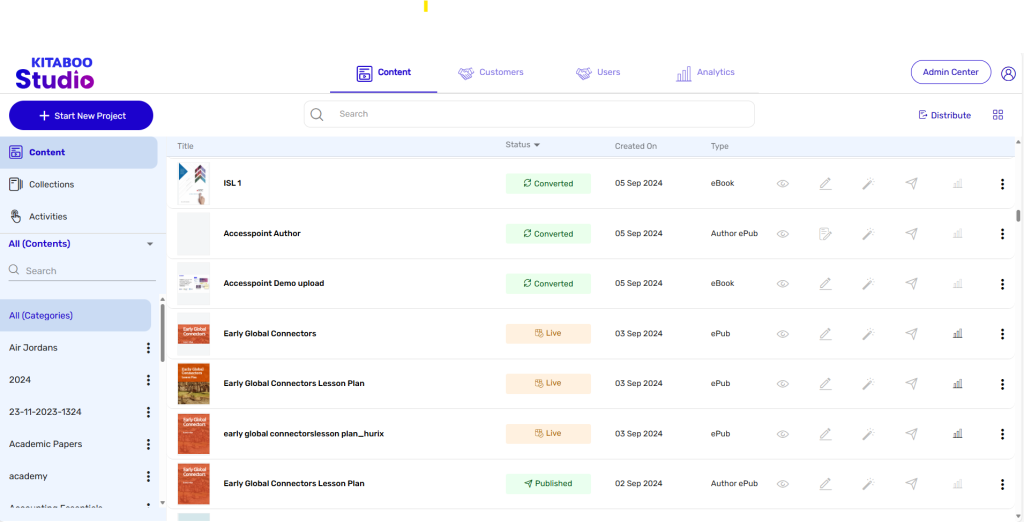
- Create the content from the Studio Platform and move it to the Converted state.
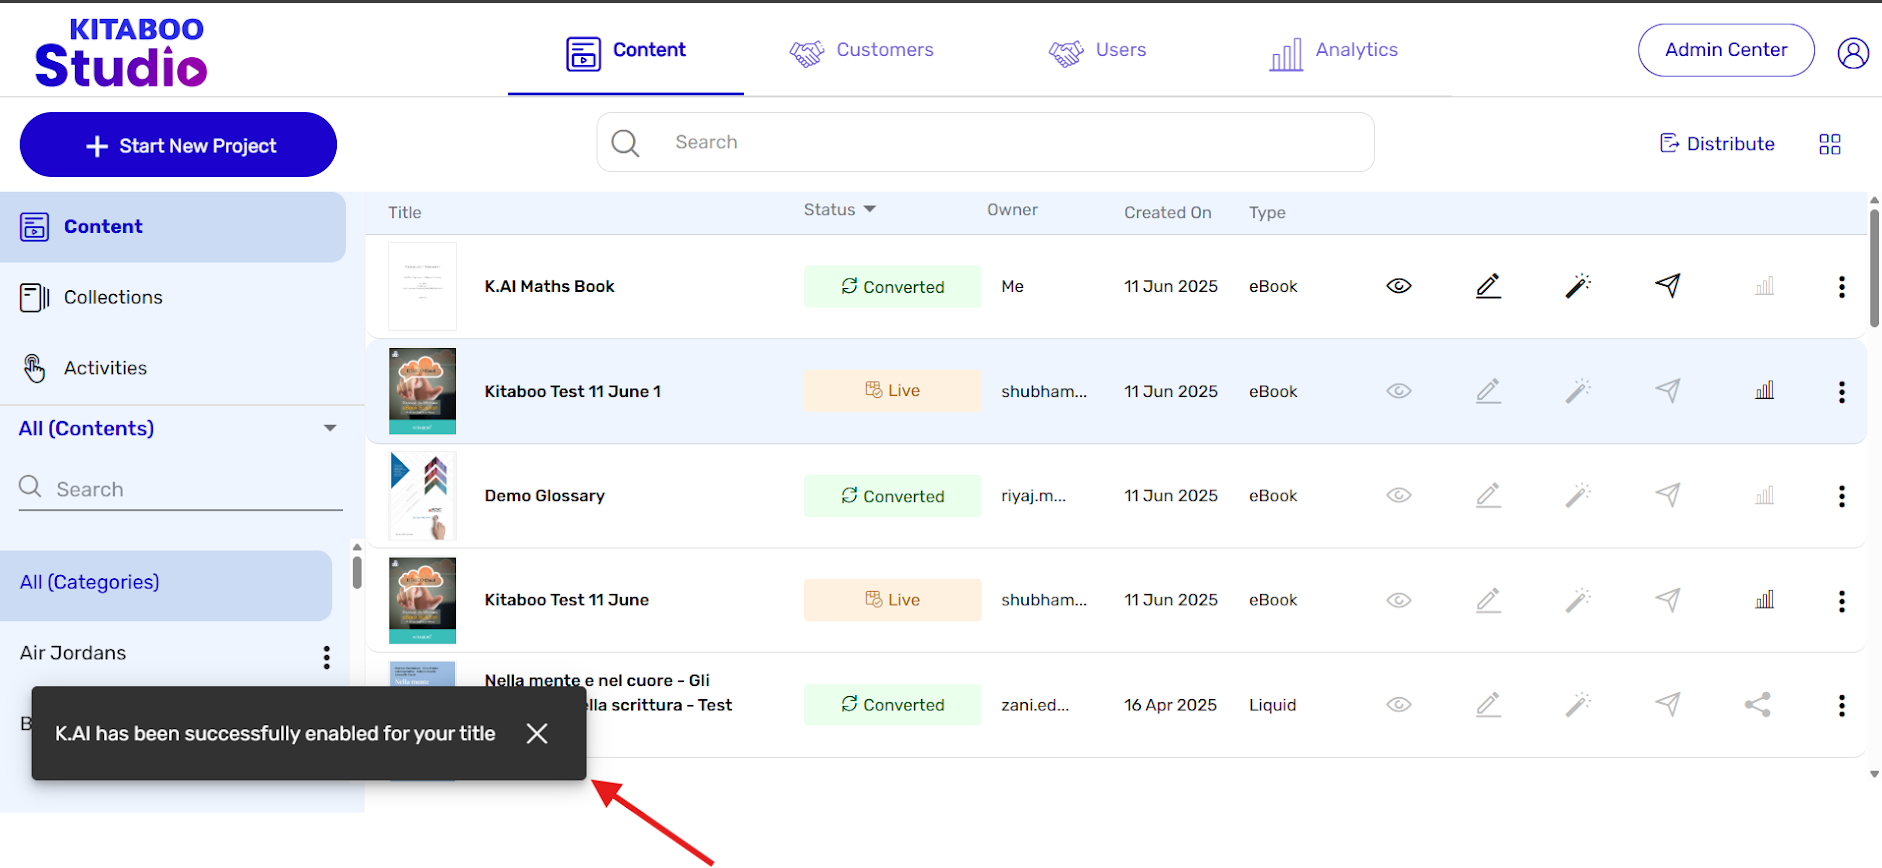
For example, I have created content titled K.AI Math’s Book and set it to the converted state. Click on the More option, where you will find the K.AI button.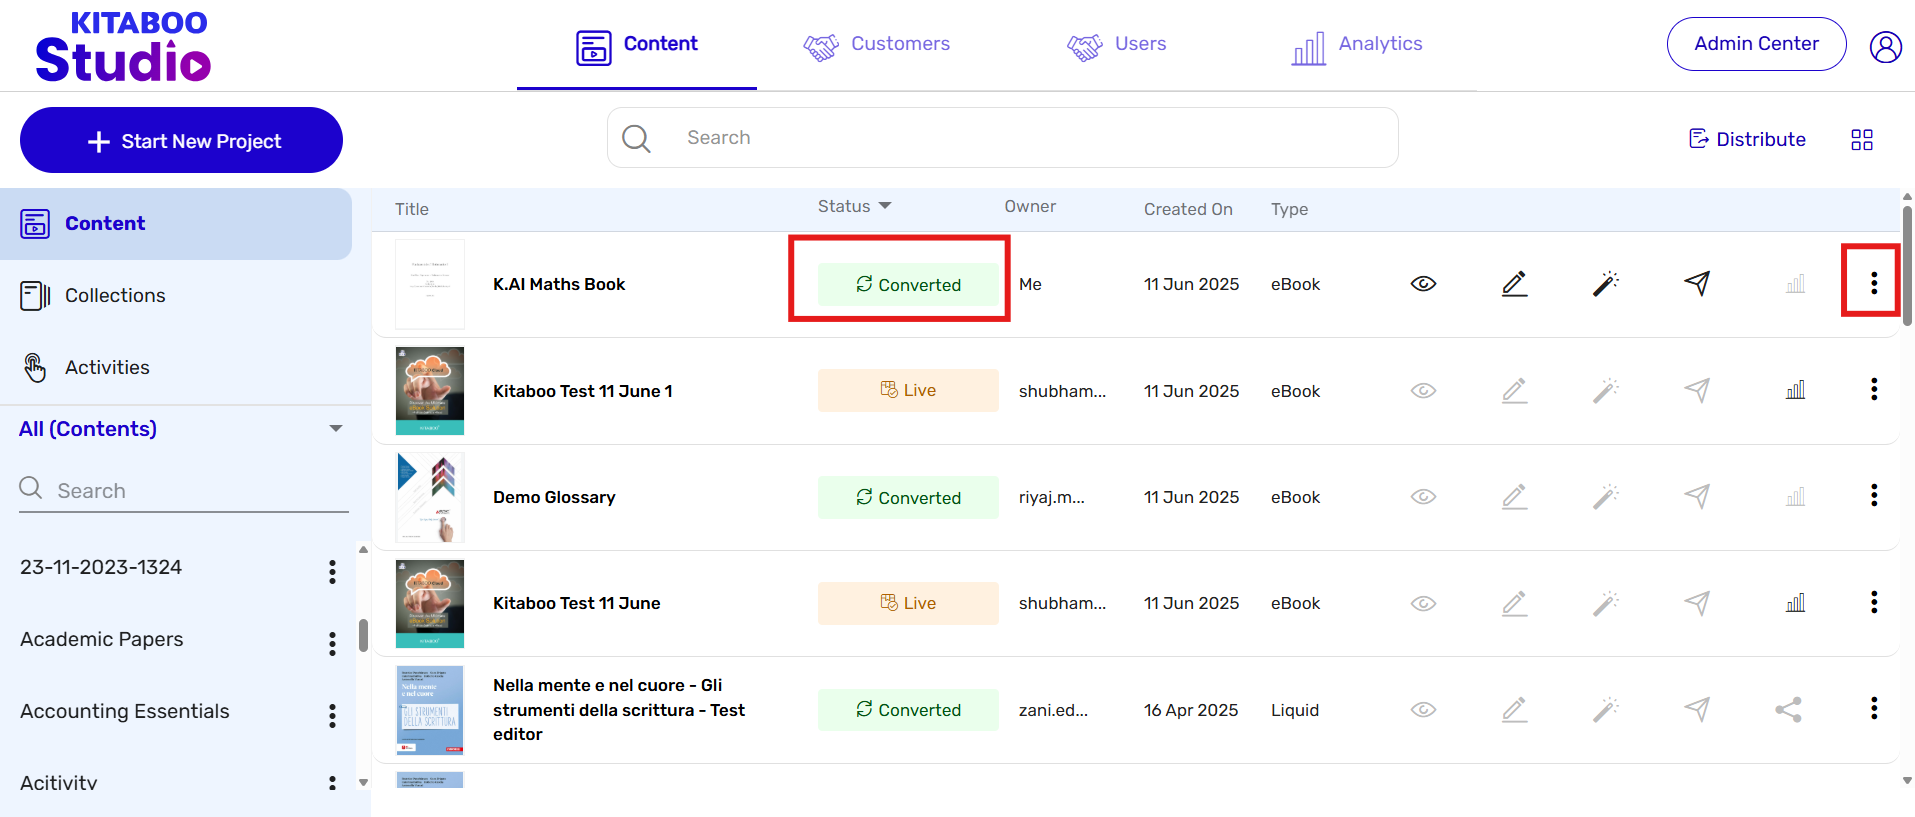
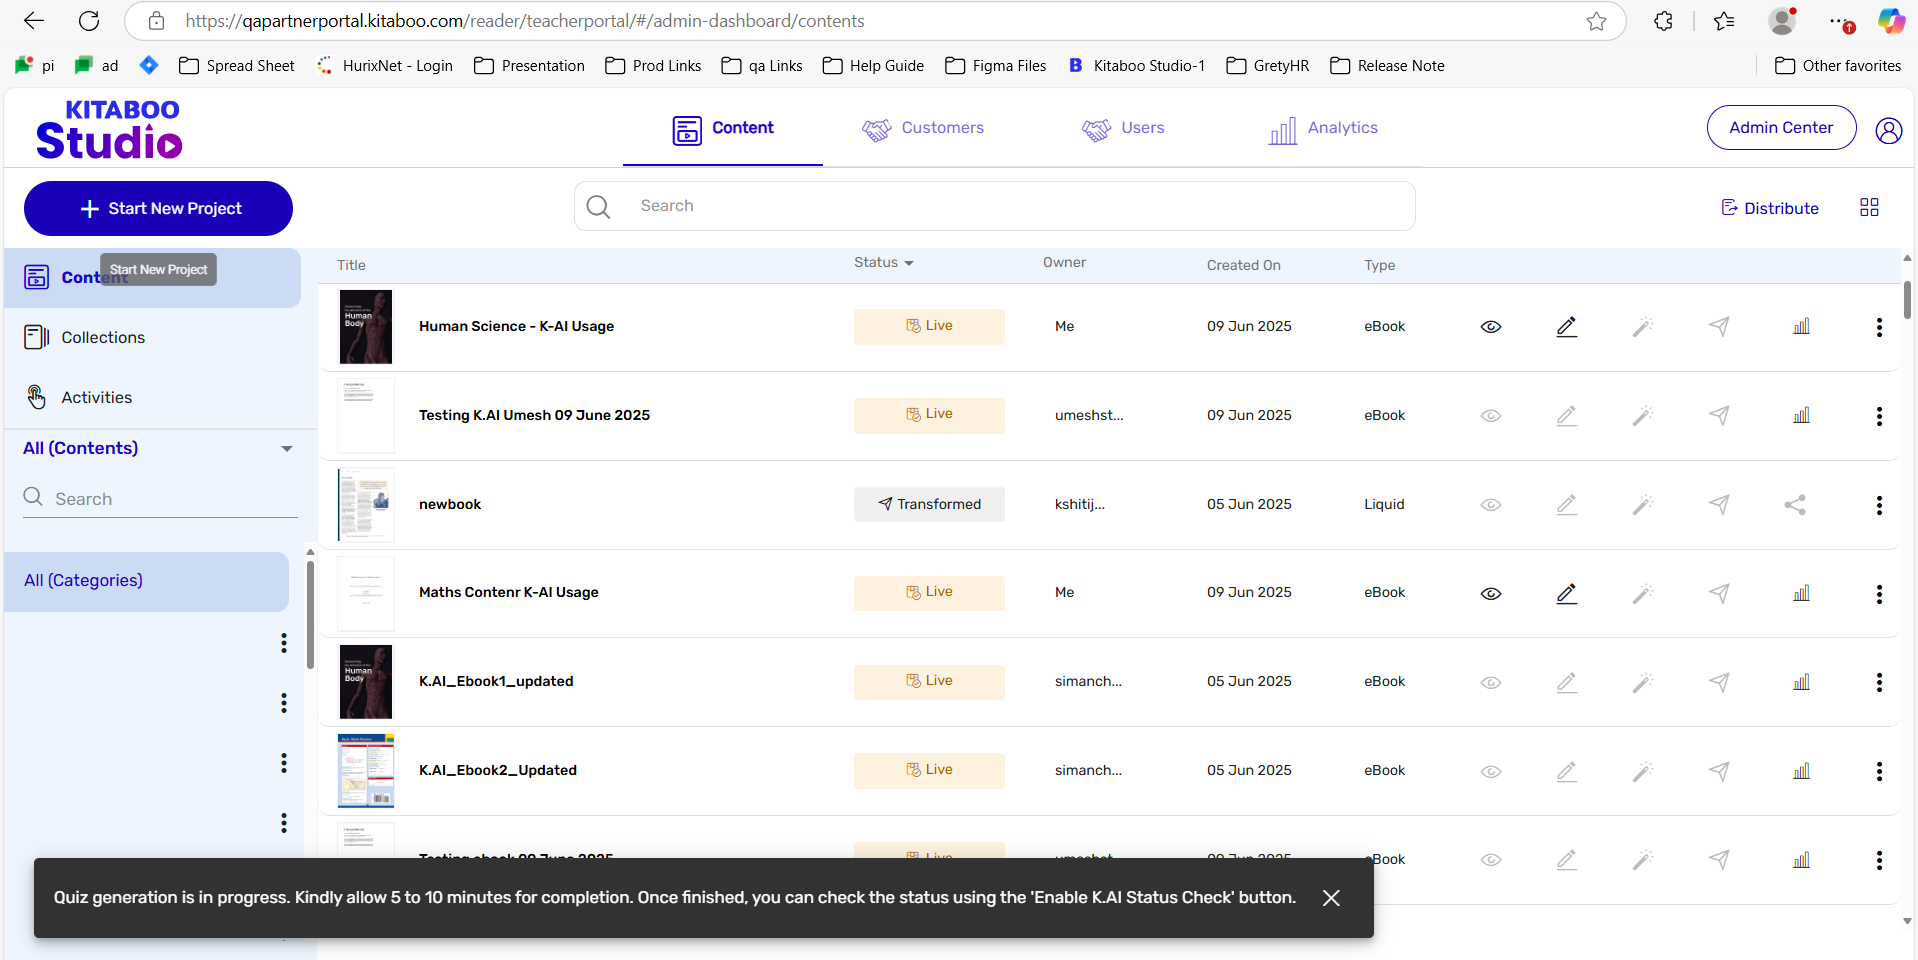
- Now click on the K.AI button to start the process. It takes approximately 5–10 minutes, as indicated on the UI, so that the client is aware. Please refer to the screenshot below.
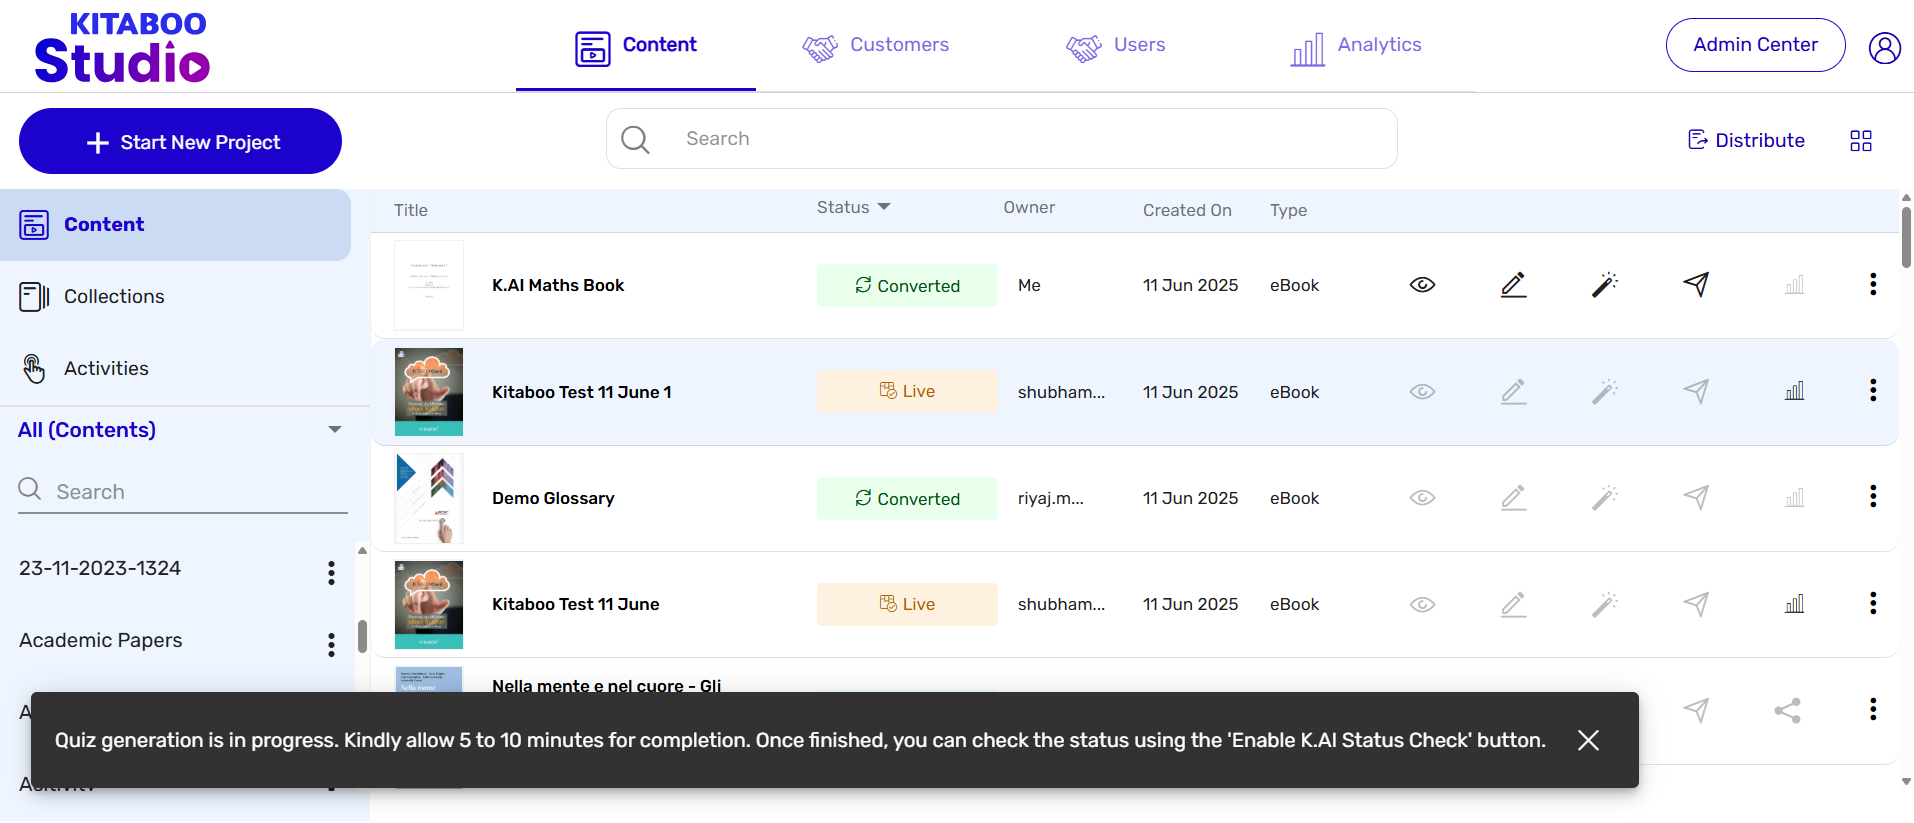
- While the process is ongoing, you can check the status by clicking the Enable K.AI Status Check button, available under the More option.
If the process is still running, the UI will display a message indicating that the request is still being processed. Kindly wait.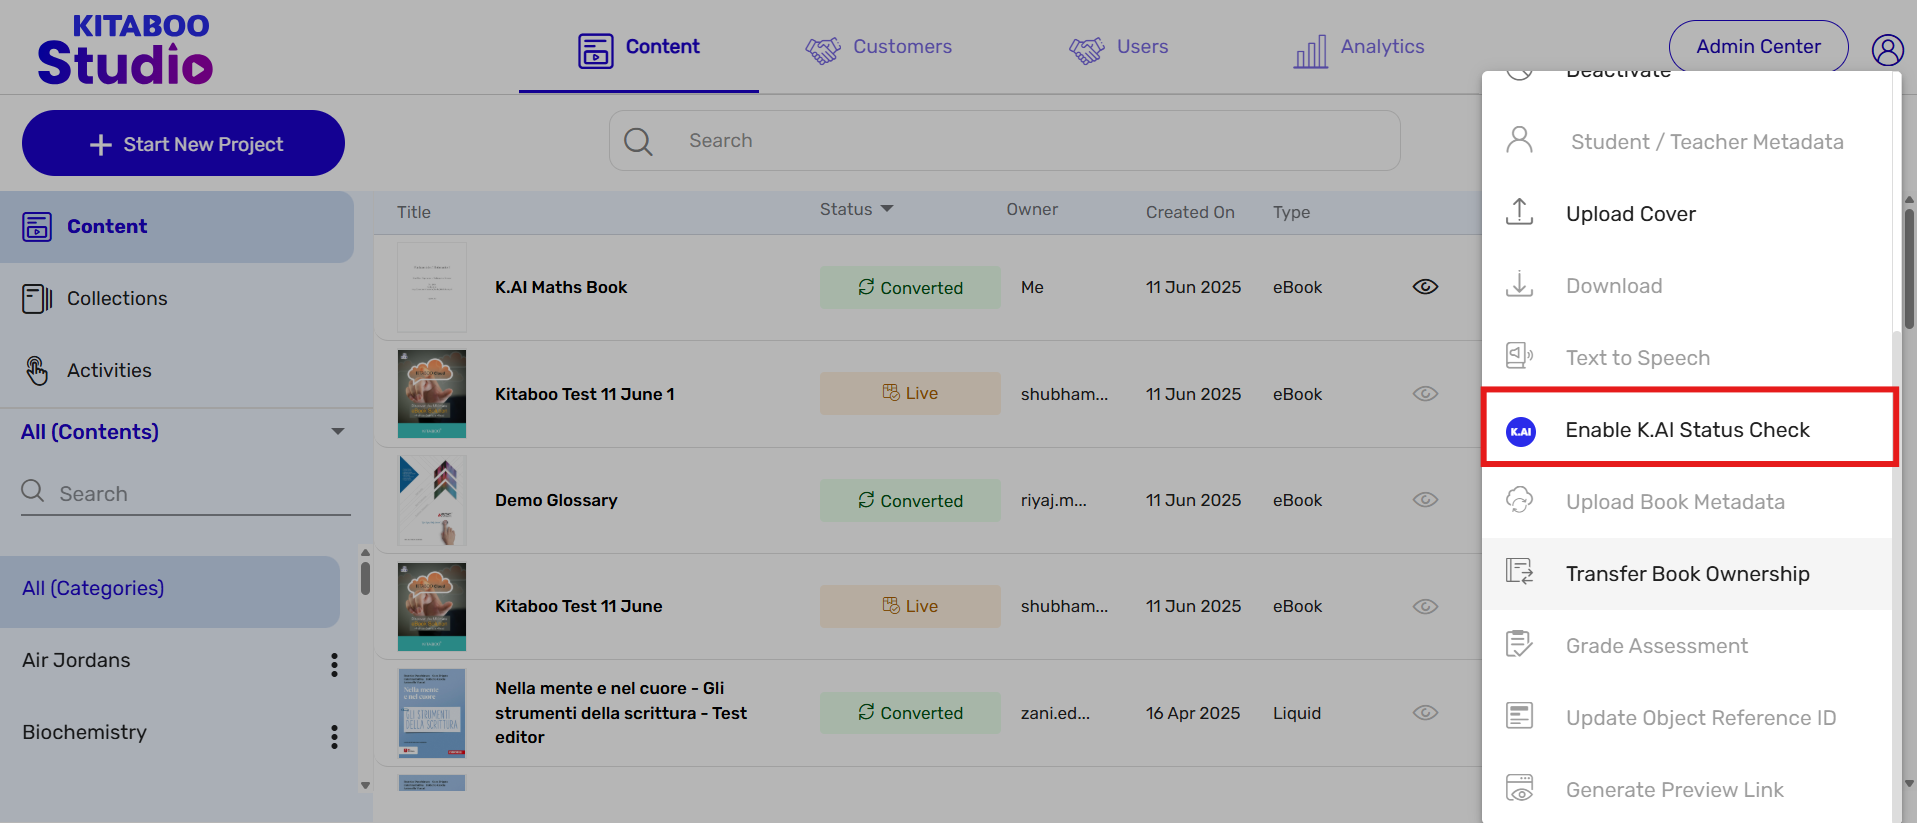
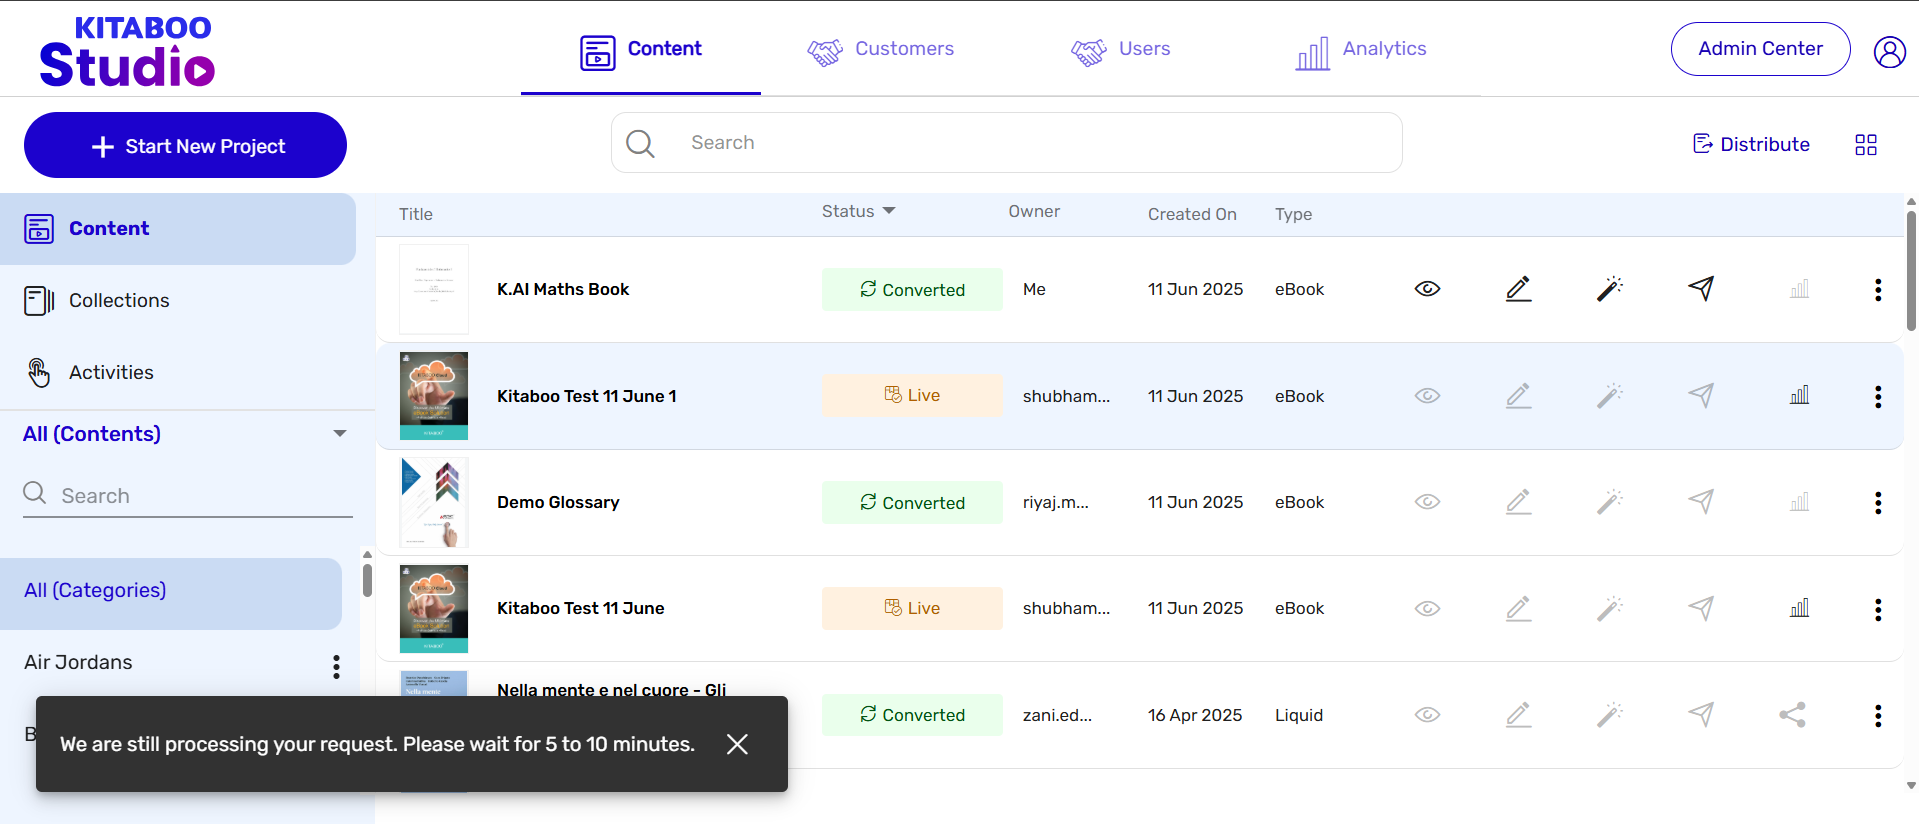
- Once the process is completed, clicking on the Enable K.AI Status Check button again will display the completion status on the UI.
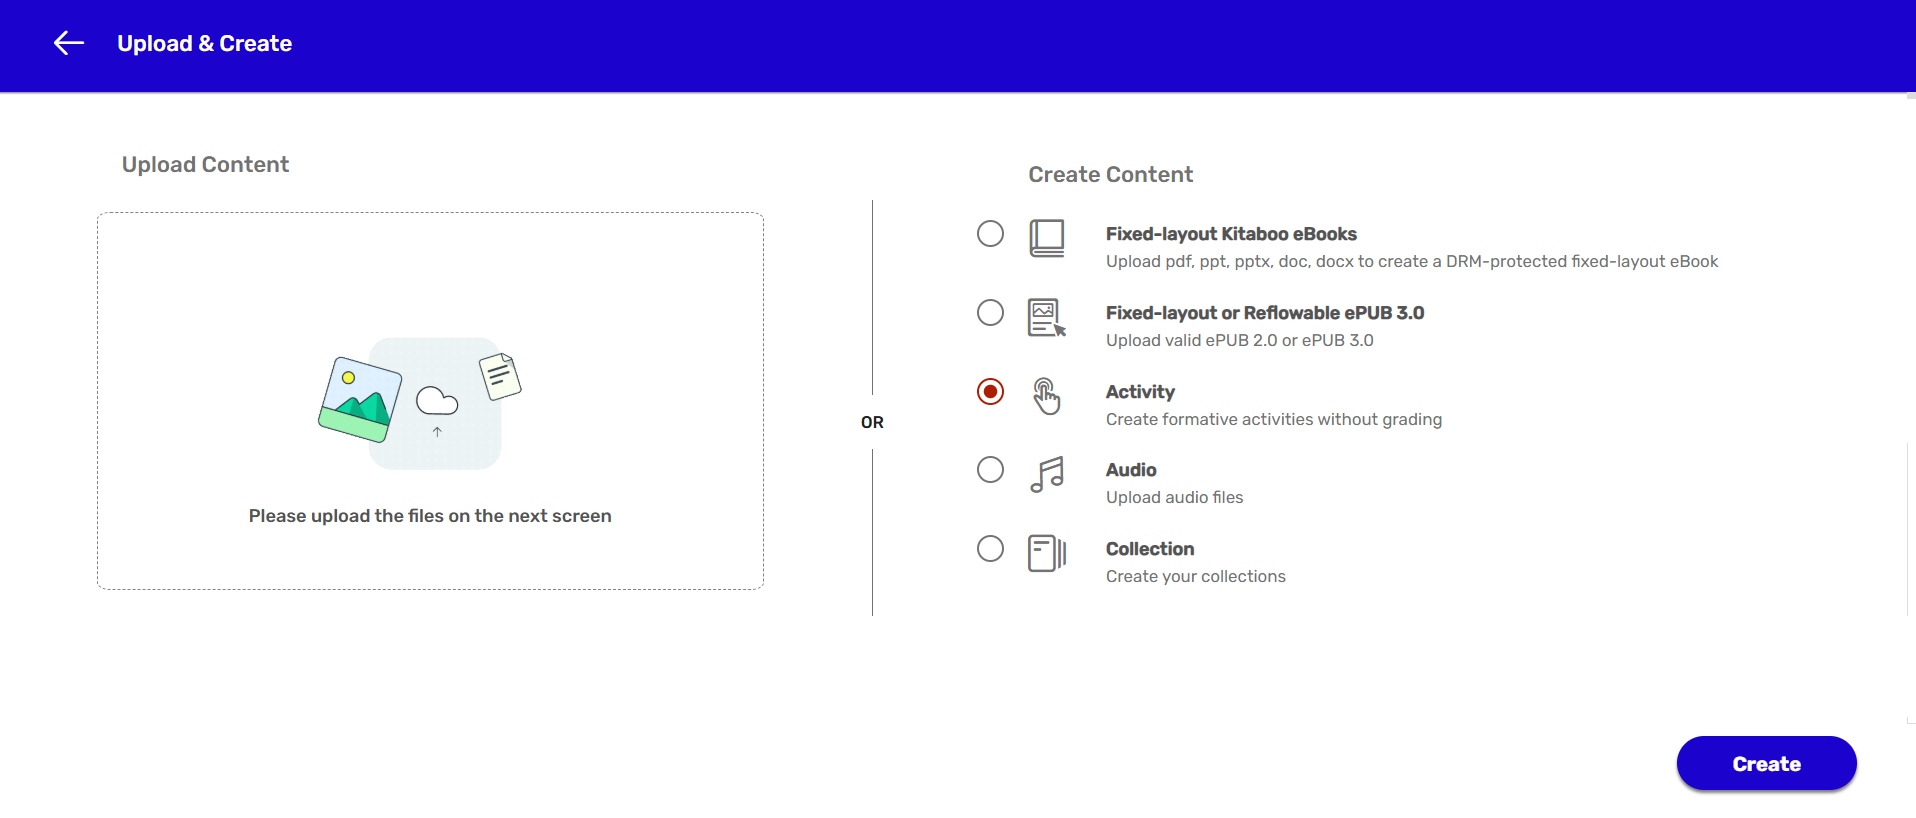
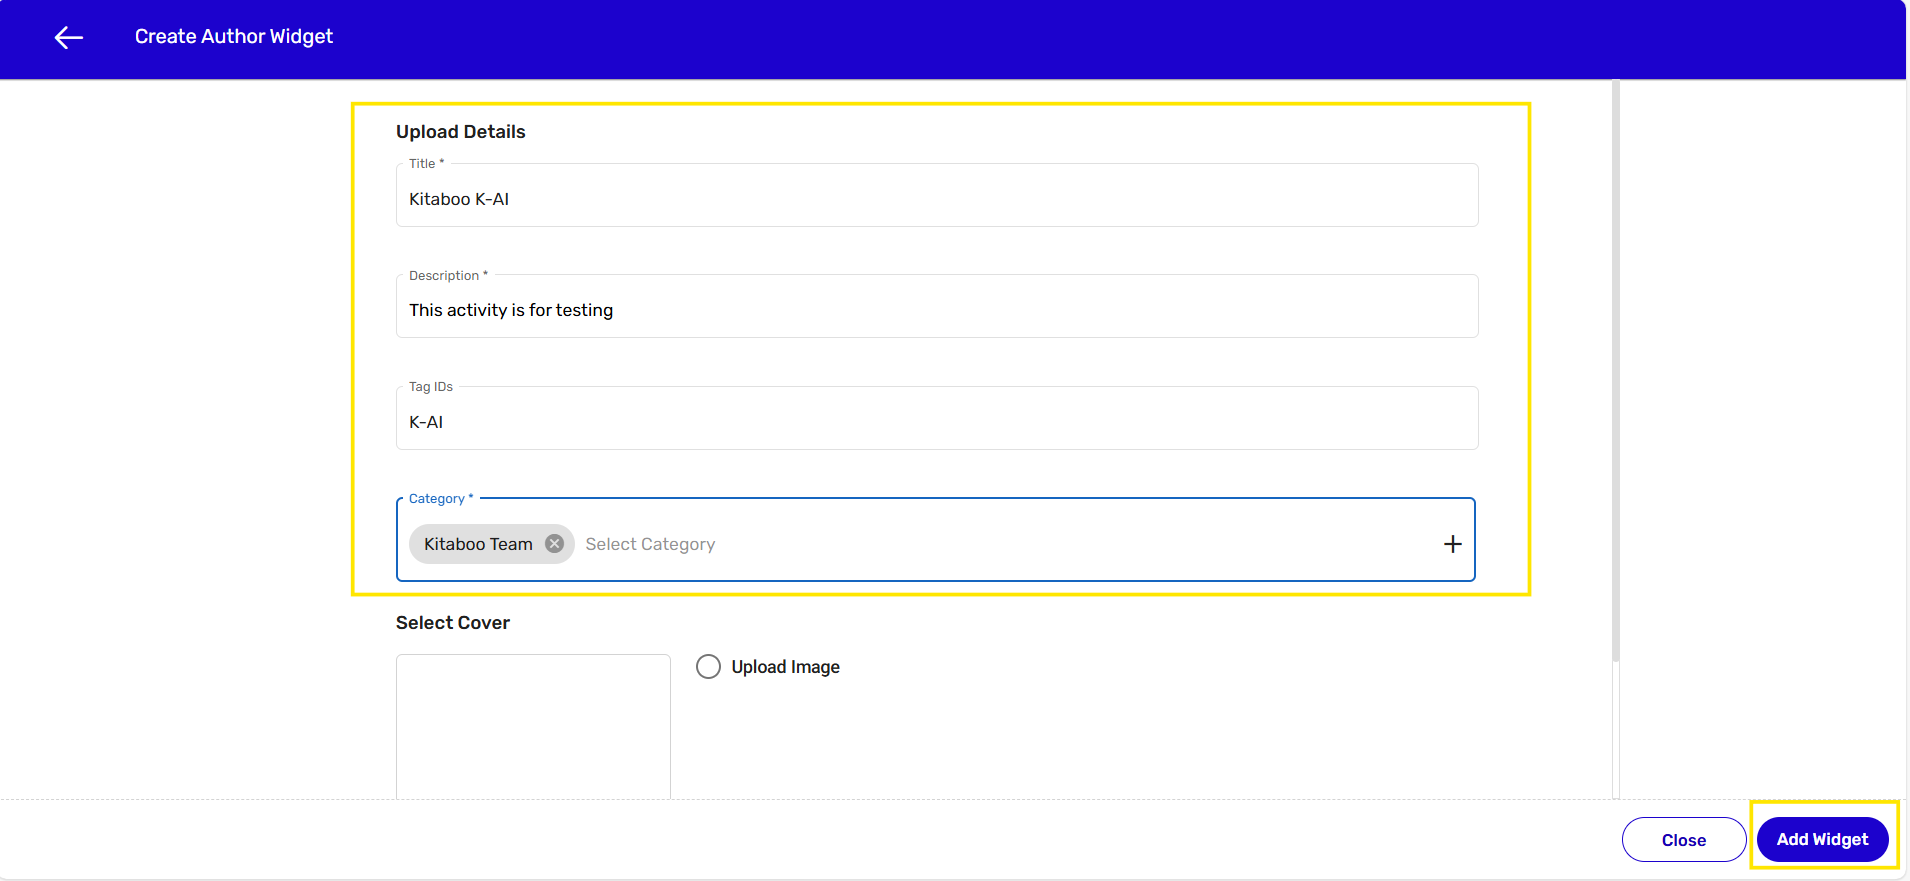
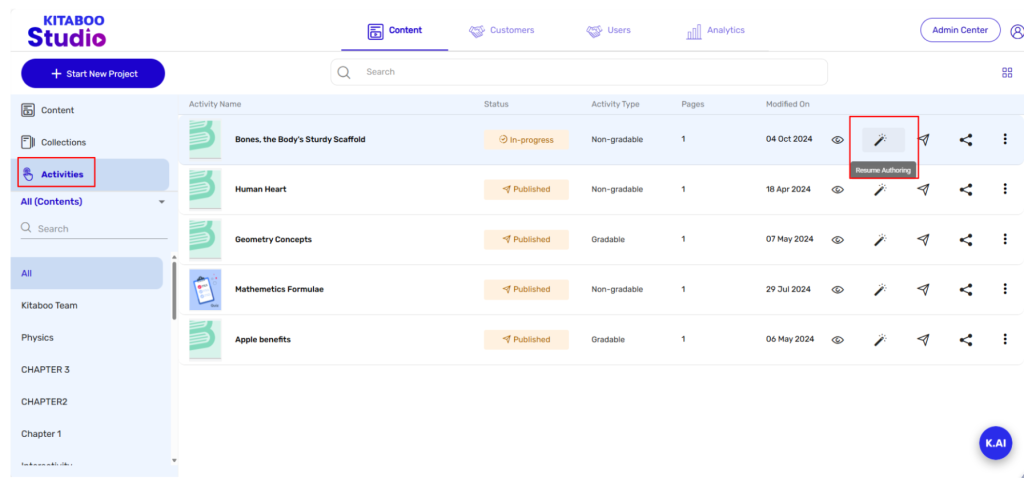
- After successfully enabling K.AI in the converted state, you can validate it by creating an activity. To do so, click on Start New Project, select the Activity content type, and fill in all the required metadata. After entering the metadata, click on the Add Widget button.
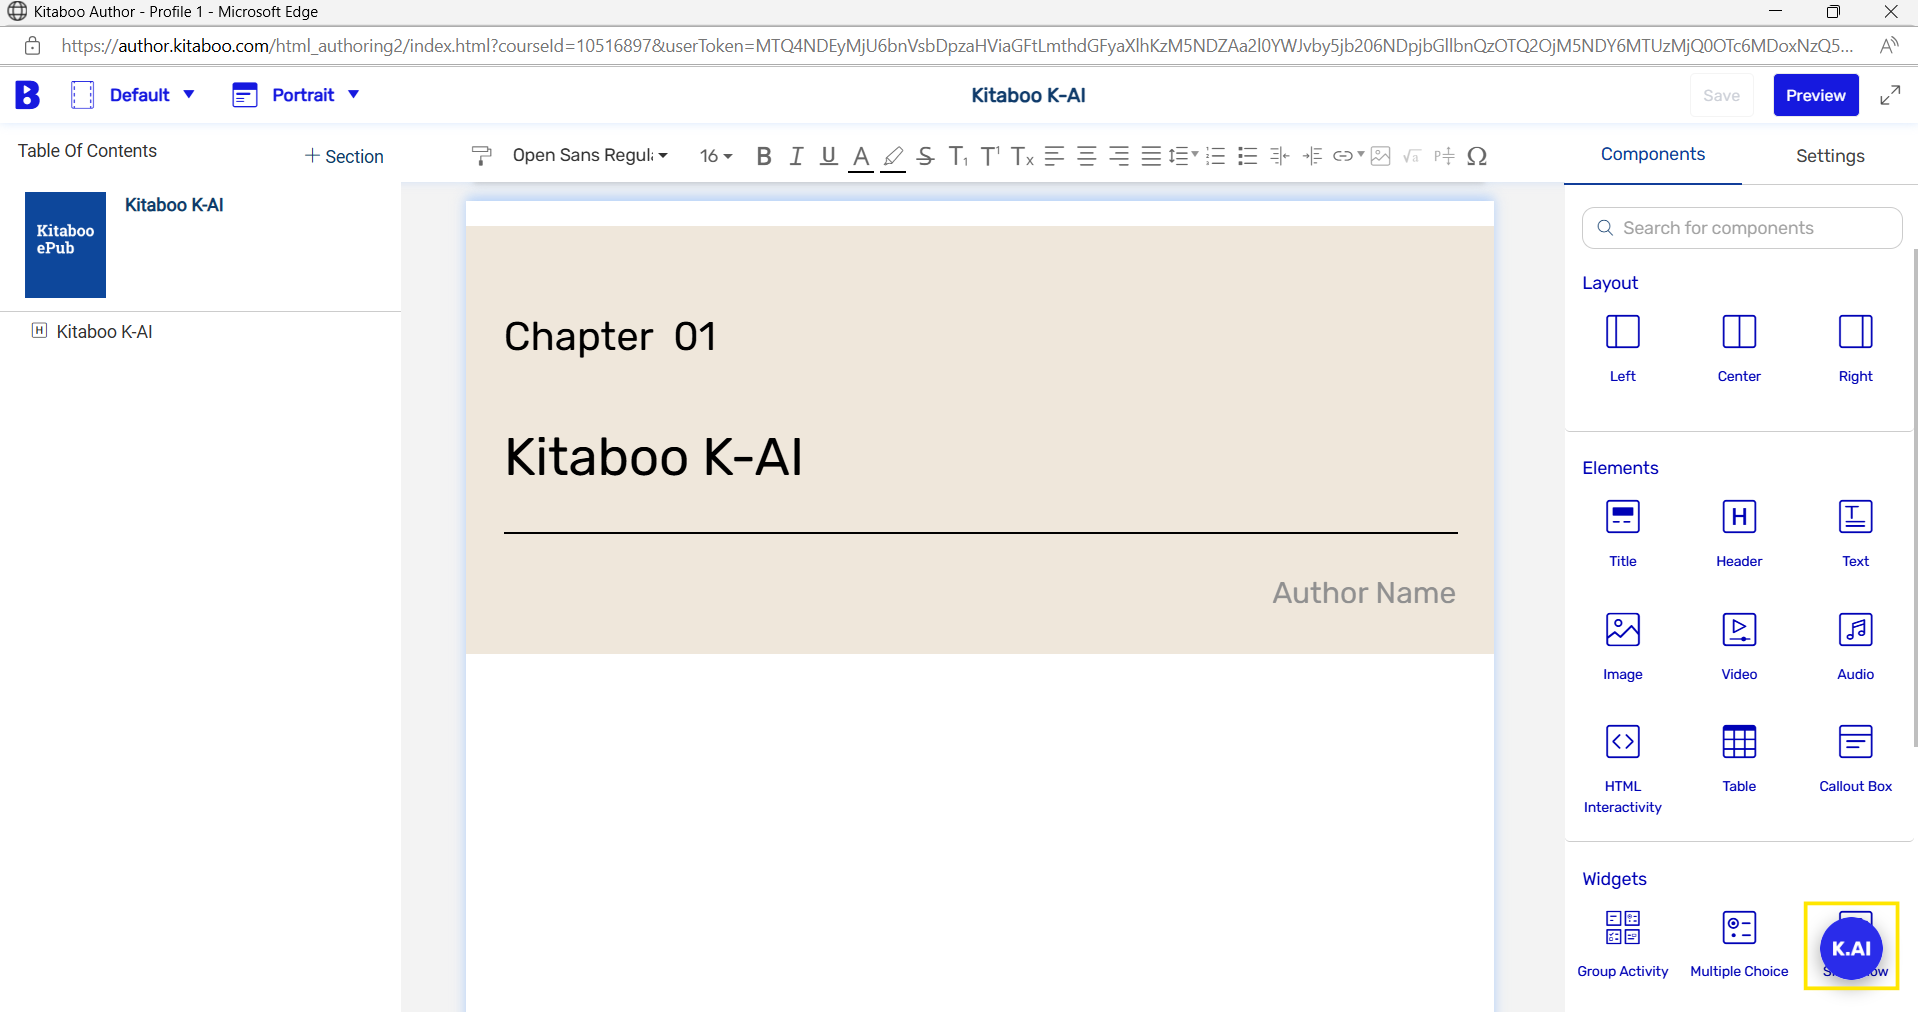
- Once the activity is created, click the Start Authoring button.

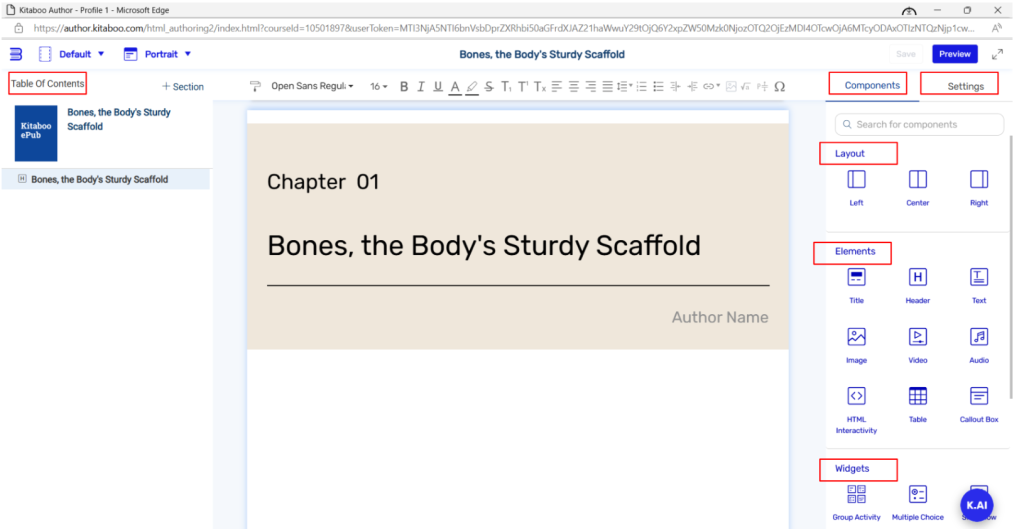
- Upon clicking Start Authoring, the authoring window will open. Inside the window, click on the K.AI button.
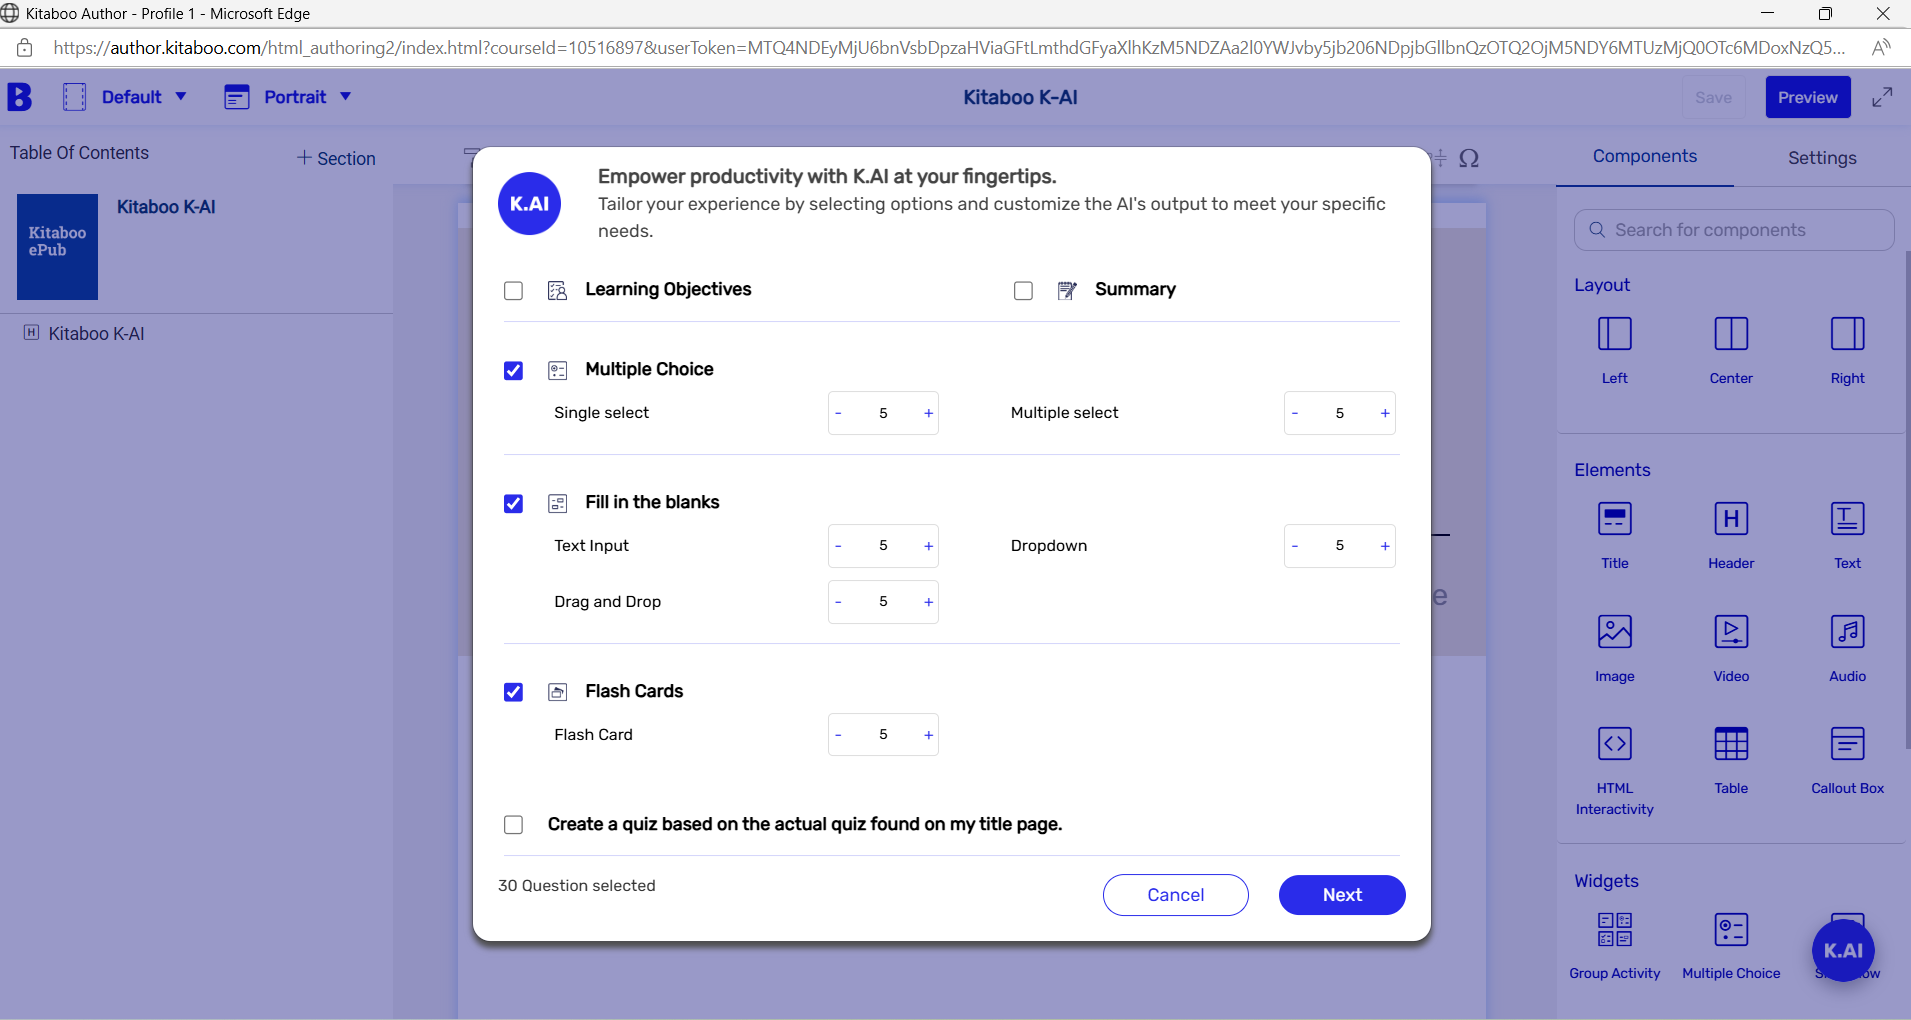
- After clicking the K.AI button, a pop-up will appear asking what type of questions you wish to generate — such as Objectives, Summary, MCQs, FIBs, or Flashcards. Click on the Next button.
Another pop-up will then appear, prompting you to select the grade for which the quiz should be generated and the desired level of complexity.
Click Next to proceed.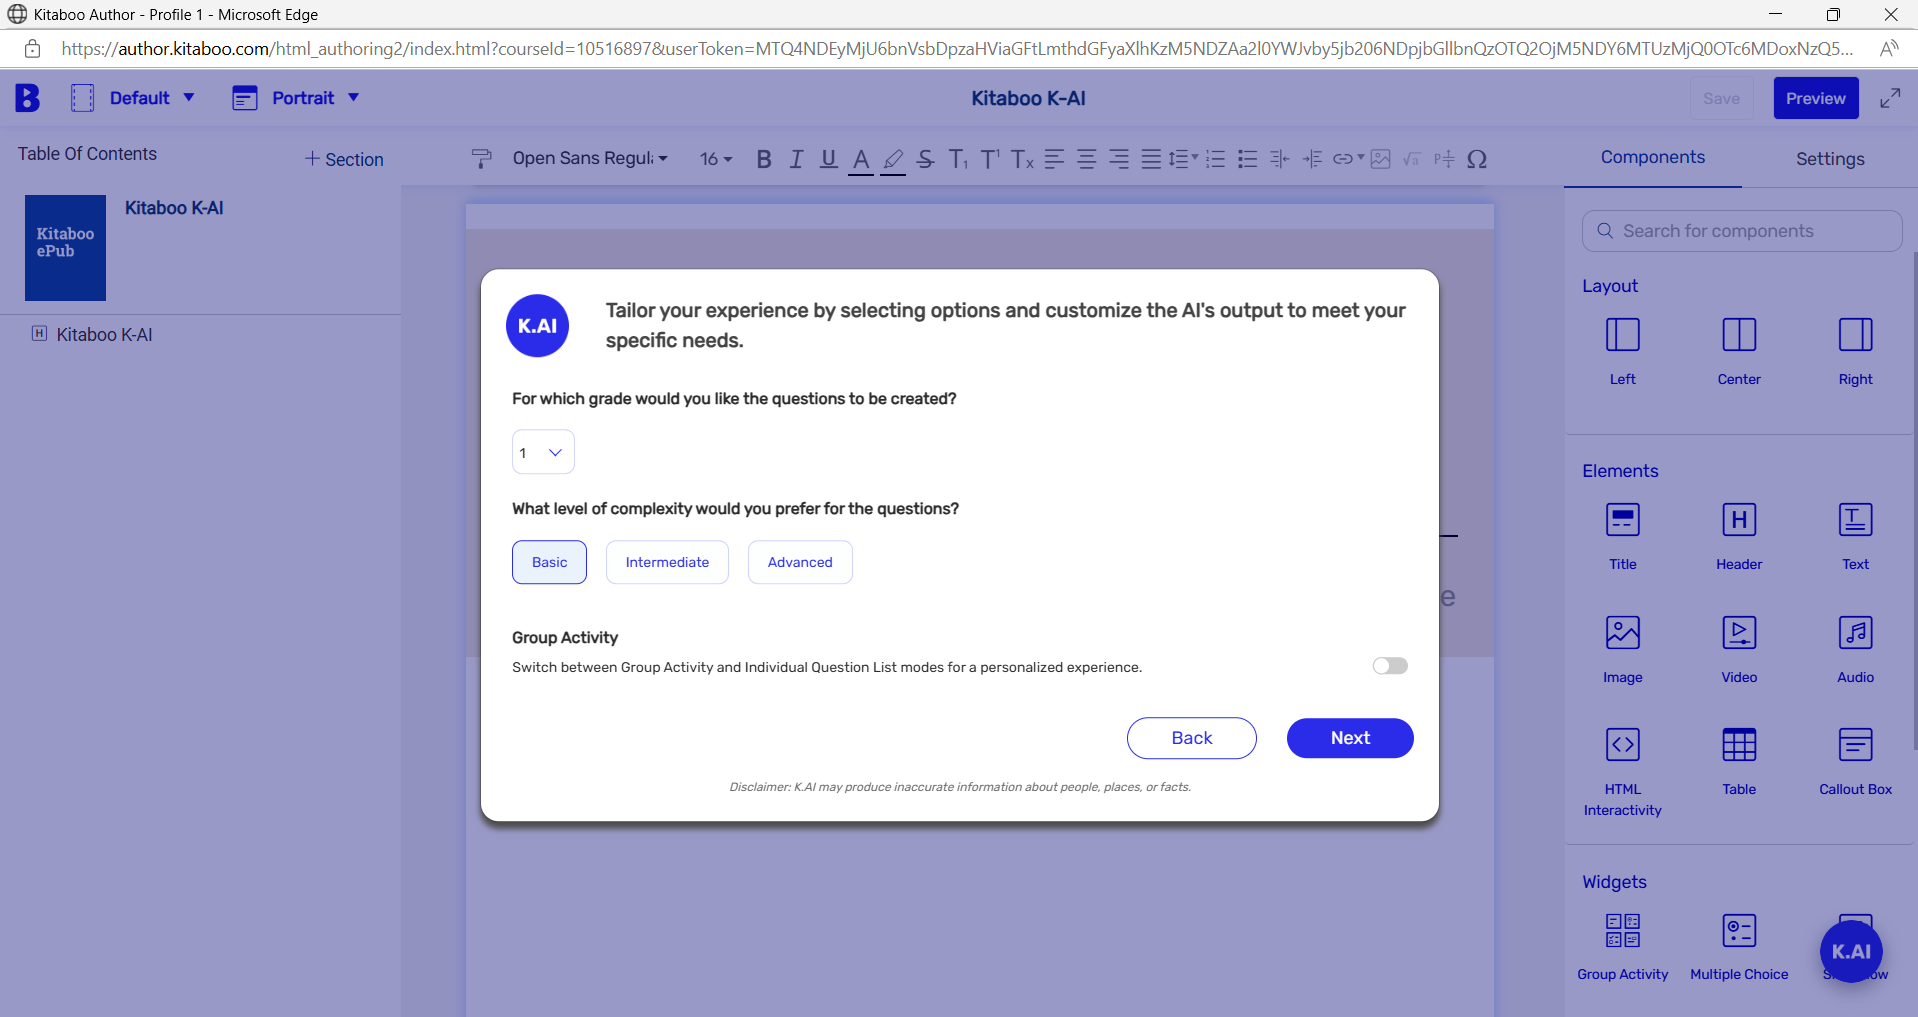
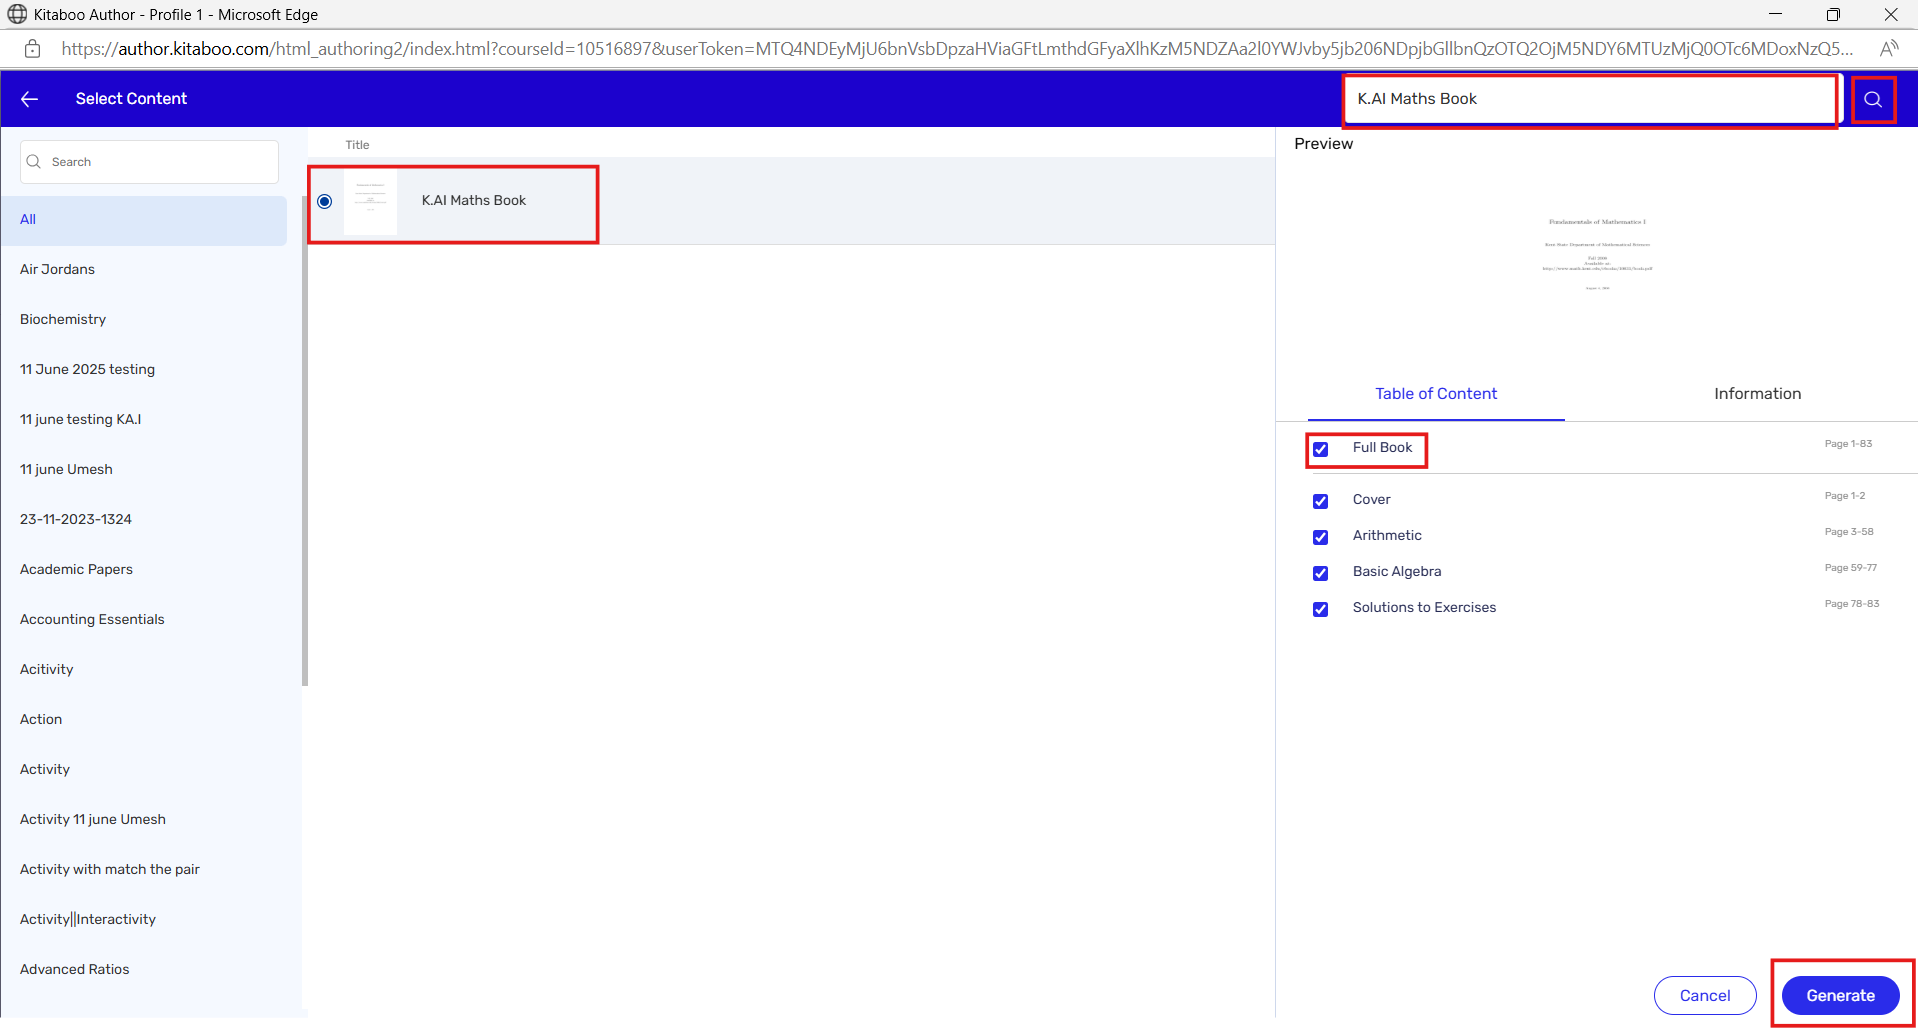
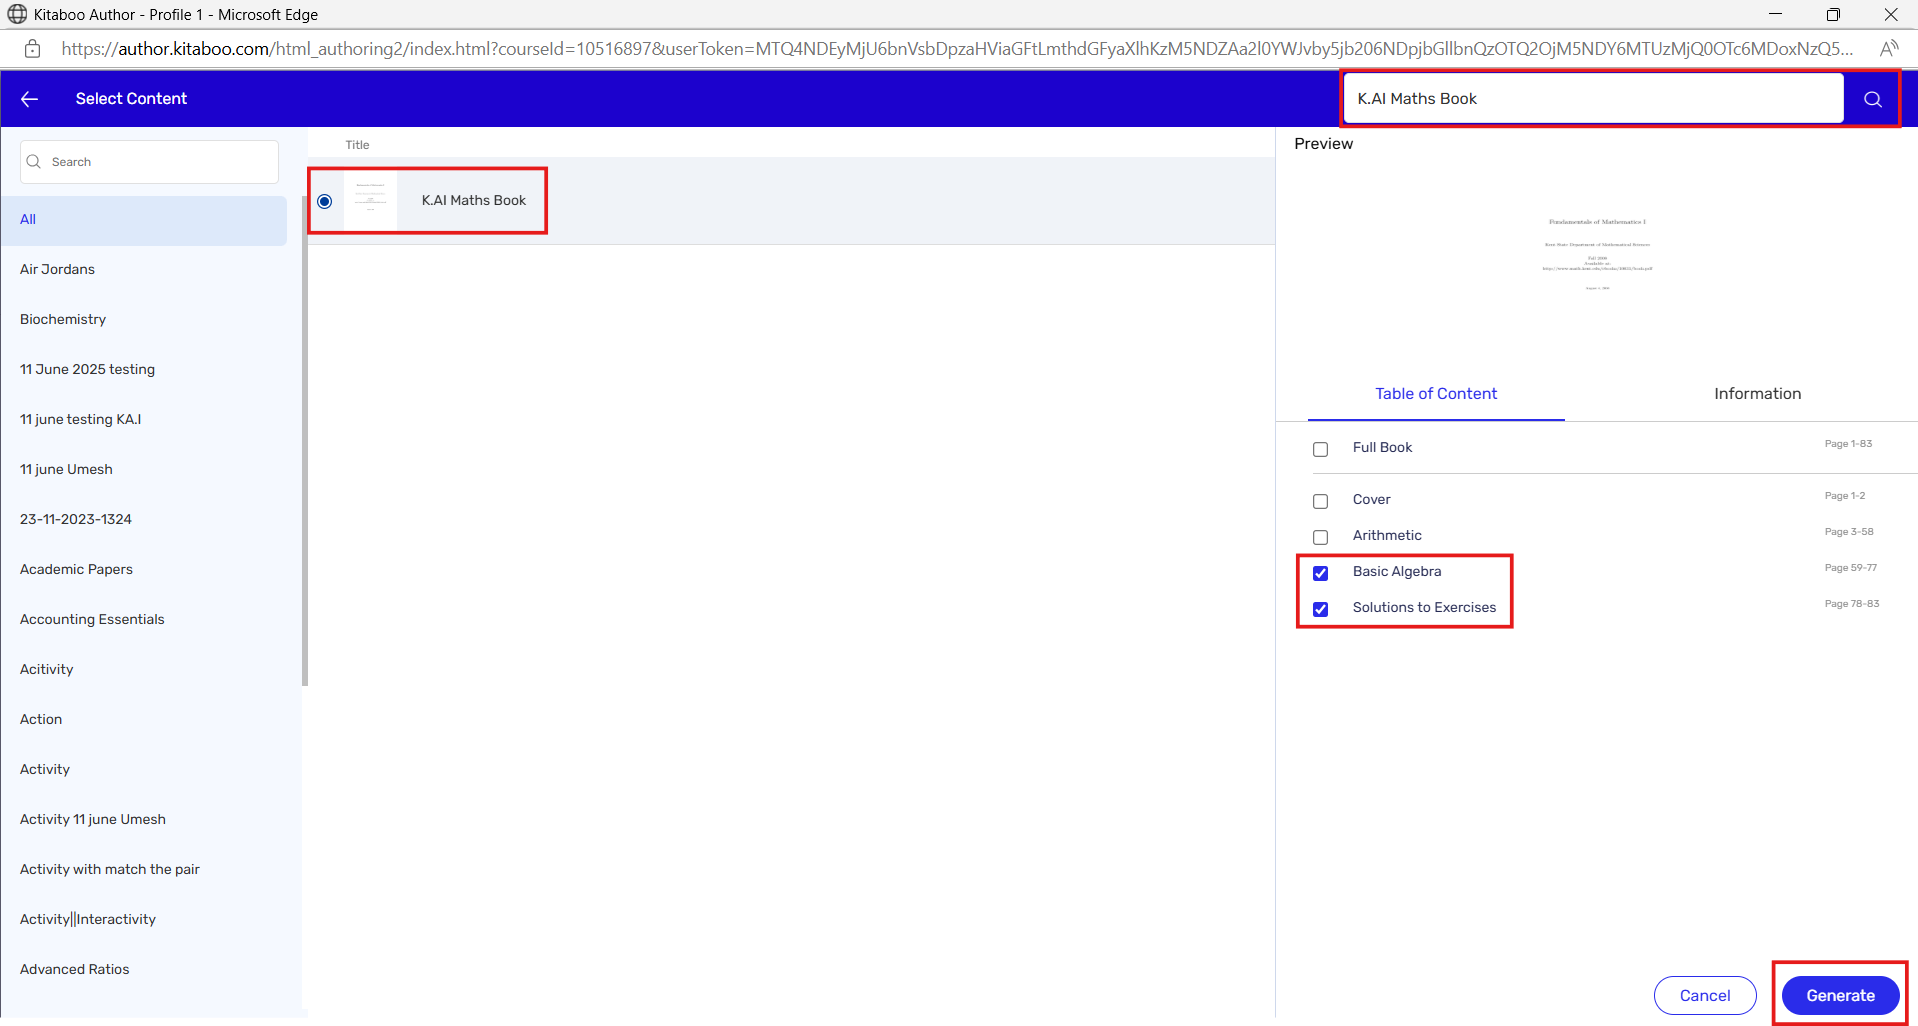
- A list of all available content will now be displayed. You can search for your book using the search option. Then, select whether you want to enable K-AI for the entire book or a specific chapter. After making your selection, click the “Generate” button.
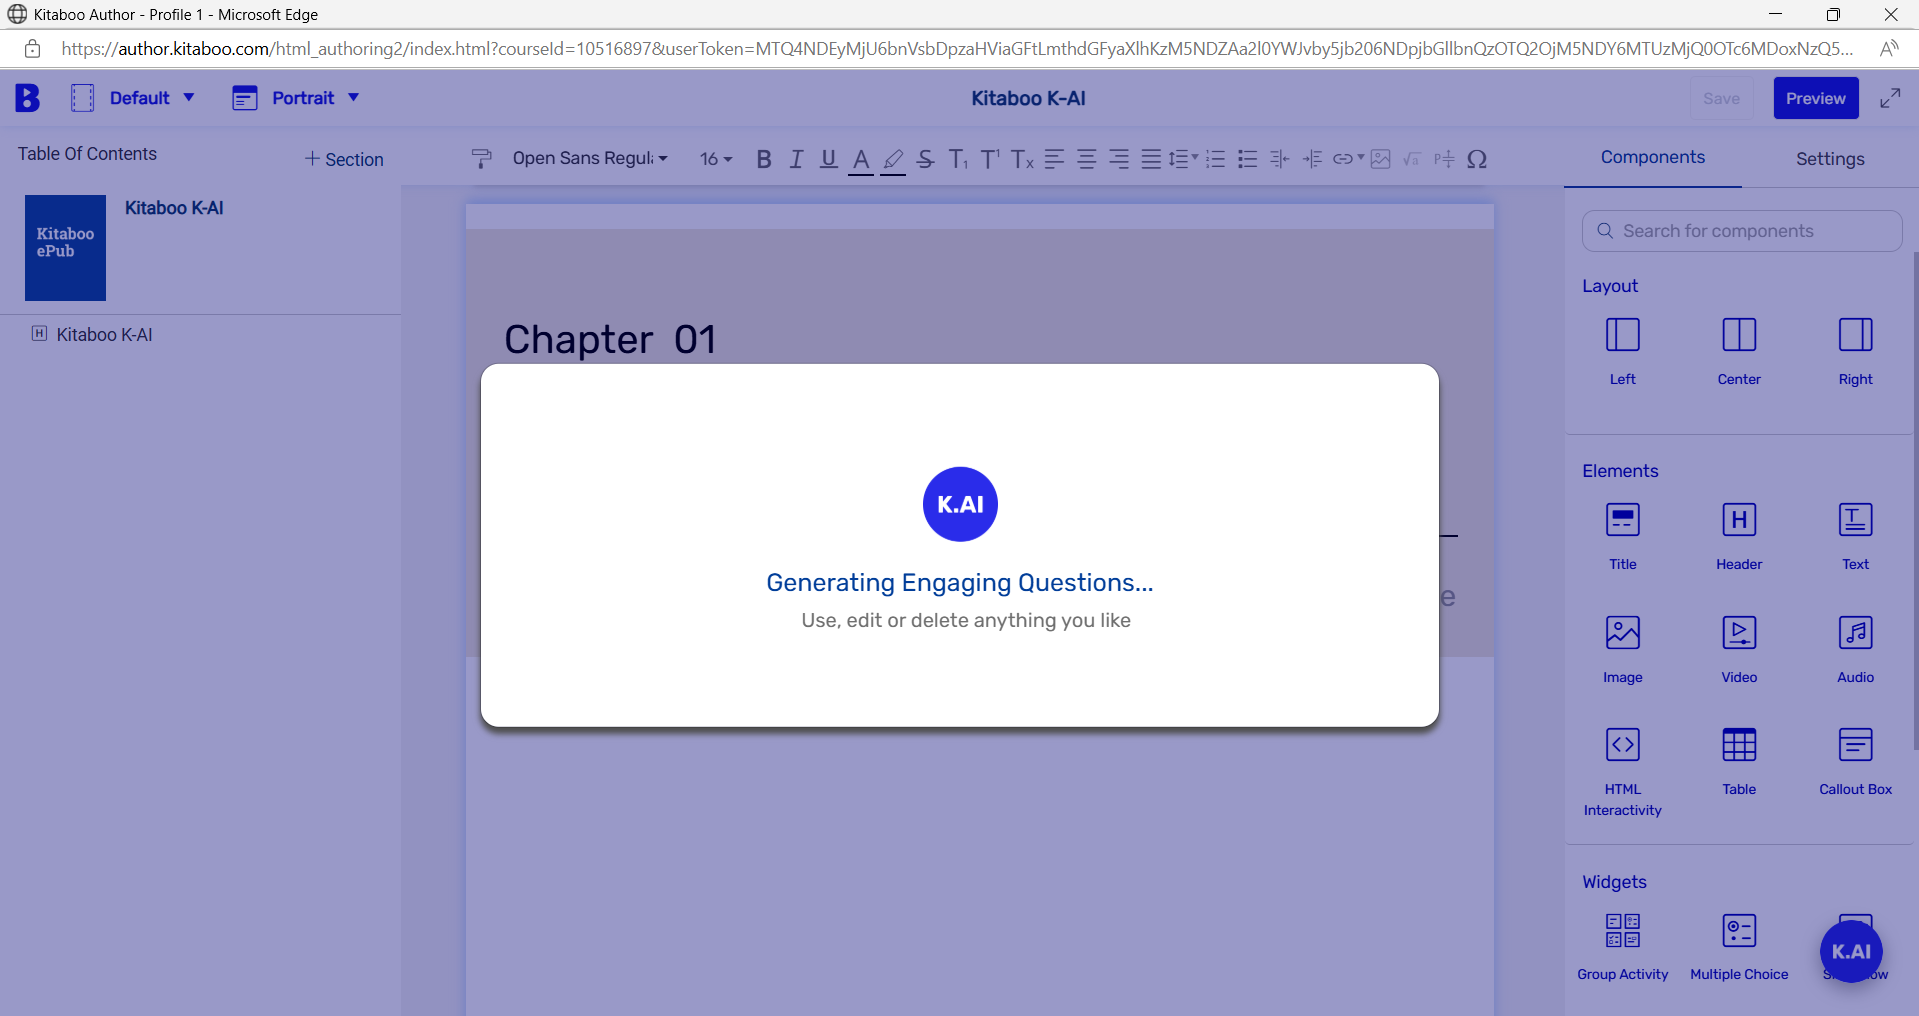
- After clicking on “Generate,” a pop-up will appear indicating that the generation is in progress.
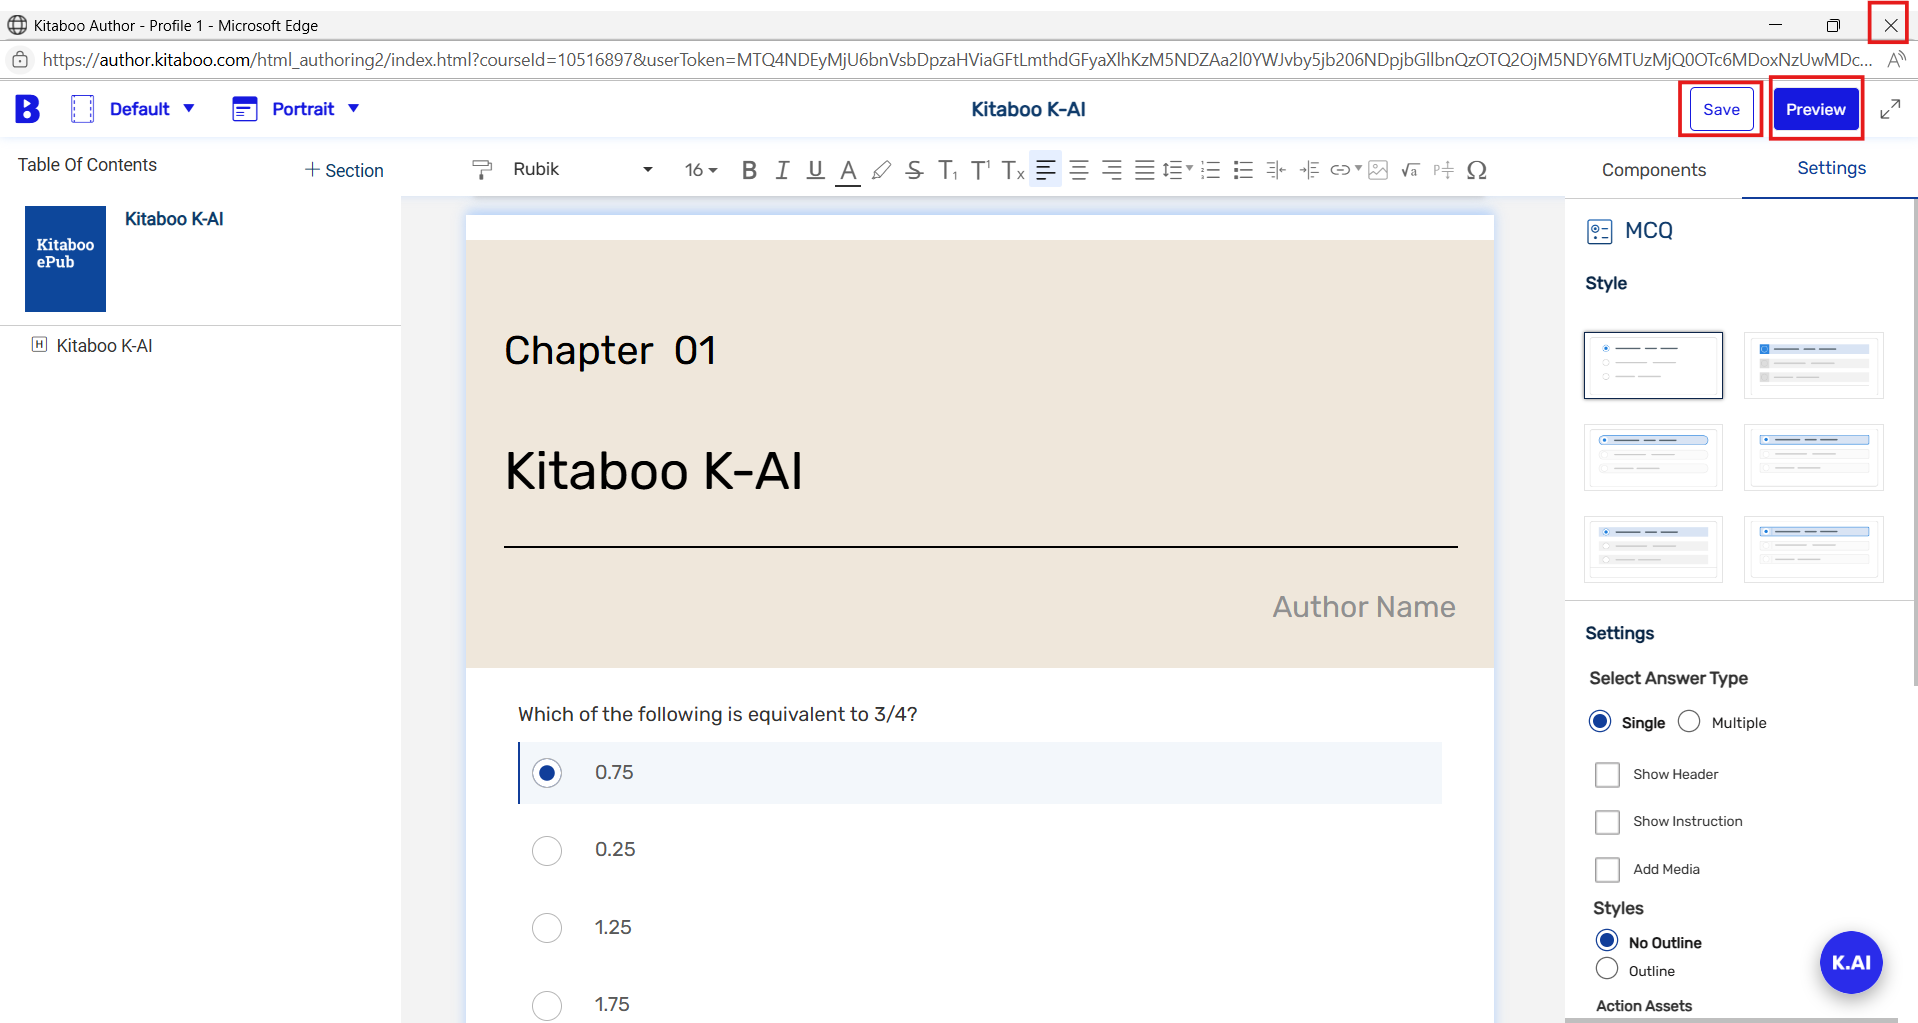
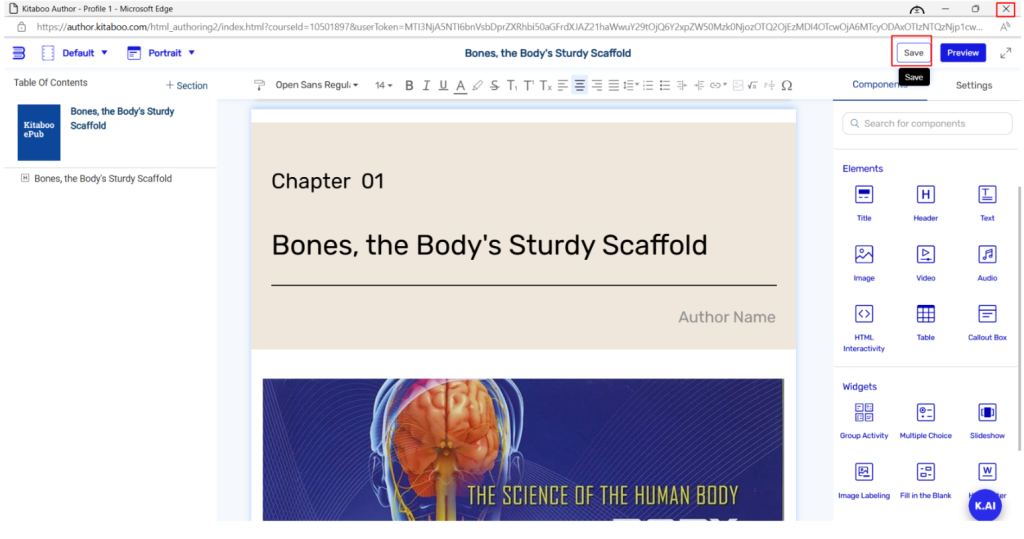
- The generation is now complete, and you can view the questions based on your selections, such as MCQ, FIB, etc. Scroll down to review all the generated questions.

- Now you can click on “Save” and then preview how it will appear on the reader. You can also attempt the questions and check whether the provided answers are correct.
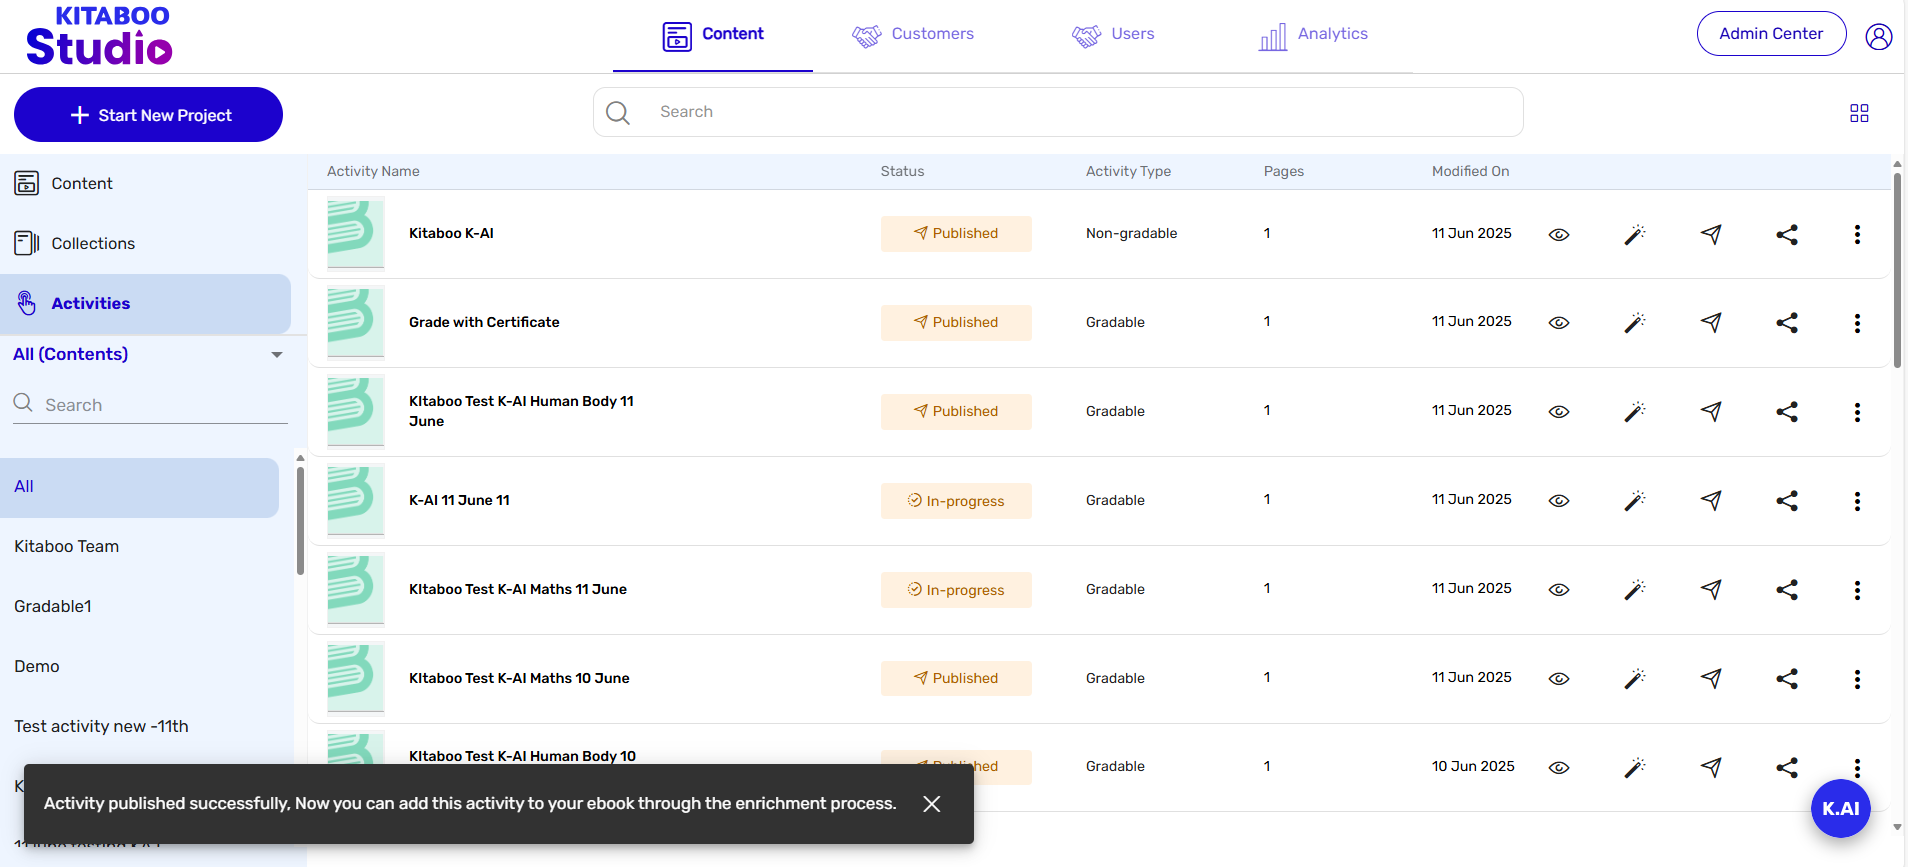
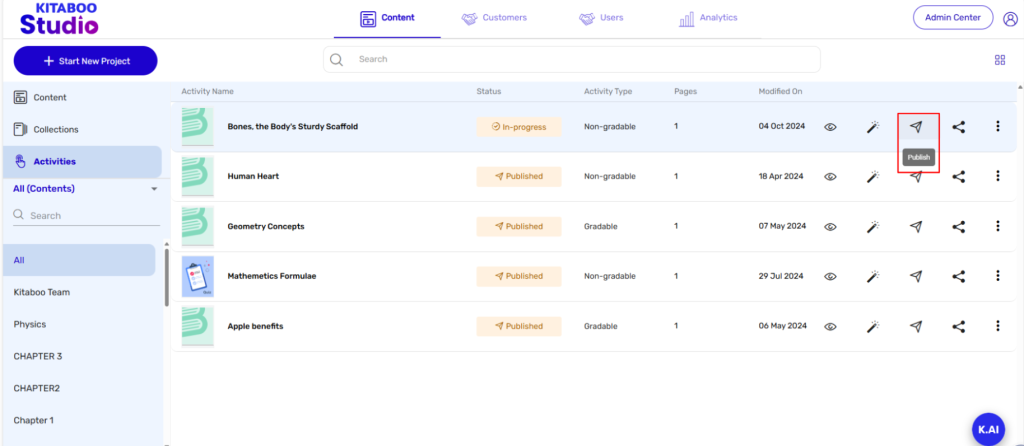
- After saving, you can close the window. Then, click on the “Publish” button to publish the activity. Within a few seconds, the activity will be published and will be available for use if you want to add it to any eBook using the Enrichment Tool.

In this way, the client can generate content in the Converted state. However, please ensure that K-AI is re-enabled after the content is archived/live. If K-AI is enabled in the Converted state but not re-enabled after archiving, it will not function properly.
In the Converted state, K-AI is useful only for the Author of the book—not for end users. For end users, K-AI must be enabled again once the book goes live.


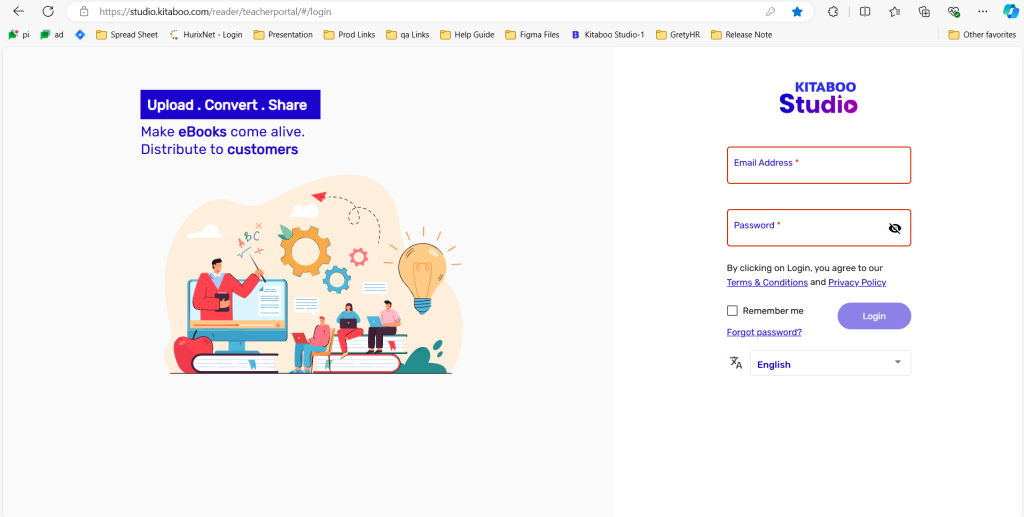


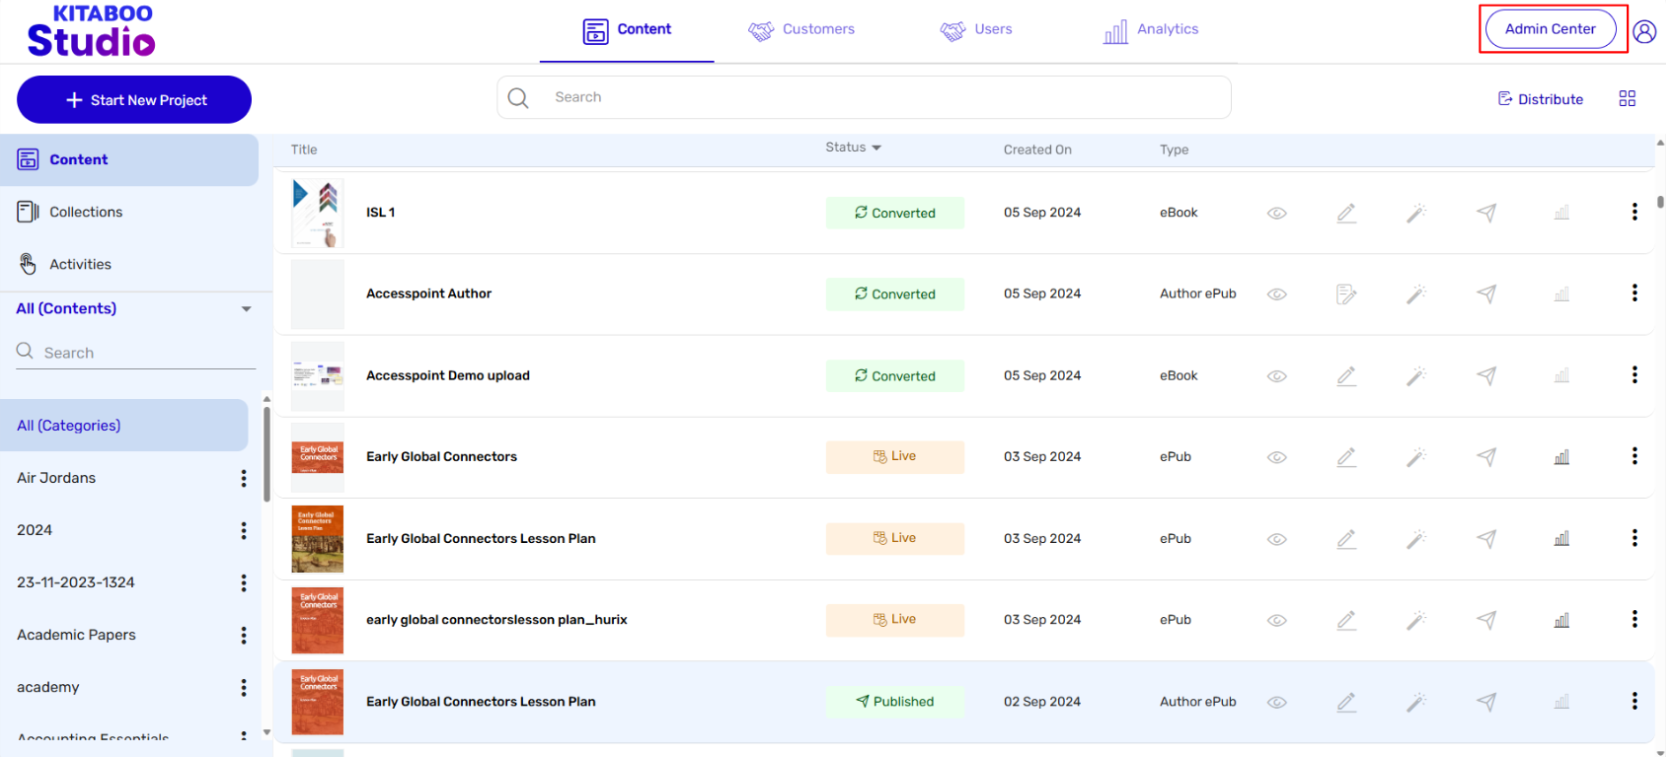
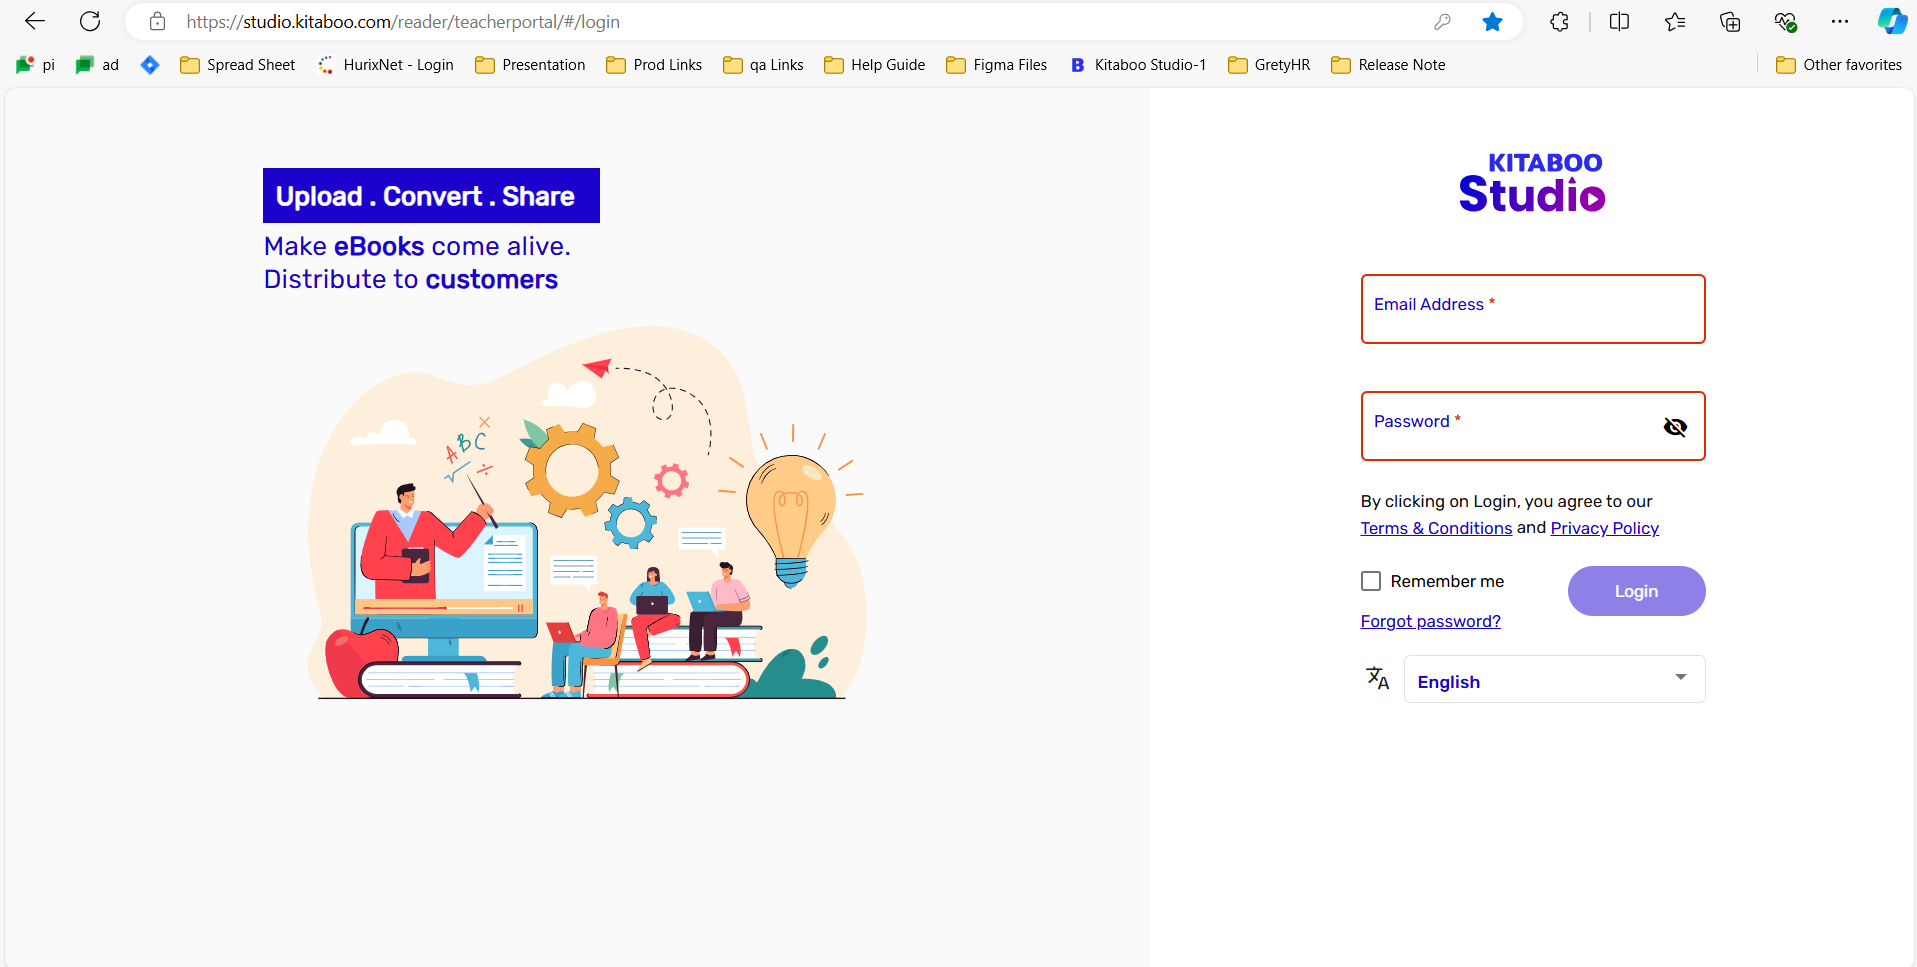
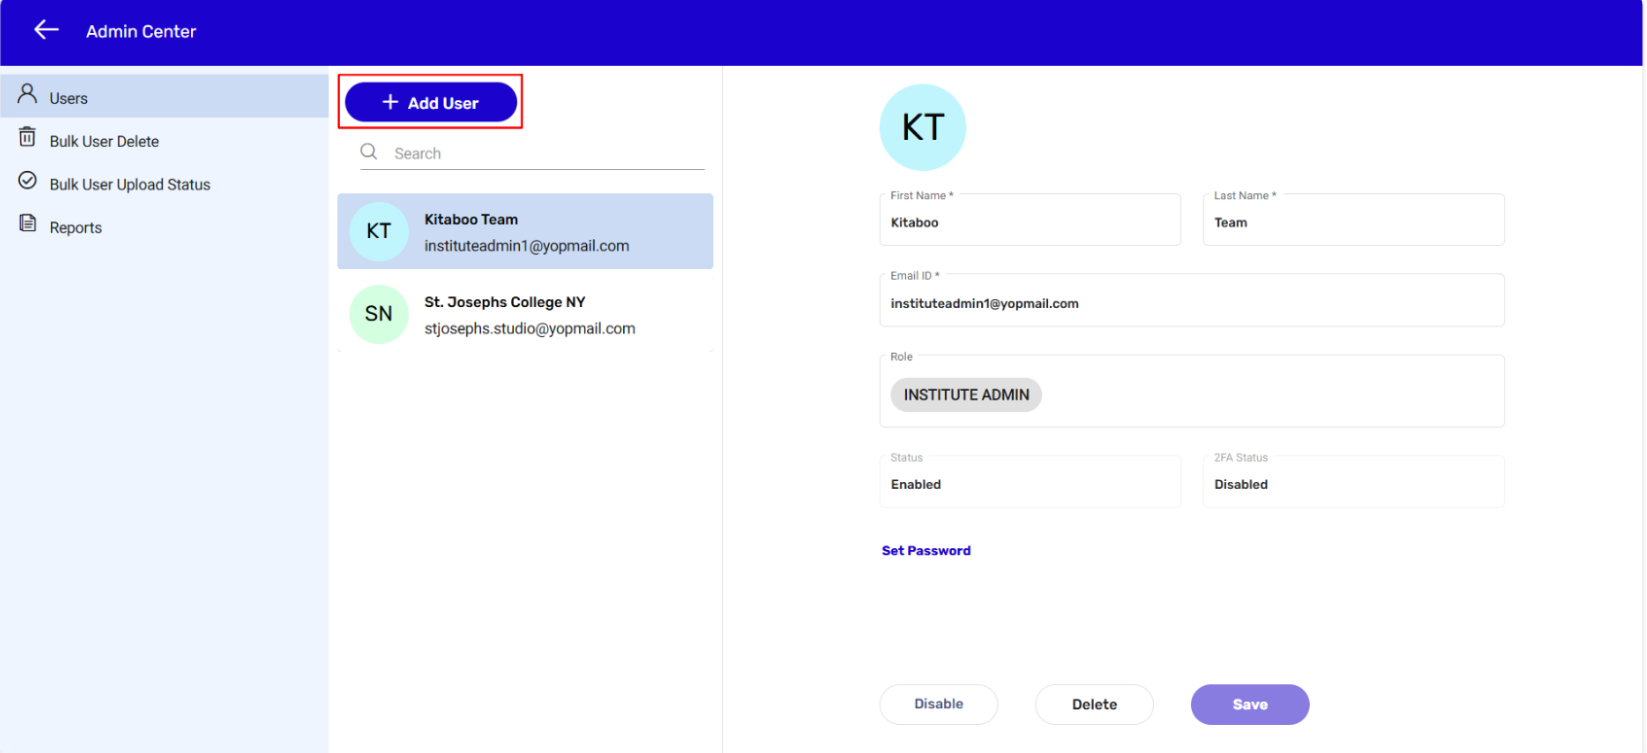
- Navigate to the Kitaboo Studio Reader login page and enter your login credentials.

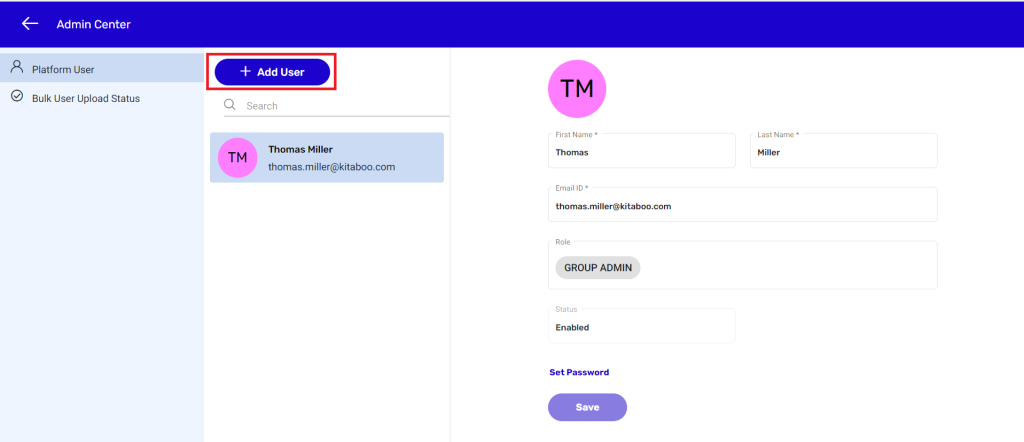
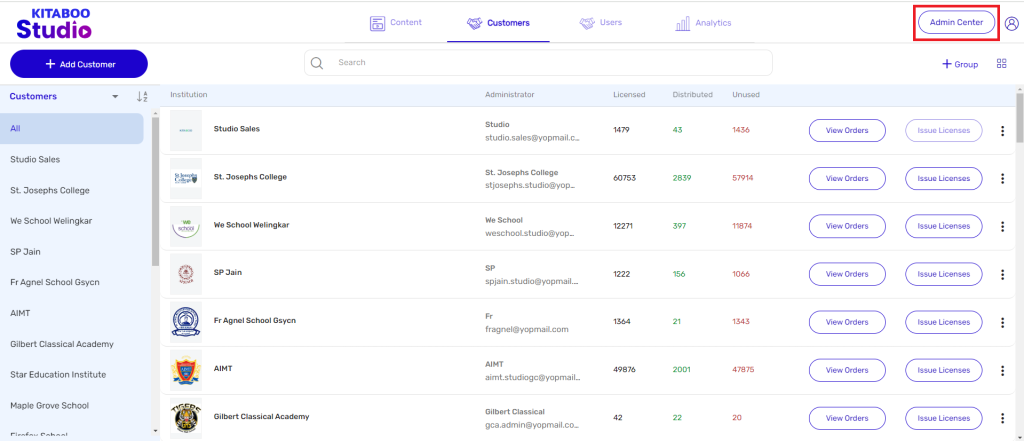
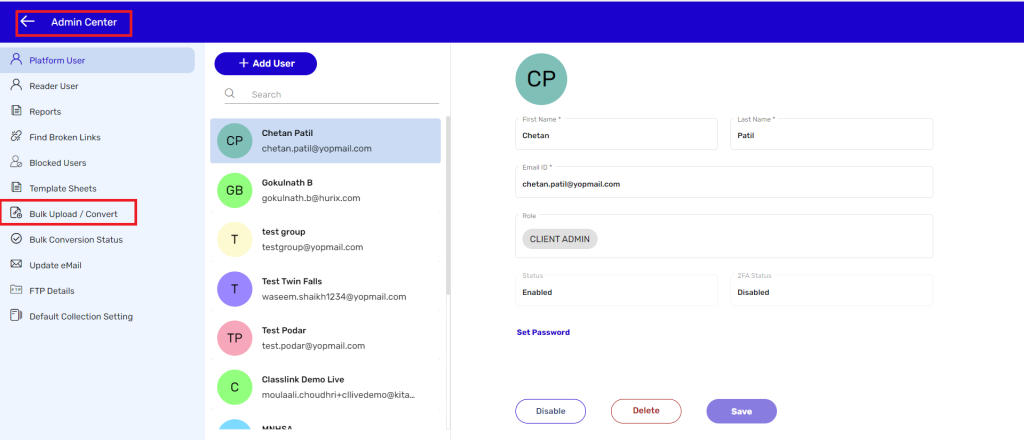
- Click on the Admin Center button on the top right corner of the screen.
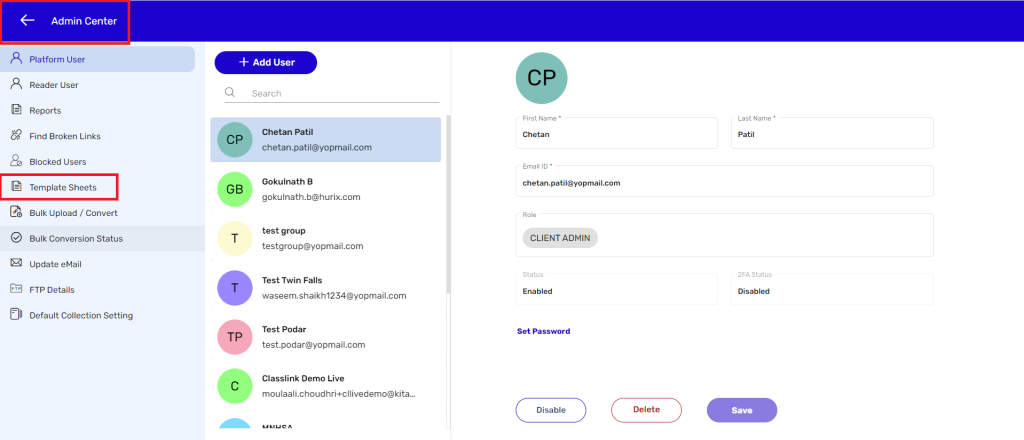
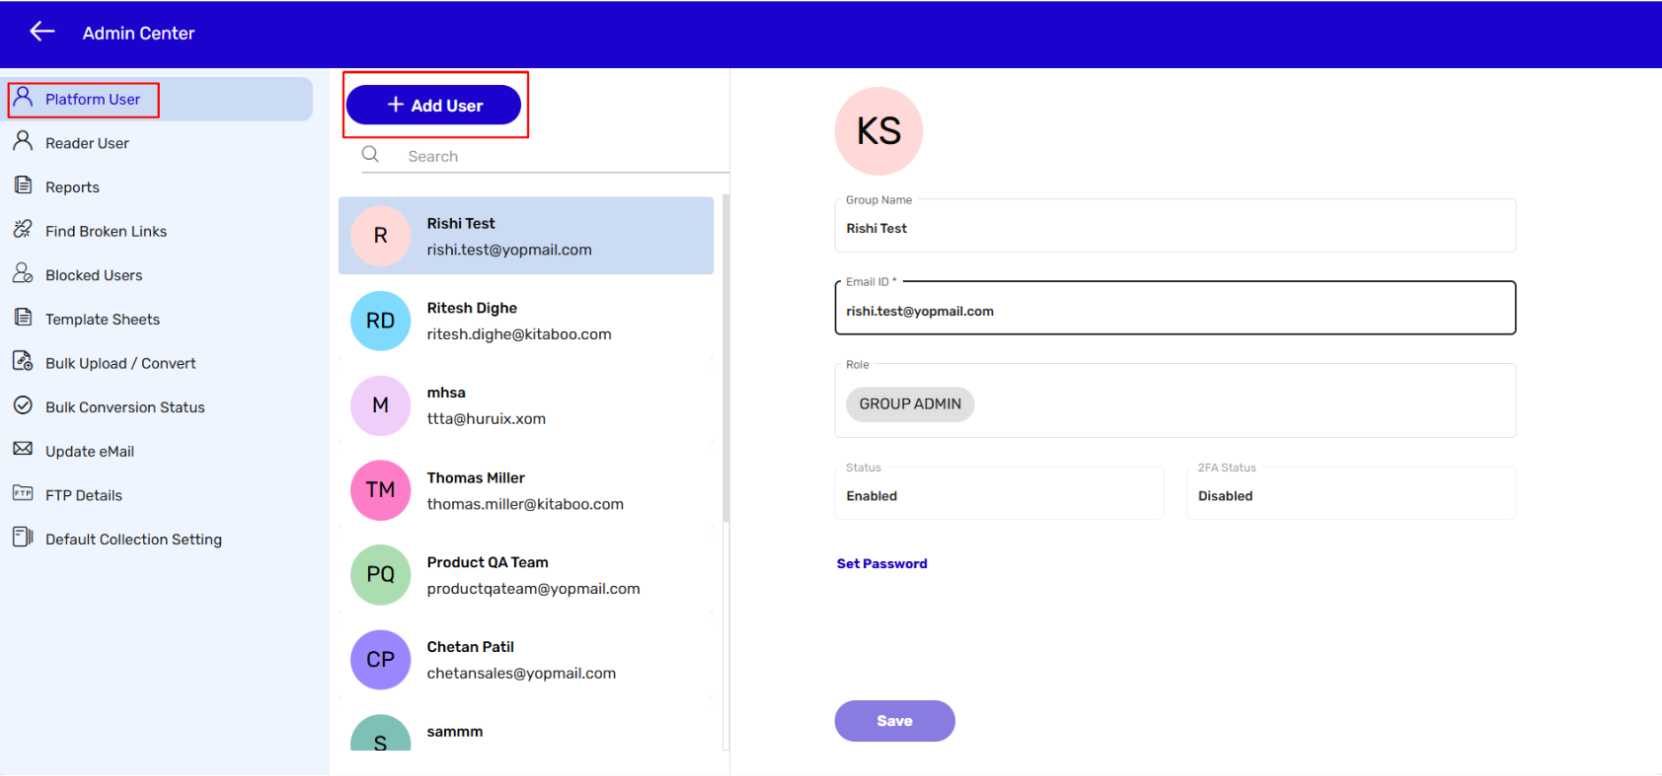
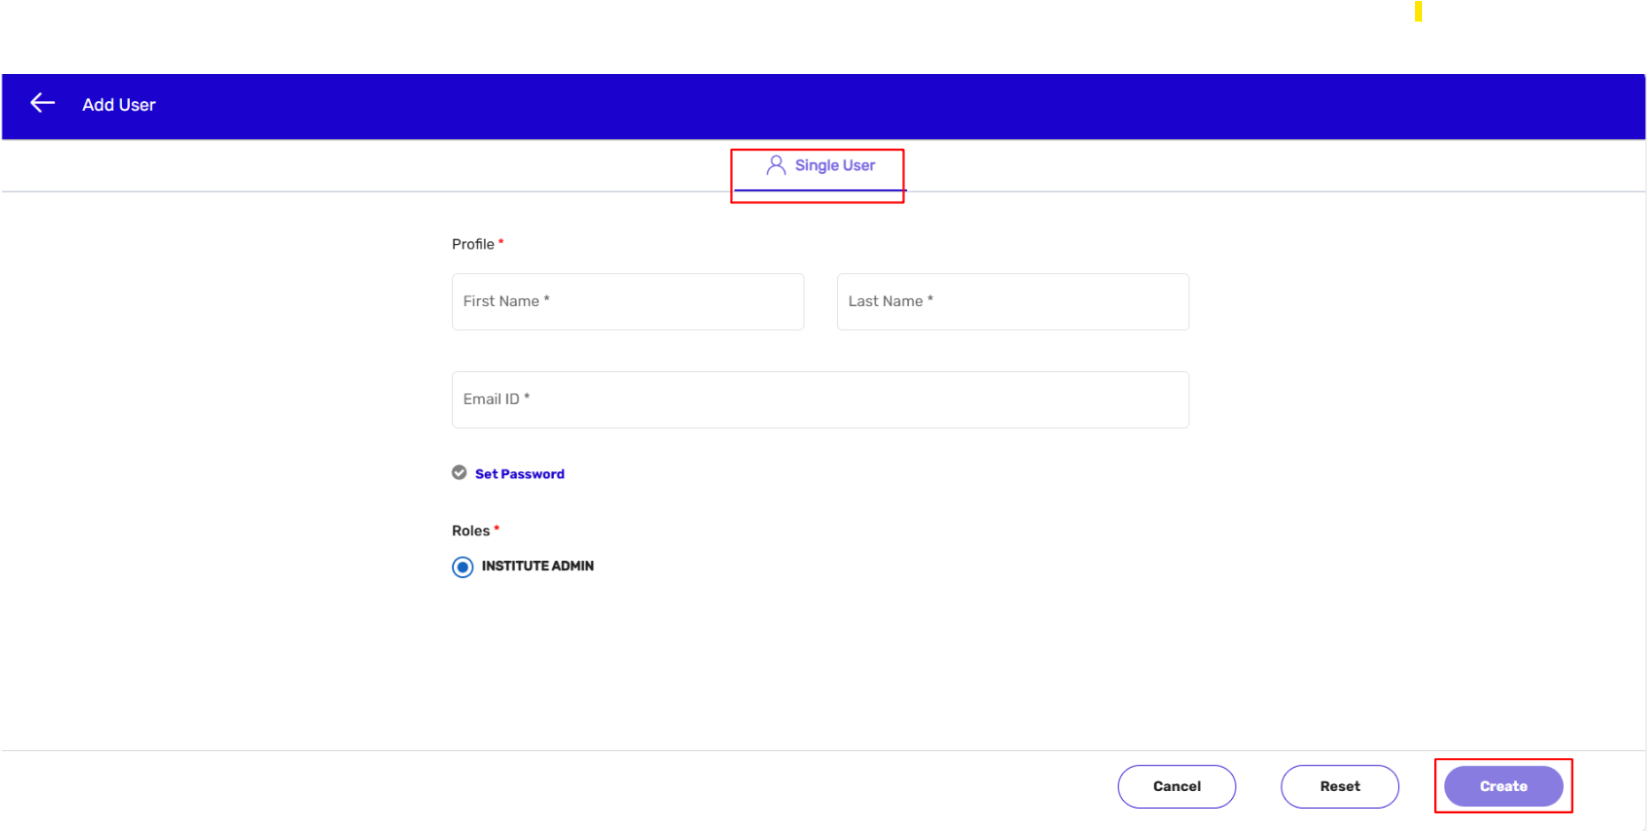
- On the Admin Center page, click on the Add User button.
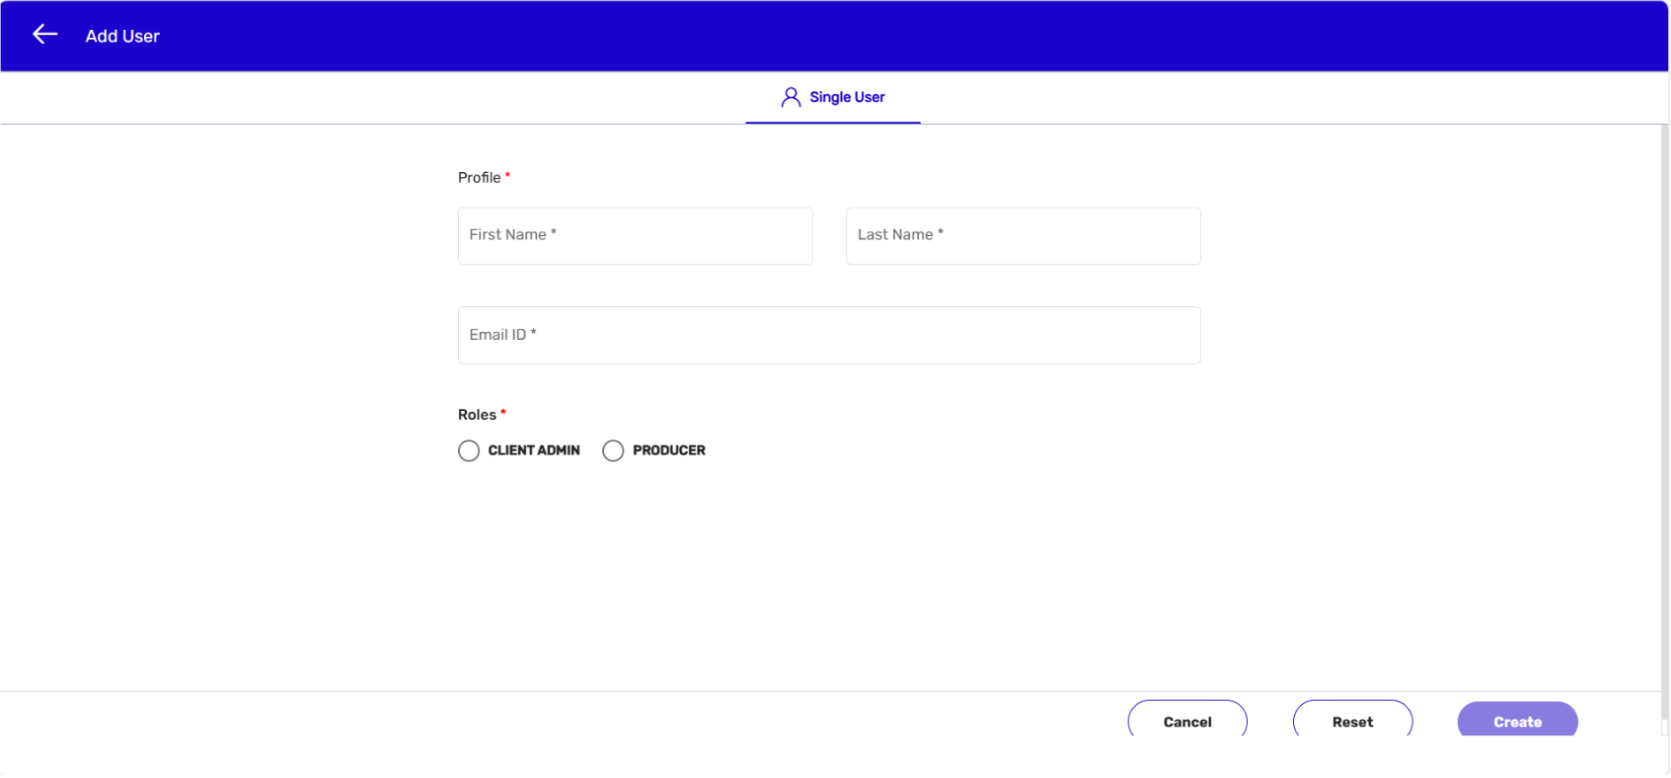
- Enter details like the First and Last names and email ID/Username on the Add User page. > Click on the Create button.
NOTE: The Roles button will appear selected by default. It will show Client Admin as the selected role.
- This is how you can create a new admin account.
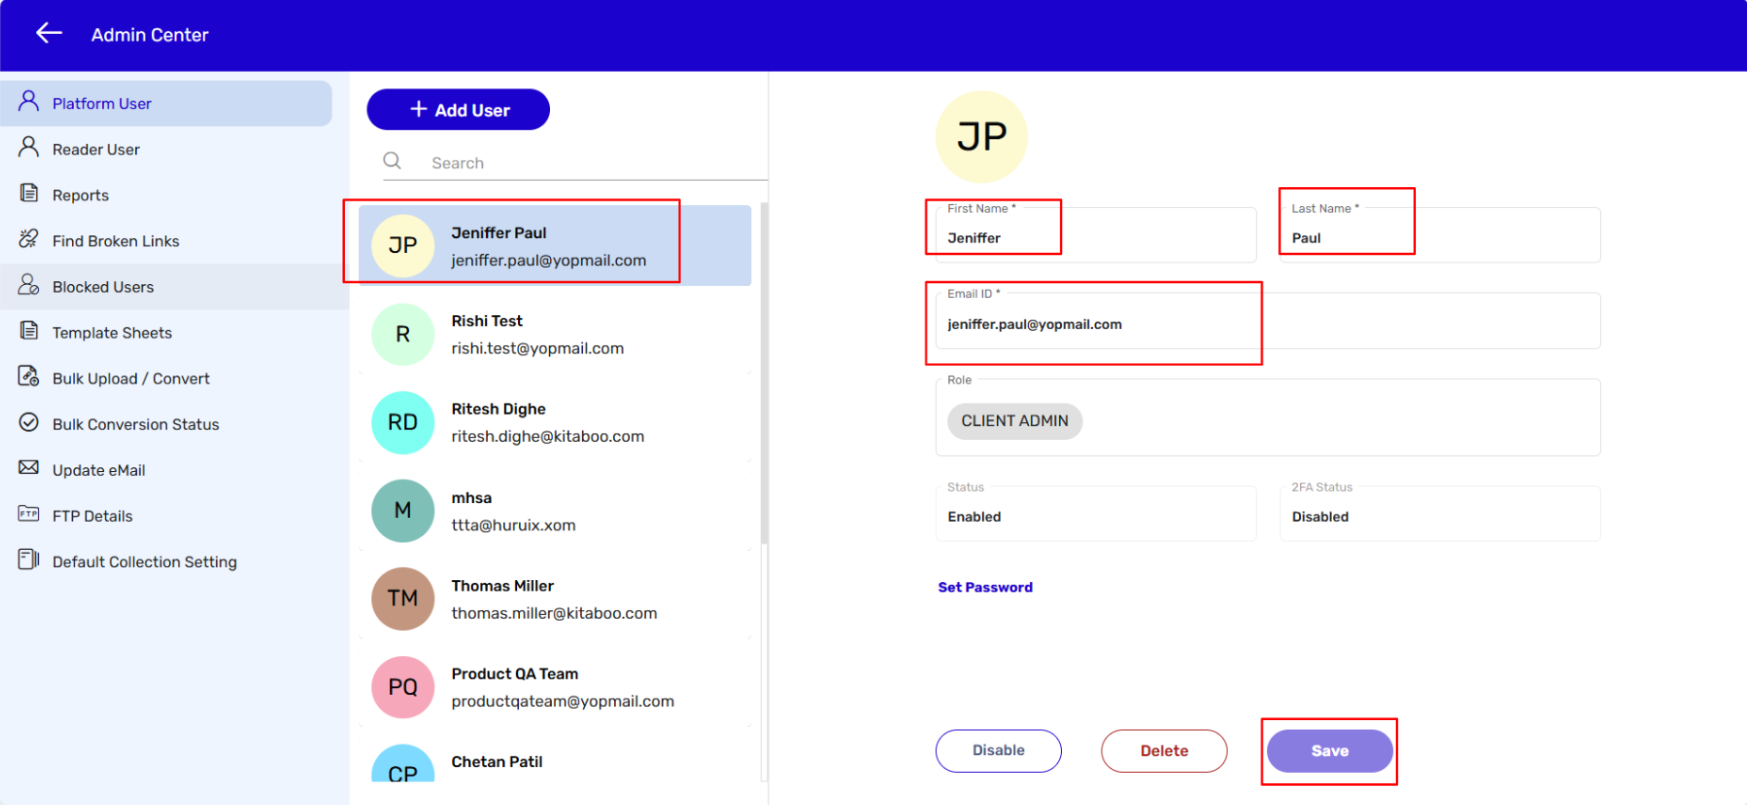
- You can also edit, delete, or disable an admin account. For editing an admin account: Navigate to the Admin Center page. > Select the account you want to edit. > Edit details in the desired fields. > Click on Save.
NOTE: You cannot edit details in the Role and Status fields.
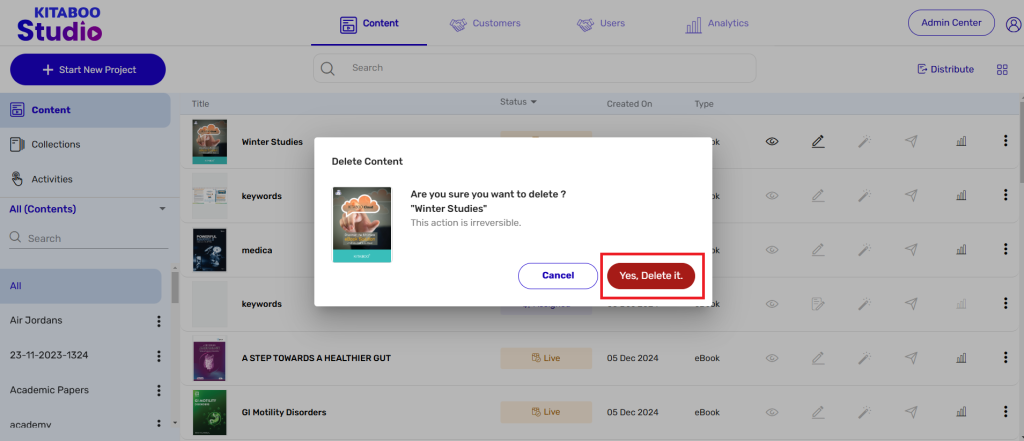
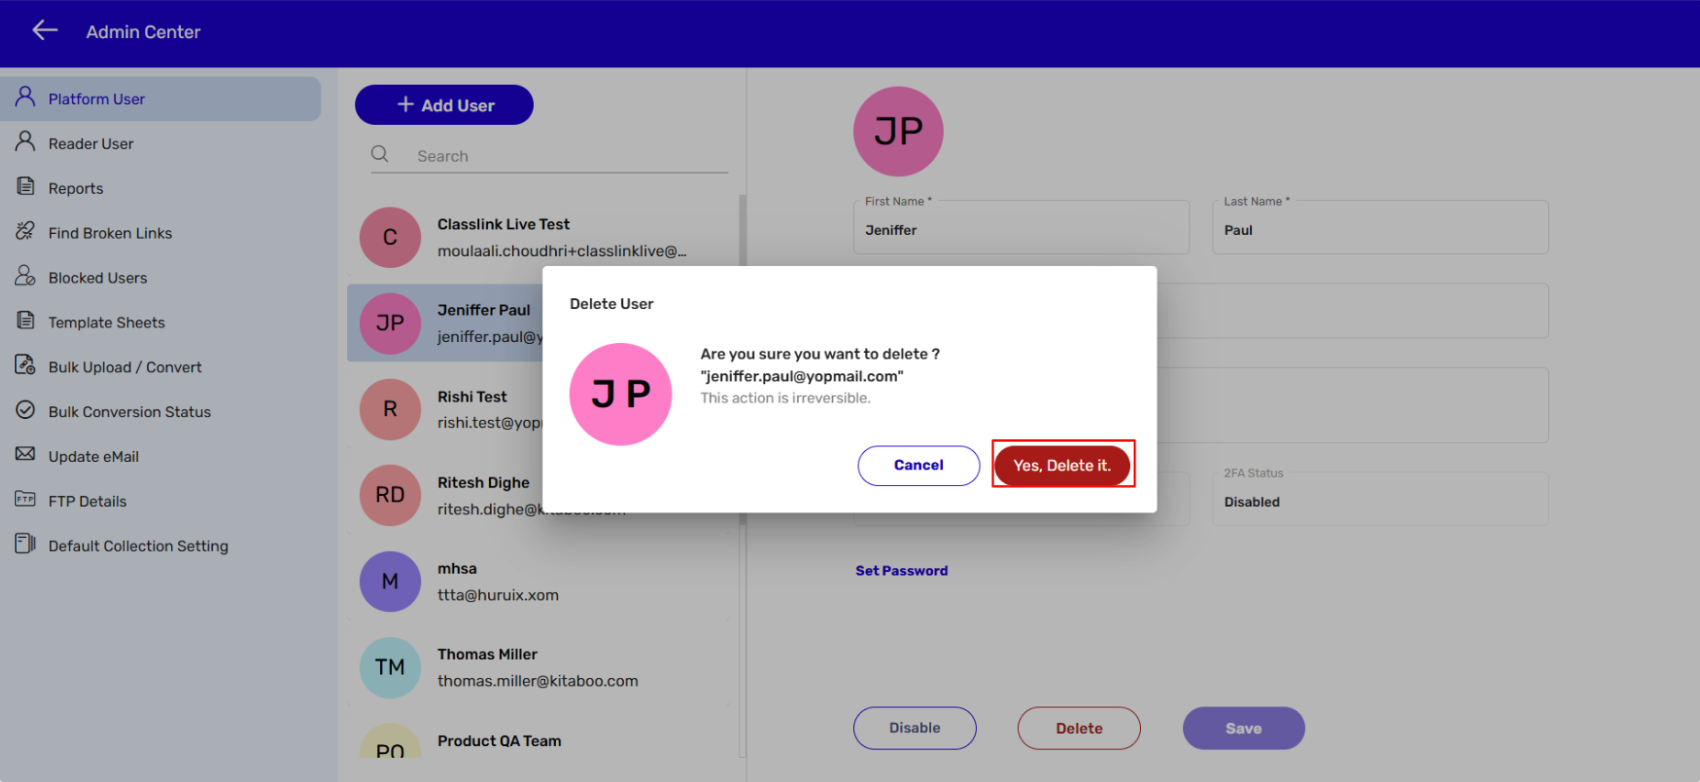
- For deleting an admin account: Navigate to the Admin Center page. > Select the account you want to delete. > Click on the Delete button.
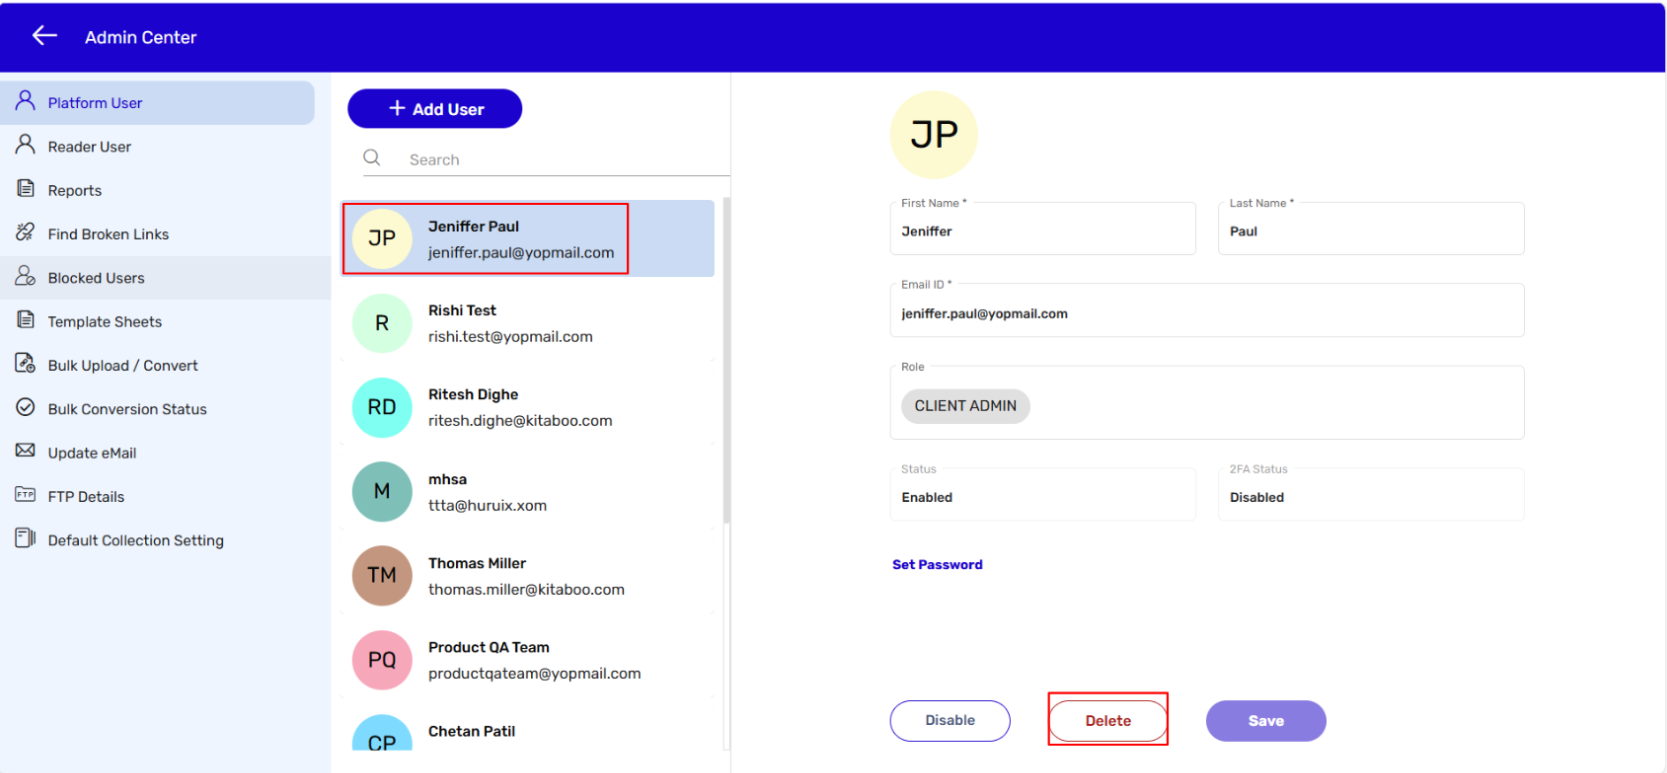
- Click on the Delete button on the pop-up. > click on Save.
- If want to disable an account: Navigate to the Admin Center page. > Select the account you want to disable. > Click on the Disable button. > Click on Save.
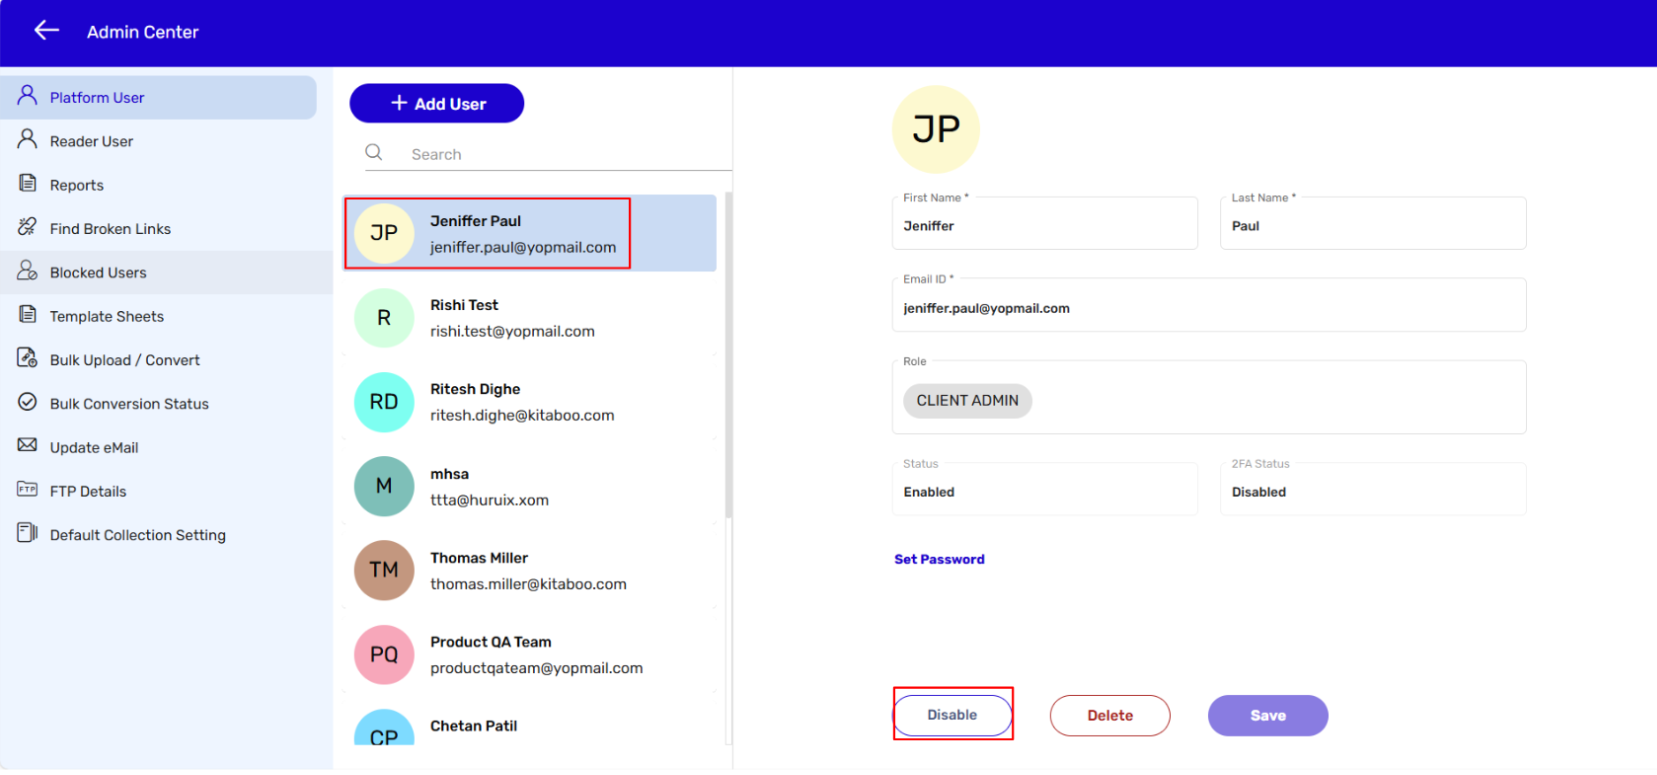
- Kitaboo Studio also enables you to restore a disabled account. If you want to restore a disabled account you need to follow the above process for enabling the account.
- Sign in with your Customer Admin credentials.

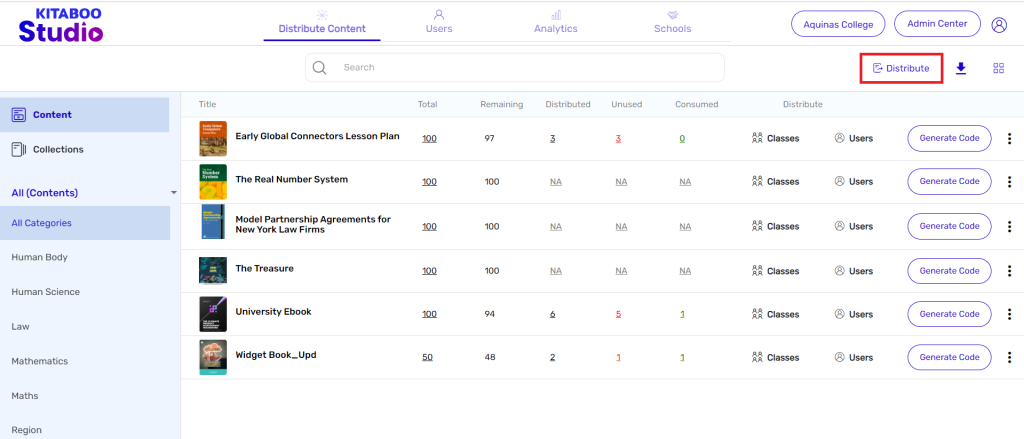
- On the Dashboard, Click on Distribute.
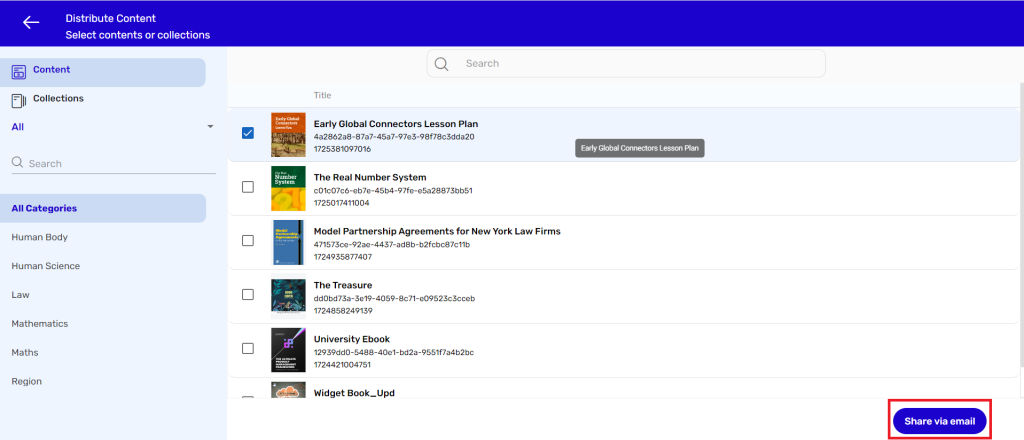
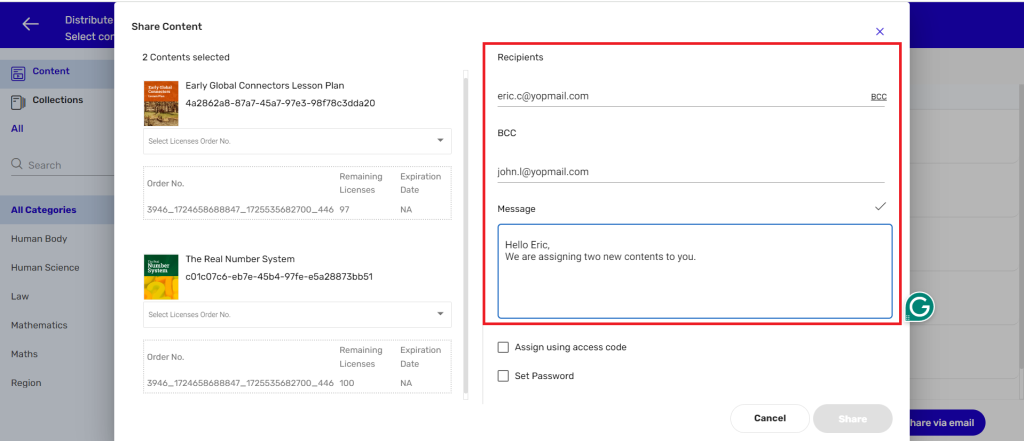
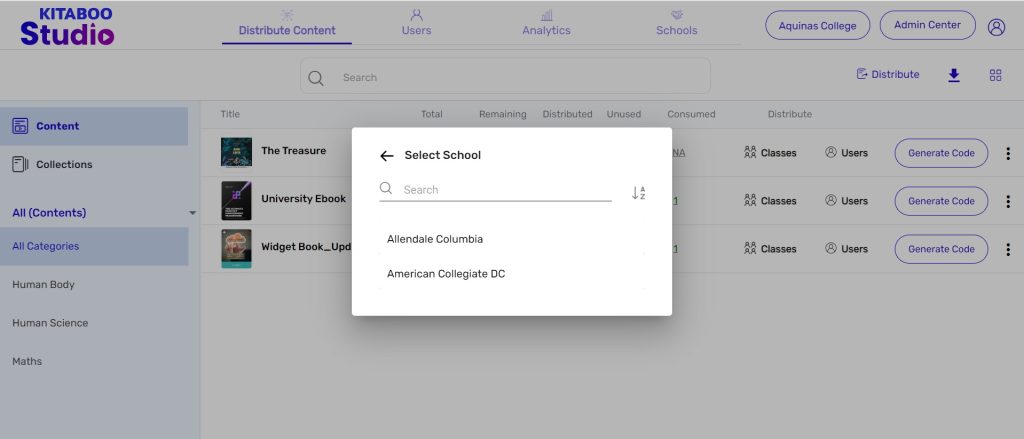
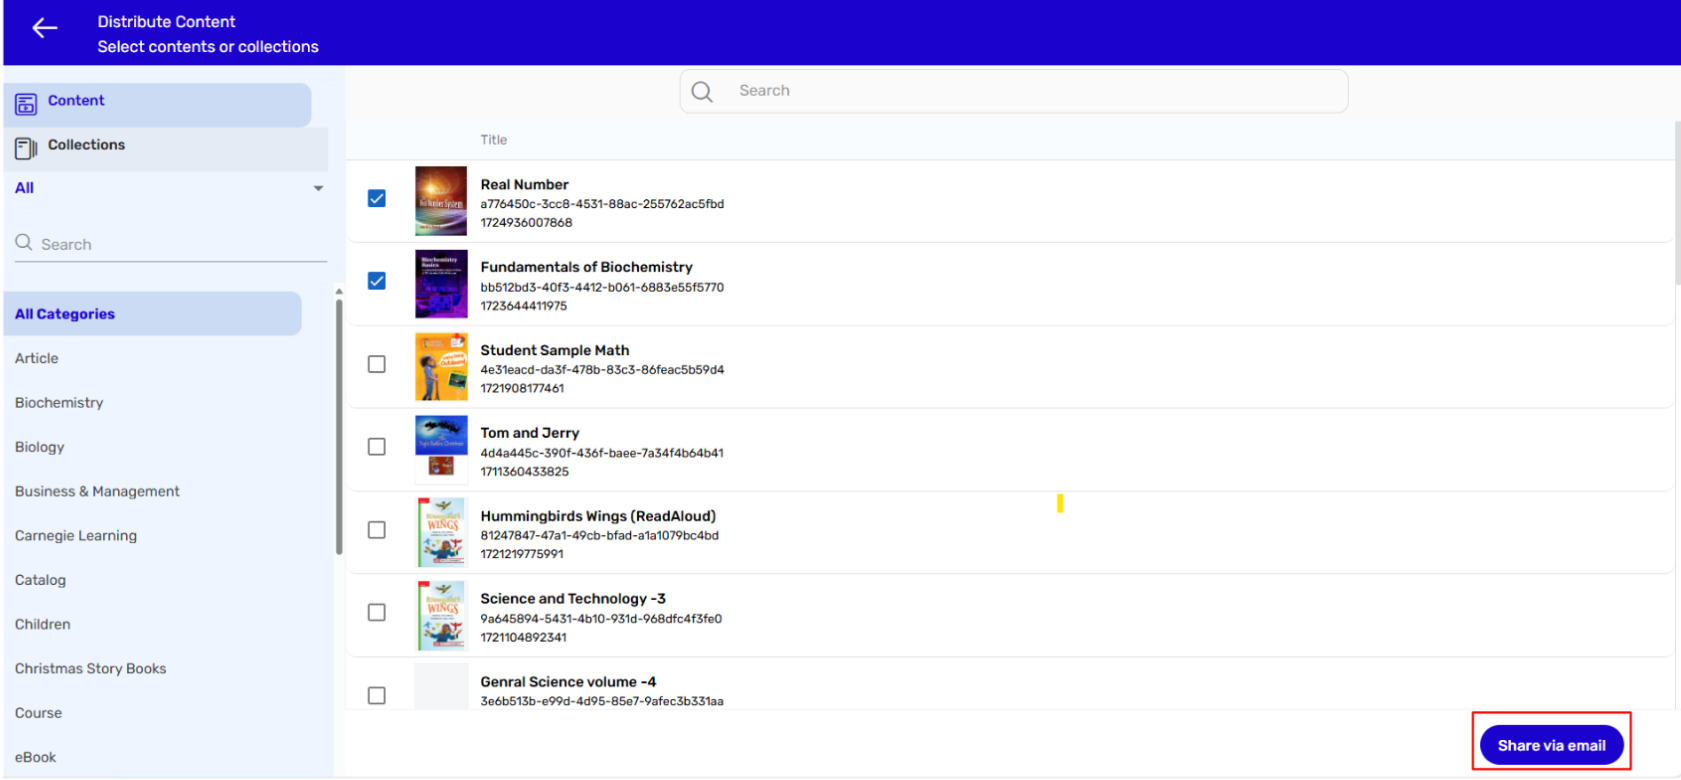
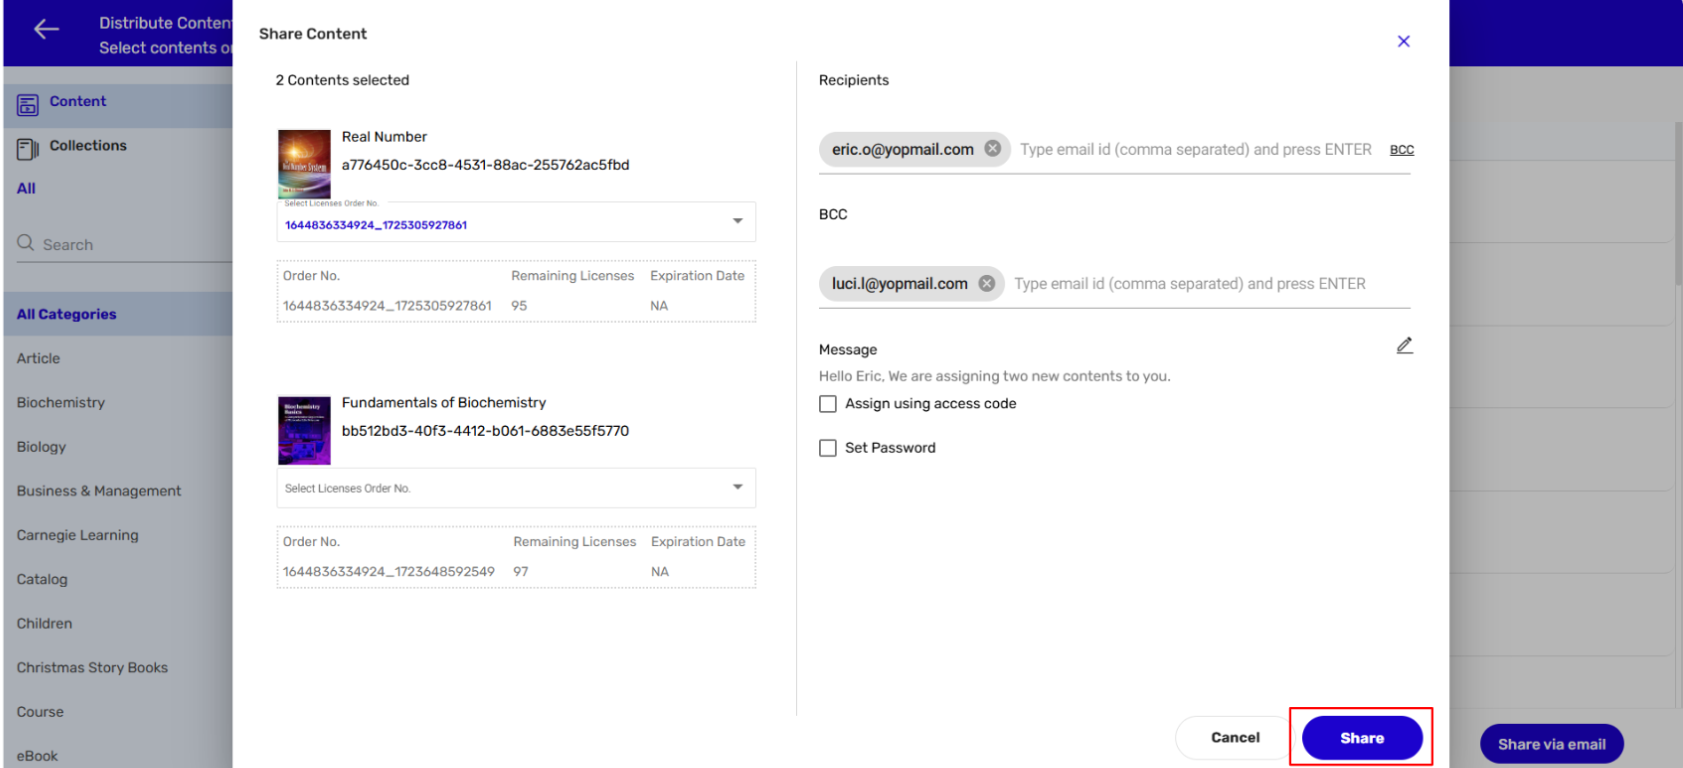
- Please select the content/collection you wish to distribute. Now, click on “Share via email” once you have selected the desired content.
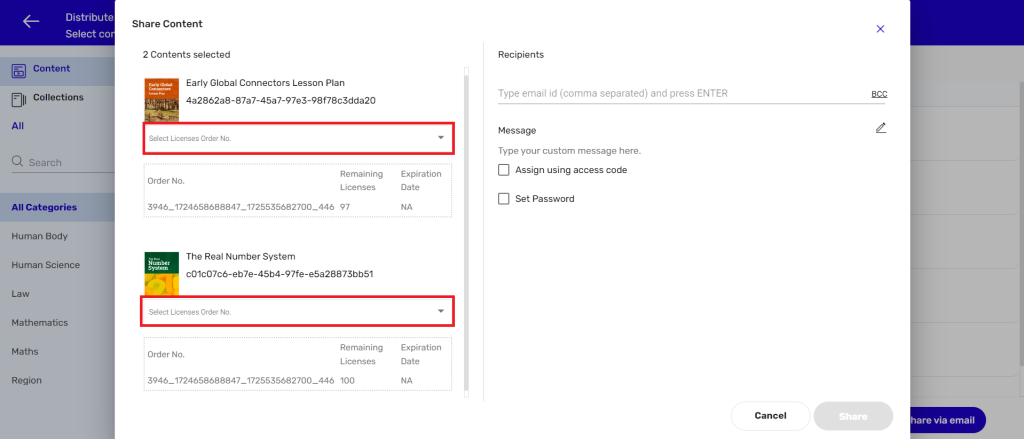
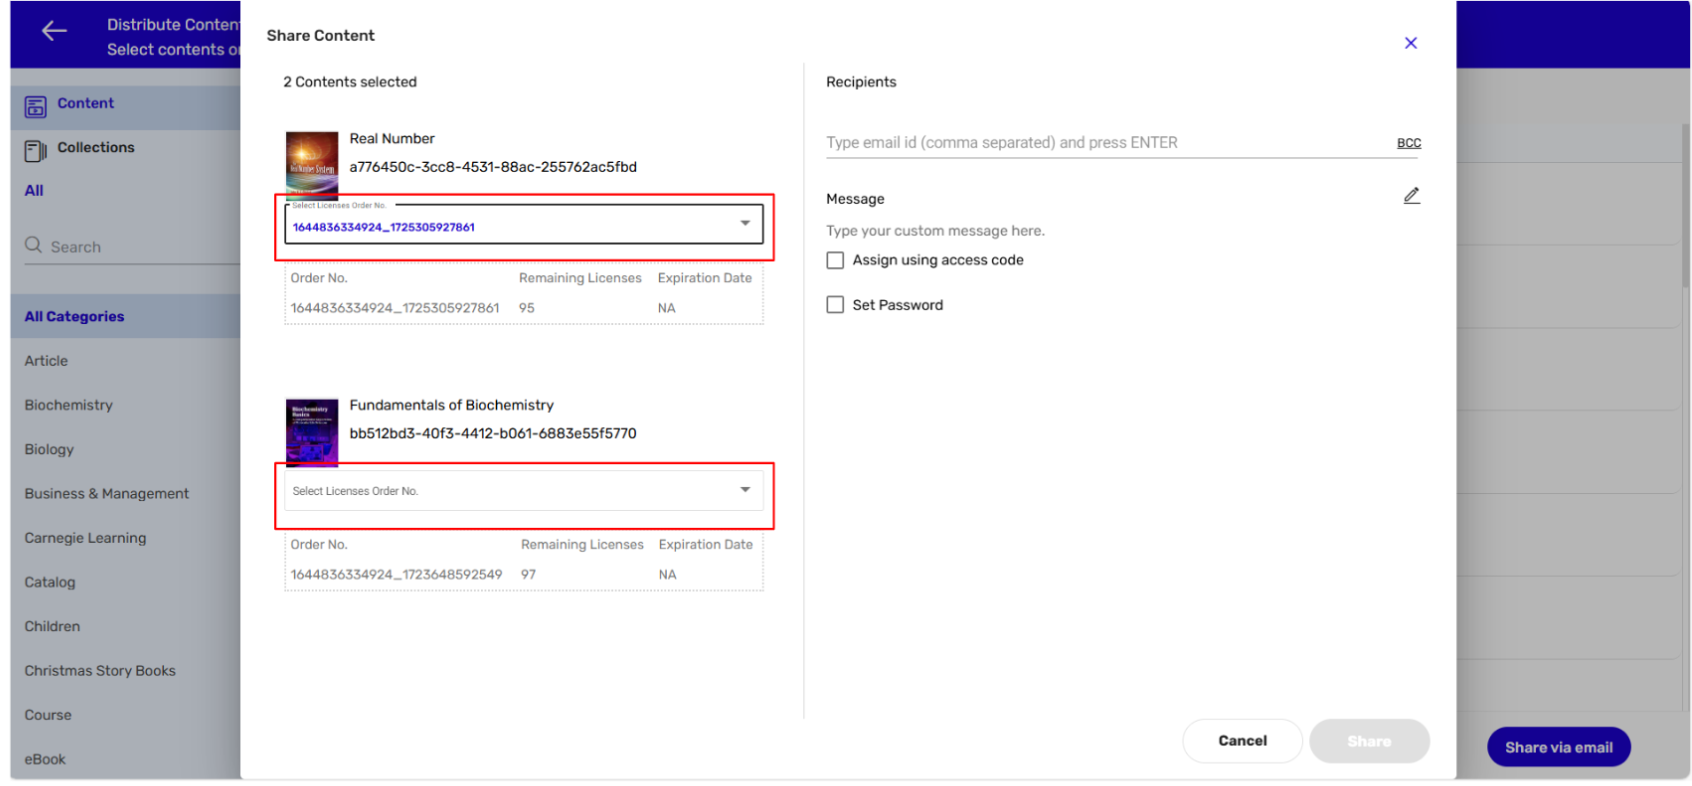
- Select the order number from which you want to share the selected content with the user.
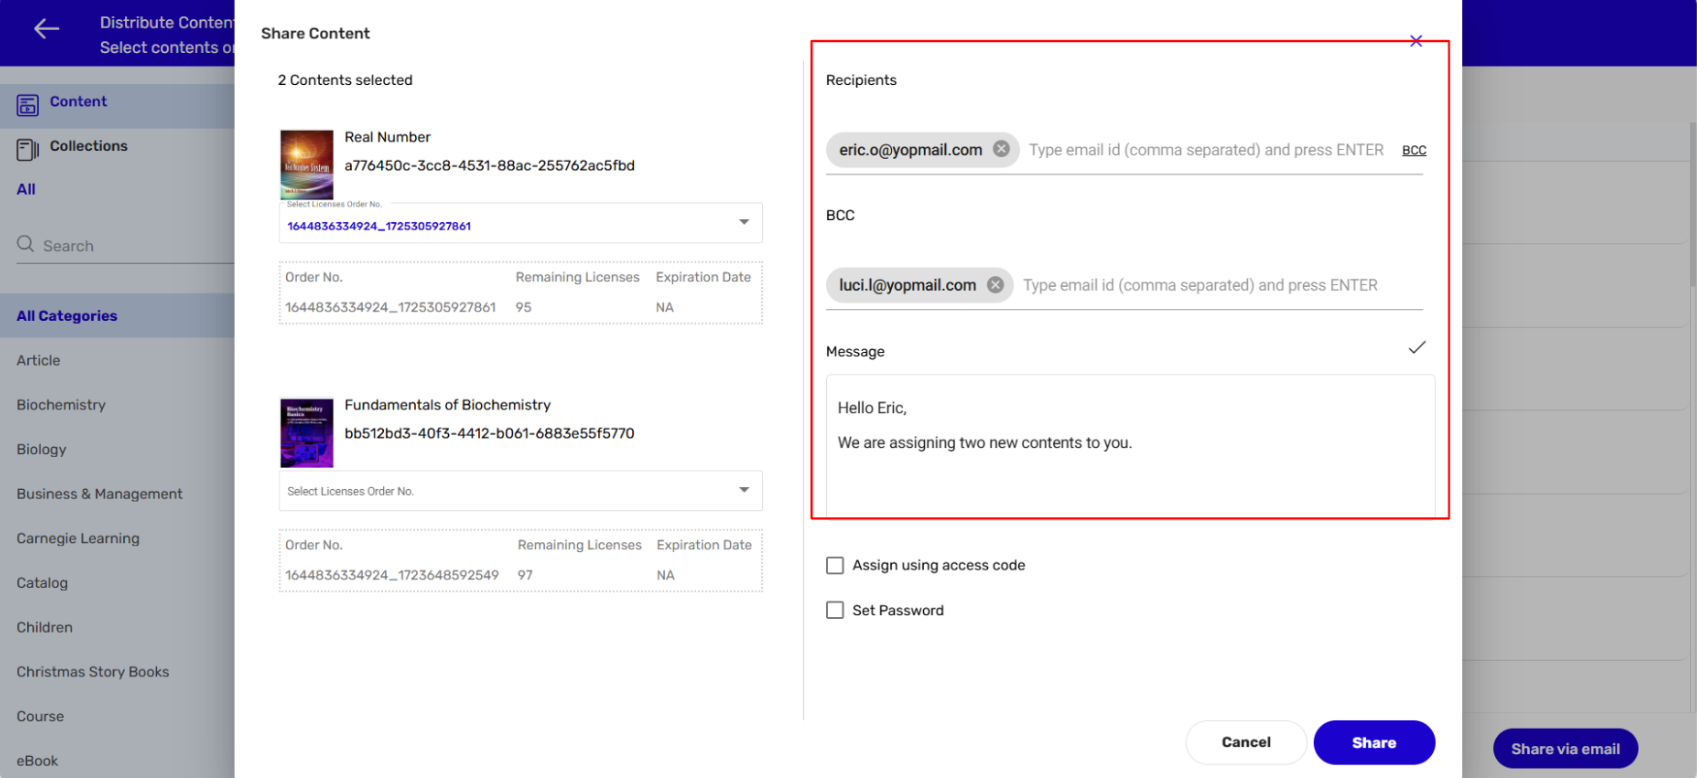
- Enter the “email address” of the users to whom you wish to distribute content. You also have the option to “Add BCC and a custom message to the email notification.
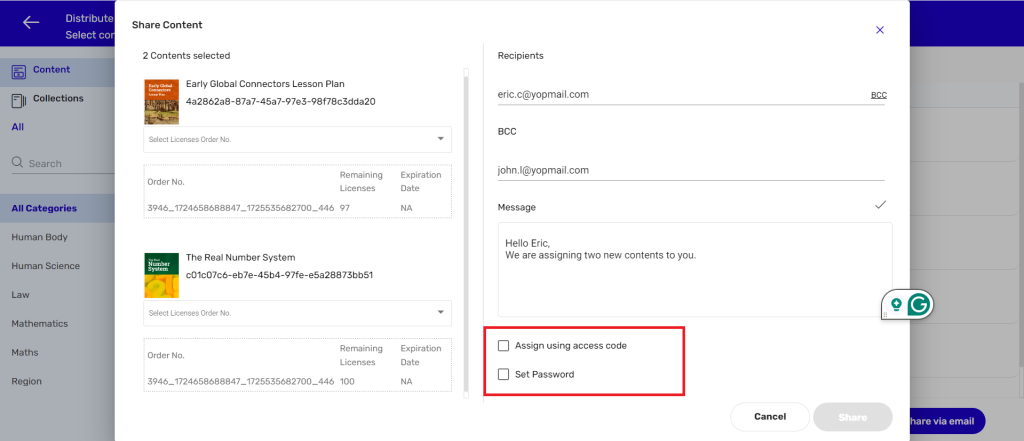
- After successfully adding the user’s emails, you can now “Set password”, and “share an access code” for the content.
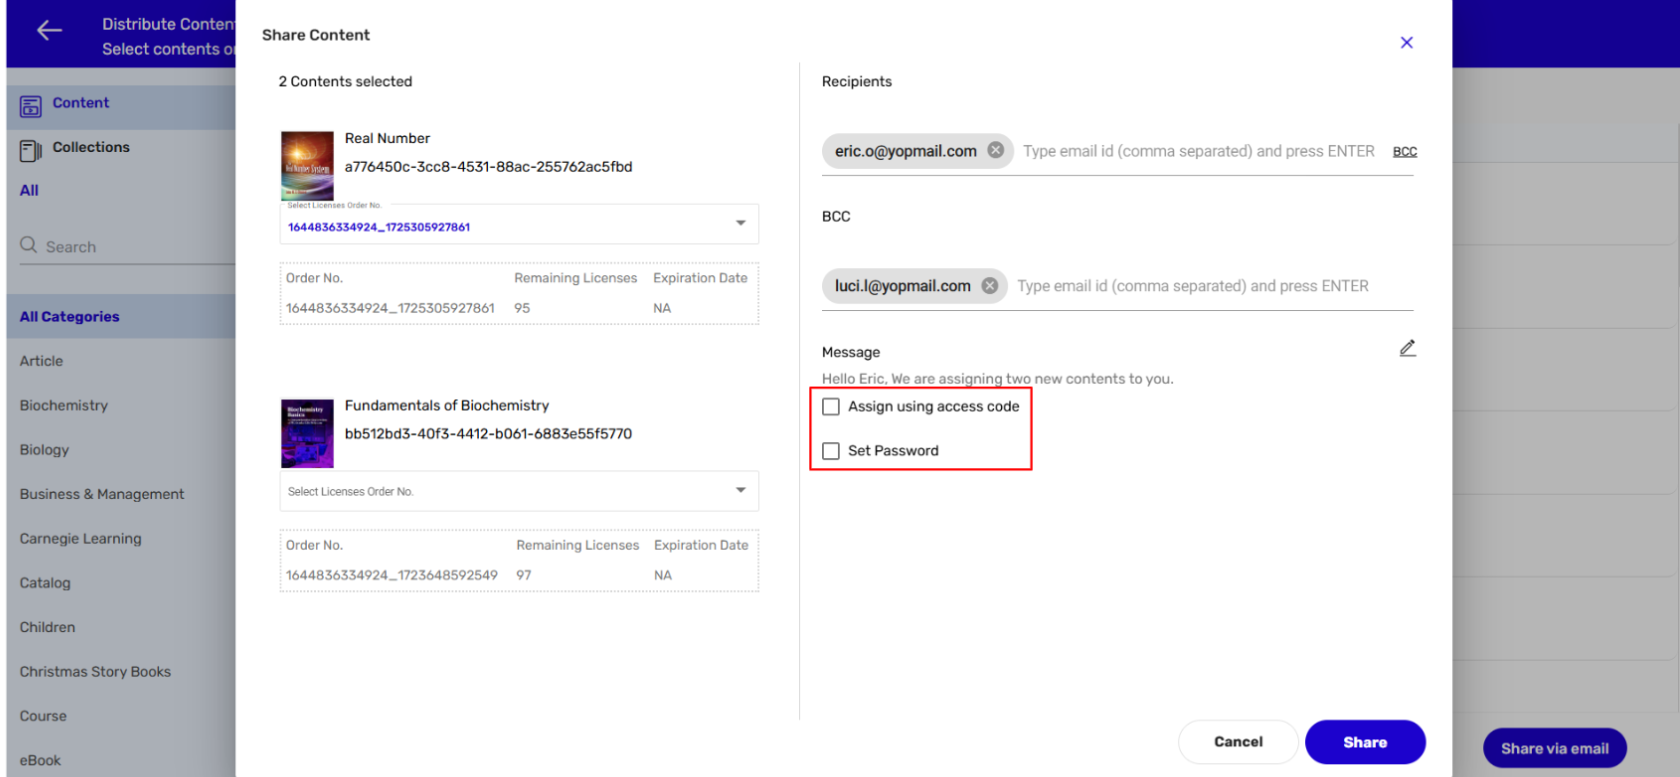
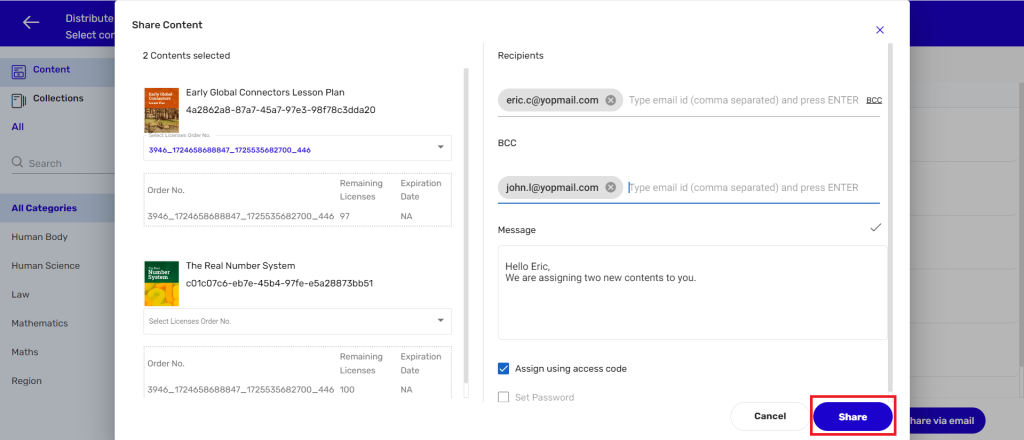
- After filling in all the required fields, you can now click on “Share”.
Note:
1.Users will receive an email notification once the content has been successfully distributed.
2. This feature will only work for the customer/partner from which you have logged in . If we attempt to add a user from a different partner, an error message will be displayed: “User exists in another partner
3. This feature by default will not be available. It is an add-on feature, kindly connect with the respective CSM to know the process for enabling the feature.
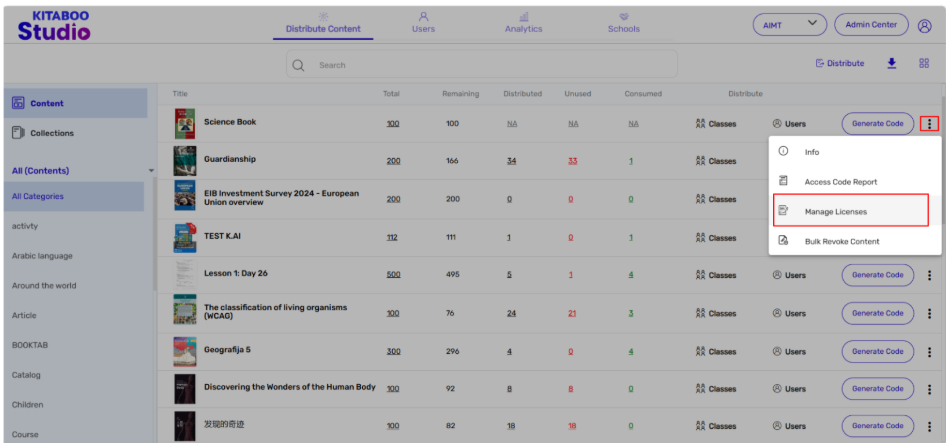
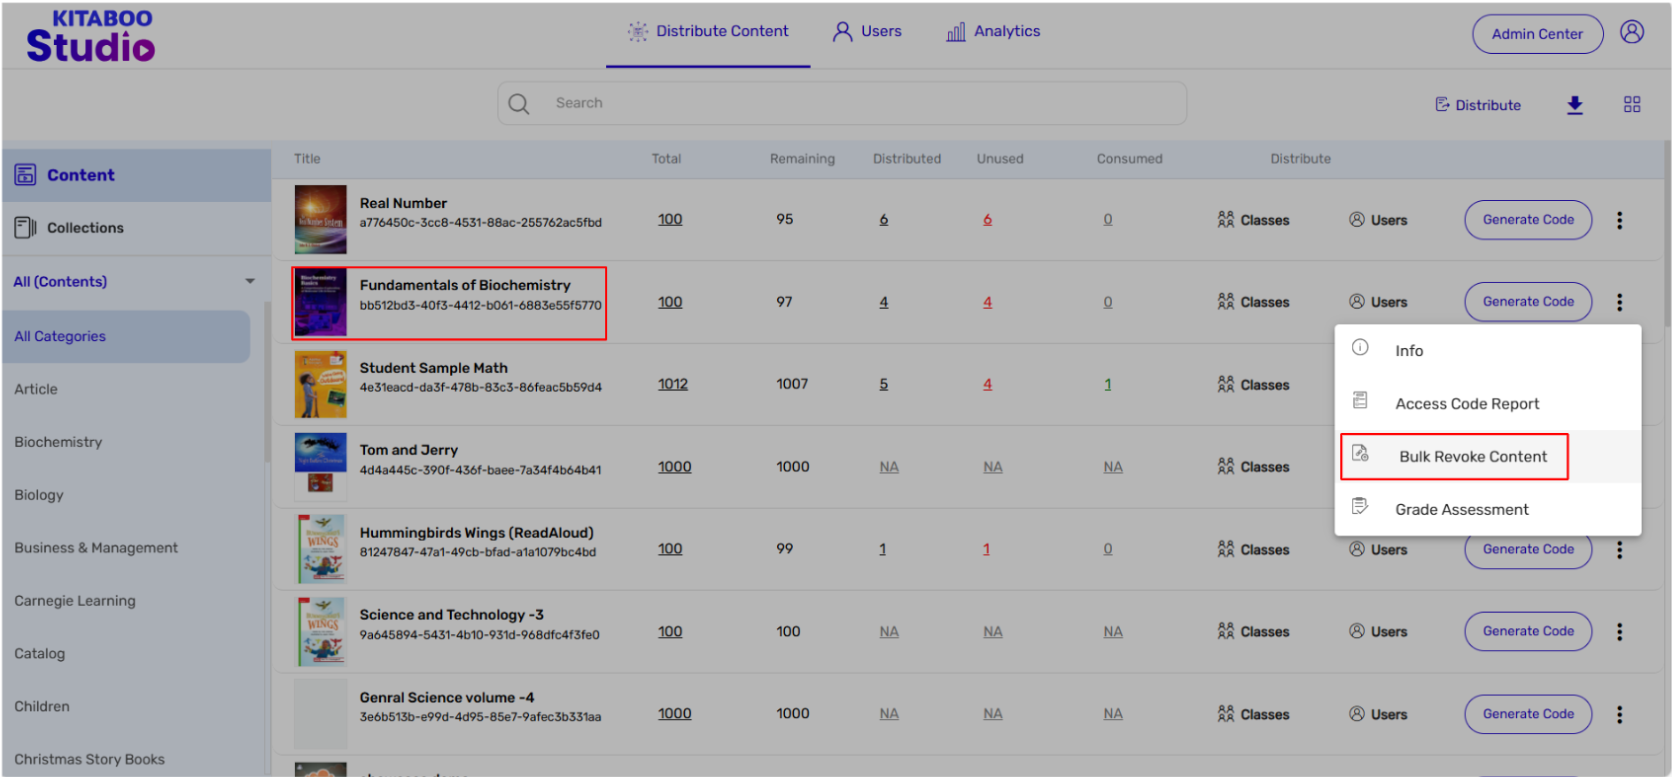
- Sign in with your Customer Admin credentials.

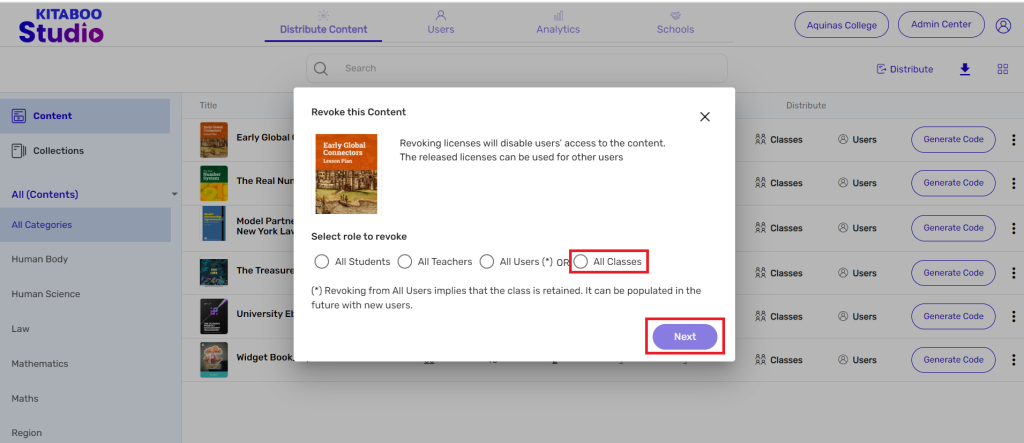
- On the Distribute Content tab, click on more options against the title you want to revoke and select Bulk Revoke.
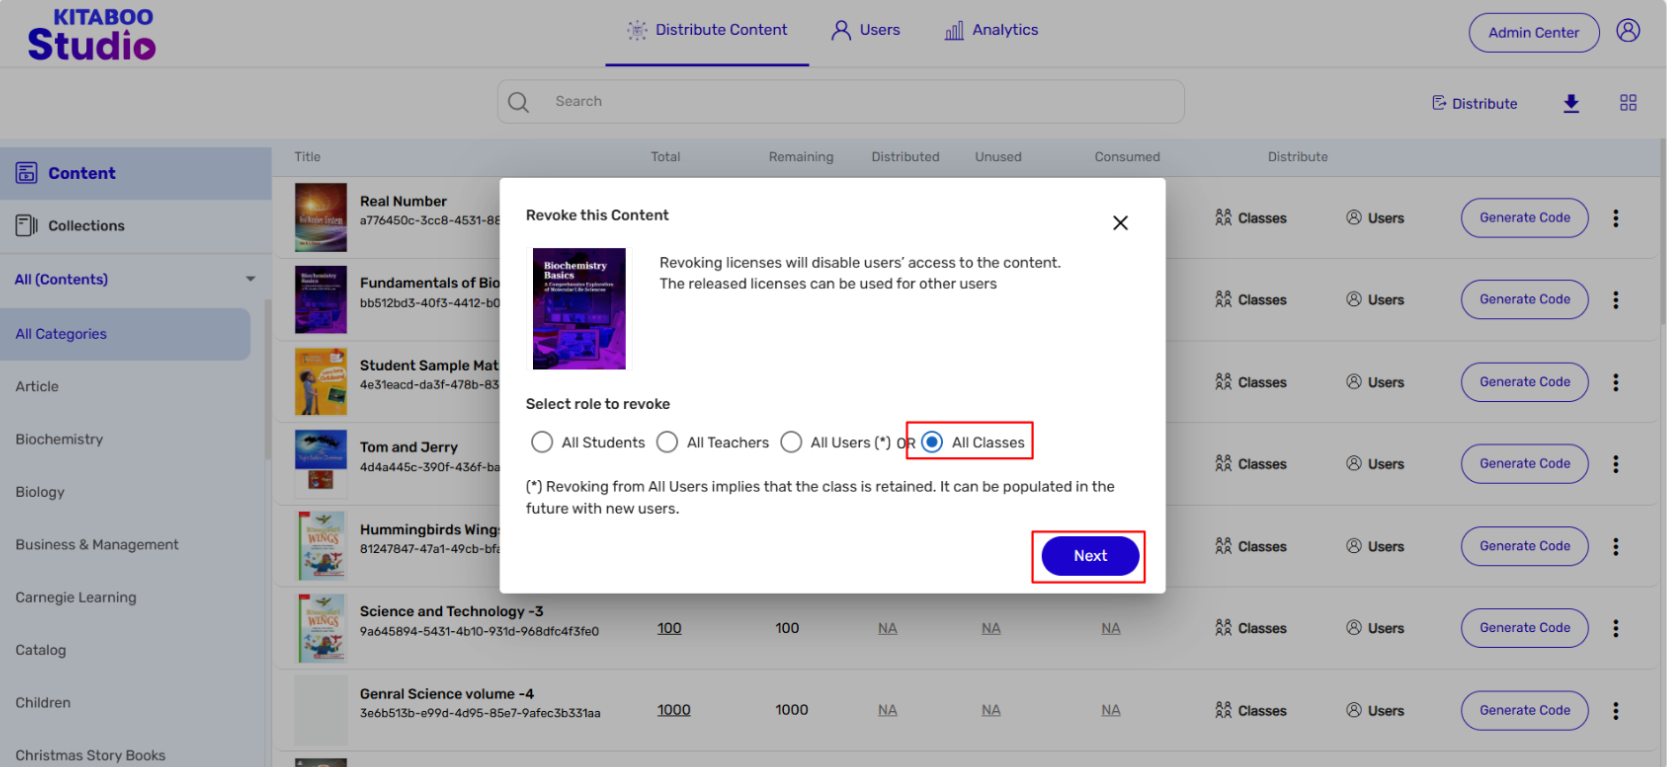
- Select the role for whom you want to revoke content e.g. all users or all classes or all students or all teachers > Click on Next.
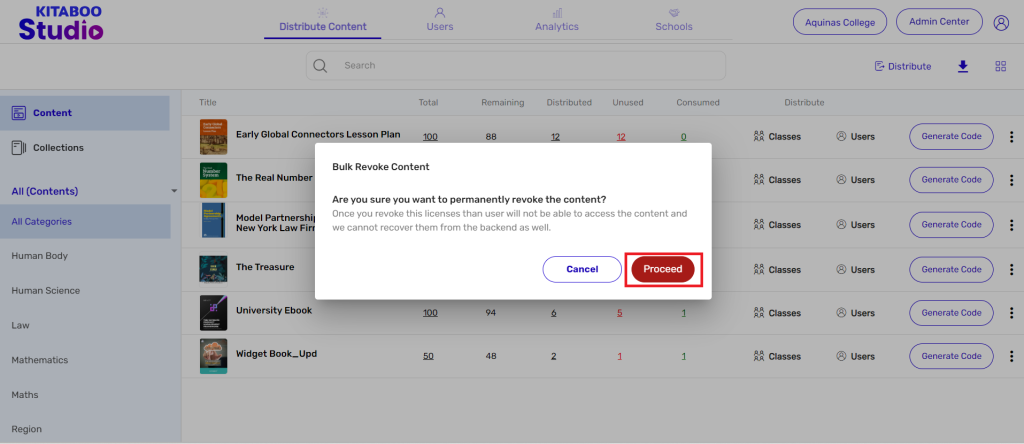
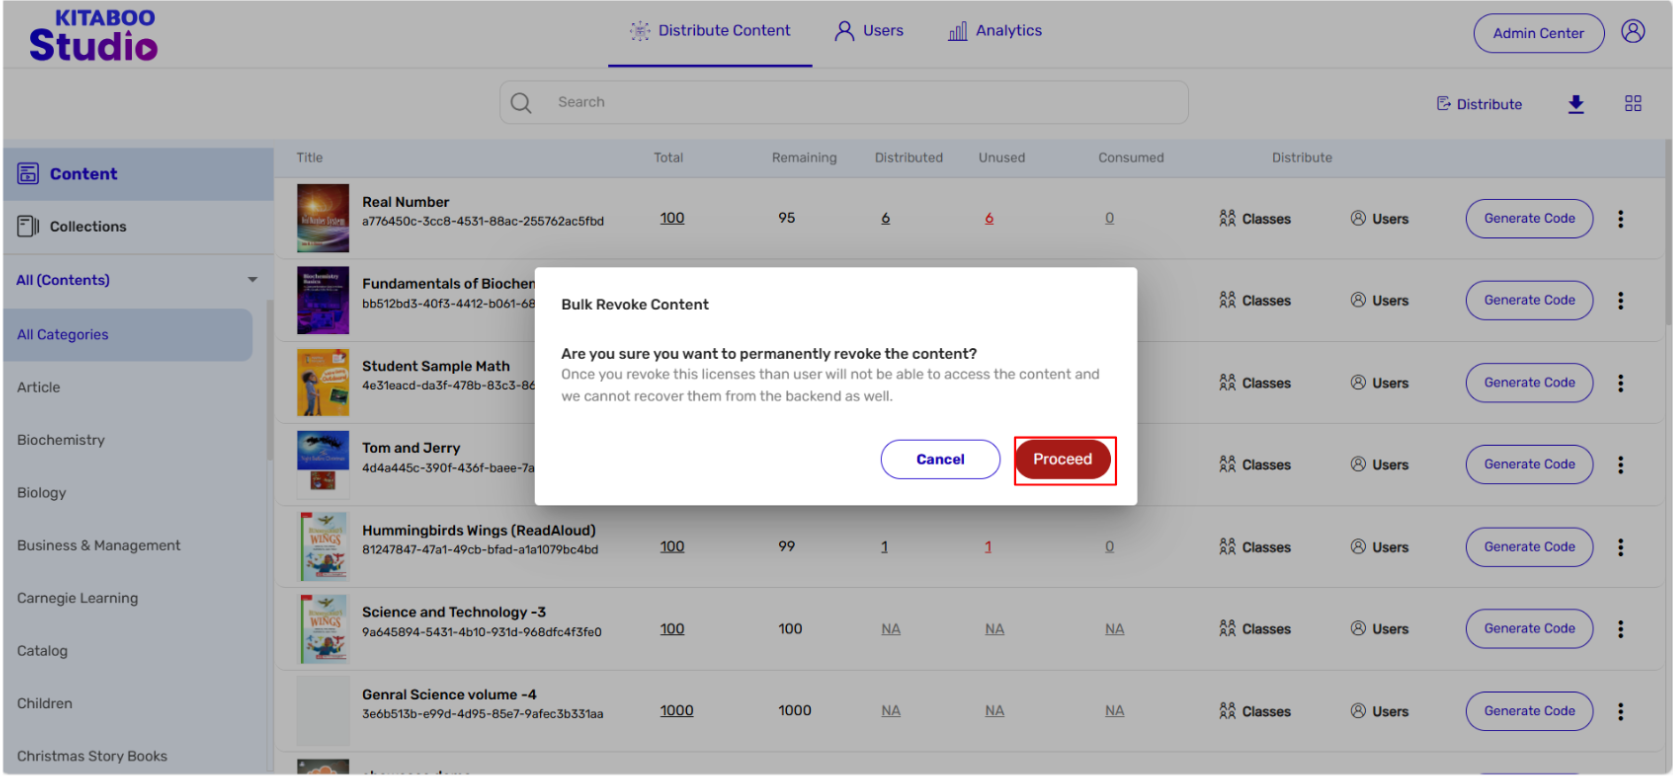
- Click on Proceed to confirm.
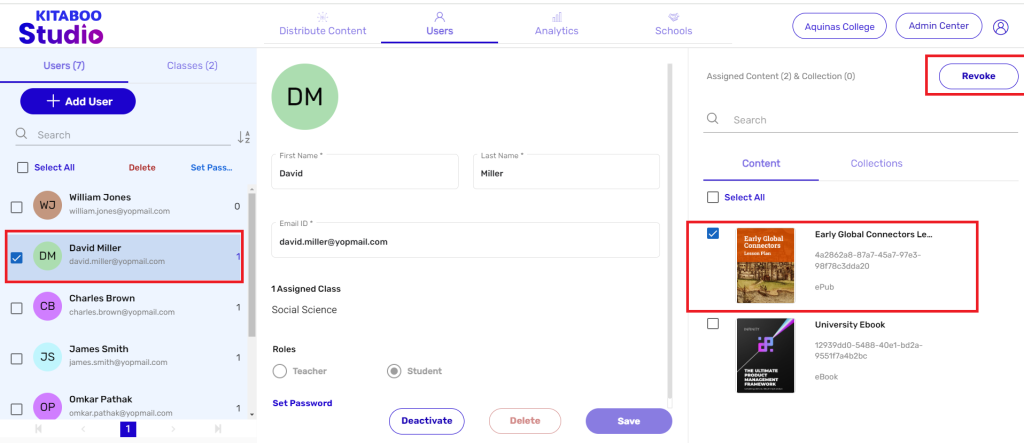
1.1 Revoking Content from a User
- Sign in with your Customer Admin credentials.

- Go to the Users tab.

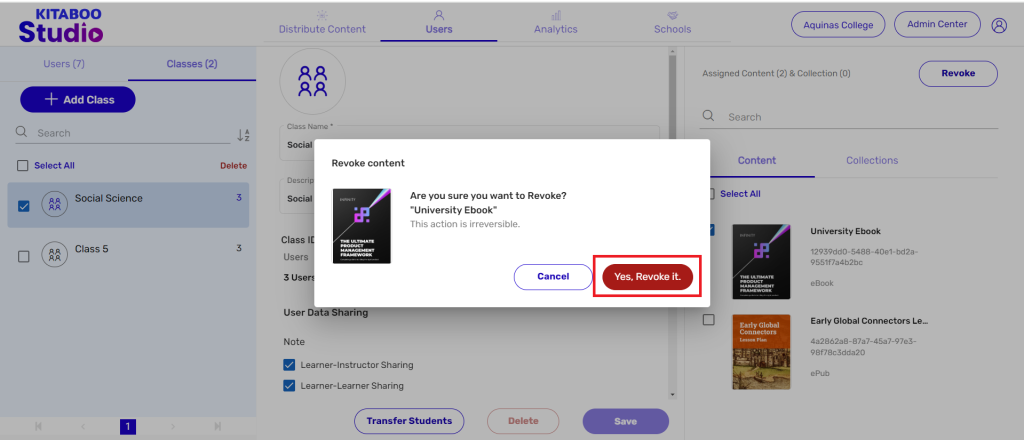
- Select the User from the list for whom you want to revoke content. > Select title(s) listed under Contents. > Click on Revoke.
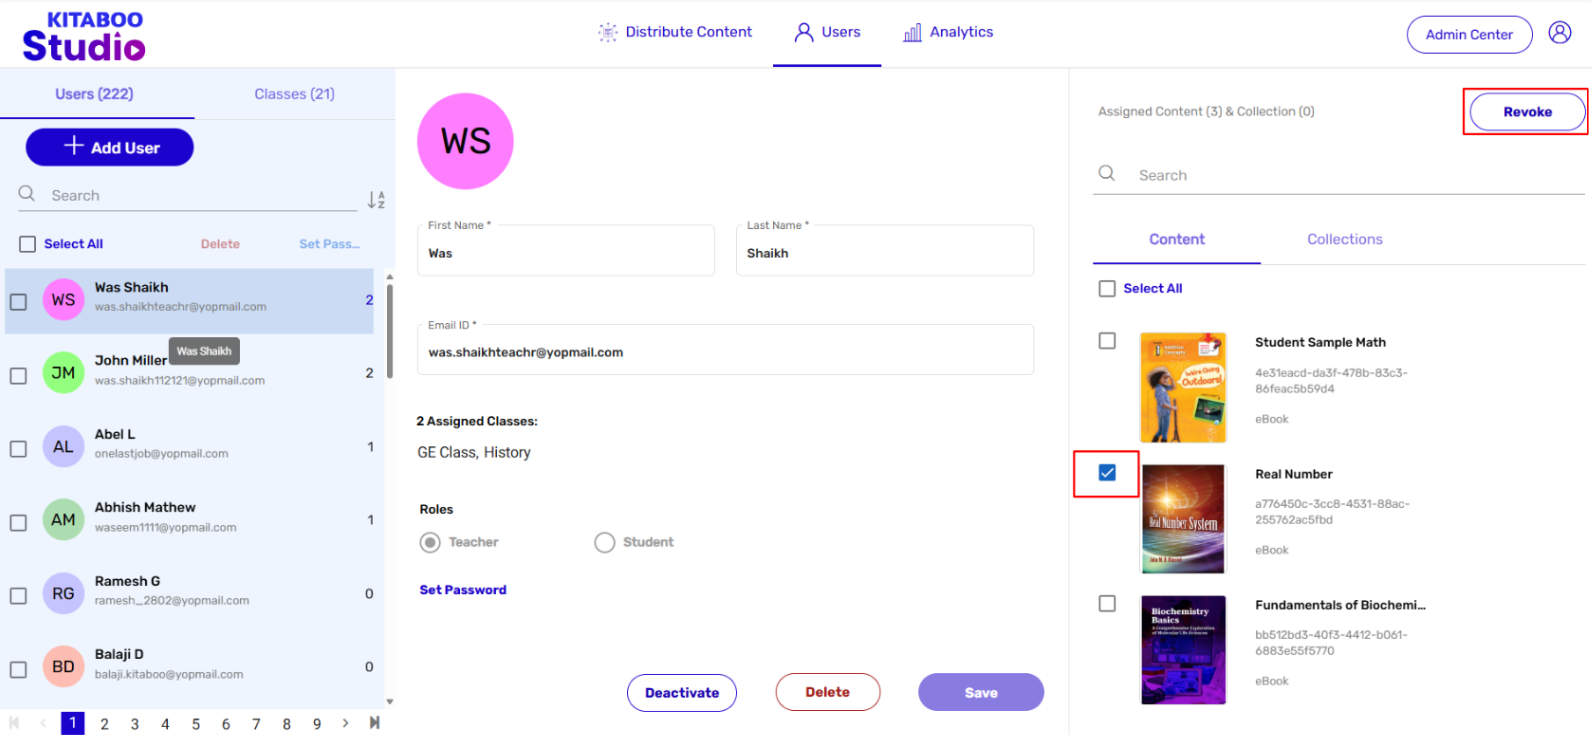
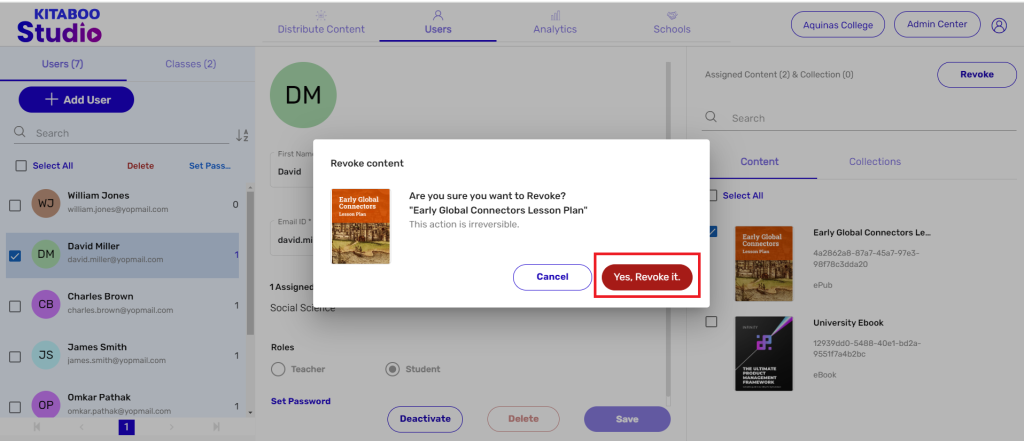
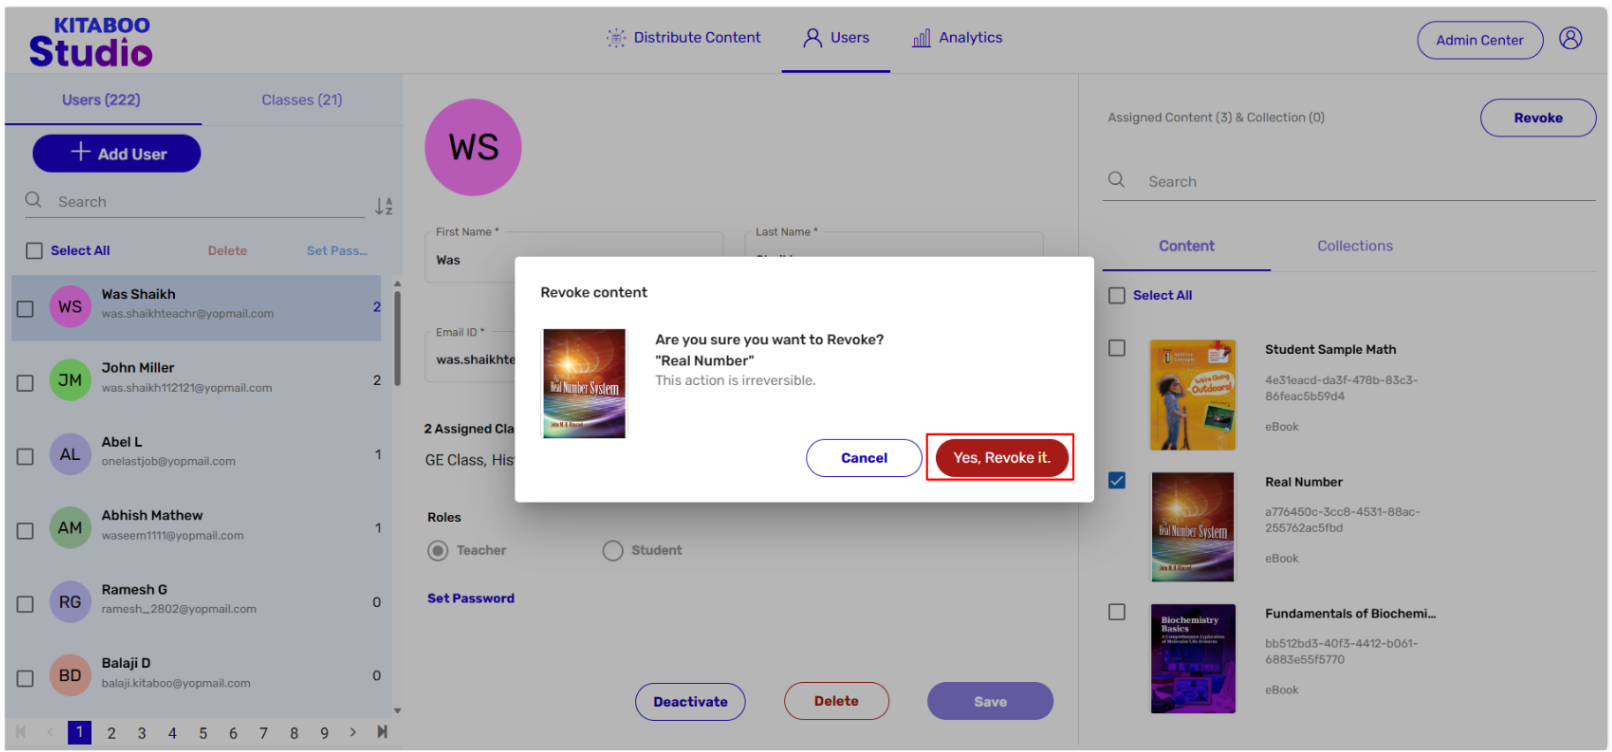
- Click on Yes, Revoke it to confirm.
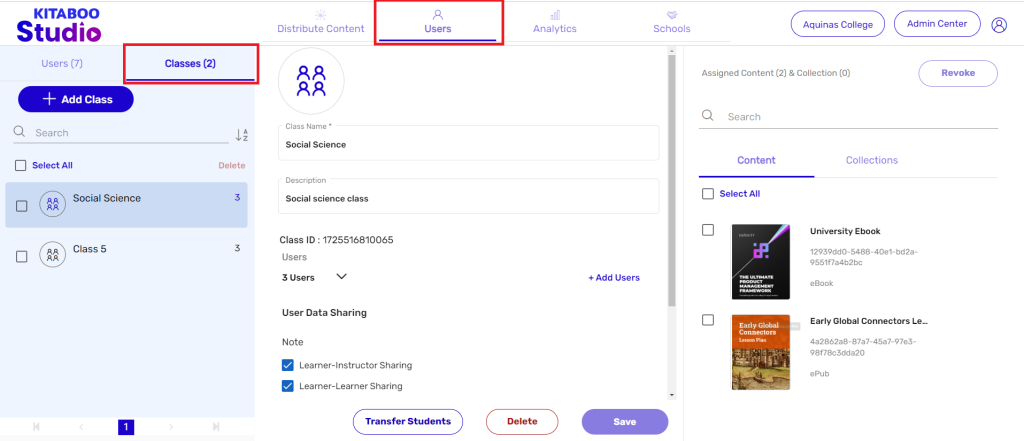
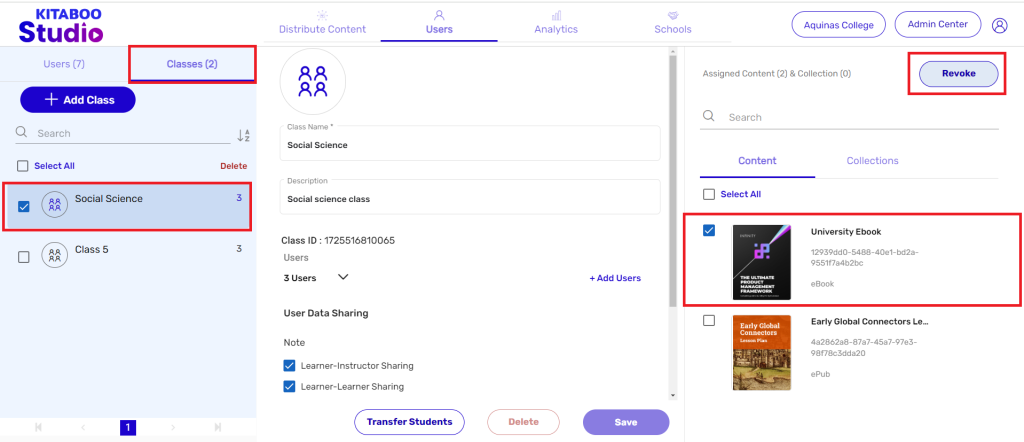
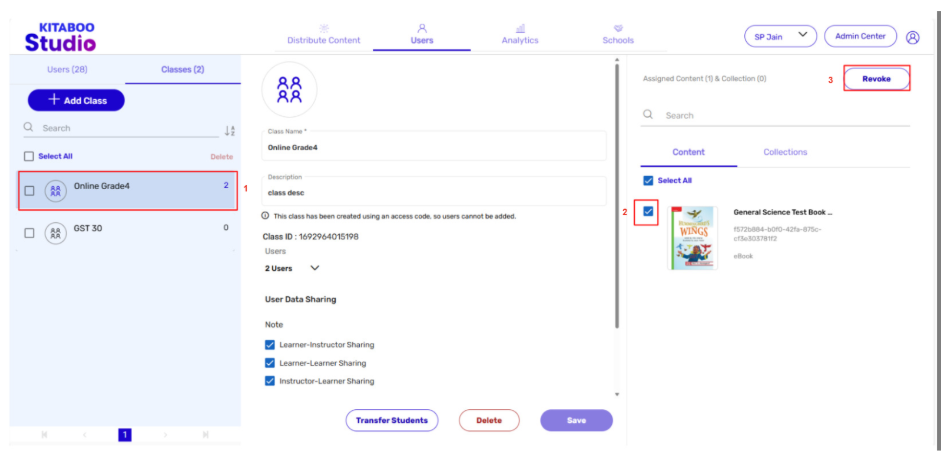
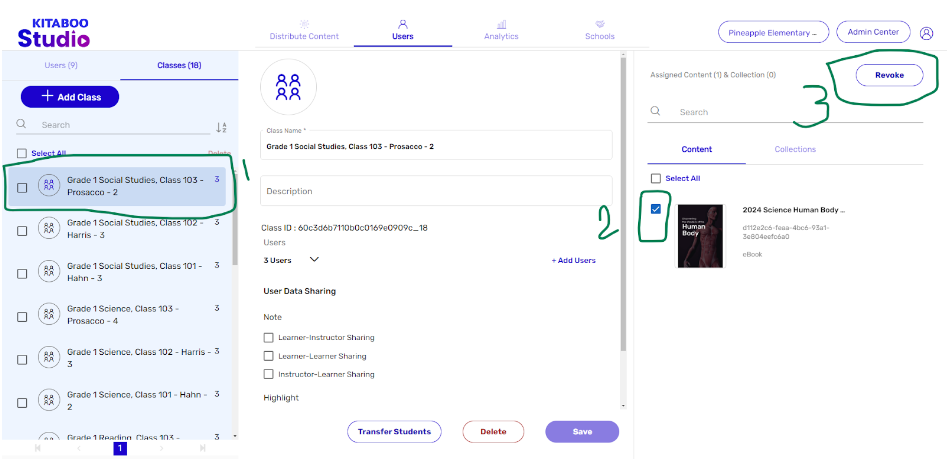
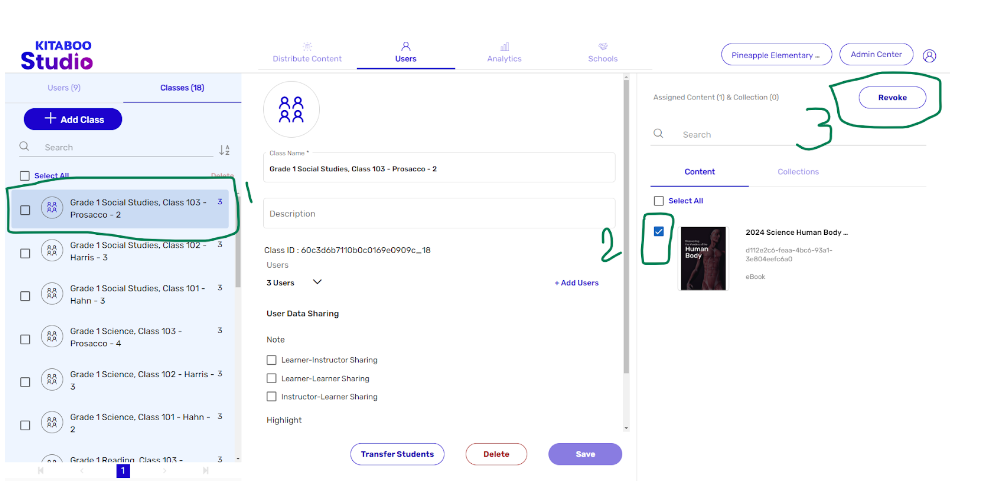
1.2 Revoking Content from a Class
- Sign in with your Customer Admin credentials.

- Go to the Users tab. > Click on Class

- Select the Class from the list for which you want to revoke content. > Select title(s) listed under Contents. > Click on Revoke.
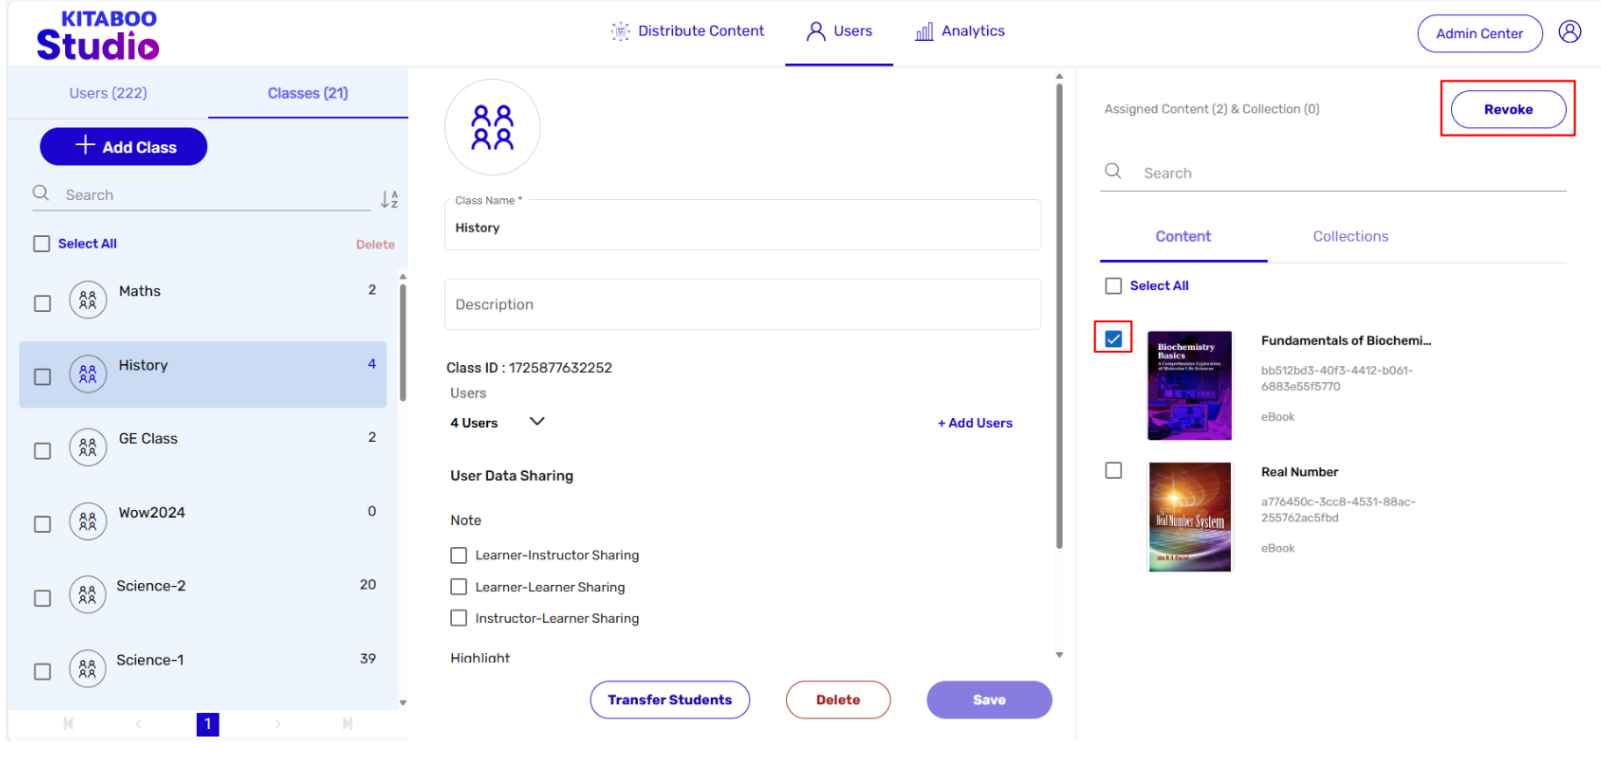
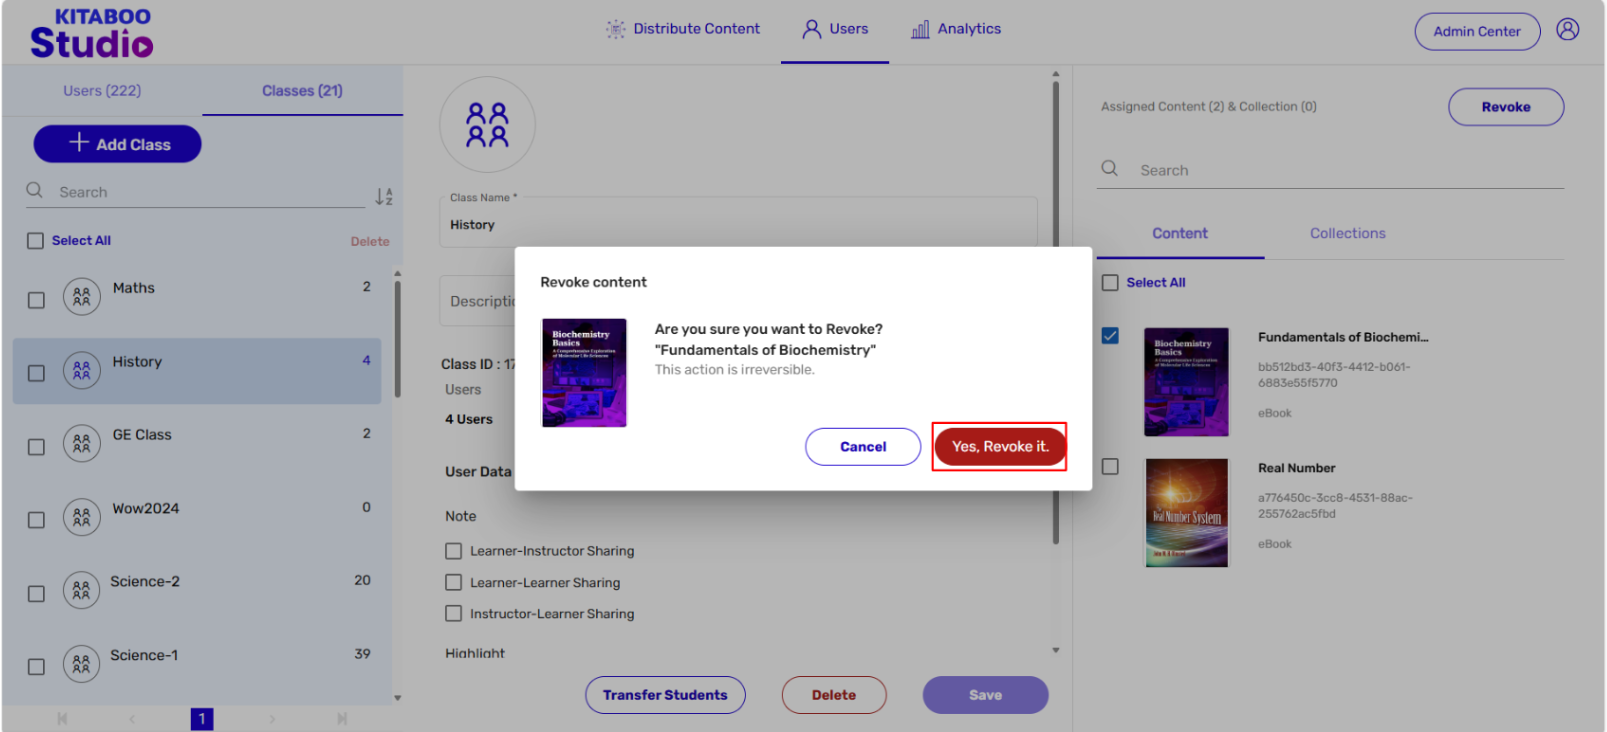
- Click on Yes, Revoke it for your confirmation.
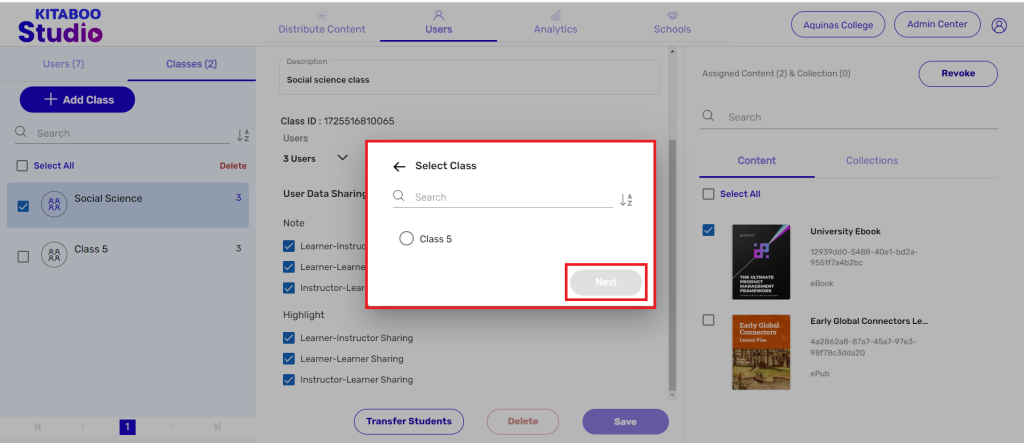
- Sign in with your Customer Admin credentials.
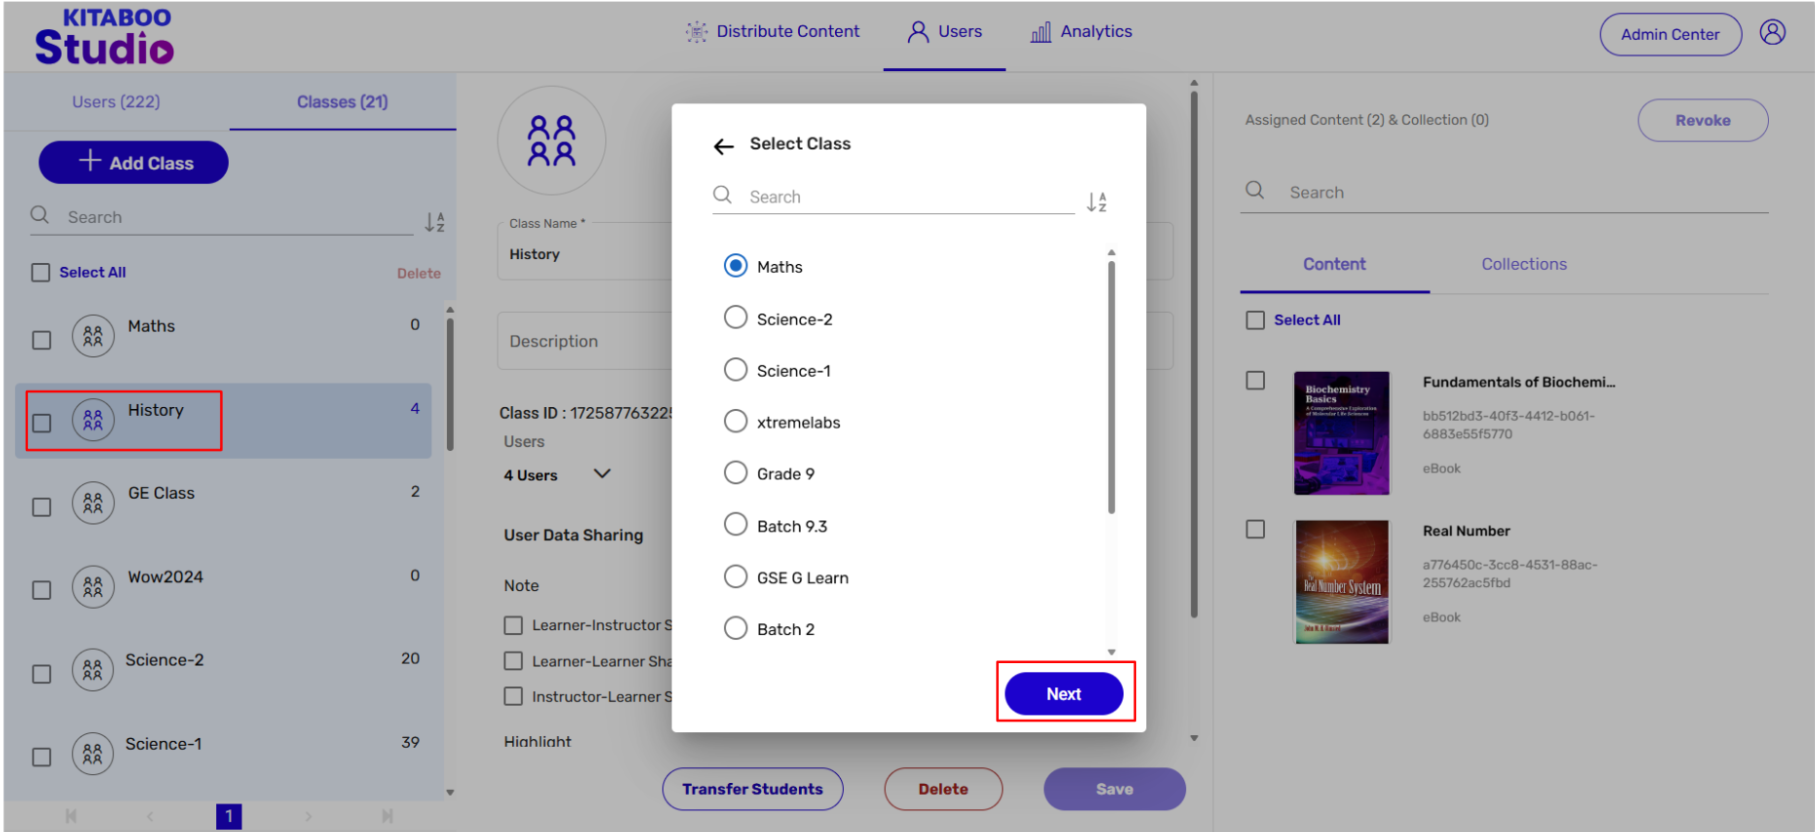
- On the Users tab, click on Class.

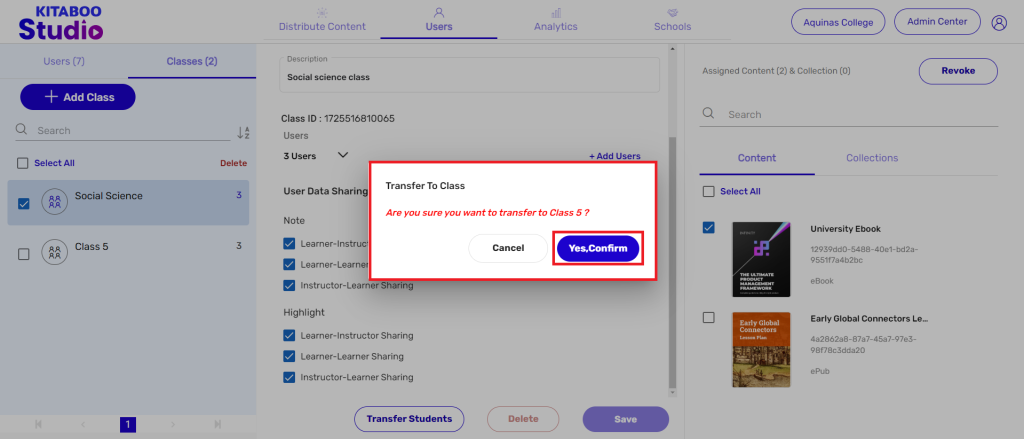
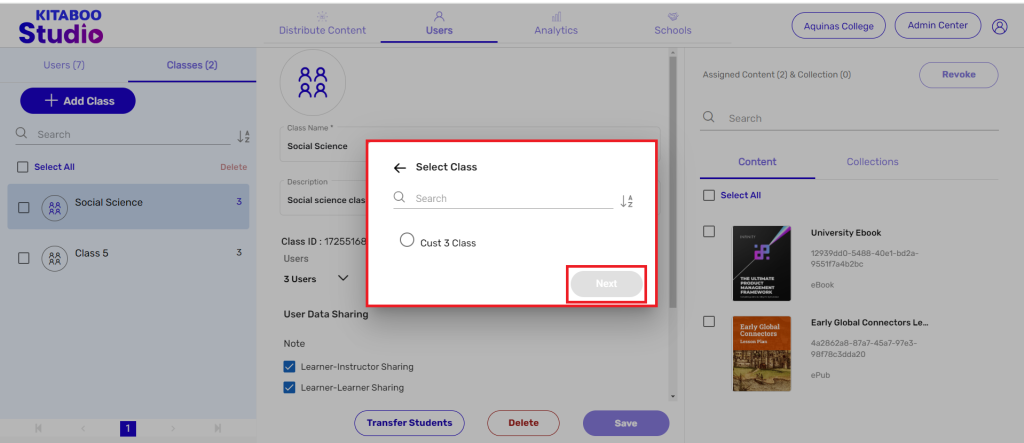
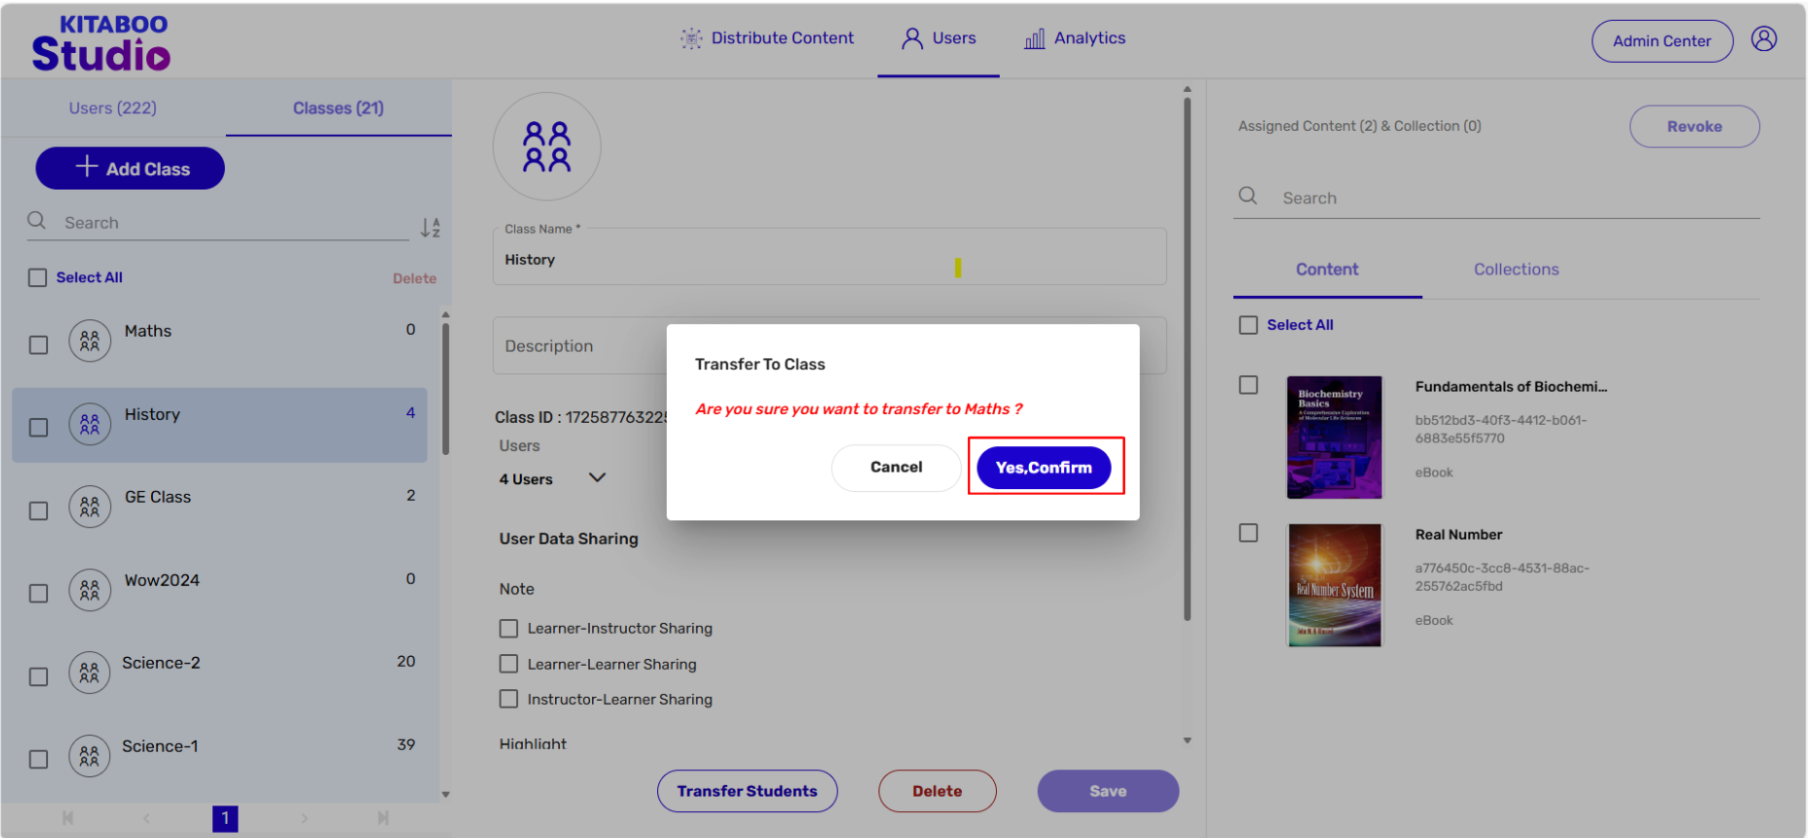
- Select the Class you want to Promote > then click on Transfer Students Button > After you click, It will show the list of existing classes. Select the Class from the list and then click on Next.
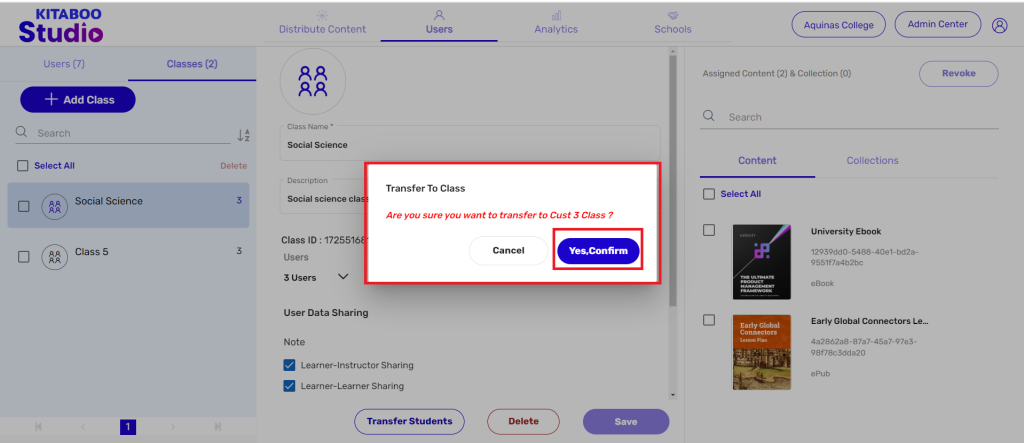
- You will see a Disclaimer popup up before you promote the users to another Class. Kindly confirm to Promote.
Note: Promoted Successfully” message will appear.
NOTE:
● Teachers will not be promoted, only students will be promoted to selected class.
● License will be auto revoked from e.g. Class A and content which is already assigned to e.g. Class B will be auto distributed to newly promoted students.
● If Class A does not have any content and you promote Class B users, it will be promoted.
● If Class A does not have sufficient licenses for promoting users from Class B, In this case not a single user will be promoted.
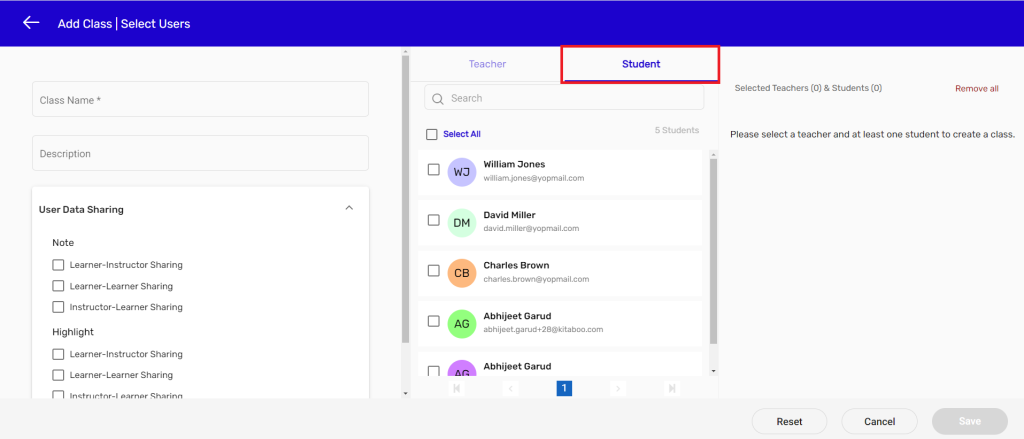
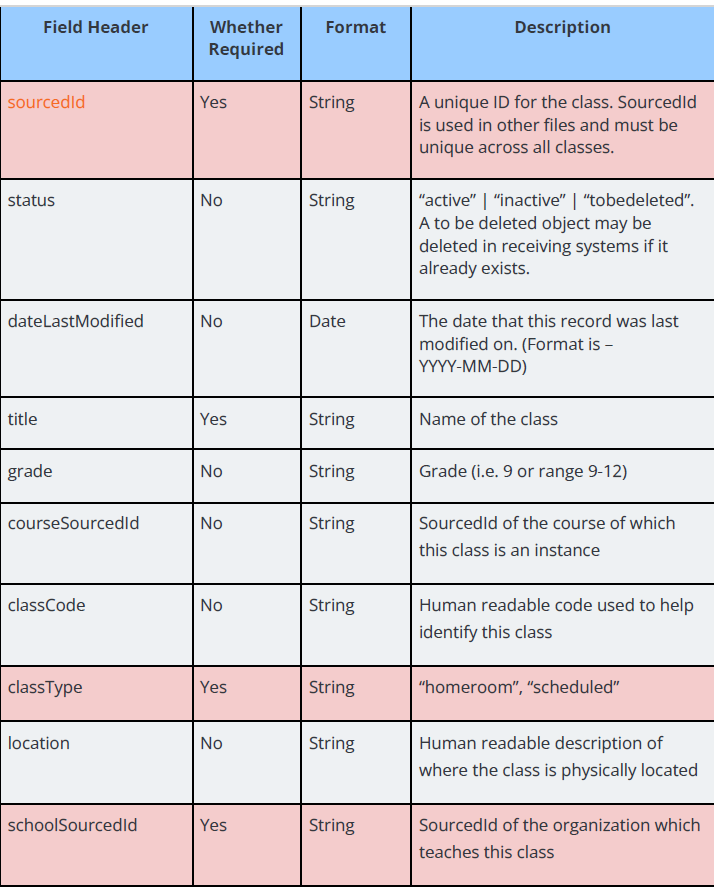
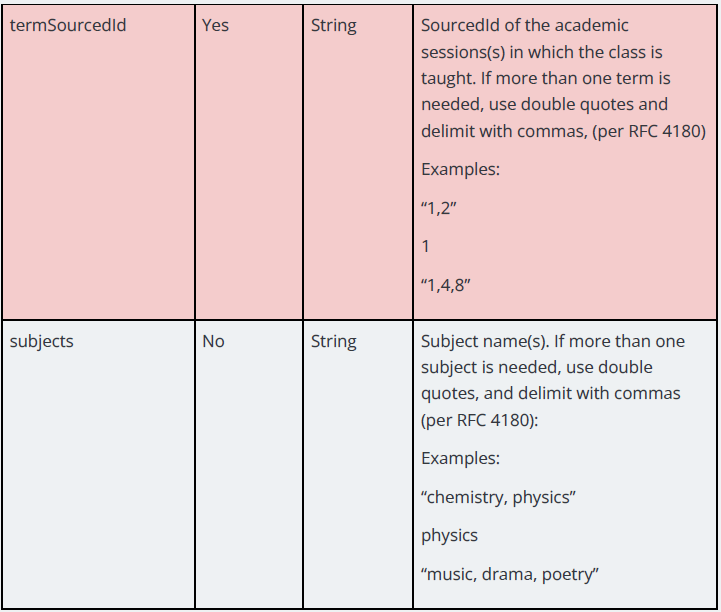
1. Create Class –
Kitaboo Studio empowers you to create a class for your users. You can create a class by
following a few simple steps.
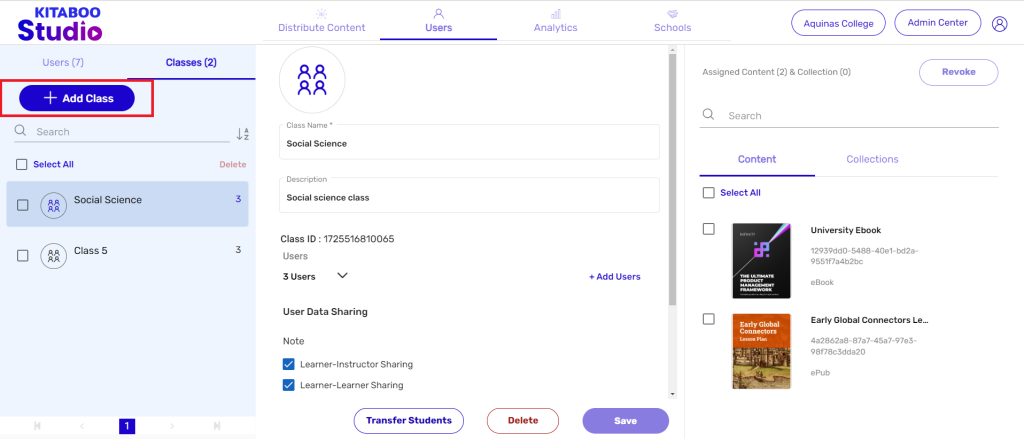
- Sign in with your Customer Admin credentials

- Switch to the Users tab, click on Class on the Users tab

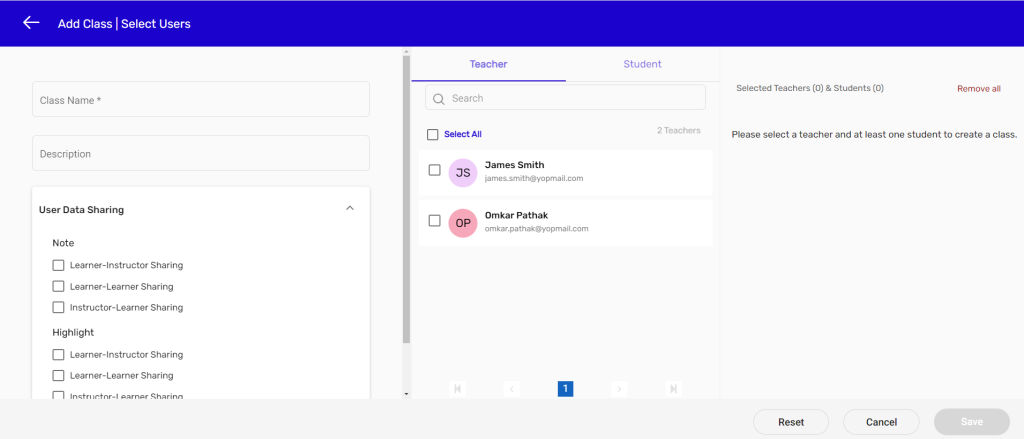
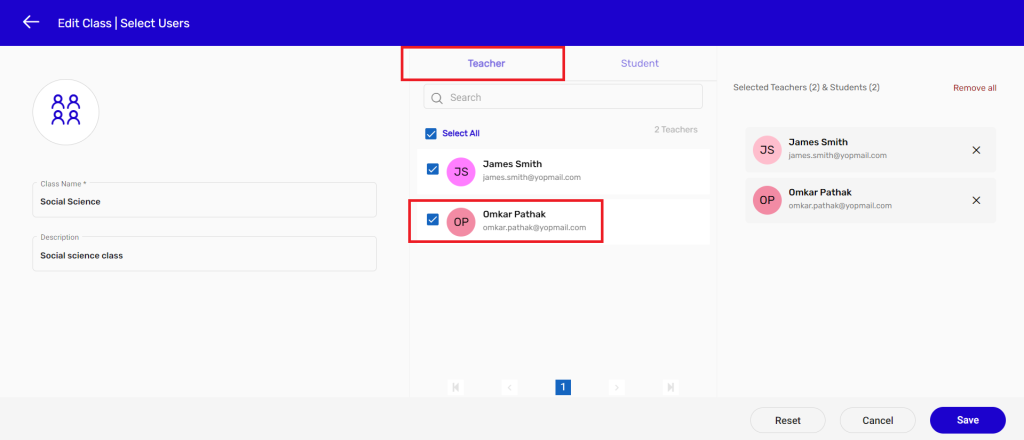
- Enter details in the Class Name and the Description fields. > Expand the User Data Sharing drop-down menu and check the set of data-sharing pairs in terms of notes-sharing and viewing of highlights. > Select Teacher(s) from the list of teachers.
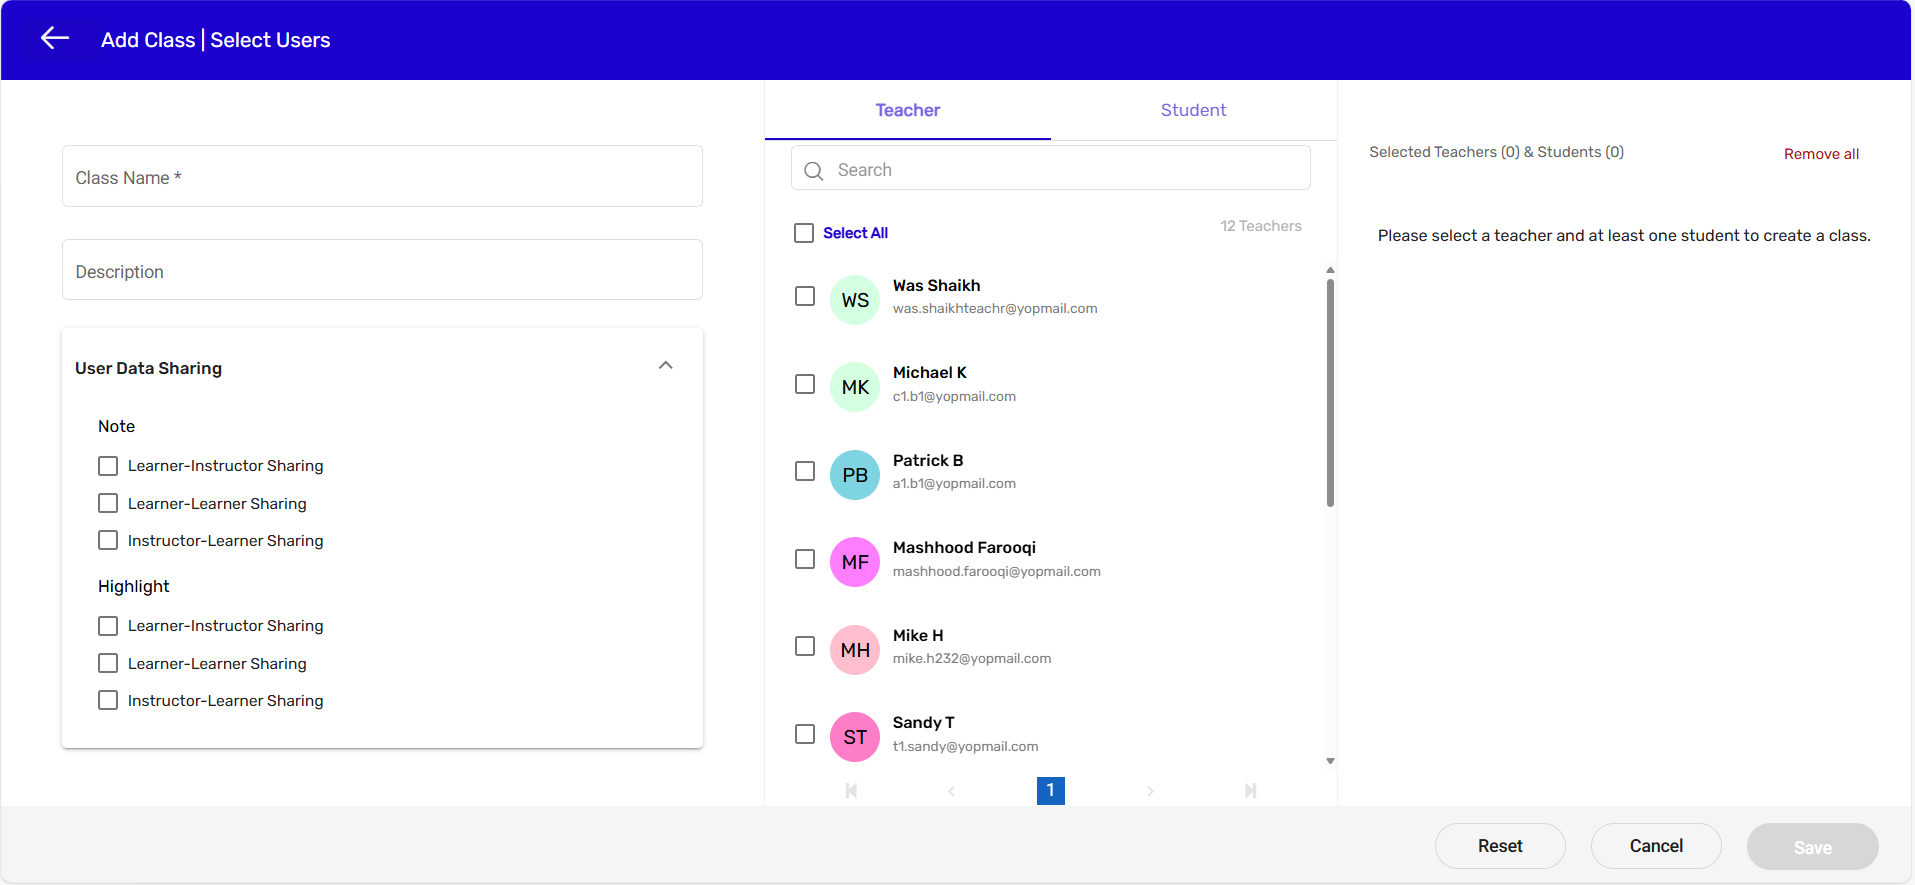
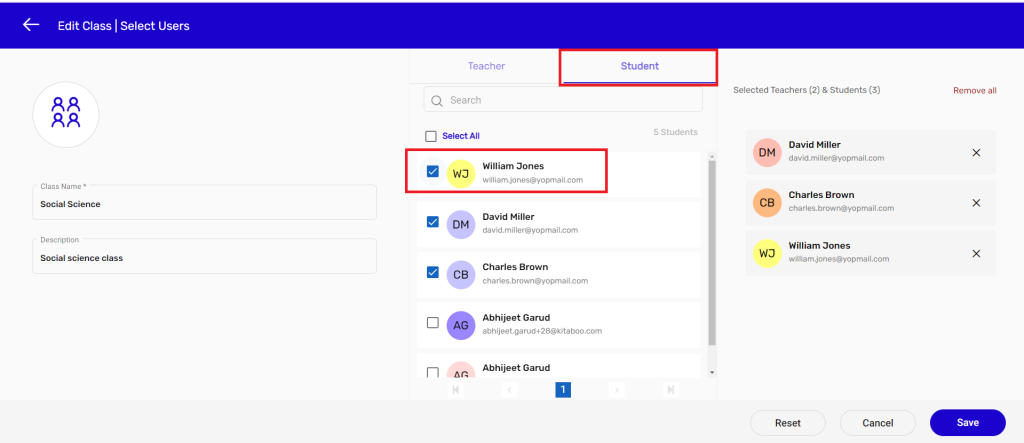
- Switch to the Student tab. > Select Student(s) from the list of students. > Click on the Save button.
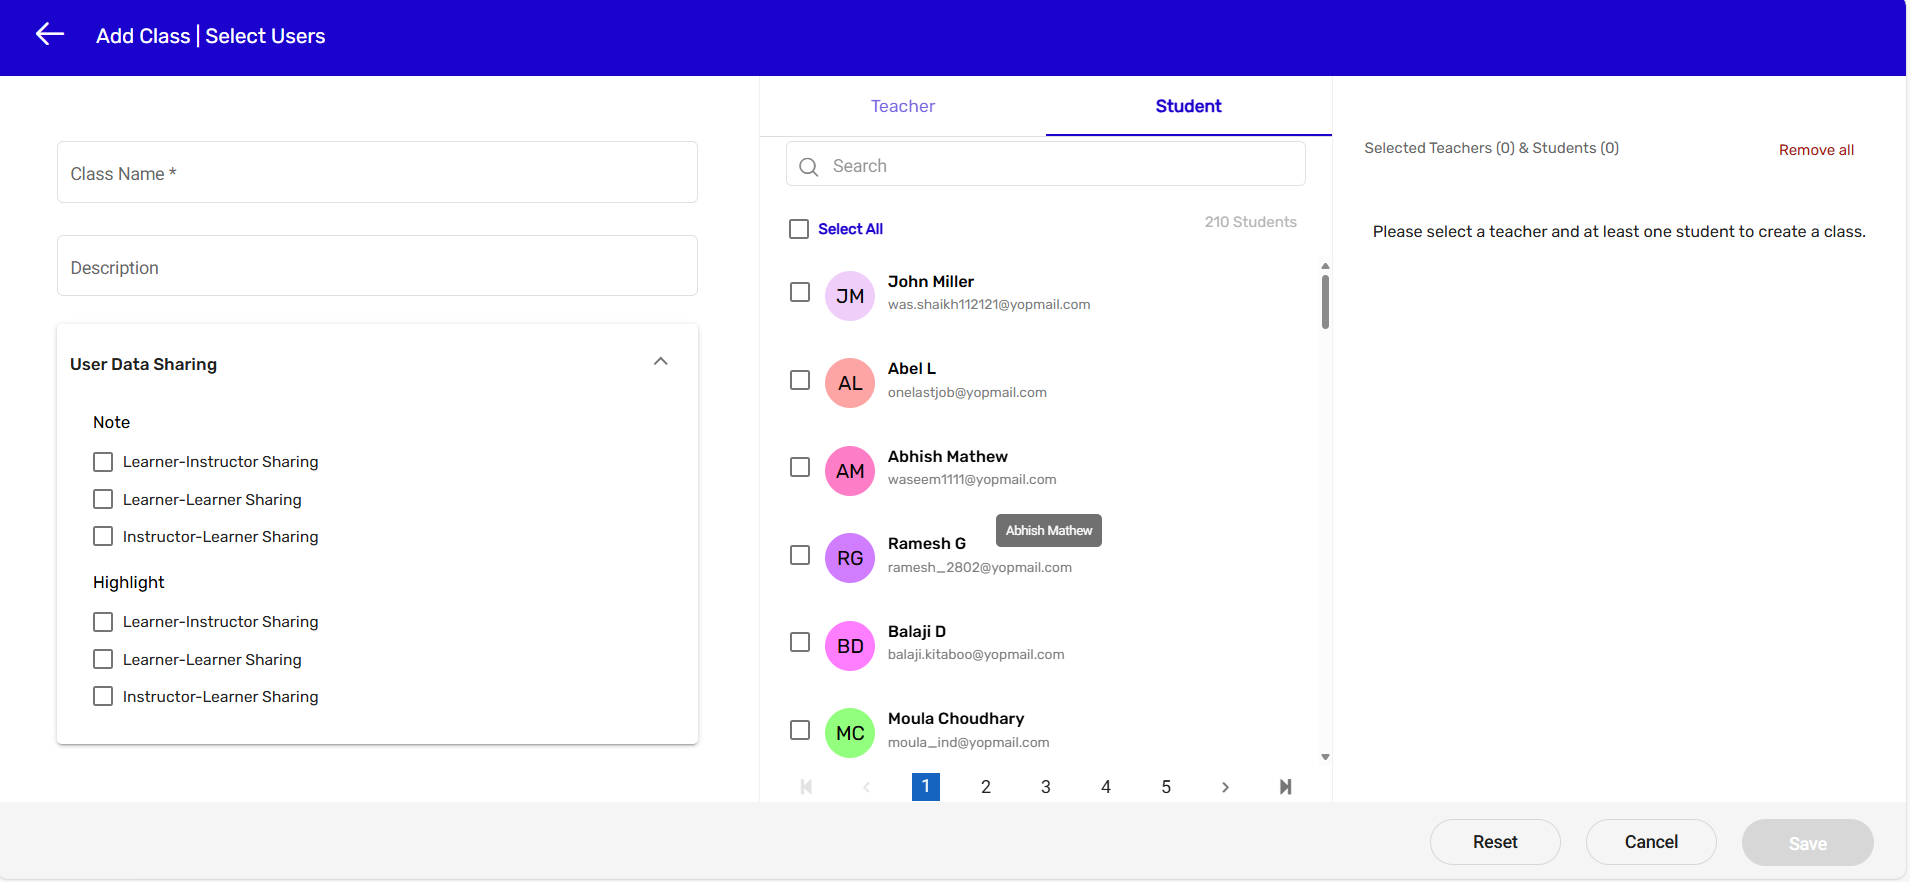
NOTE:
● The Teacher tab will be the default selection.
● Minimum one teacher and one student should be selected to create a class
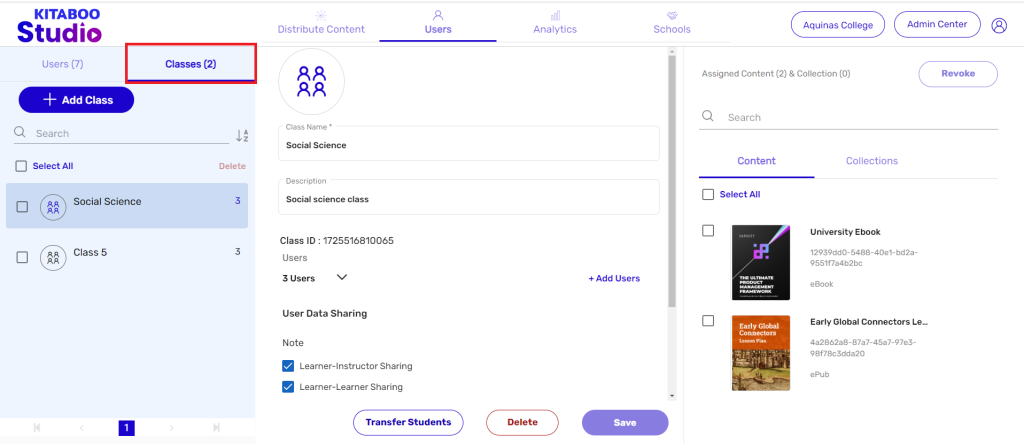
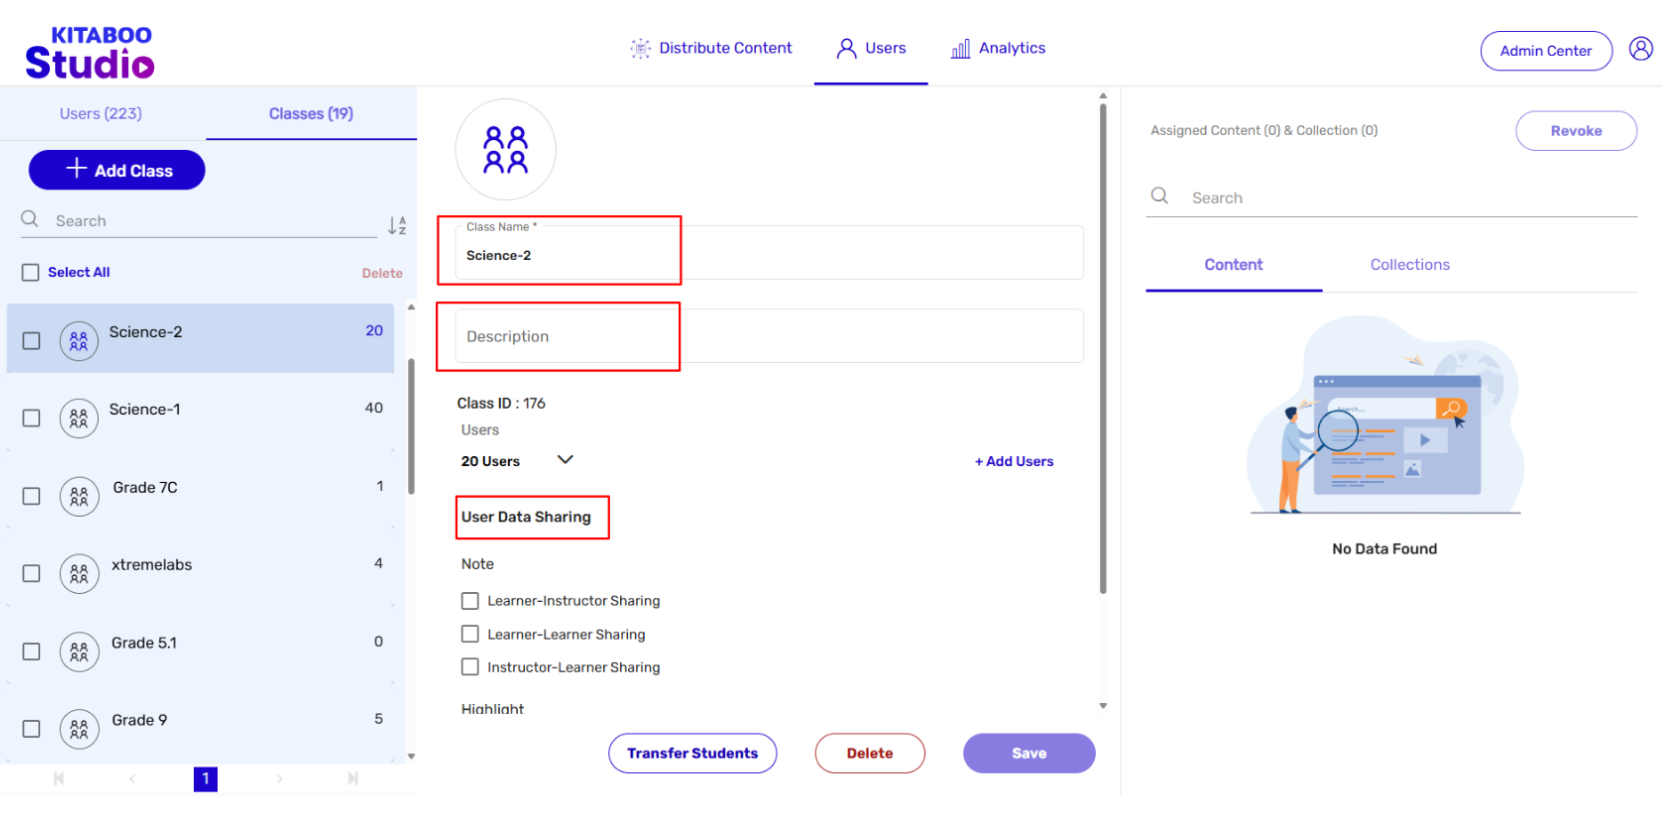
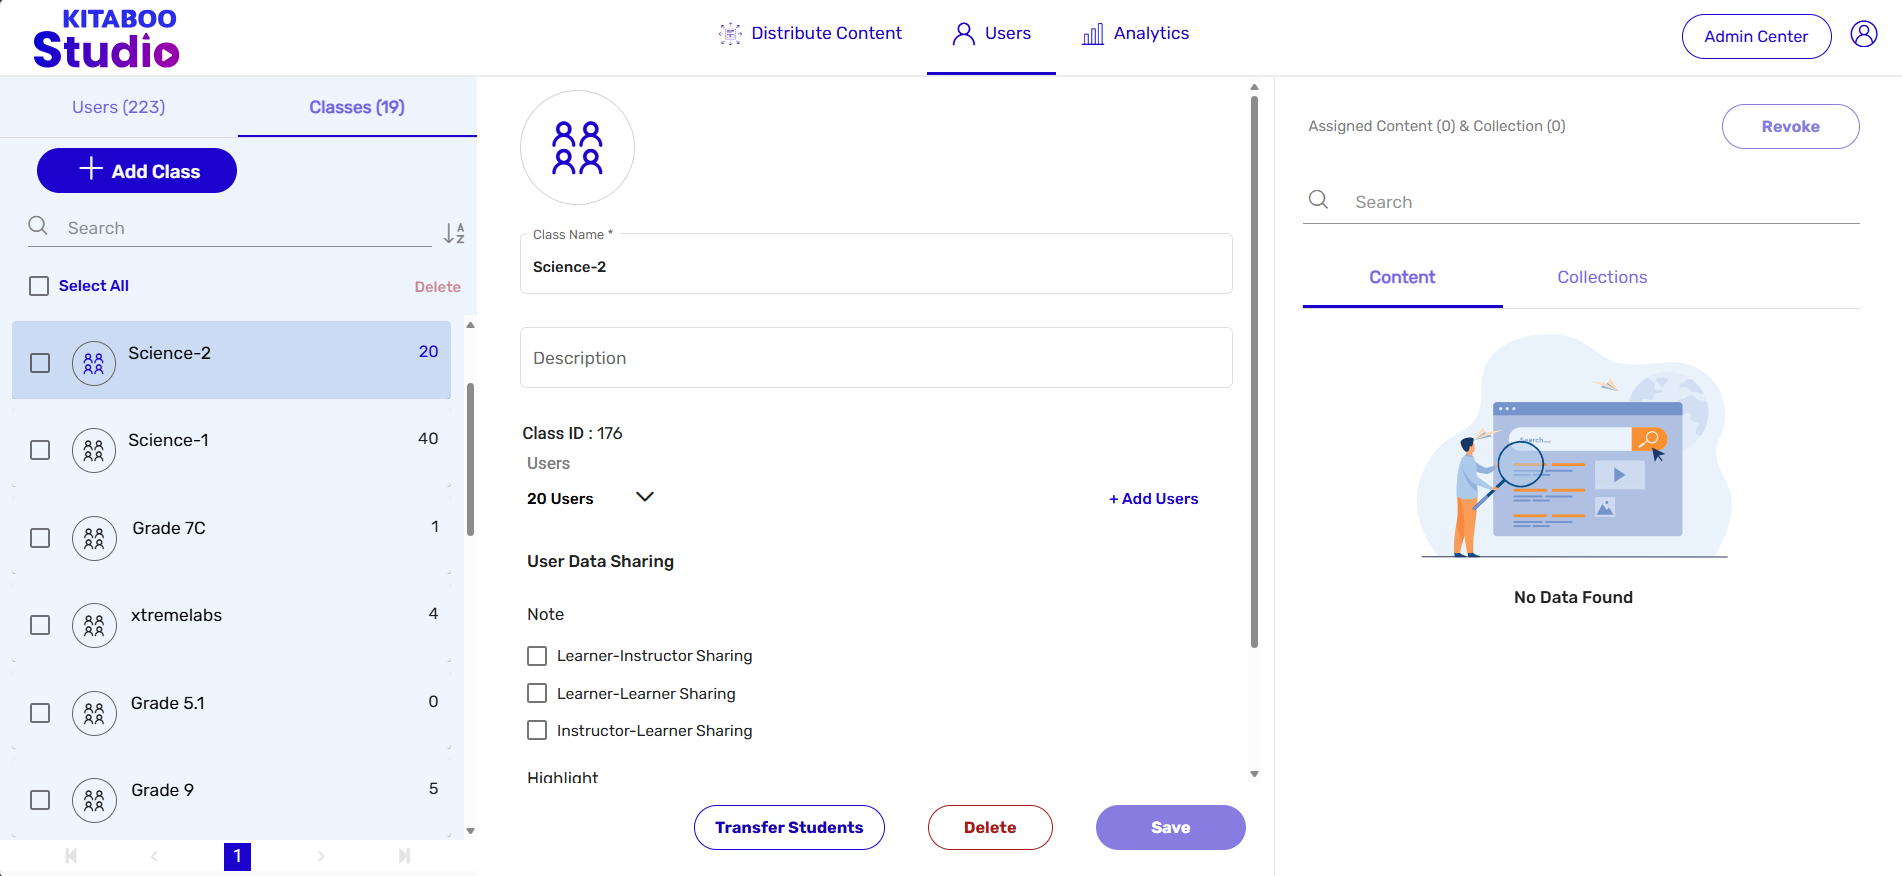
2. Editing a Class –
You have already created a class. You may, however, need to modify some of the information
related to the class. Kitaboo portal allows you to edit the required information.
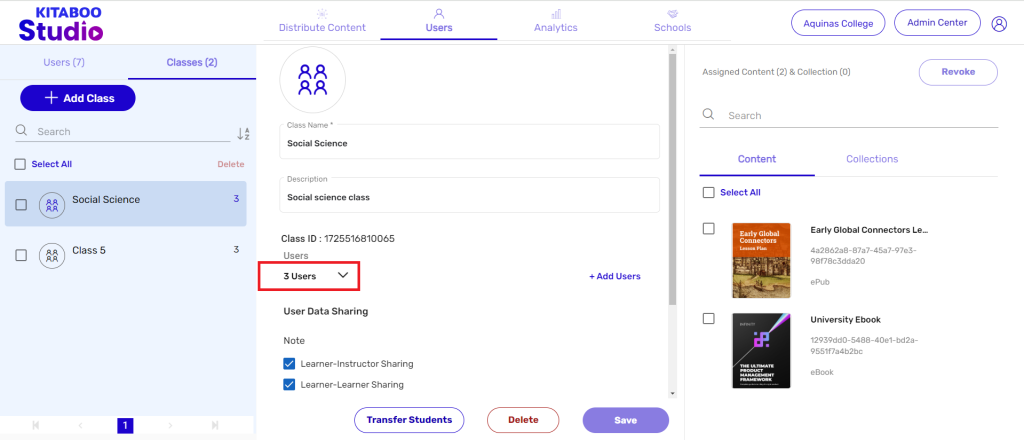
- Sign in with your Customer Admin credentials

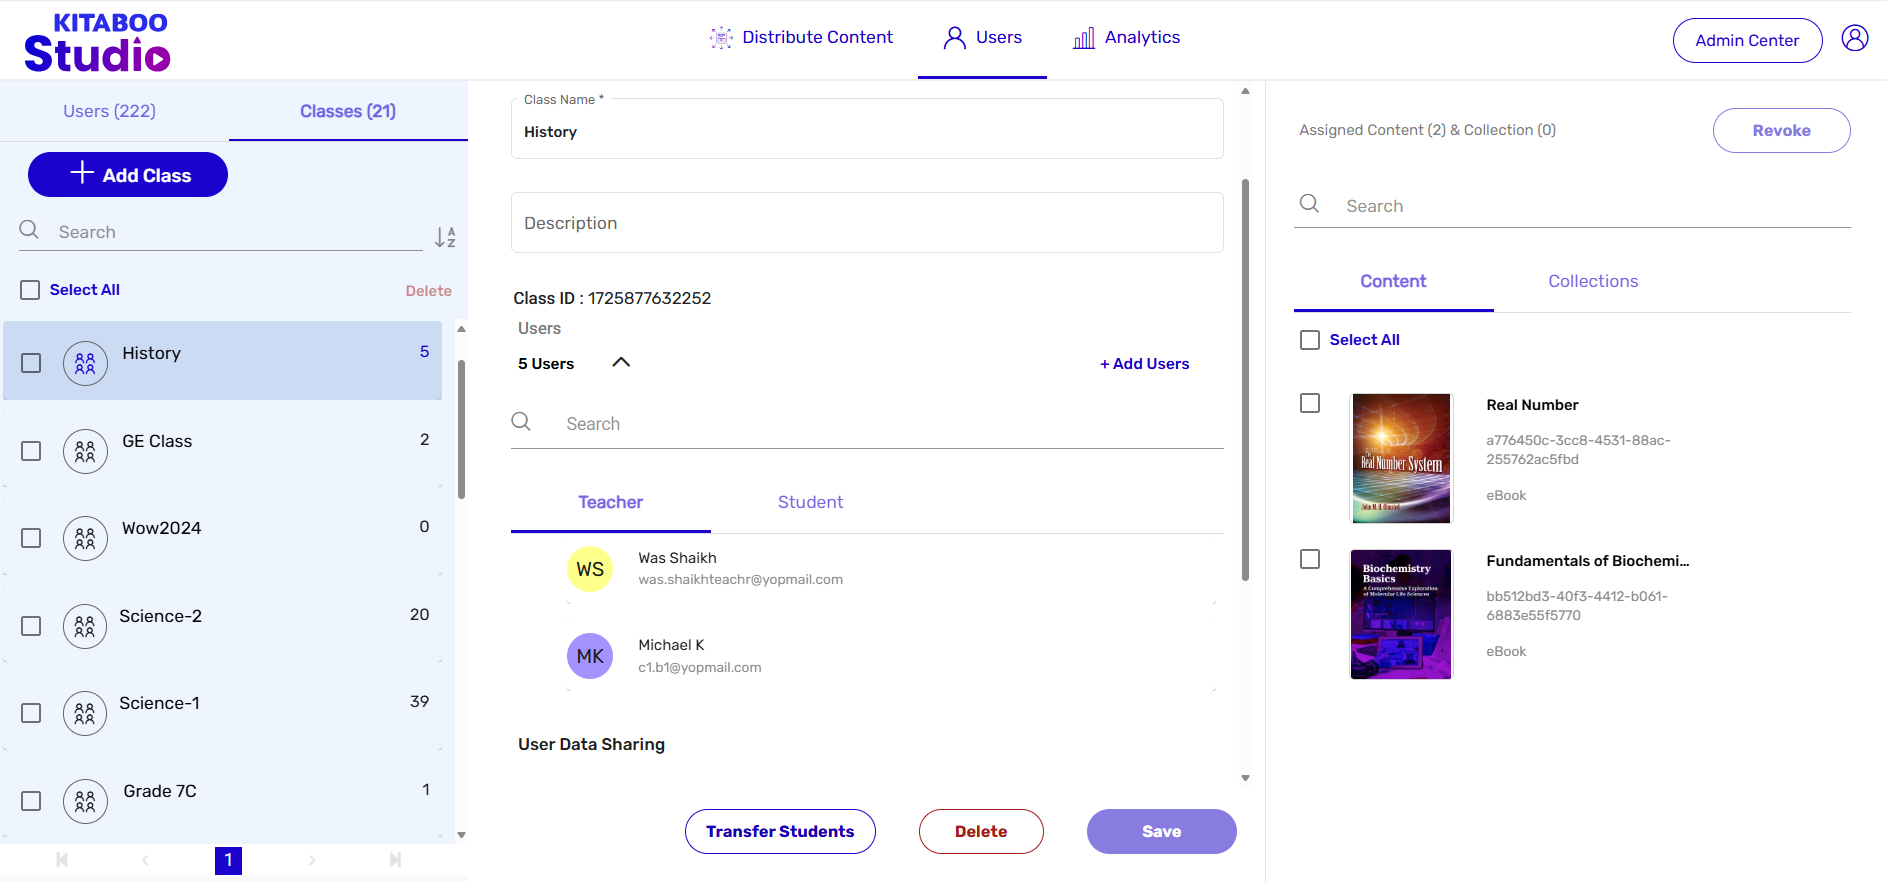
- Switch to the Users tab. > Click on Class on the Users tab.

- Select the class you want to edit. > Modify information in the desired field(s). > Click on Save.
NOTE: Information in the highlighted field has been edited in this example.
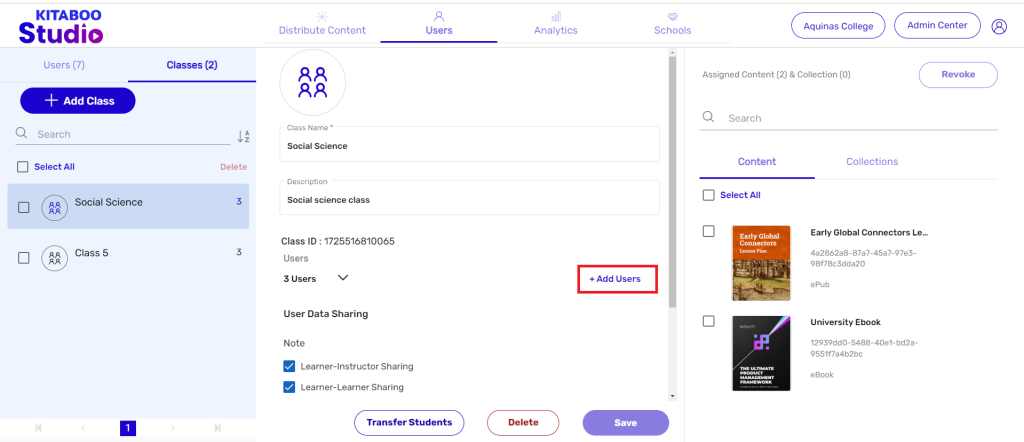
3. Adding a New User to an Existing Class
The Kitaboo portal also enables you to add a new user or more than one user to an existing class. You just need to follow a few steps for adding a new user.
- Sign in with your Customer Admin credentials.

- On the Users tab, click on Class.
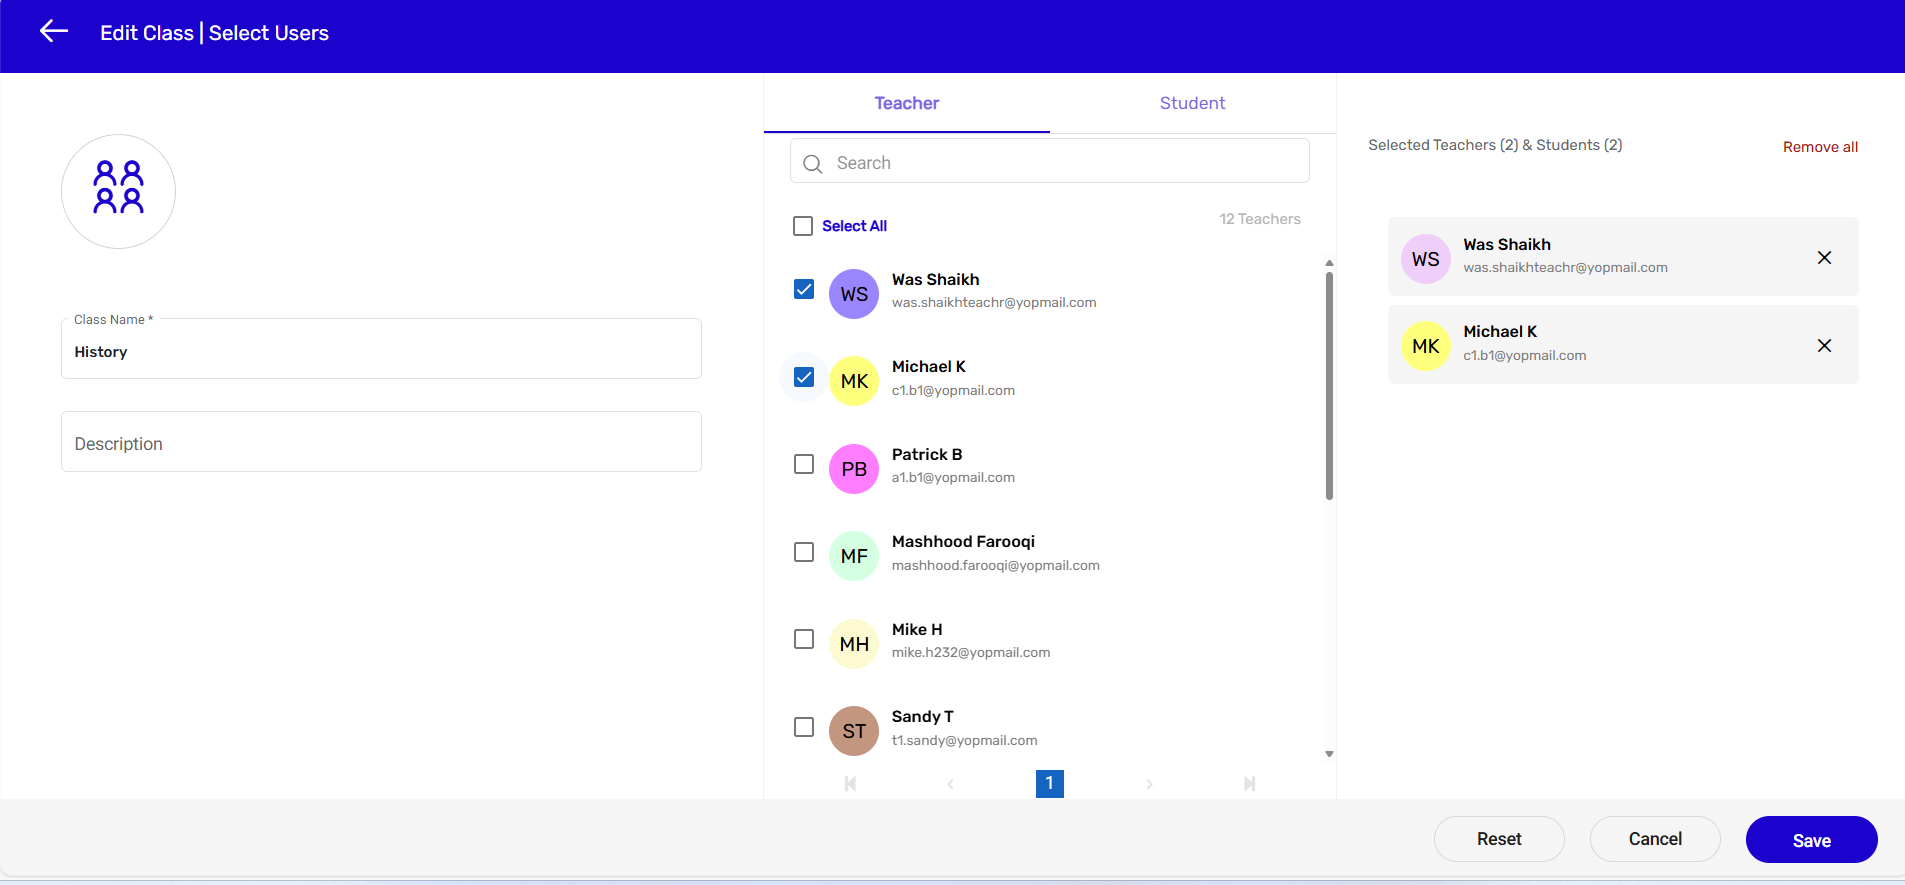
- Select the class you want to add user(s) to. > Click on the Add Users hyperlink.
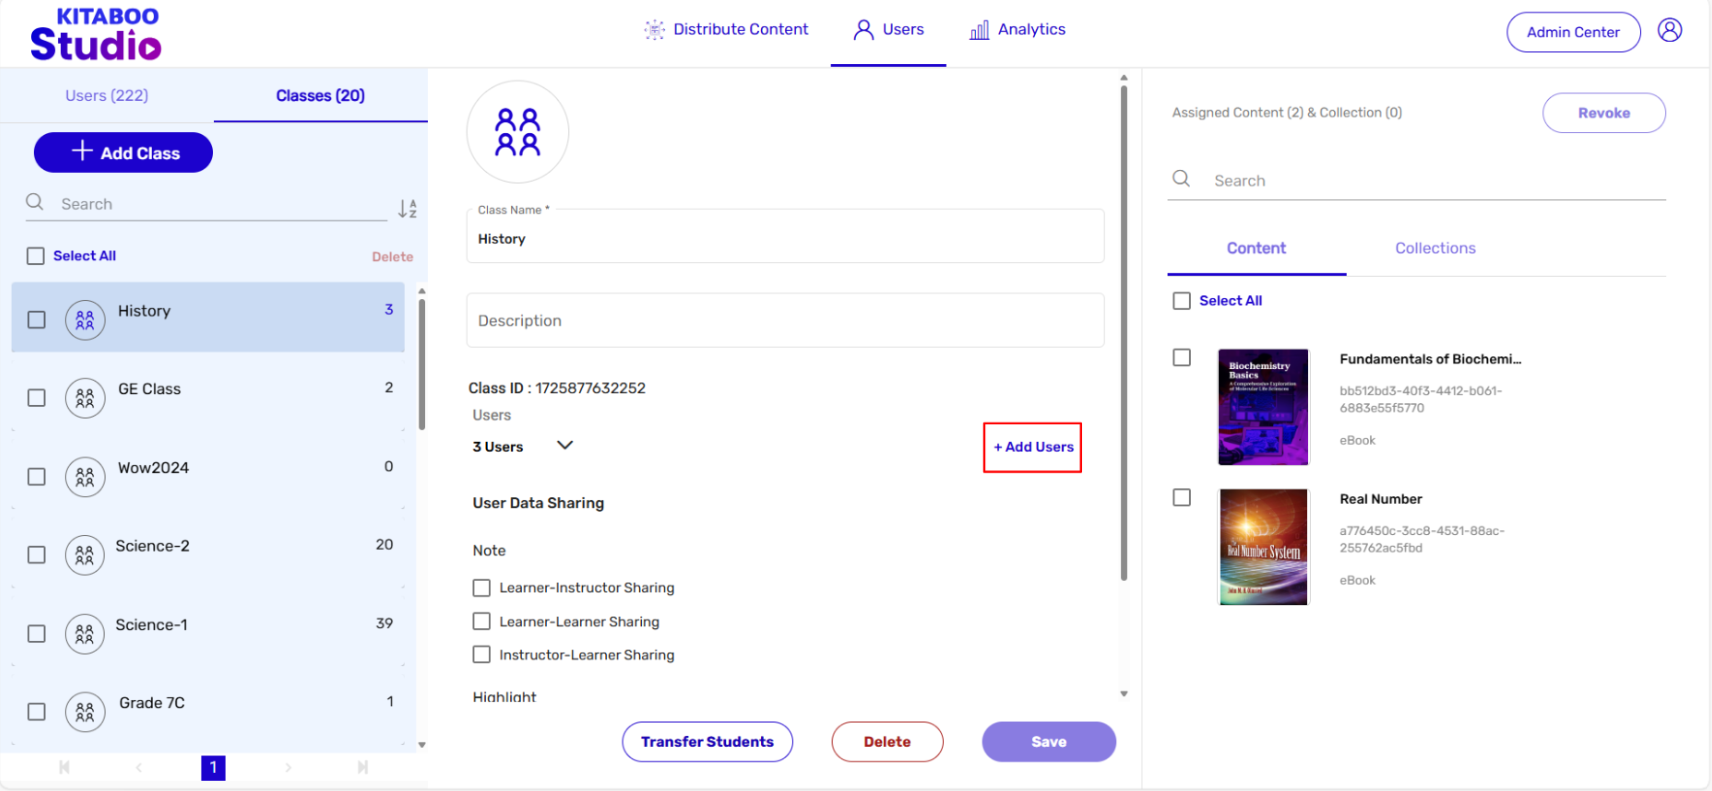
- Select the user’s Role (Teacher or Student) you want to add. > Select the user’s name(s) Box from the list.
NOTE: The second user (Teacher) has been added in this example.
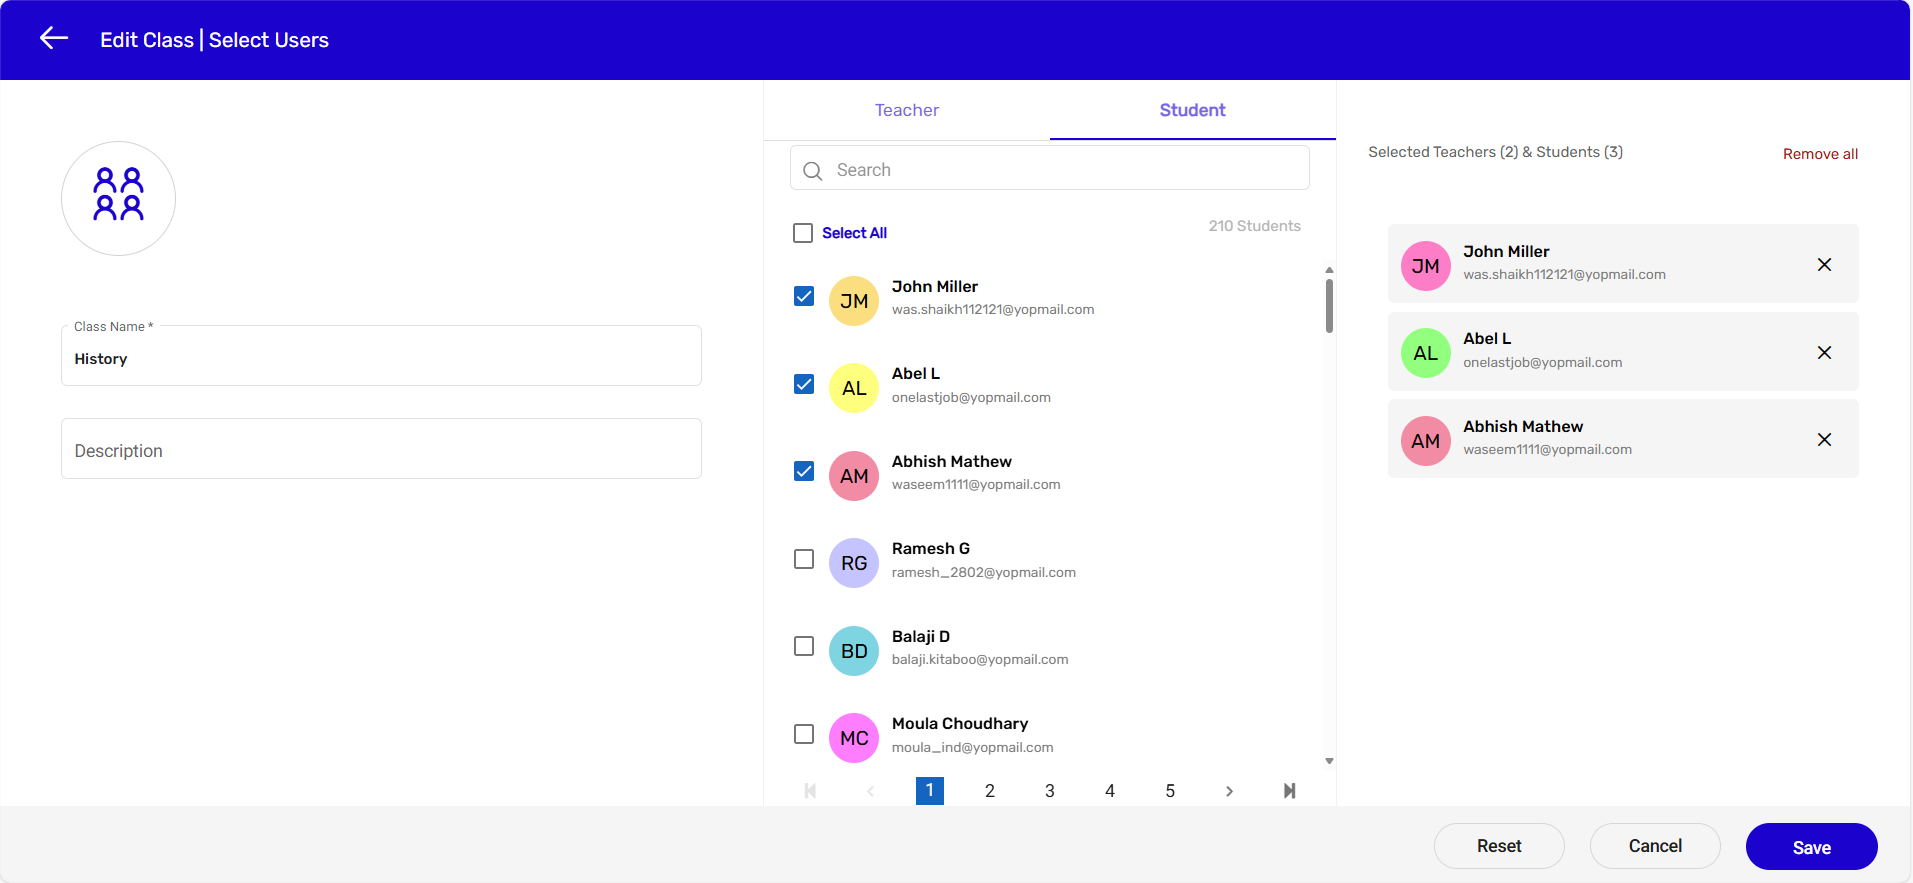
- Switch the user’s Role if required. > Select the user’s name(s) Checkbox from the list. > Click on Add.
NOTE: The third user (students) have been added in this example.
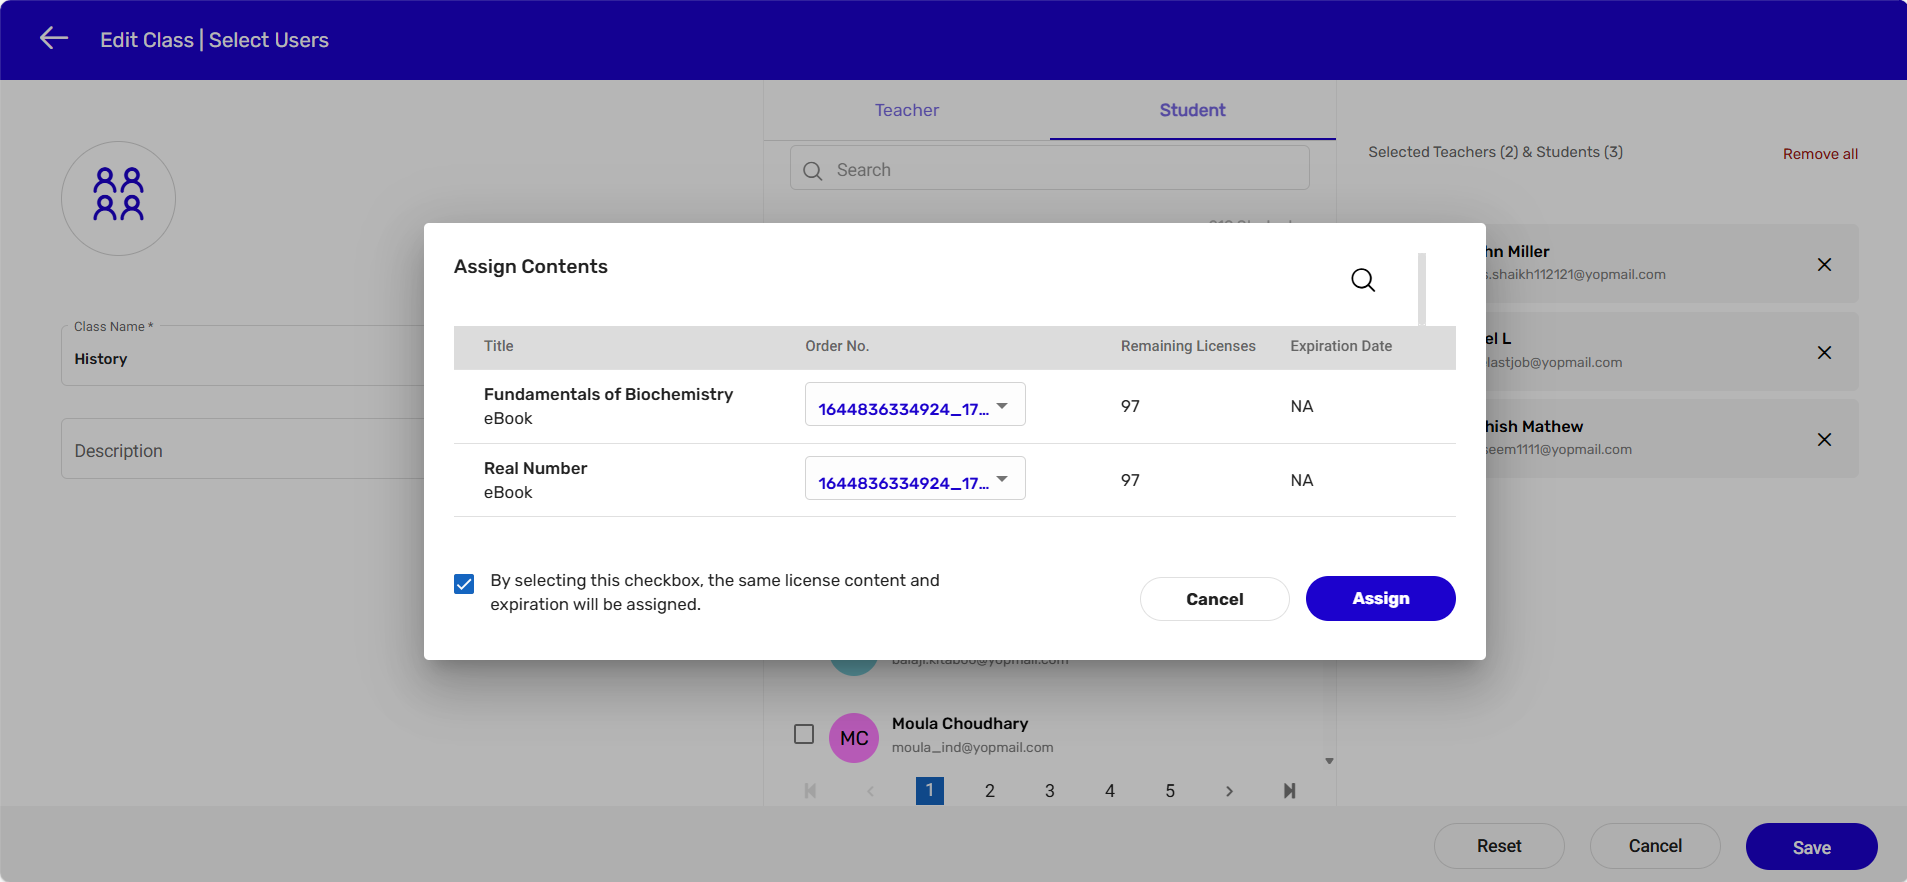
- In this example, there are three titles listed on the Assign Contents pop-up. You can manually select an order number from the drop-down menu against each title. > Click on the Assign button.
However, if the number of titles is too many, you can select the checkbox on the pop-up, and click on the Assign button.
NOTE: The system will automatically select a title with remaining licenses valid for a maximum expiry period.
Important:
● No new user can be added to an existing class if there is no content assigned to the class.
● No new user can be added to an existing class if the number of remaining licenses for the content assigned to the class is zero.
4. Removing a User from an Existing Class
The Kitaboo system also allows you to remove a user from an existing class. Let’s see how to
do it.
- Sign in with your Customer Admin credentials.

- On the Users tab, click on Class.

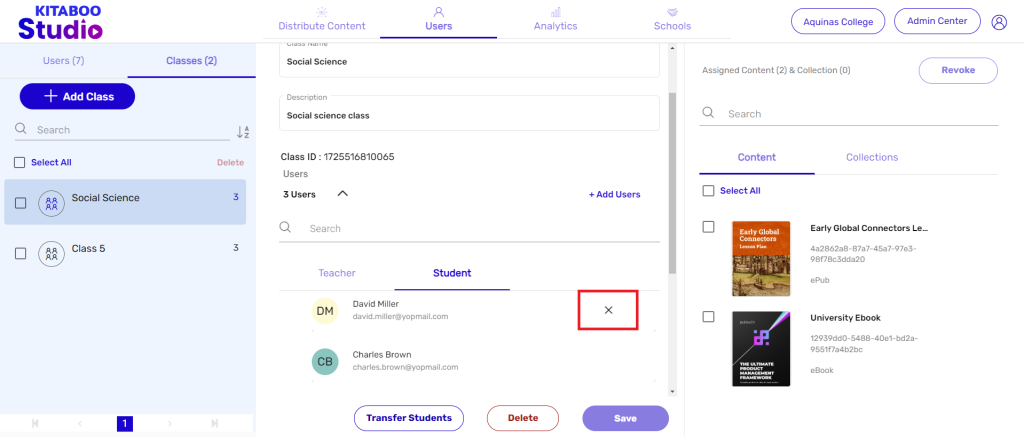
- Select the Class you want a user to remove from. > Click on Users.
- Click on the user type, Teacher/Student, you want to remove. > Roll the cursor over the user you want to remove. > Click on the Cross symbol that appears.
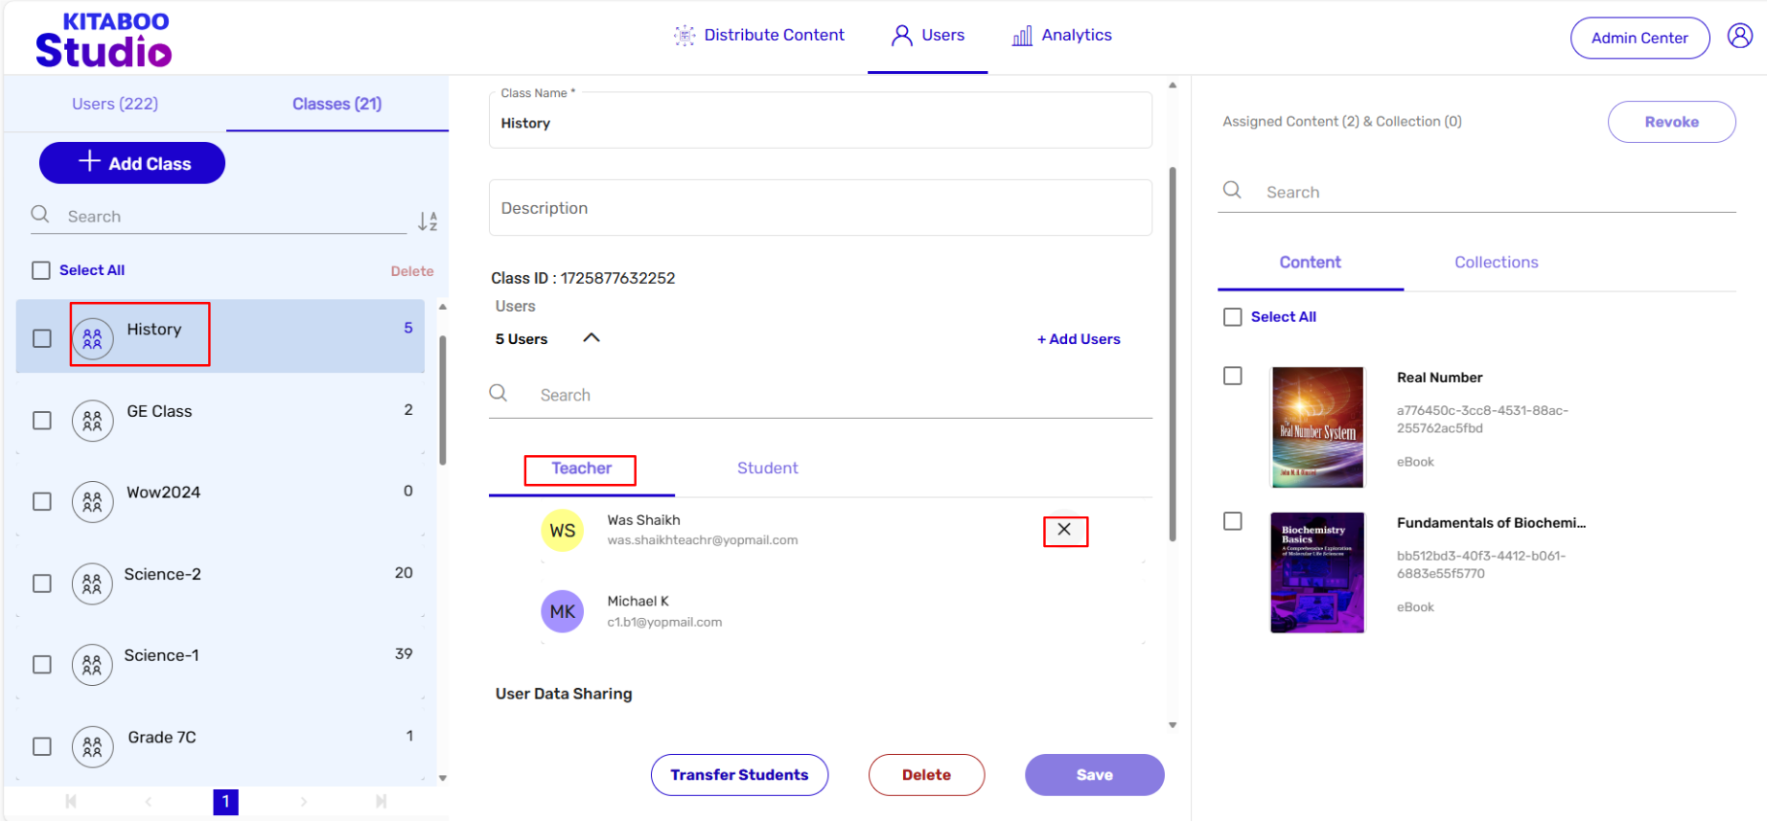
NOTE:
- The user type Teacher will appear enabled by default.
- In a similar way you can do it for students.
1. Users
- Sign in with your Customer Admin credentials.

- The Admin Center button is placed on the top right corner of the screen.
- The Admin Center page enables the main Institute Admin to either edit the profile of an existing user or add new user(s).
NOTE: Items like name, email ID, and password editable, except role.
Important: The main institute admin can change the password of his/her own account as well as of the other users attached to the institute’s account.
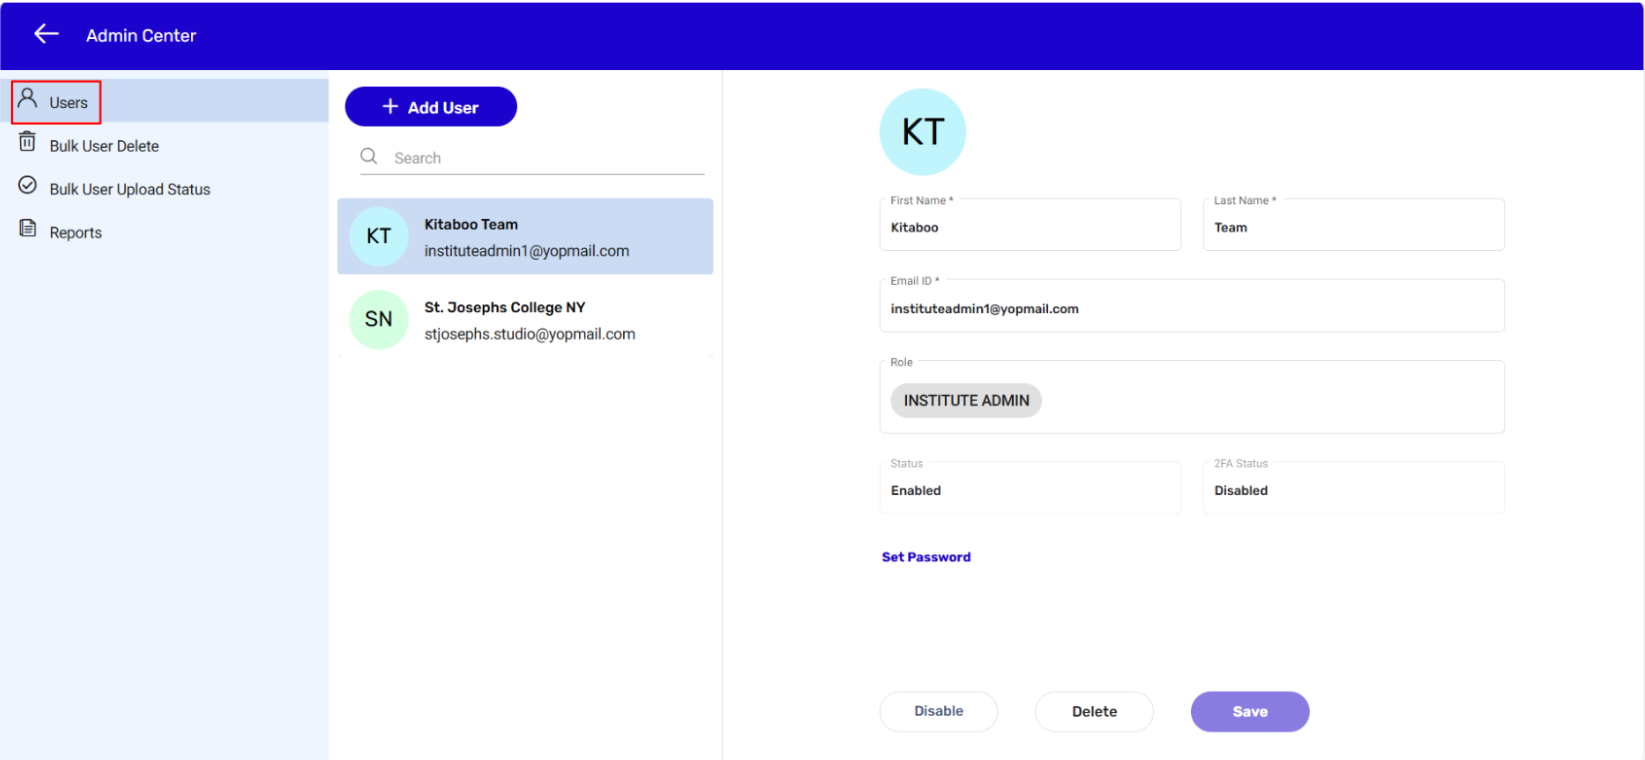
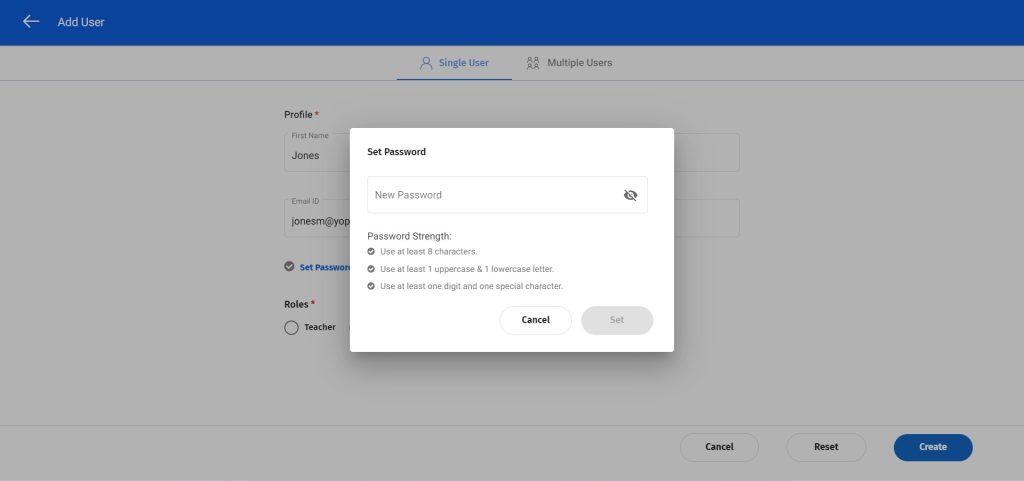
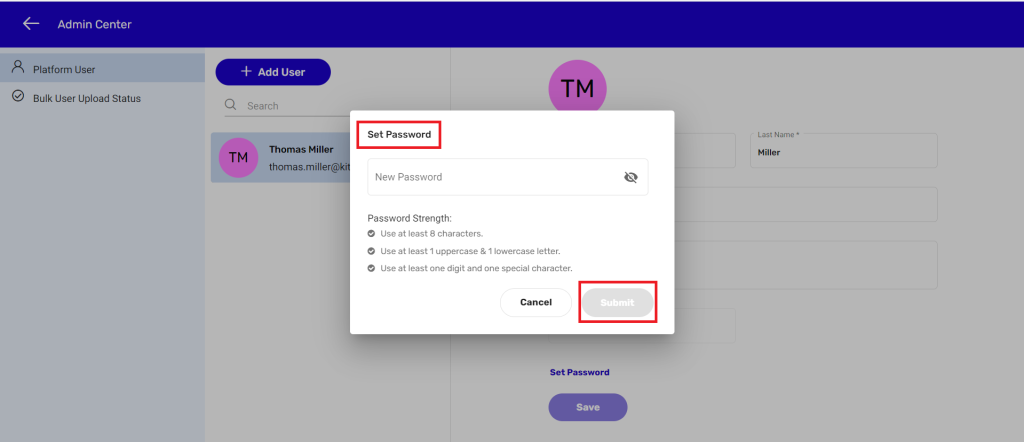
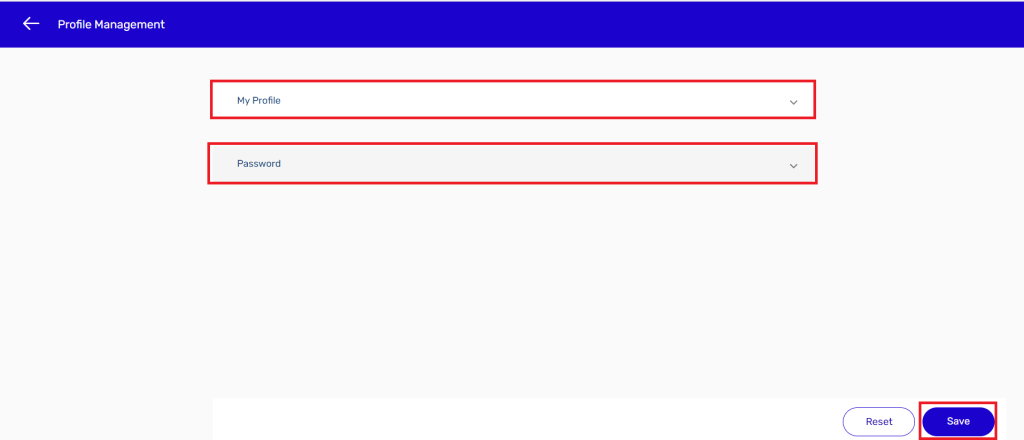
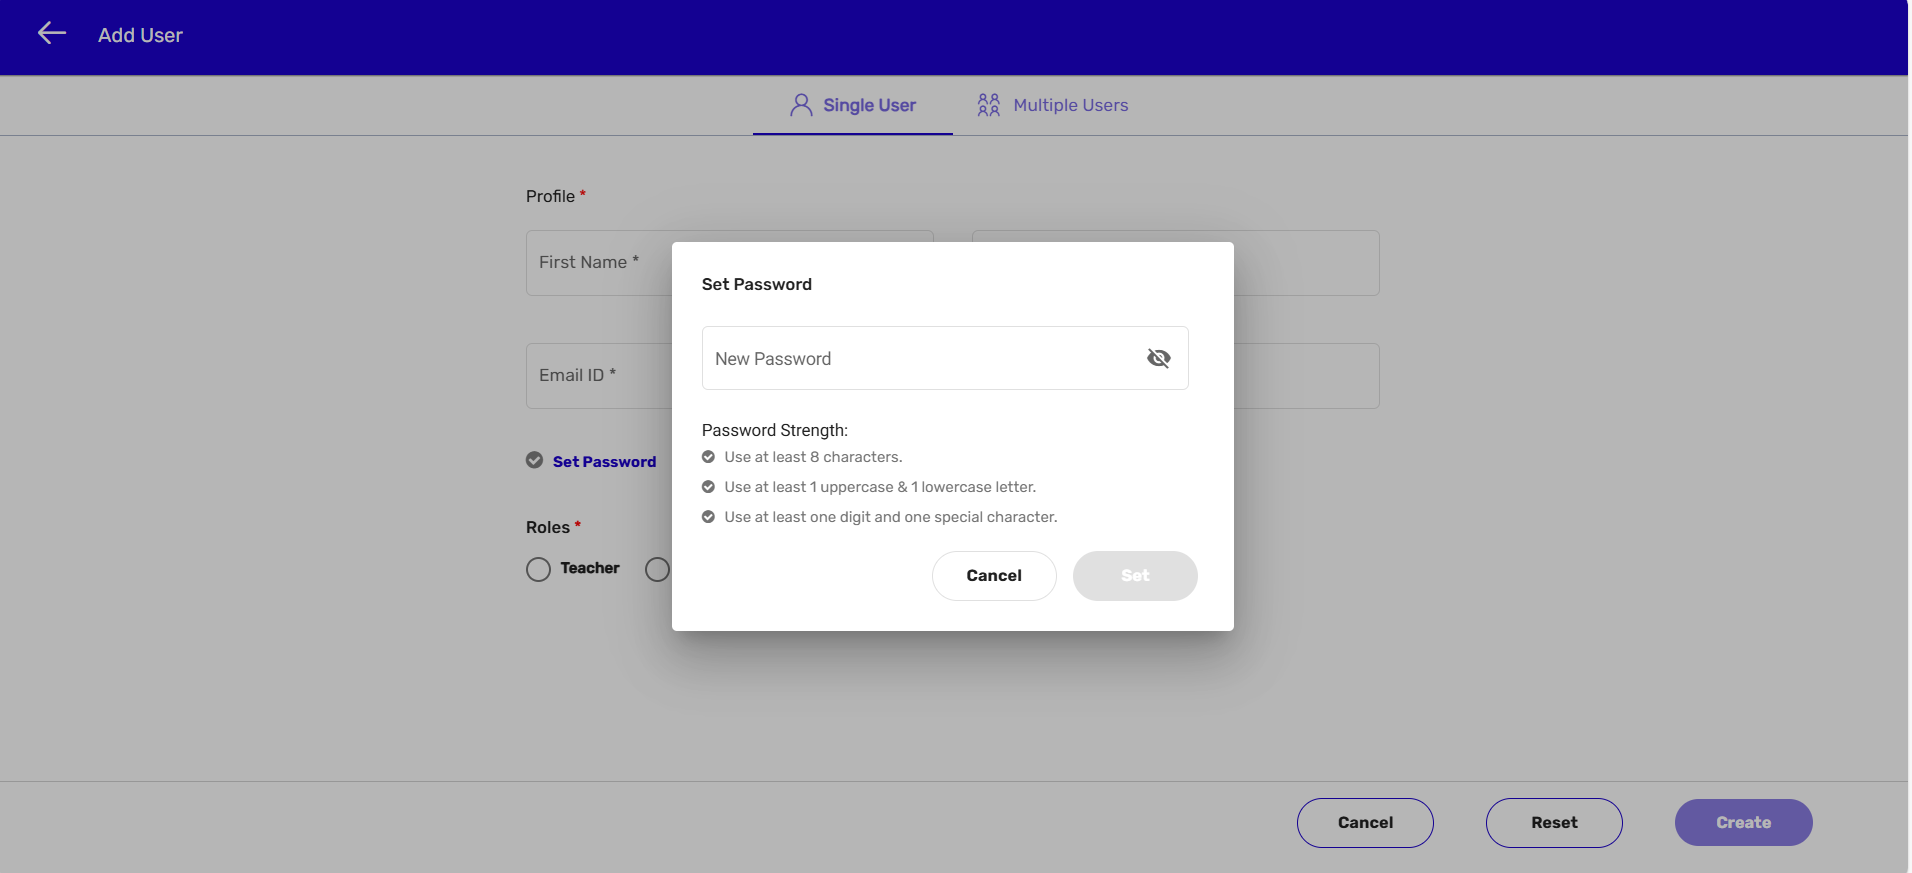
- To change the password of an existing user: Click on the Set Password link. > On the Set Password pop-up, enter a new password as per the prescribed format for a password. > click on Save.

- The Admin Center also enables you to add a single user or to simultaneously add multiple users to your account.
 2. Bulk User Delete
- Sign in with your Customer Admin credentials.

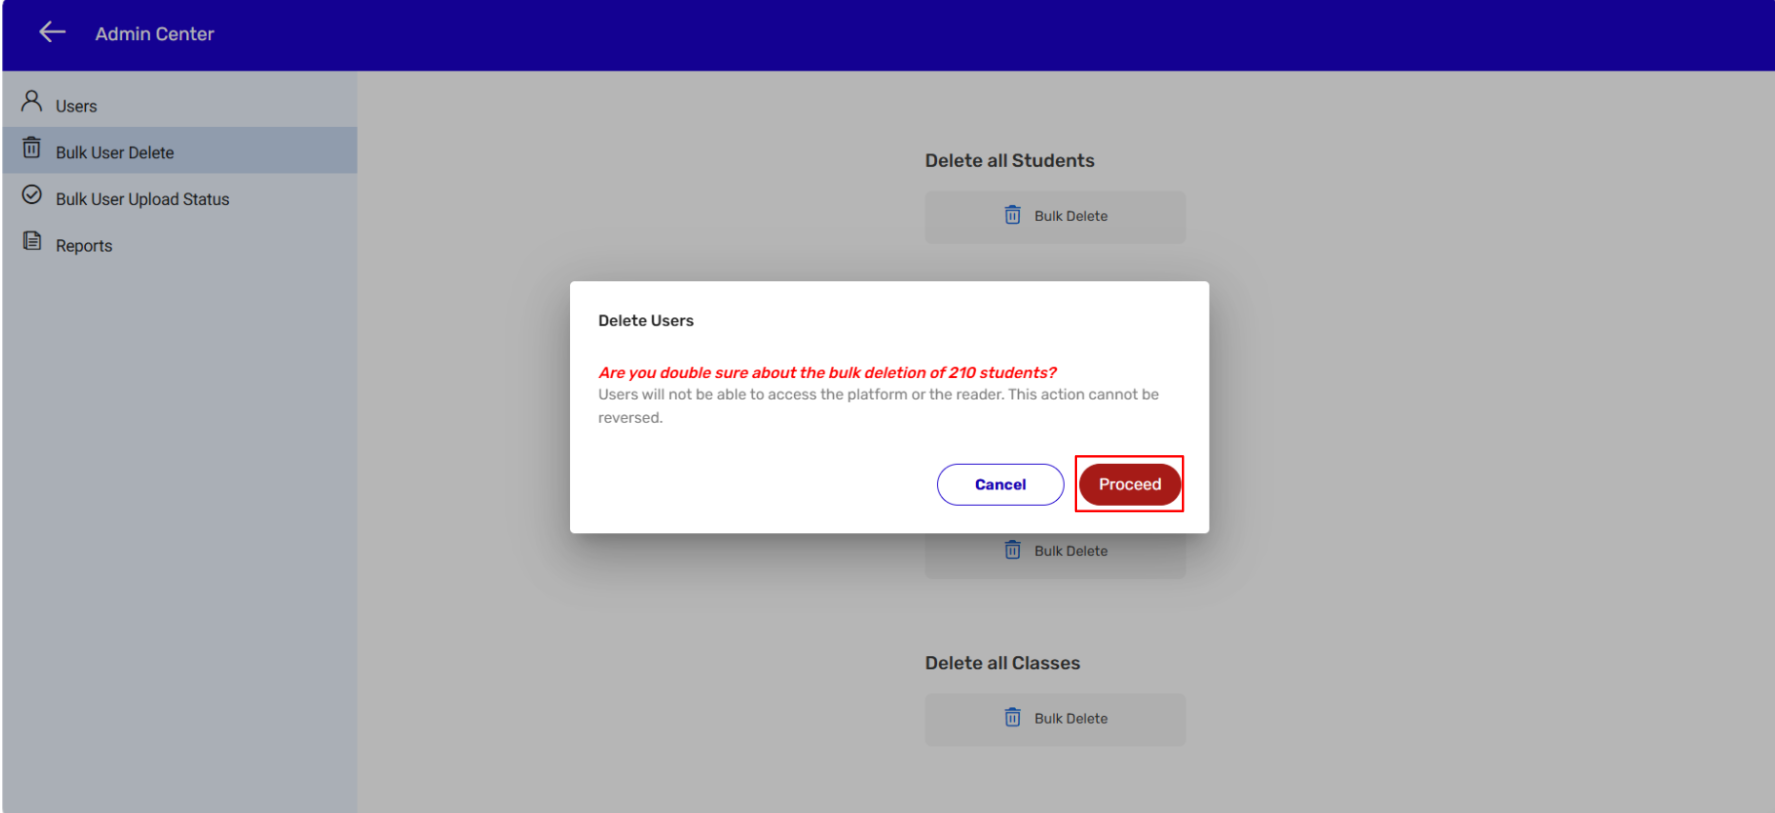
- Select the option from the list for which you want to delete e.g. all users, all students, all teachers, all classes.
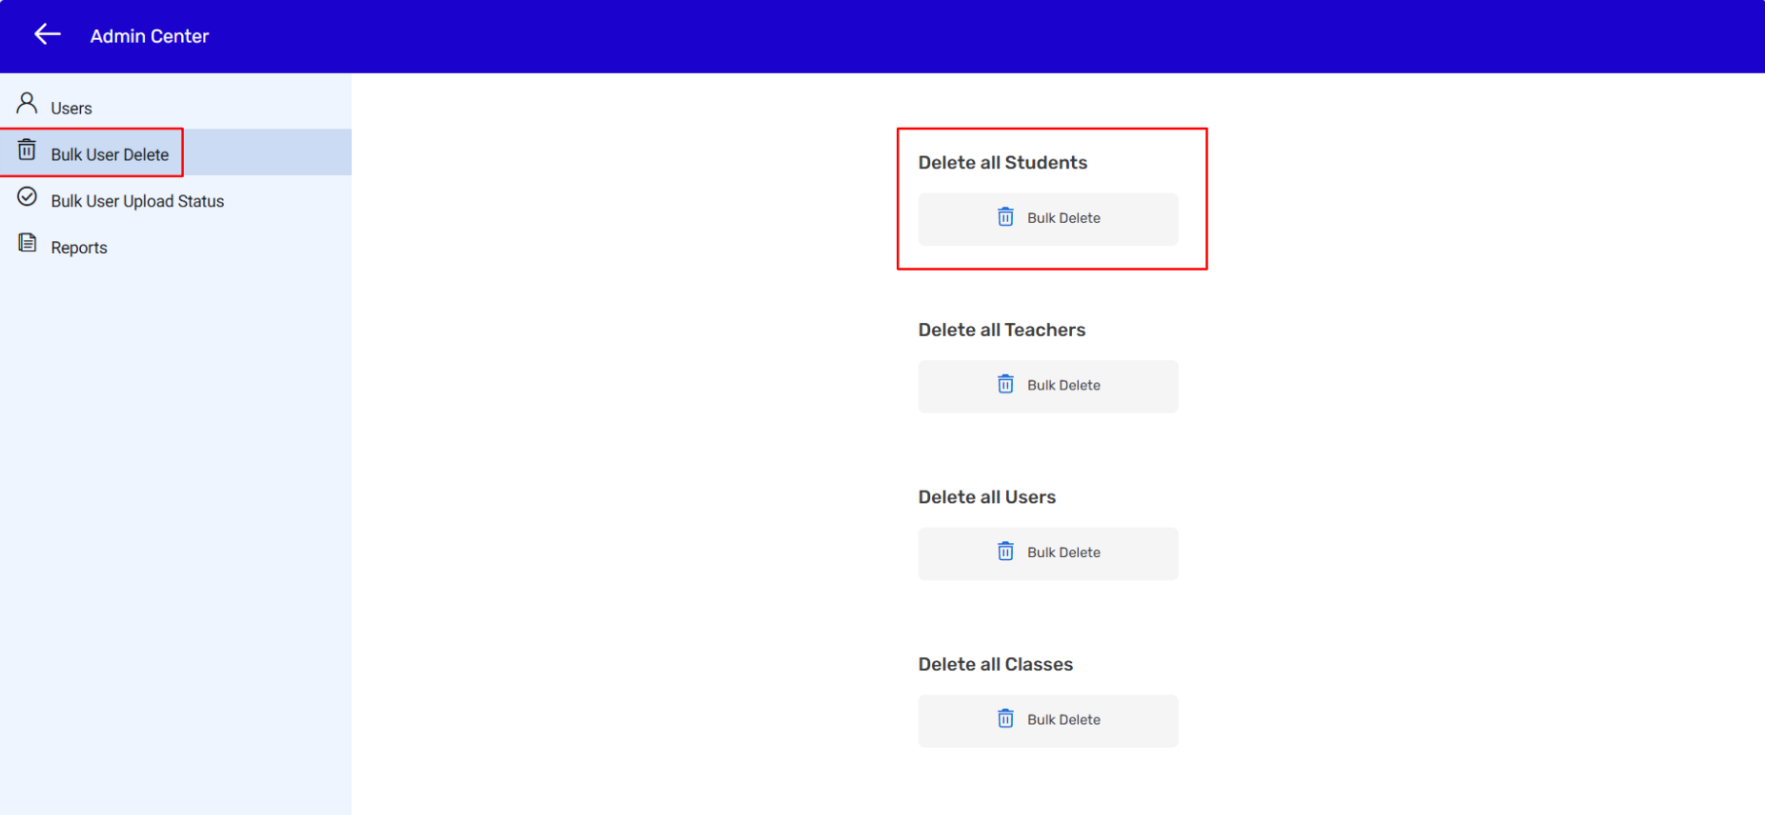
- Click on Proceed to confirm.

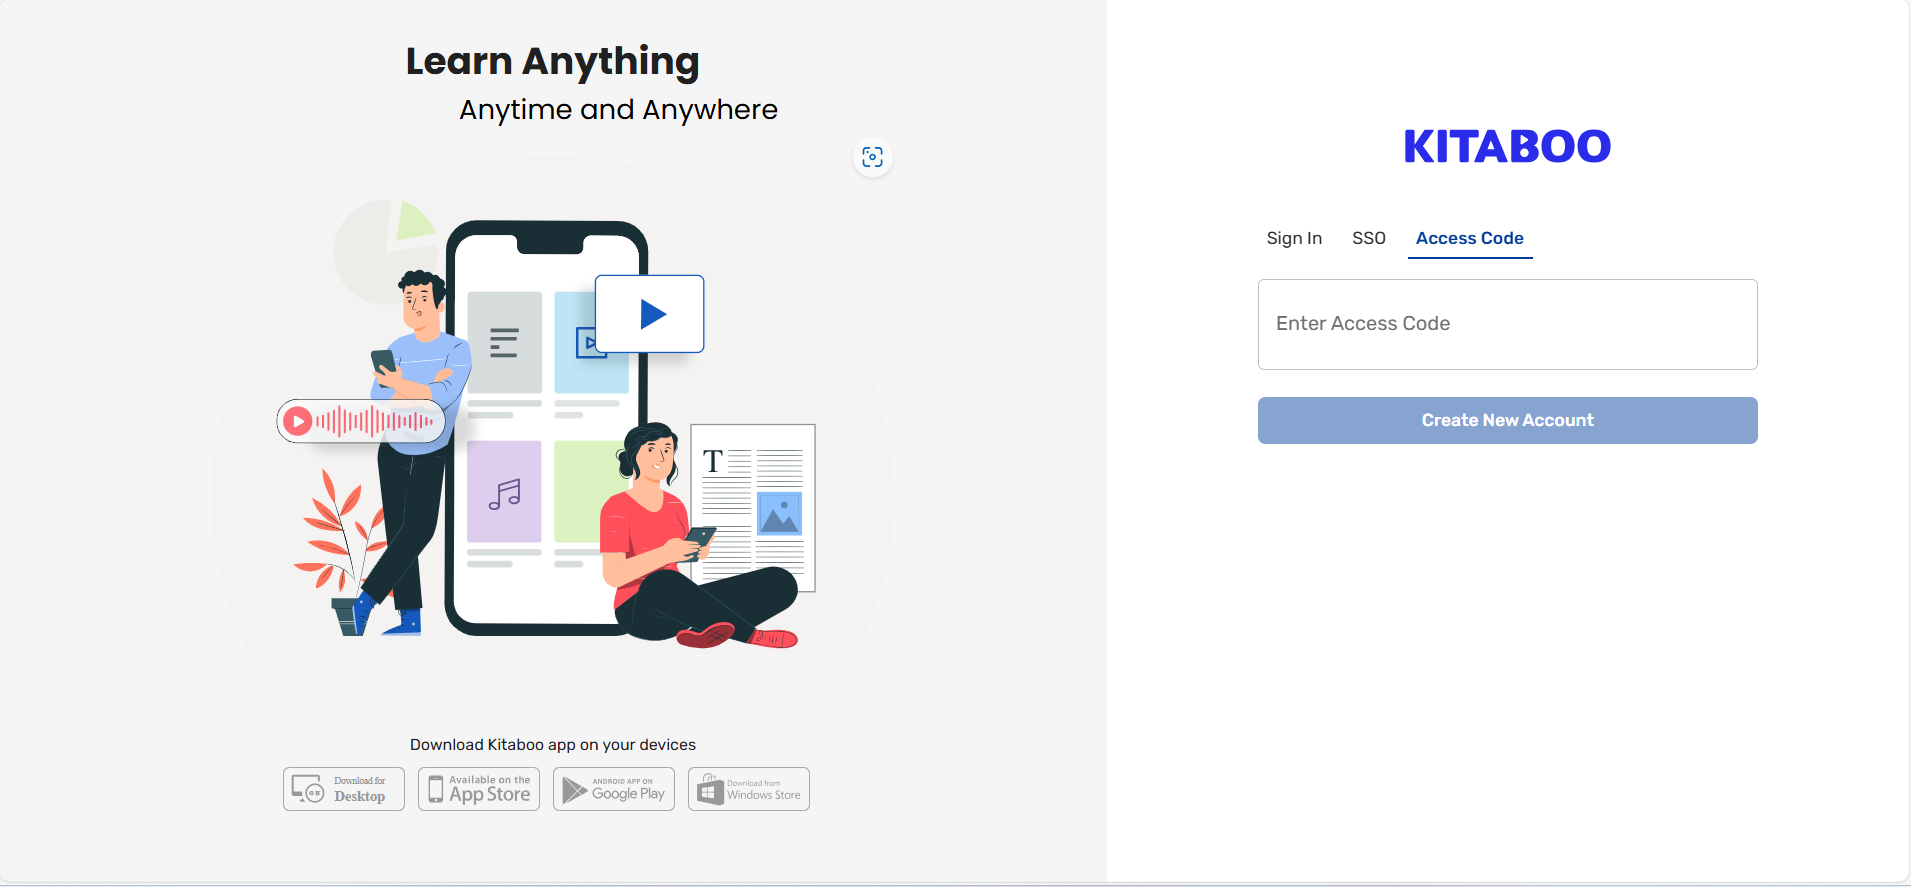
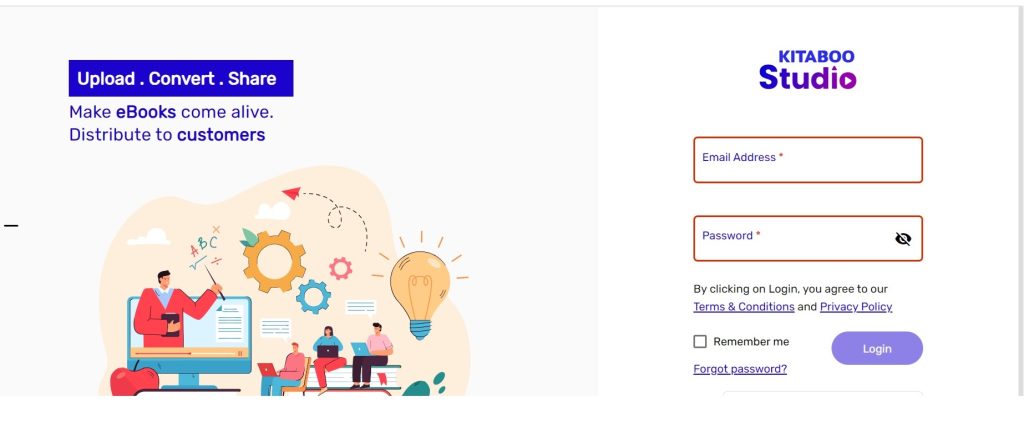
Enter your Email Address and Password to proceed further

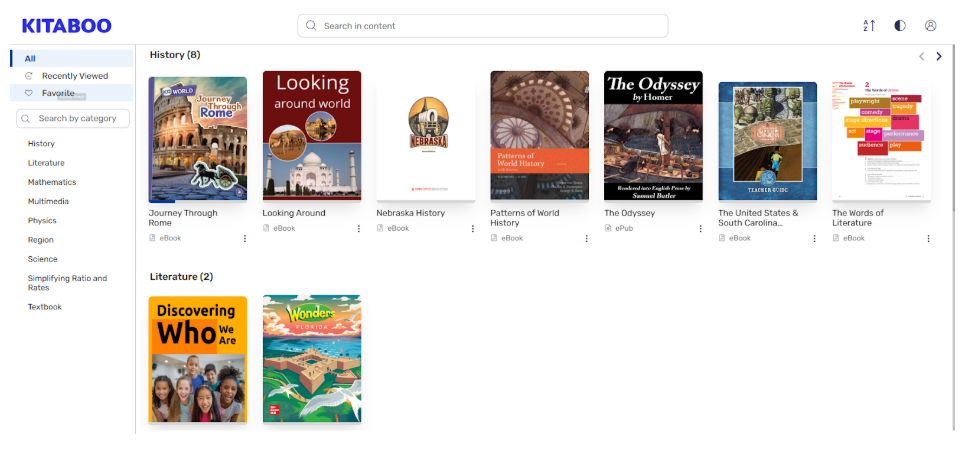
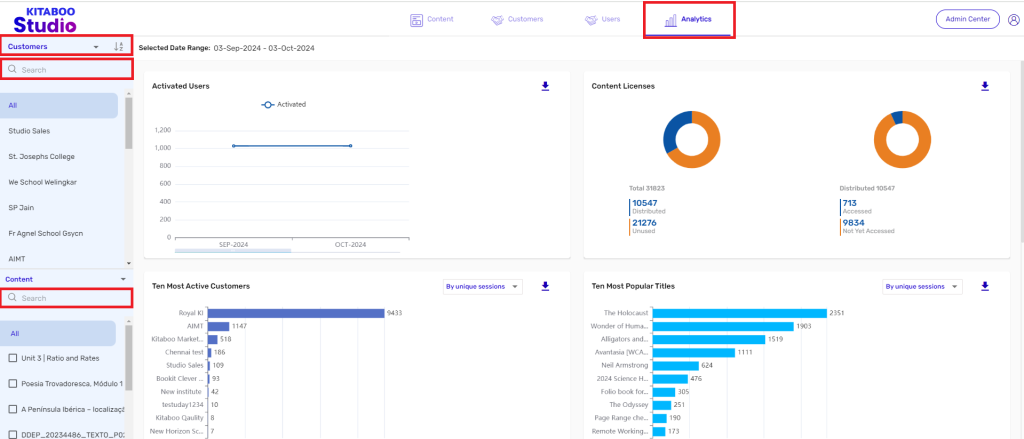
2. This is adashboard where you can distribute content, perform user creation & class creation.
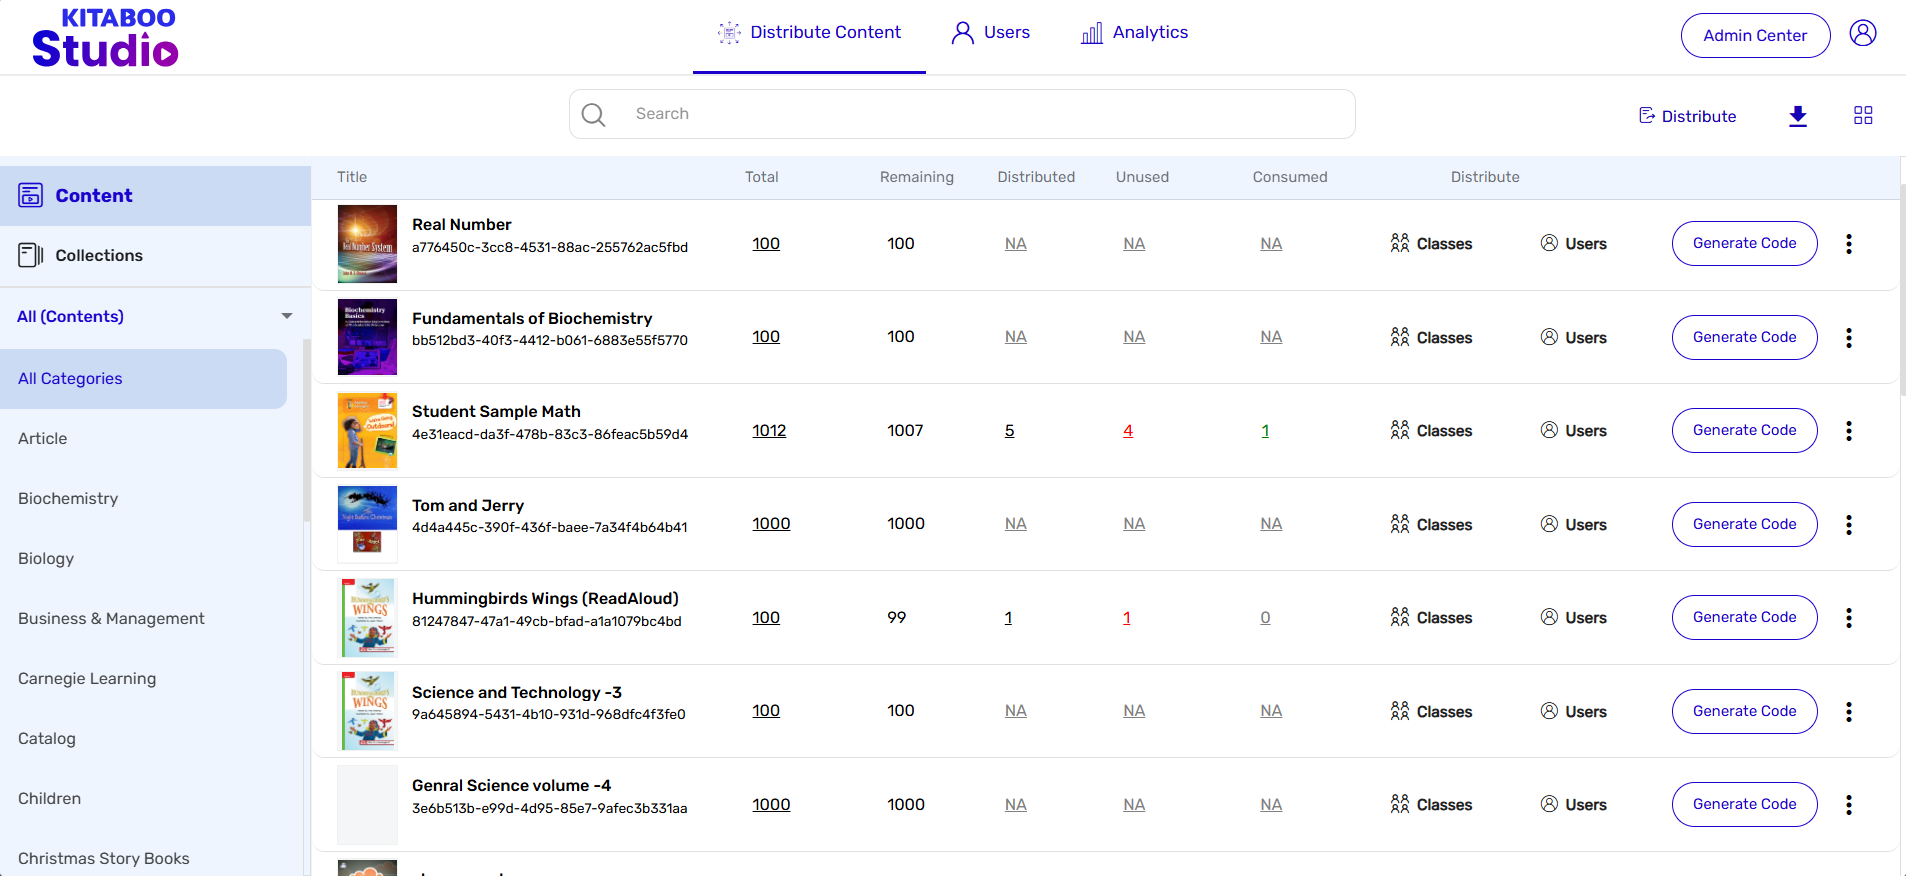
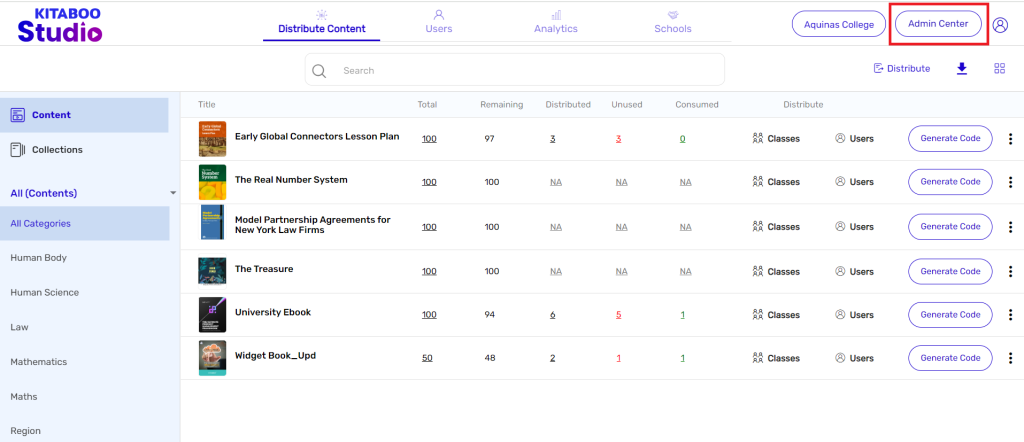
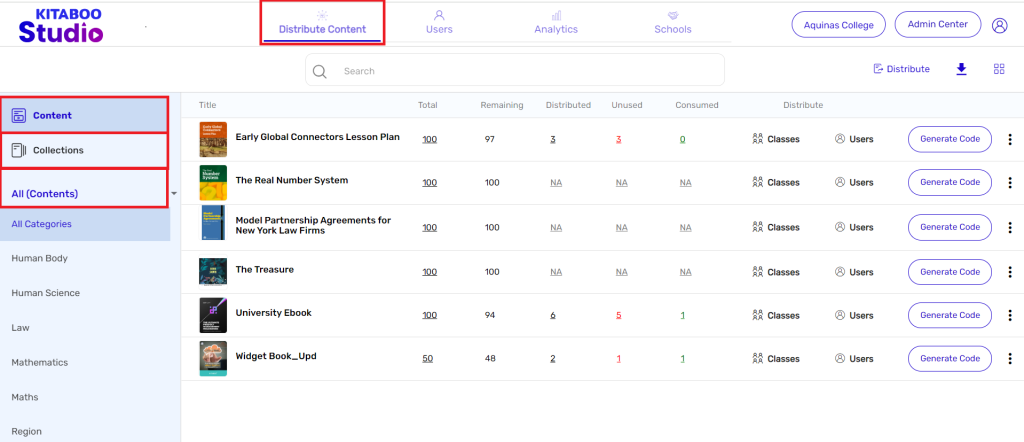
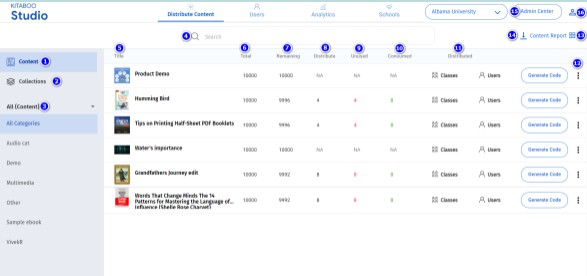
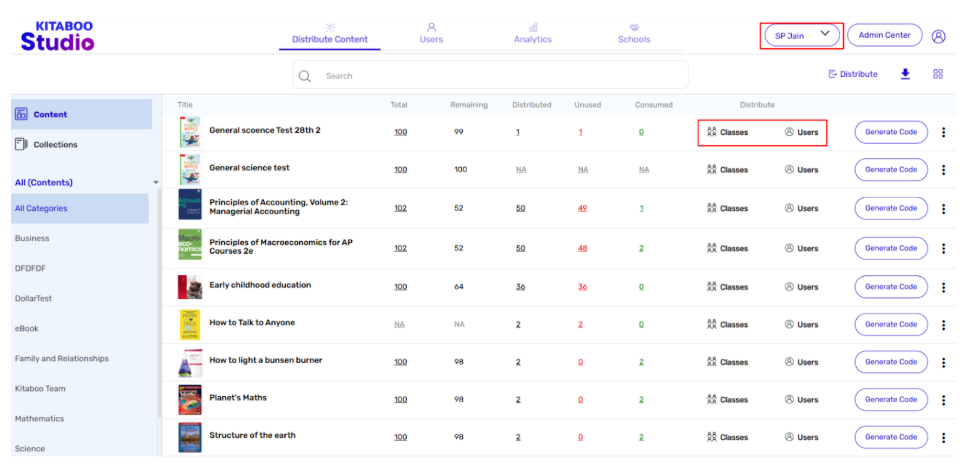
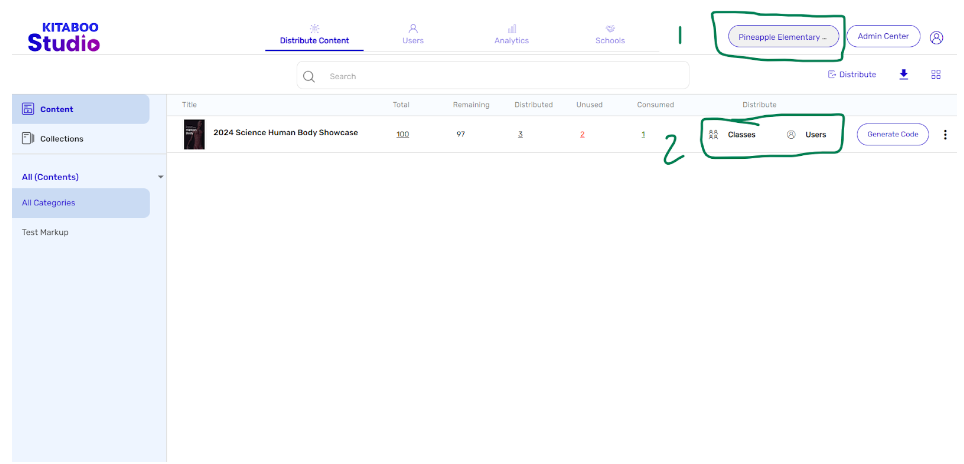
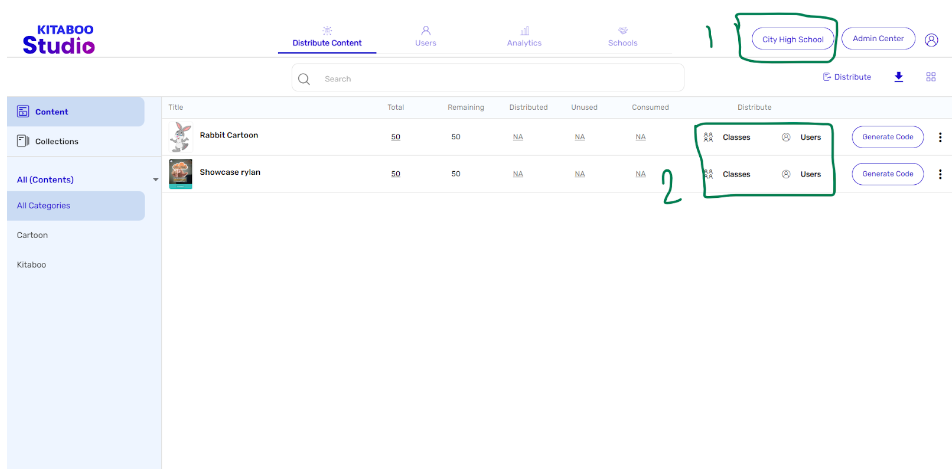
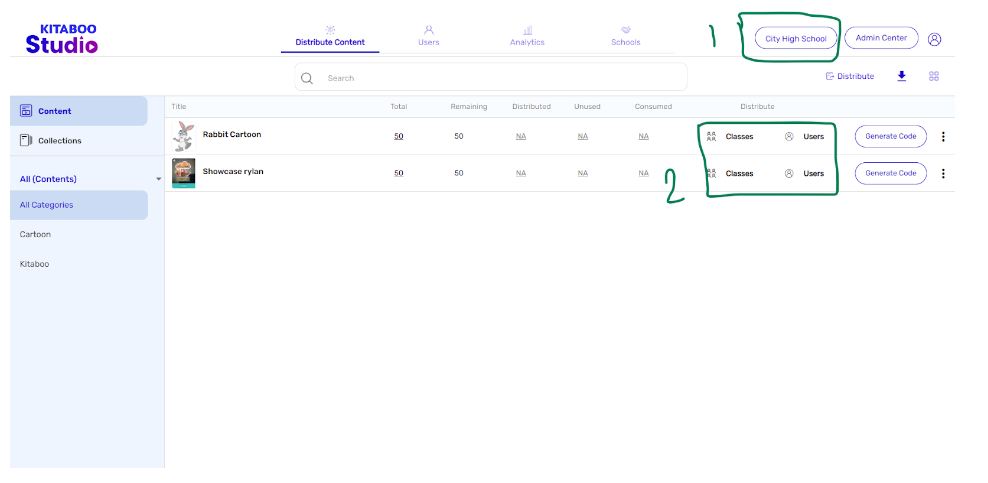
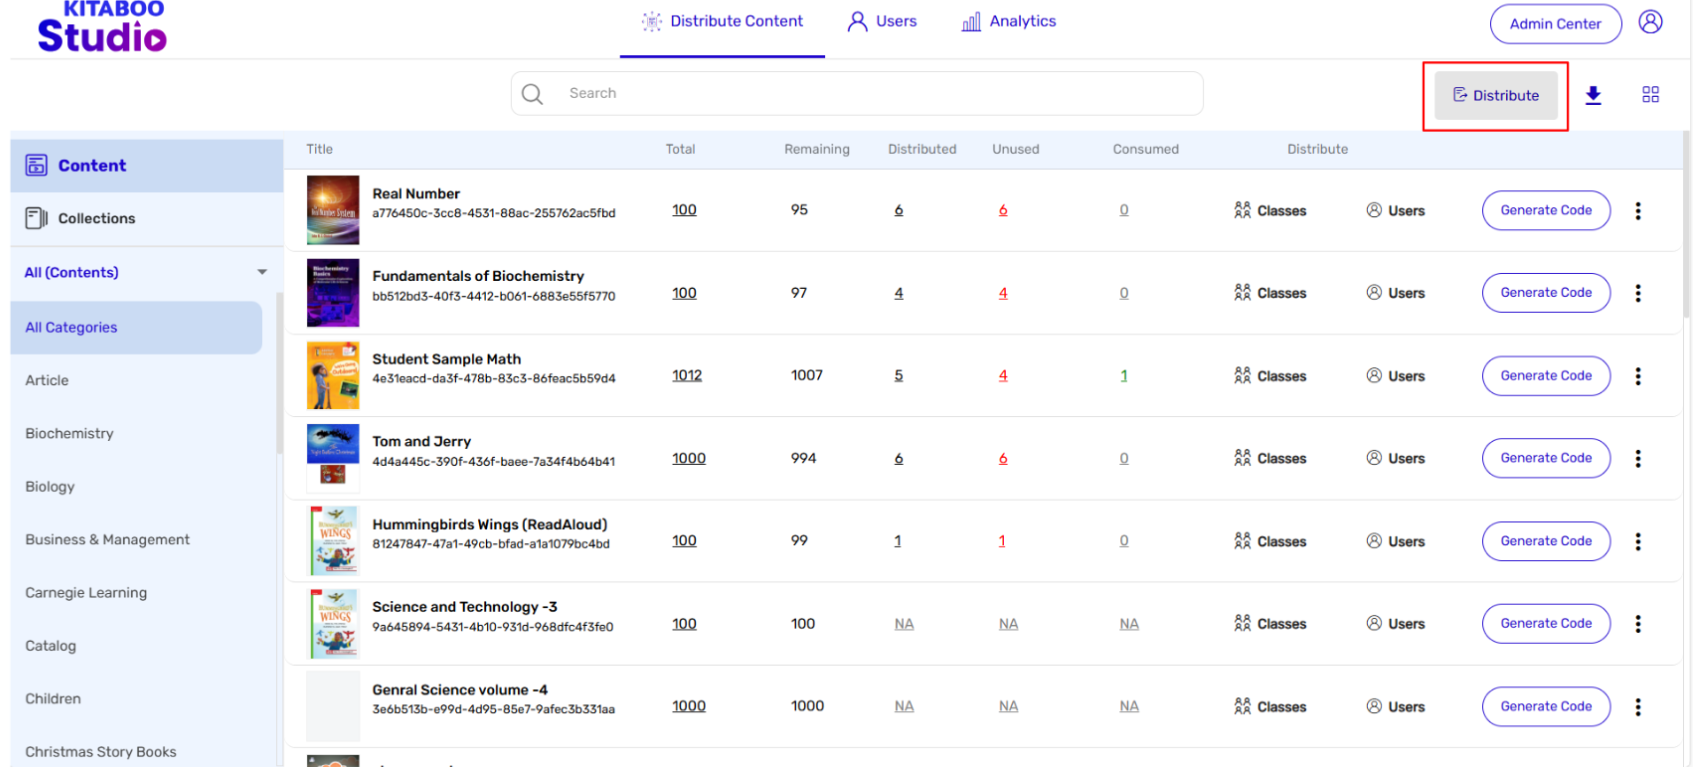
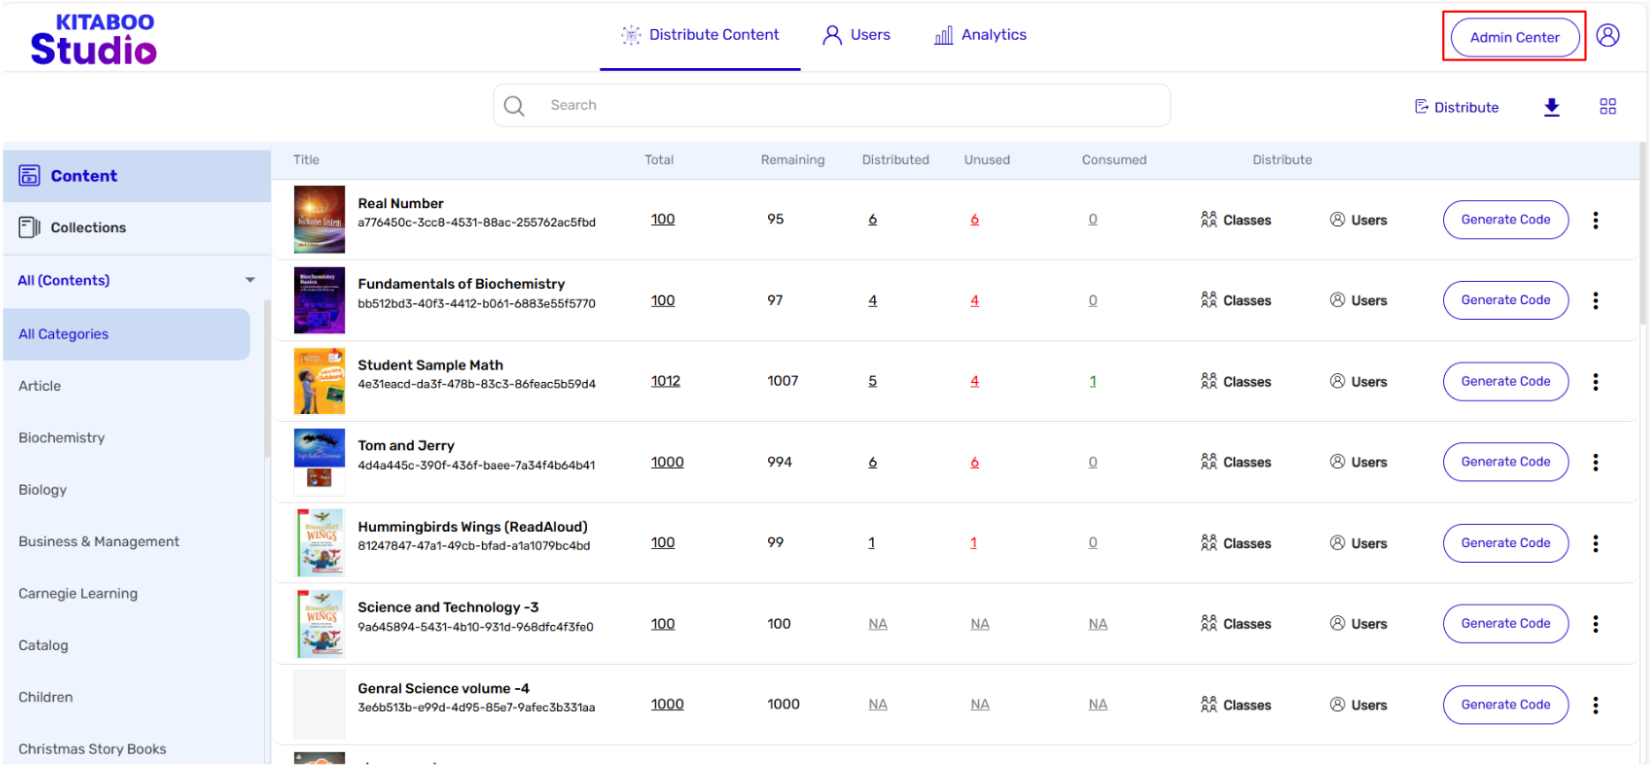
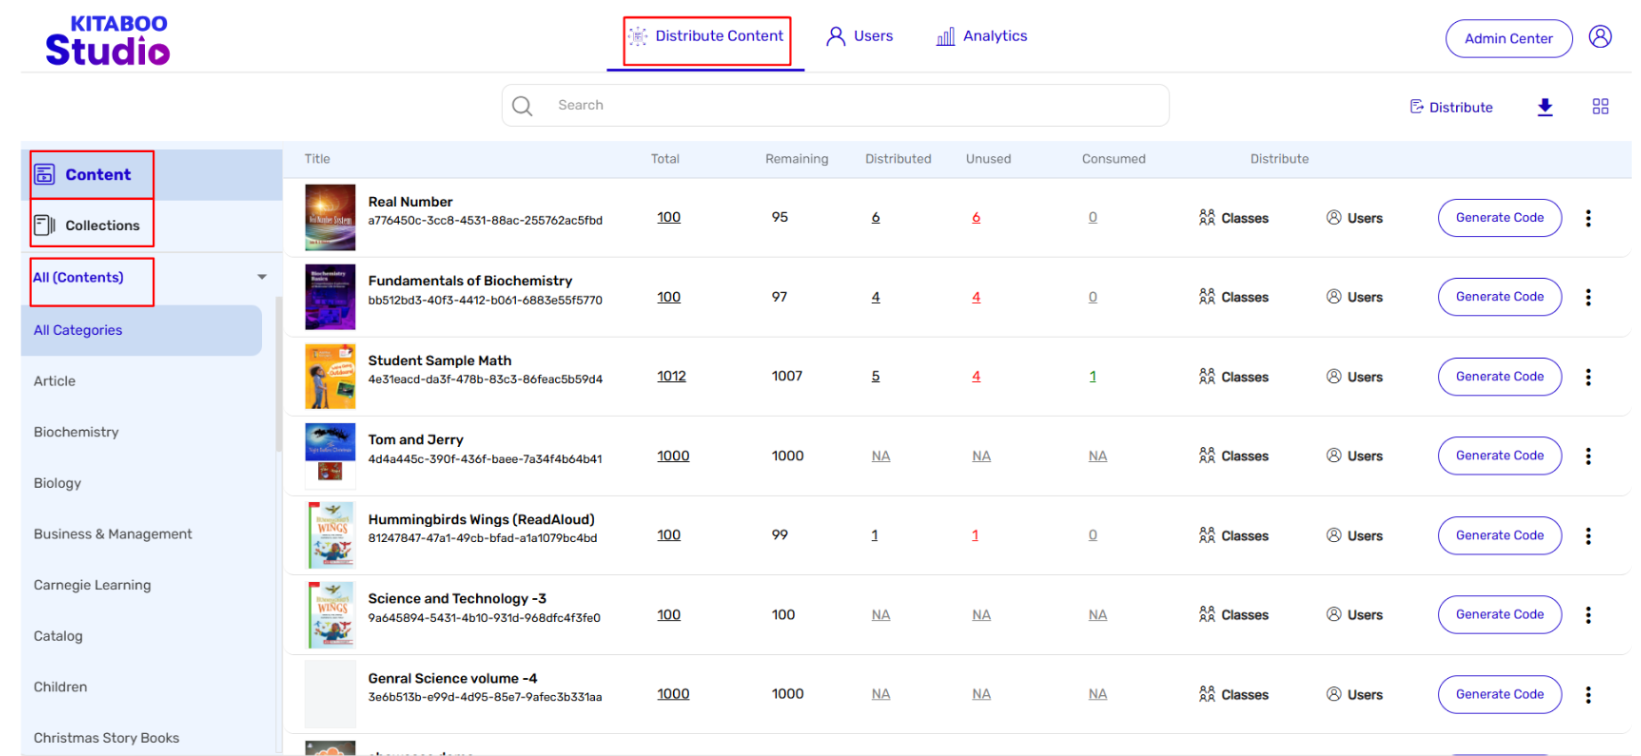
3.1.1 The Distribute Content Tab
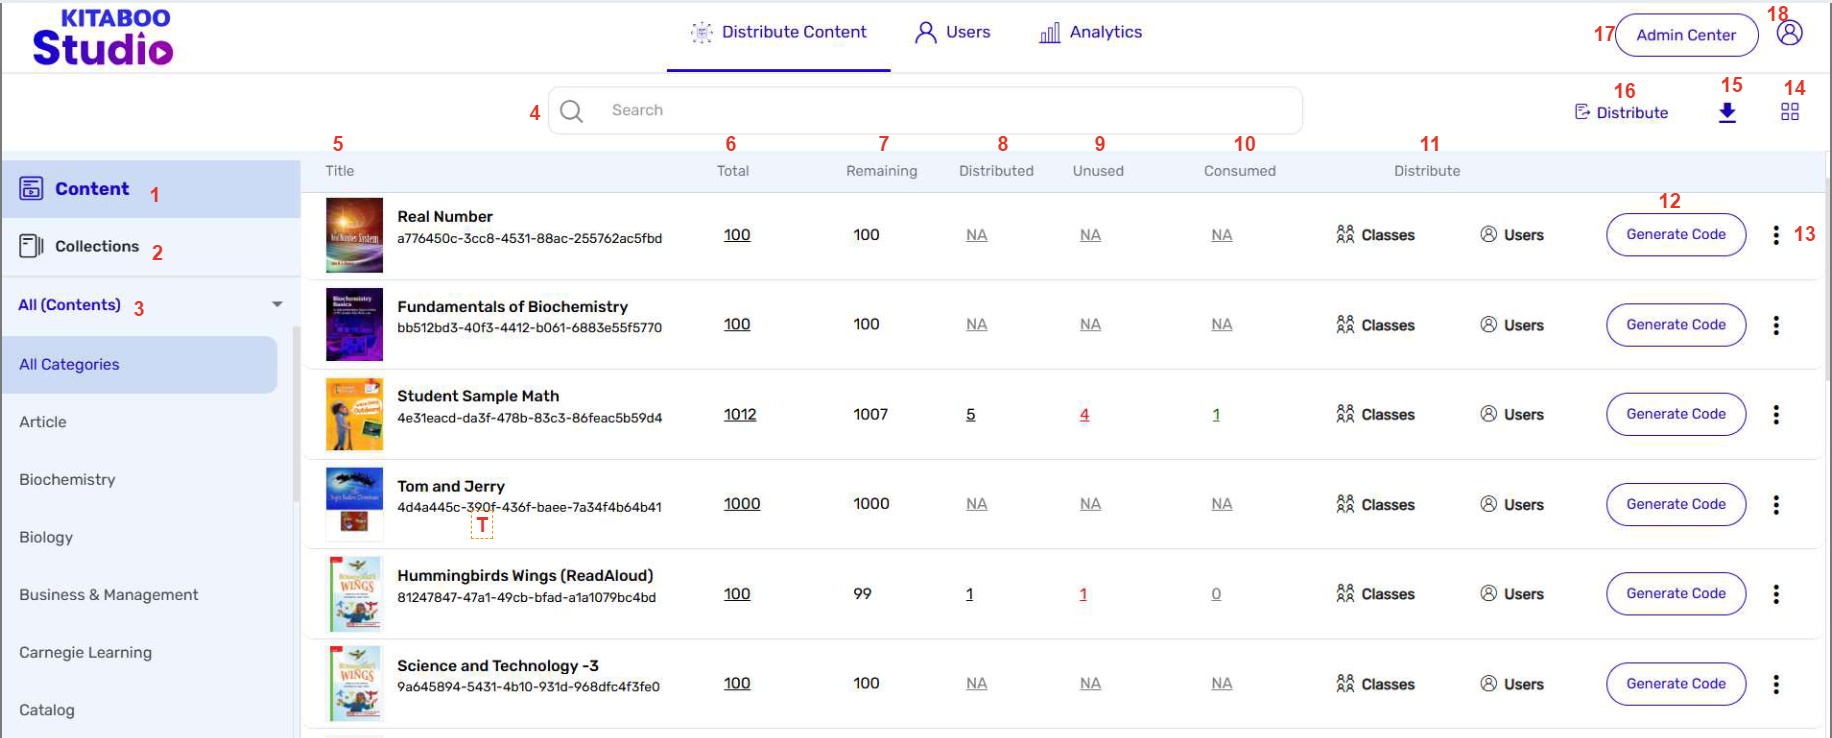
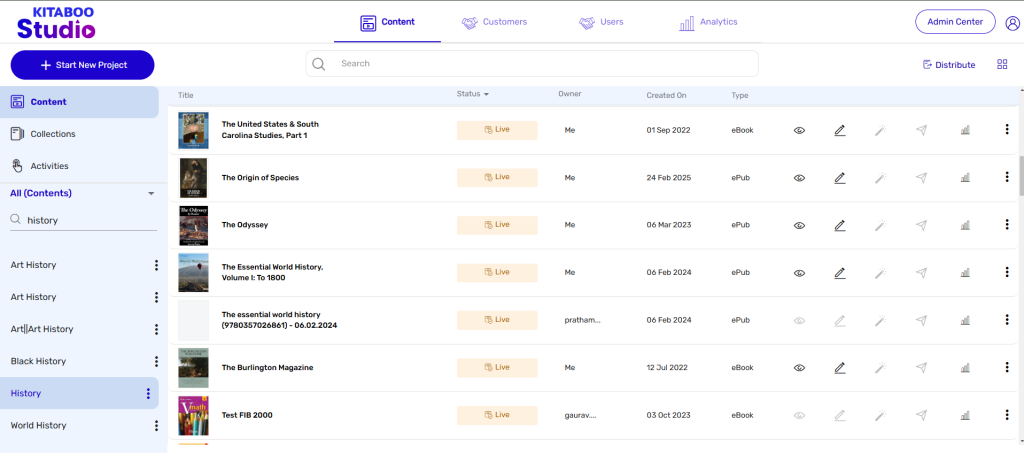
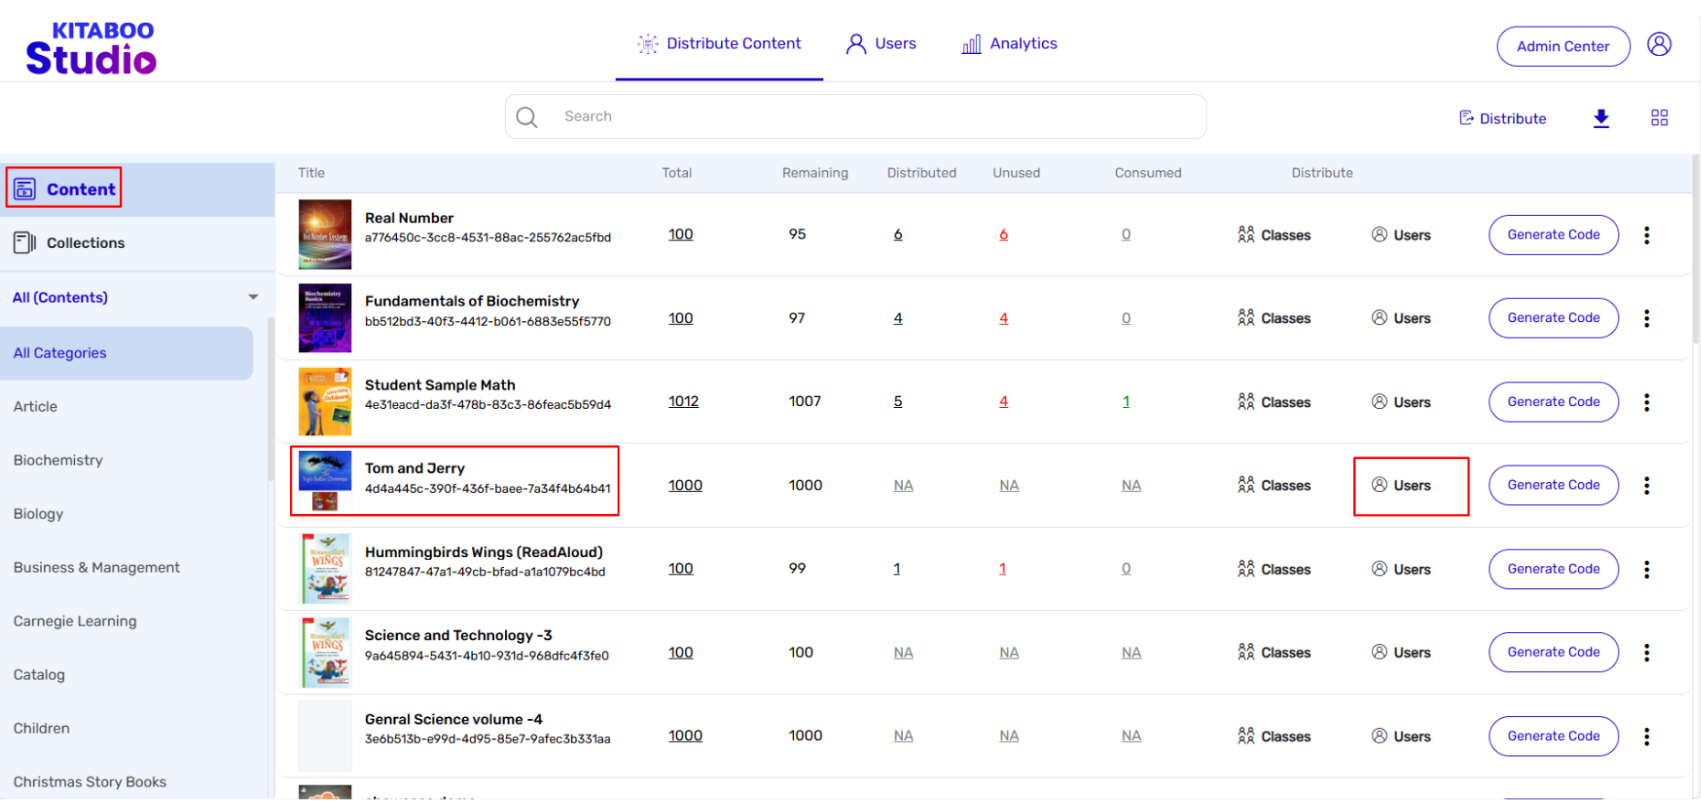
- Content – Lists all the available content on the Kitaboo system.
- Collections – Lists all the available collections (a few pieces of content grouped together) on the Kitaboo system.
- All (Content) – Lists all the available content based on their types or categories, like eBook, ePub, SCORM, audio book, video book etc.
- Search – Lets you do a quick search of content by its name.
- Titles – Displays names of the titles on the Kitaboo system.
- Total – Defines the total number of licenses issued.
- Remaining – Defines how many of the issued licenses are still available for distribution.
- Distributed – Defines the number of licenses that have already been distributed.
- Unused – Defines the number of licenses still to be used or consumed by users.
- Consumed – Defines the number of licenses already used or consumed by users.
- Distribute – Lets you select whether you want to distribute content to a class or a user.
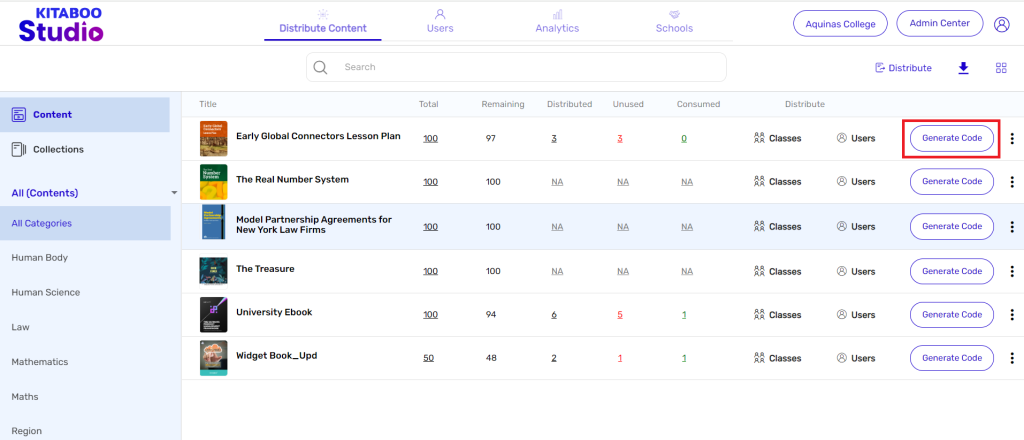
- Generate Code – Enables you to generate access codes for a content in the form
of an excel sheet, which comprises information like total number of licenses, expiry date, device limit, and user type – whether a student, a teacher etc. - More Options Icon – Lets you discover more information about a content or view the access code report for a content.
- Toggle View – Enables you to select the way you want to view the list of content – whether in the form of a simple list or as a grid with thumbnails for the listed content.
- Content Report – Enables you to download a report on the usage of content comprising information like total number of licenses, number of remaining, distributed, unused, and consumed licenses.
- Distribute – This feature allows you to distribute content directly to the end user. You only need to enter the email ID, and the user will be created accordingly. If you wish to distribute content to an existing user, you can do so by entering the email ID of the existing user.
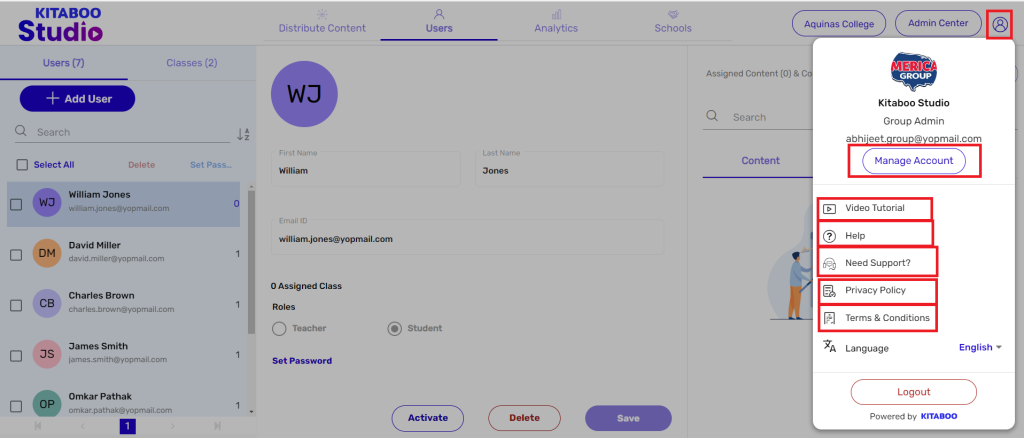
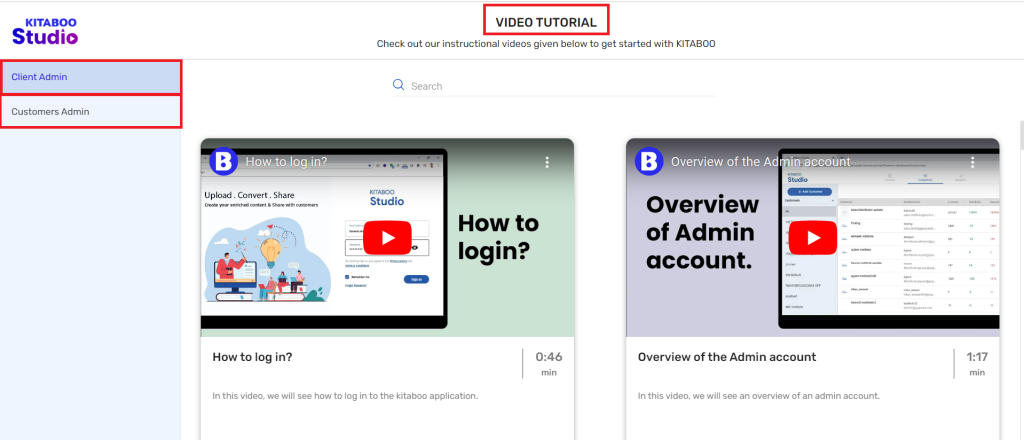
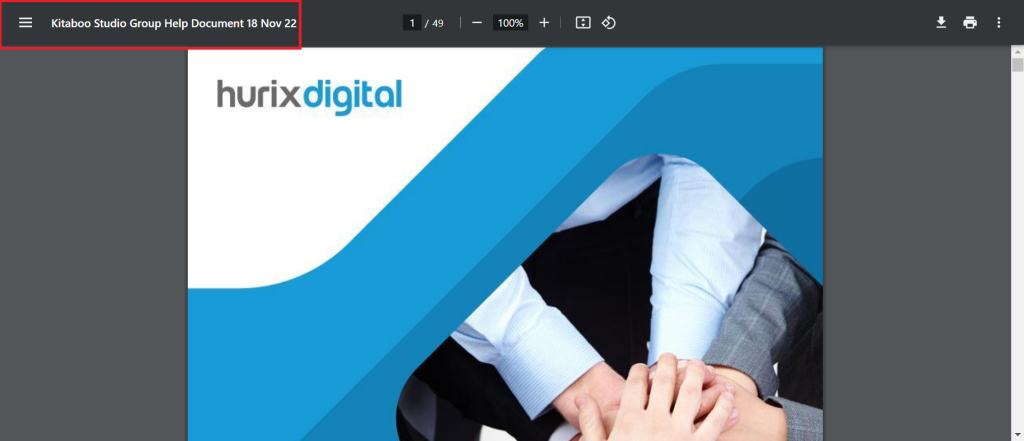
- Profile and Settings – Lets you manage your profile, view a few video tutorials, access the Kitaboo platform help guide, and know about the platform privacy policies and terms and conditions.
- Admin Center – Lets the main institute admin view or edit the profile of your existing customer(s), including the password or add a new user.
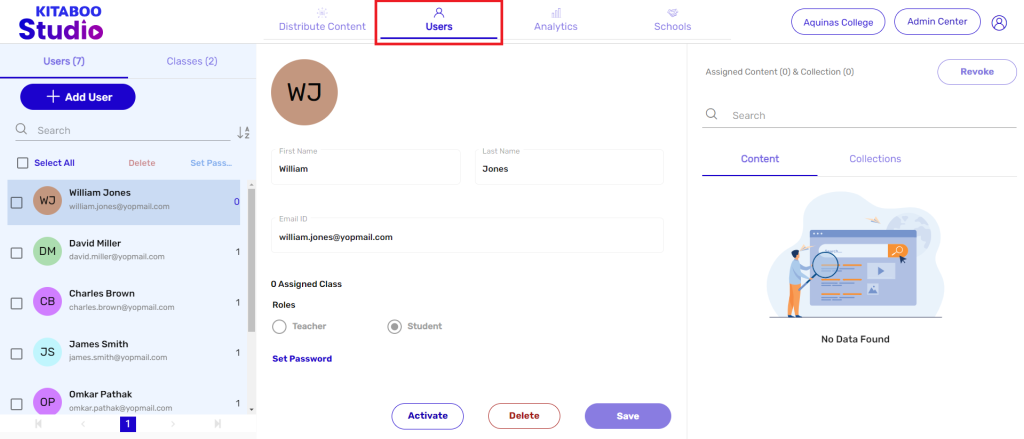
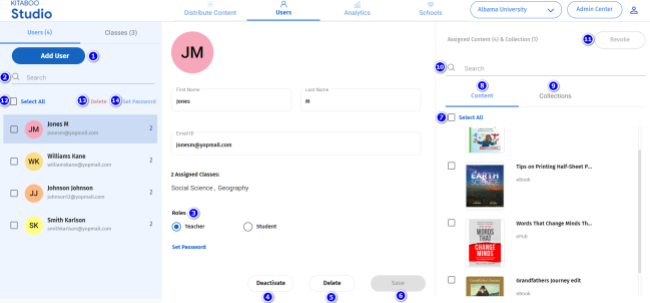
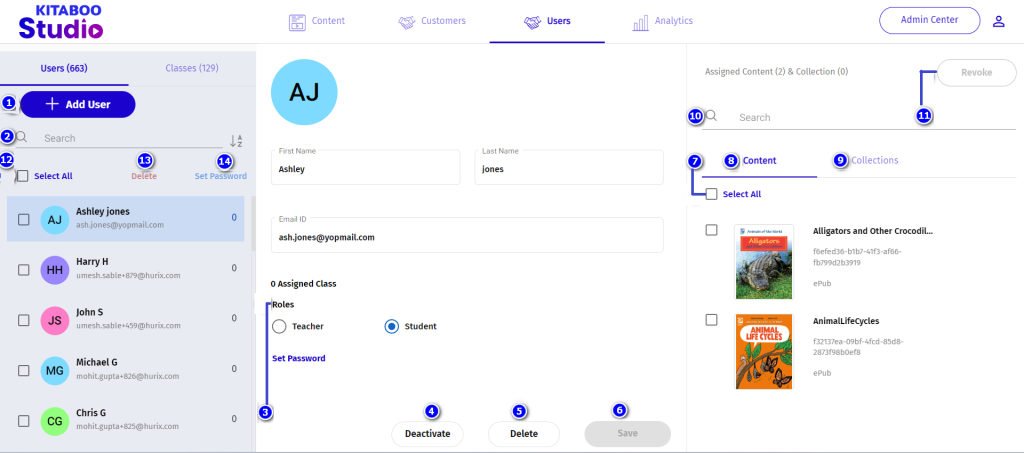
3.1.2 The Users Tab
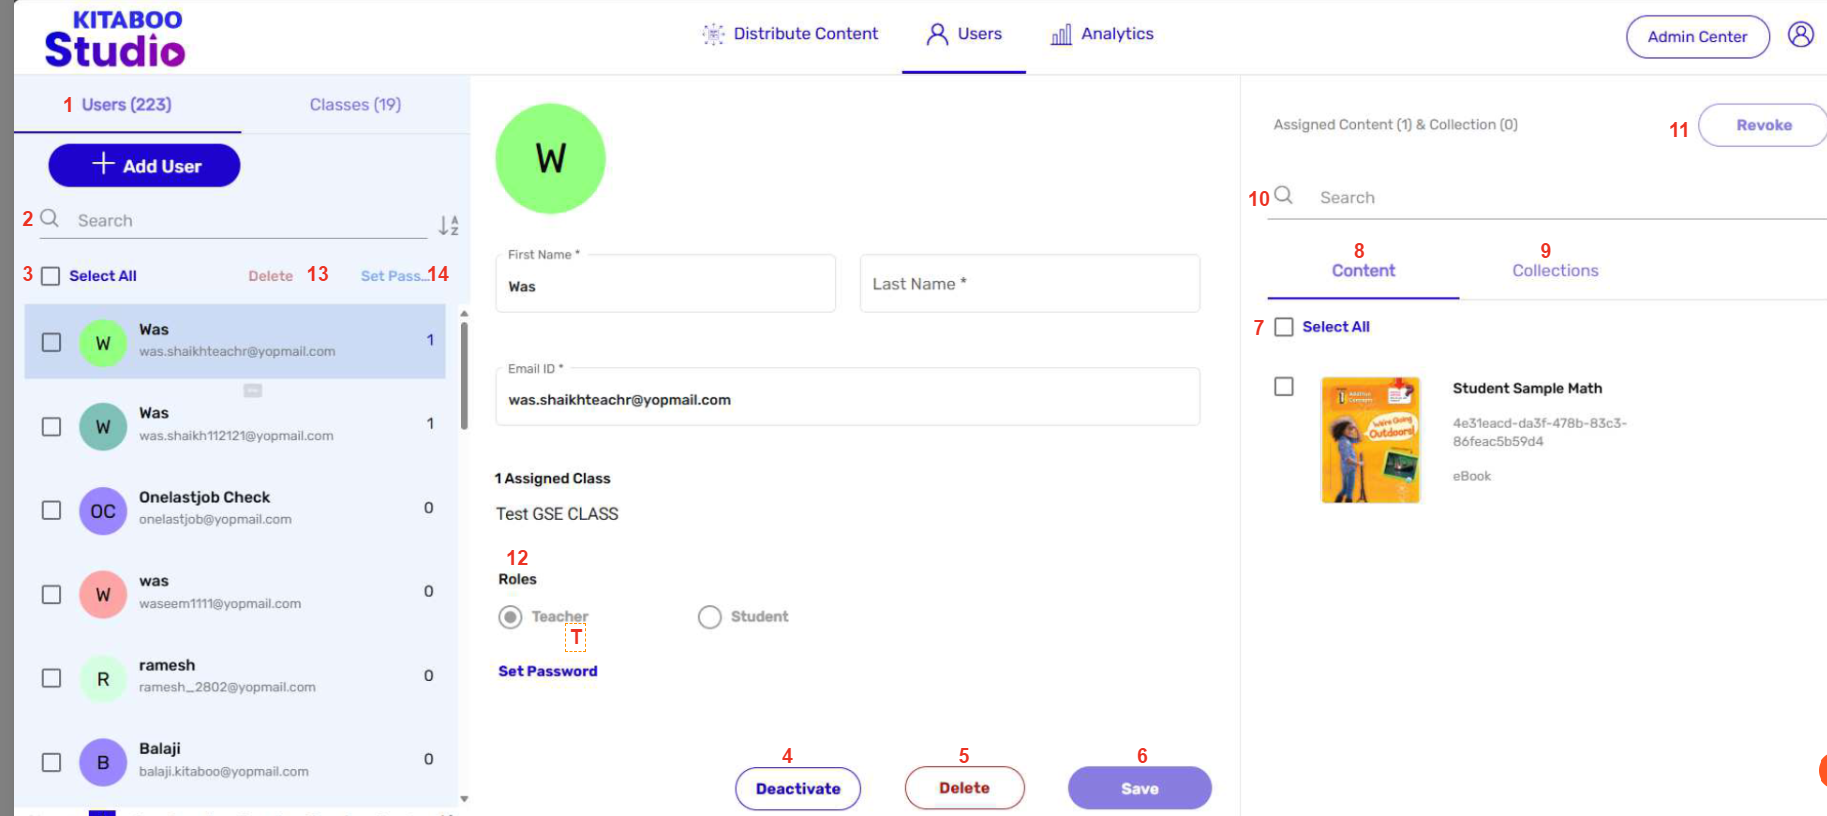
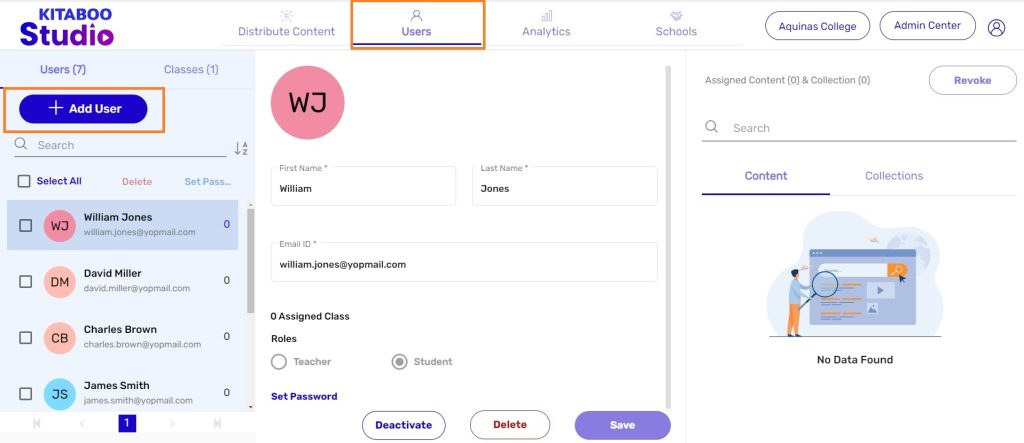
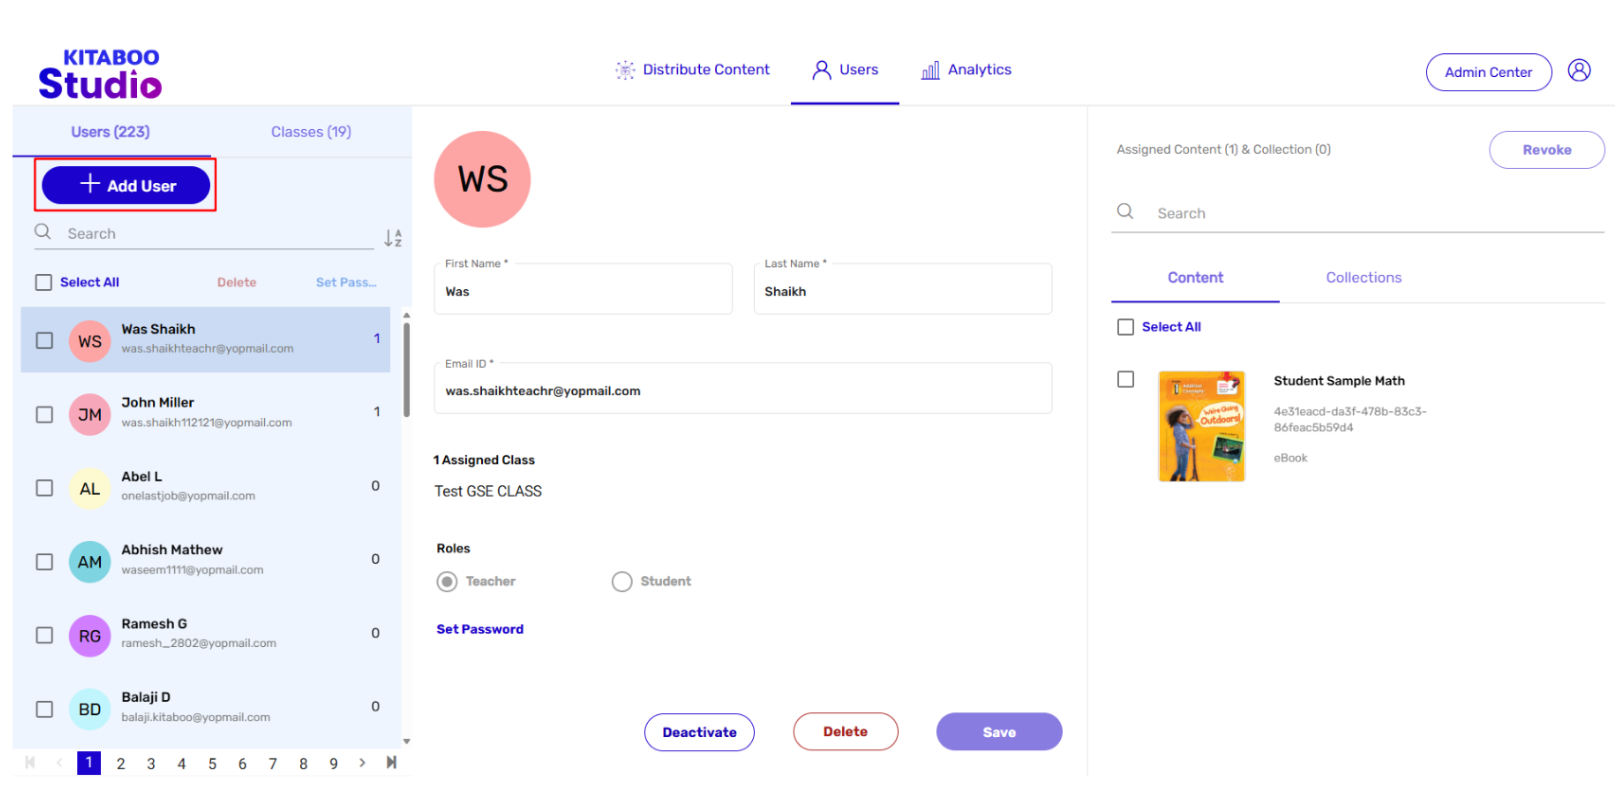
- Add User – Enables you to add a new user or multiple users to the Kitaboo system.
- Search – Enables you to do a quick search of an existing user.
- Select All – Lets you select all the listed users if you want to select all of them/few of them from the users list.
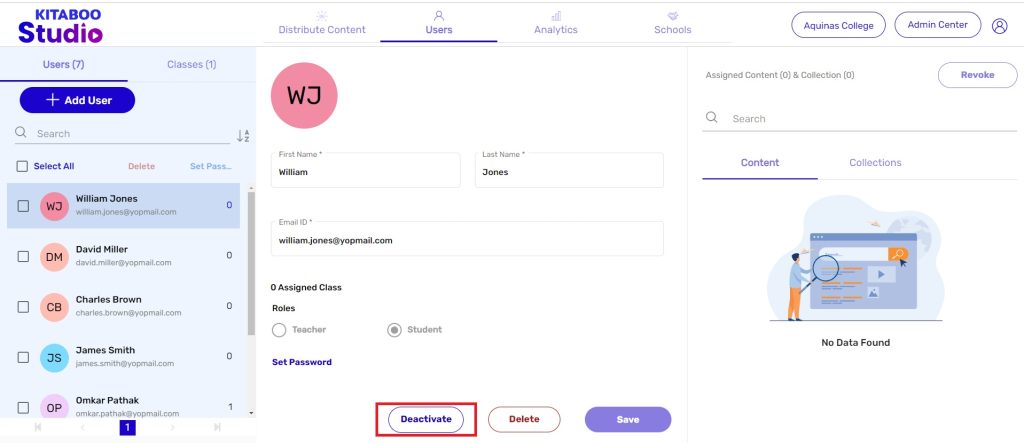
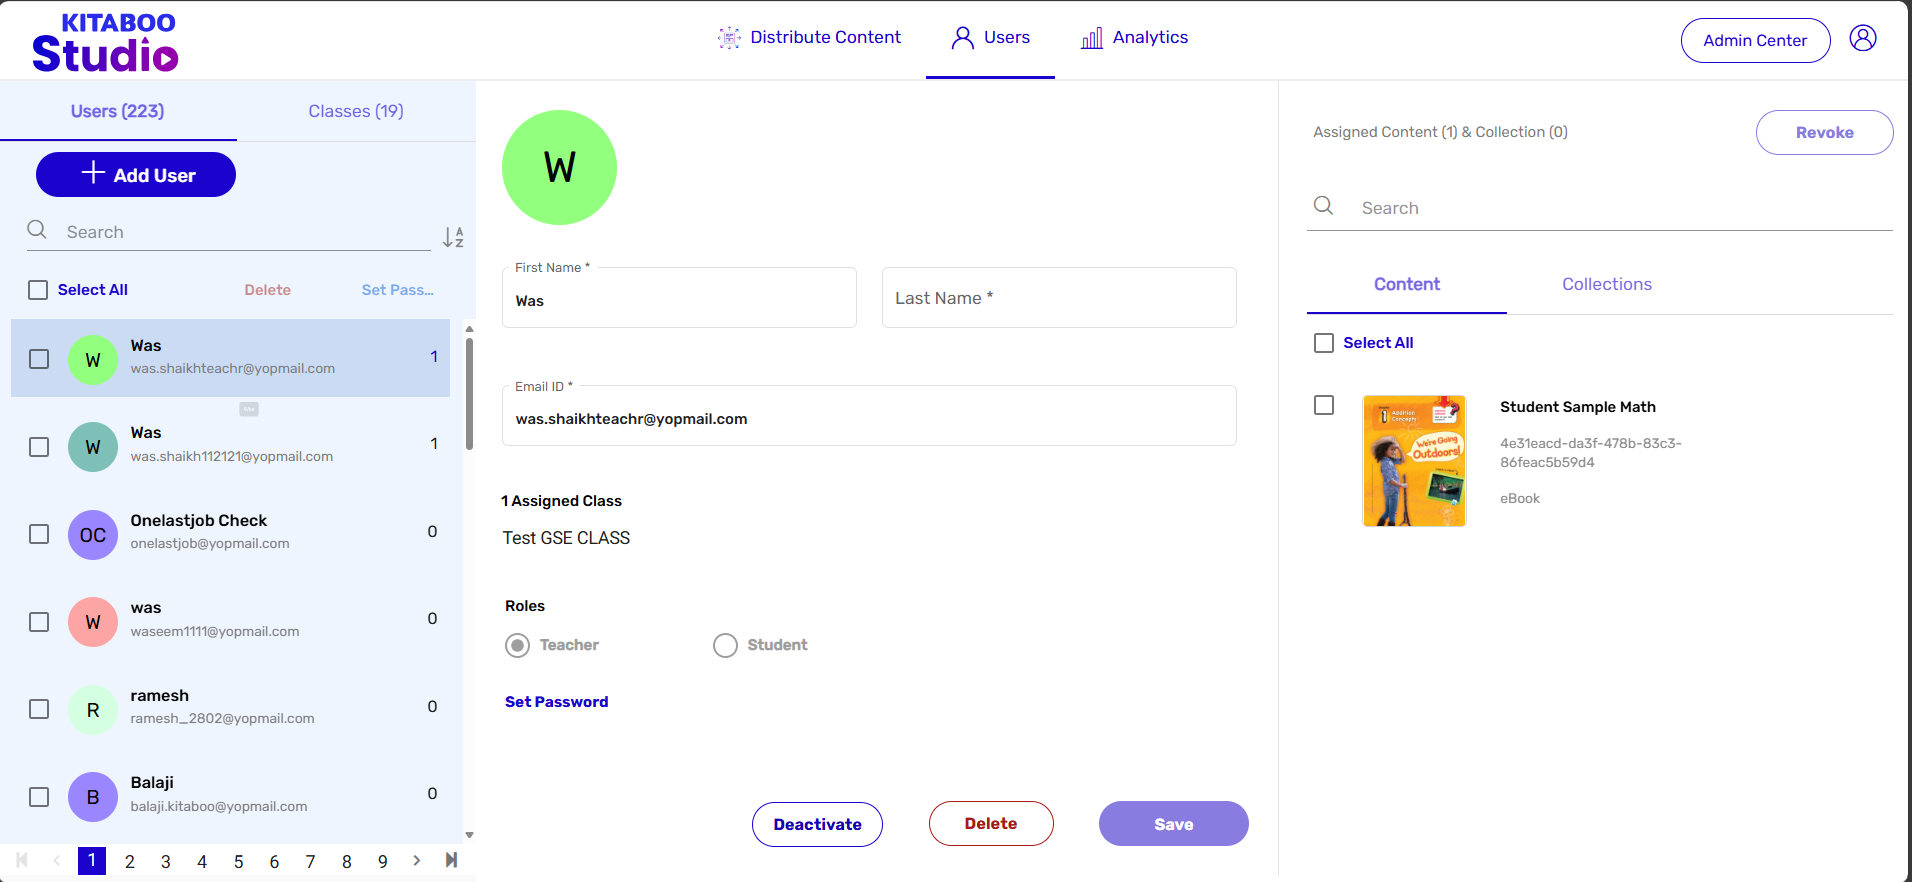
- Deactivate – Enables you to deactivate or suspend an existing user. A deactivated user exists on the Kitaboo system, but will not be able to access content until he/she remains deactivated. He/she can be restored.
- Delete – Enables you to delete or remove a user from the Kitaboo system. A deleted user cannot be restored.
- Save – Lets you save the edits.
- Select All – Lets you select all the listed pieces of content/collections if you want to revoke all of them from a user.
- Content – Displays a list of content assigned to a user.
- Collections – Displays a list of collections assigned to a user.
- Search – Enables you to do a quick search of a content or a collection.
- Revoke – Enables you to revoke the selected pieces content or collections from access
by a user. - Roles – Lets you define the role of the to-be-added user – whether a teacher or a student.
- Delete Selected Users – Lets you delete all the listed users if you want to delete all of them/few of them from the users list.
- Set Password – Enable you to set password for selected user or All user
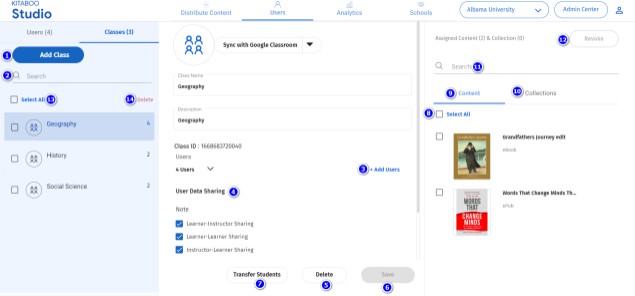
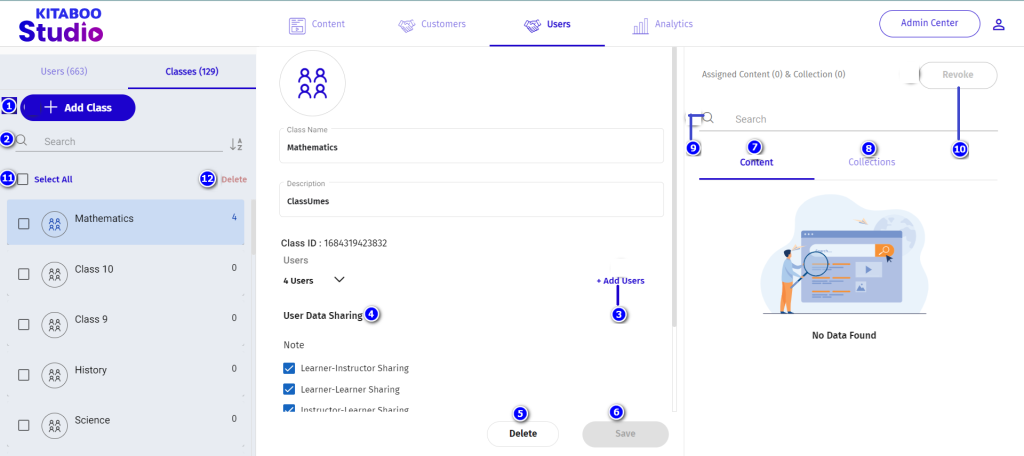
3.1.3 The Users Tab – Class
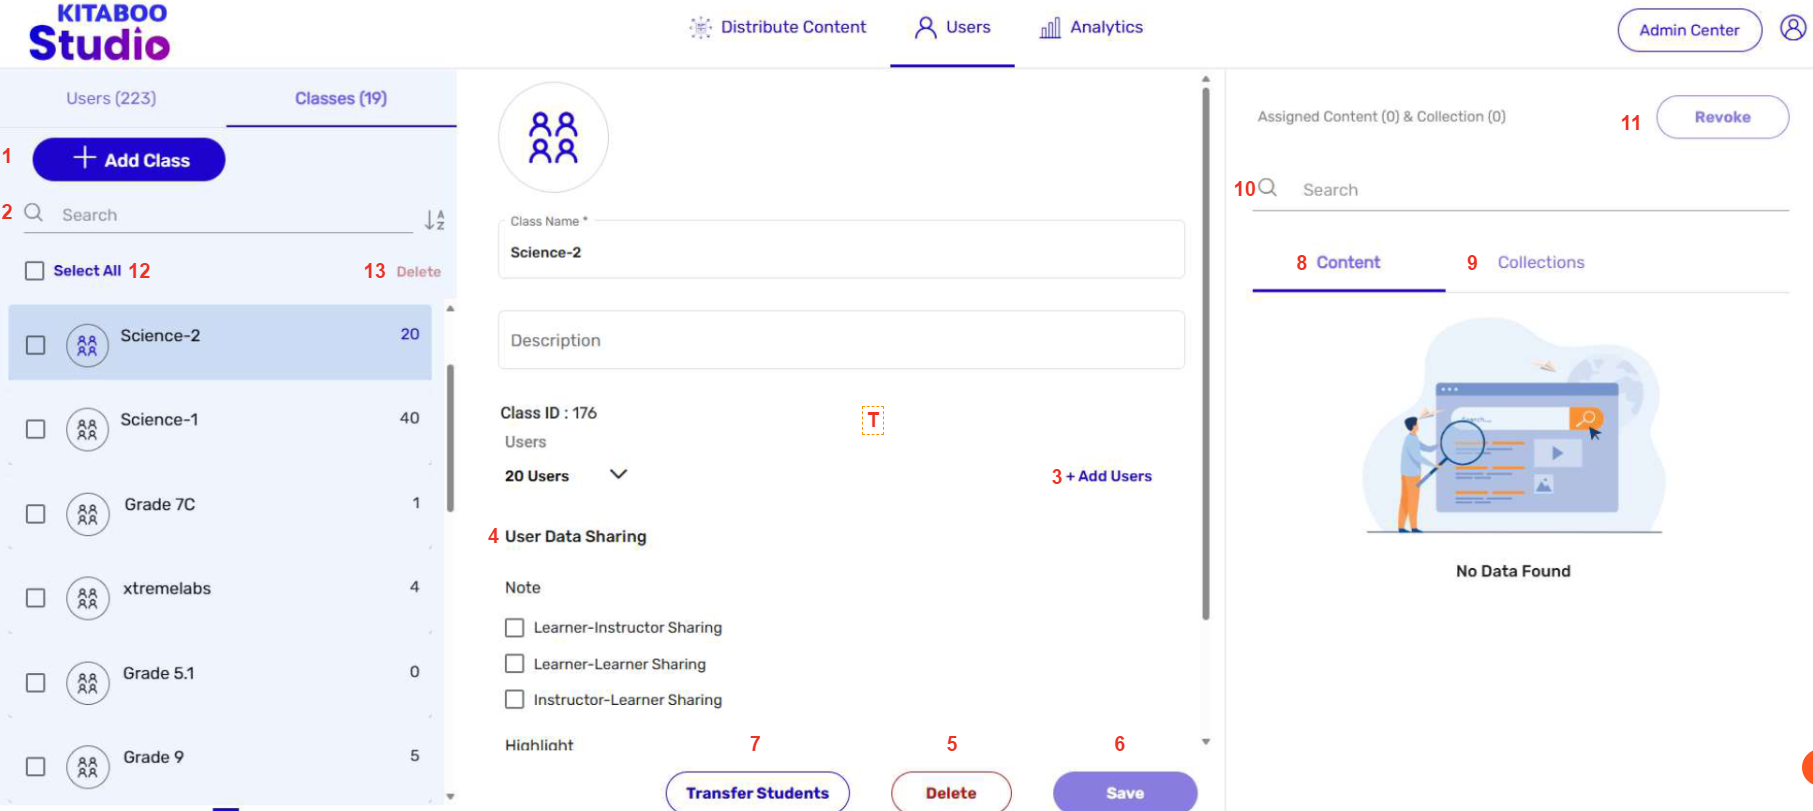
- Add Class – Enables you to add a new class to the Kitaboo system.
- Search – Enables you to do a quick search of an existing class.
- Add Users – Lets you add new users to an existing class.
- User Data Sharing – Lets you define the data like notes and highlights sharing options by selecting the relevant checkboxes.
- Delete – Enables you to delete or remove an existing class from the Kitaboo system. A deleted class cannot be restored.
- Save – Lets you save the edits.
- Transfer Students – Enables you to transfer the students from one class to another class.
- Content – Displays a list of content assigned to a class.
- Collections – Displays a list of collections assigned to a class.
- Search – Enables you to do a quick search of a content or a collection.
- Revoke – Enables you to revoke the selected pieces content or collections from access by a class.
- Select all – Lets you select all the listed classes if you want to select all of them/few of them from the class list.
- Delete Selected Class– Lets you delete all the listed classes if you want to delete all of them/few of them from the class list.
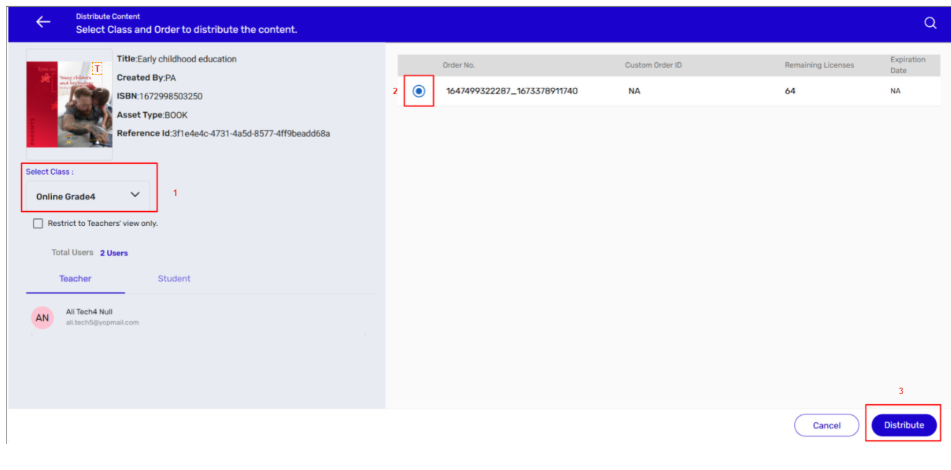
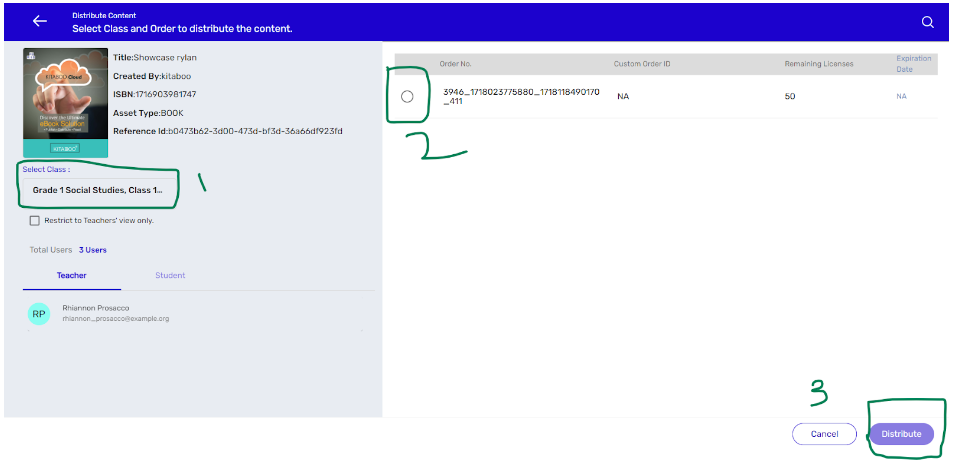
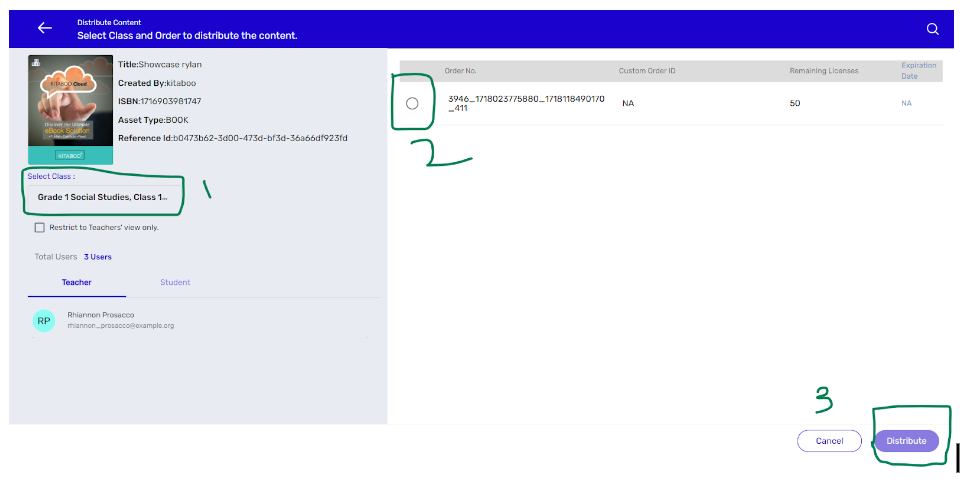
1. Distribute to Class –
1. 1 Distributing Content to a Class
- Sign in with your Customer Admin credentials.

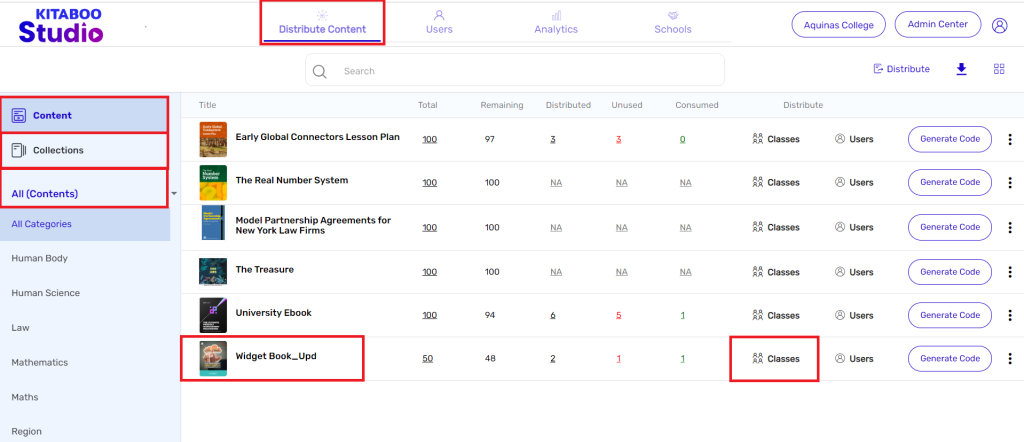
- On the Distribute Content tab, you have three options – Contents, Collections, and All (Content) – to use for distributing a content.
NOTE: The Contents option will be the default selection.
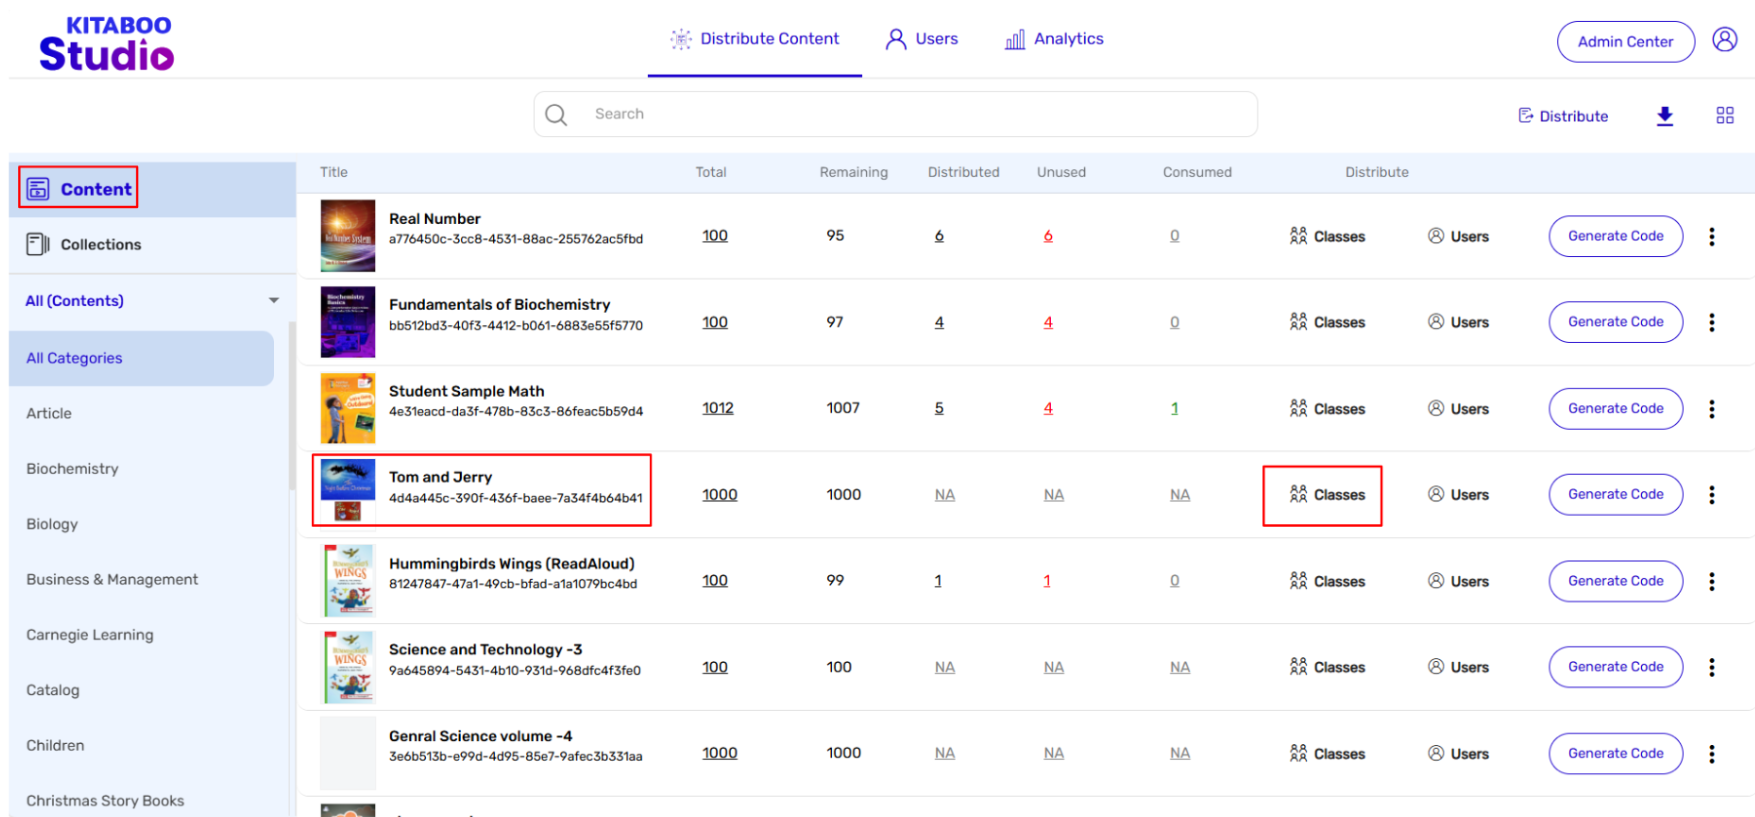
- Click on any of the three options. > Click on the Class against the title you want to distribute.

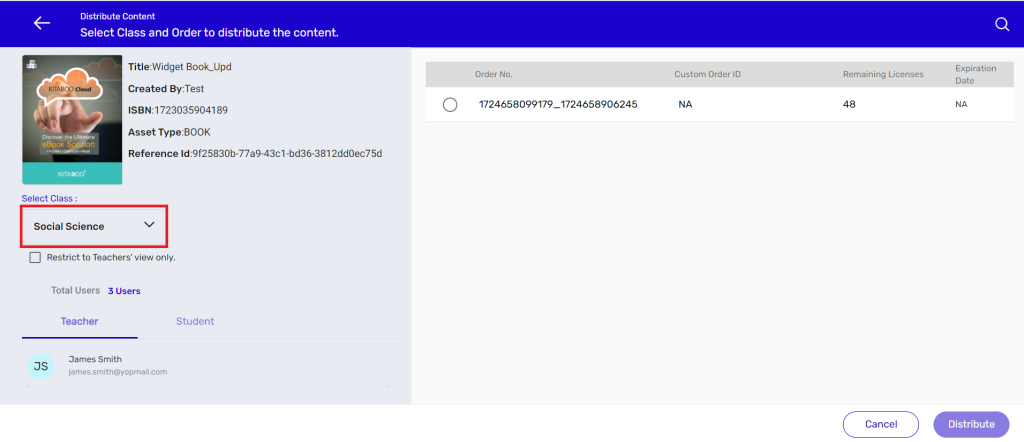
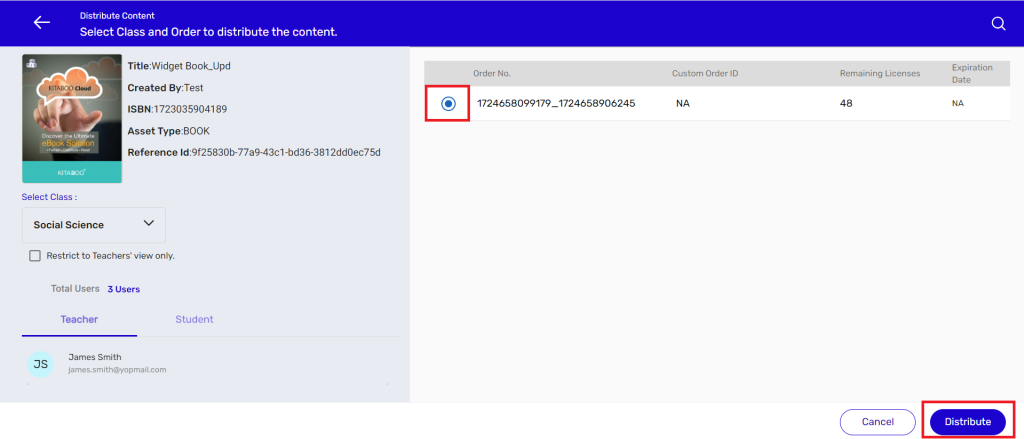
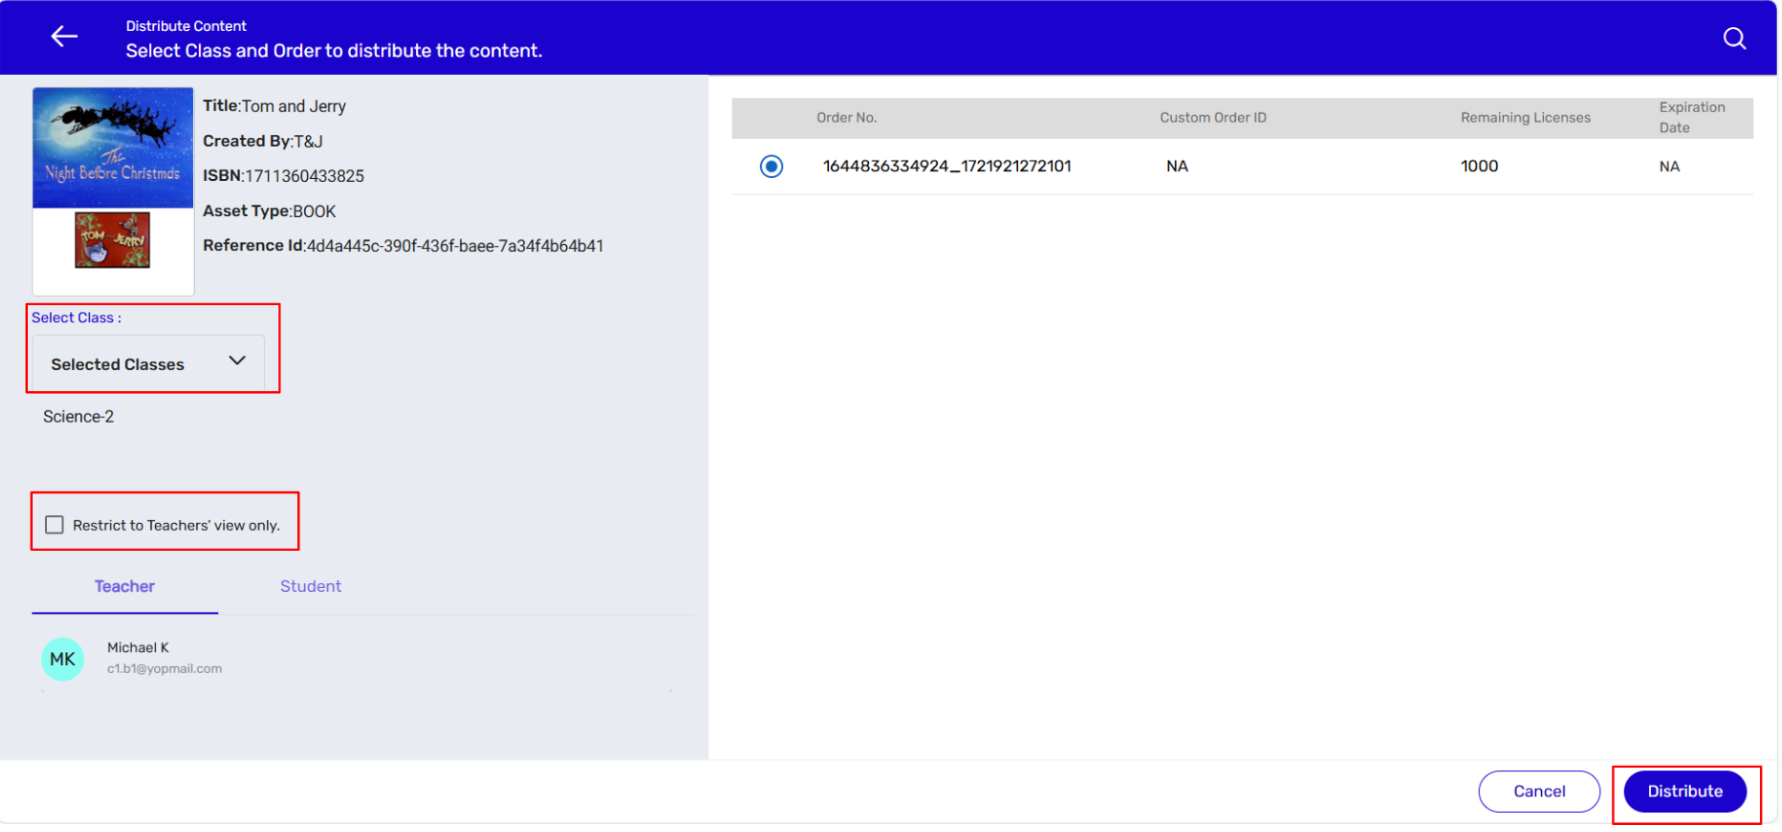
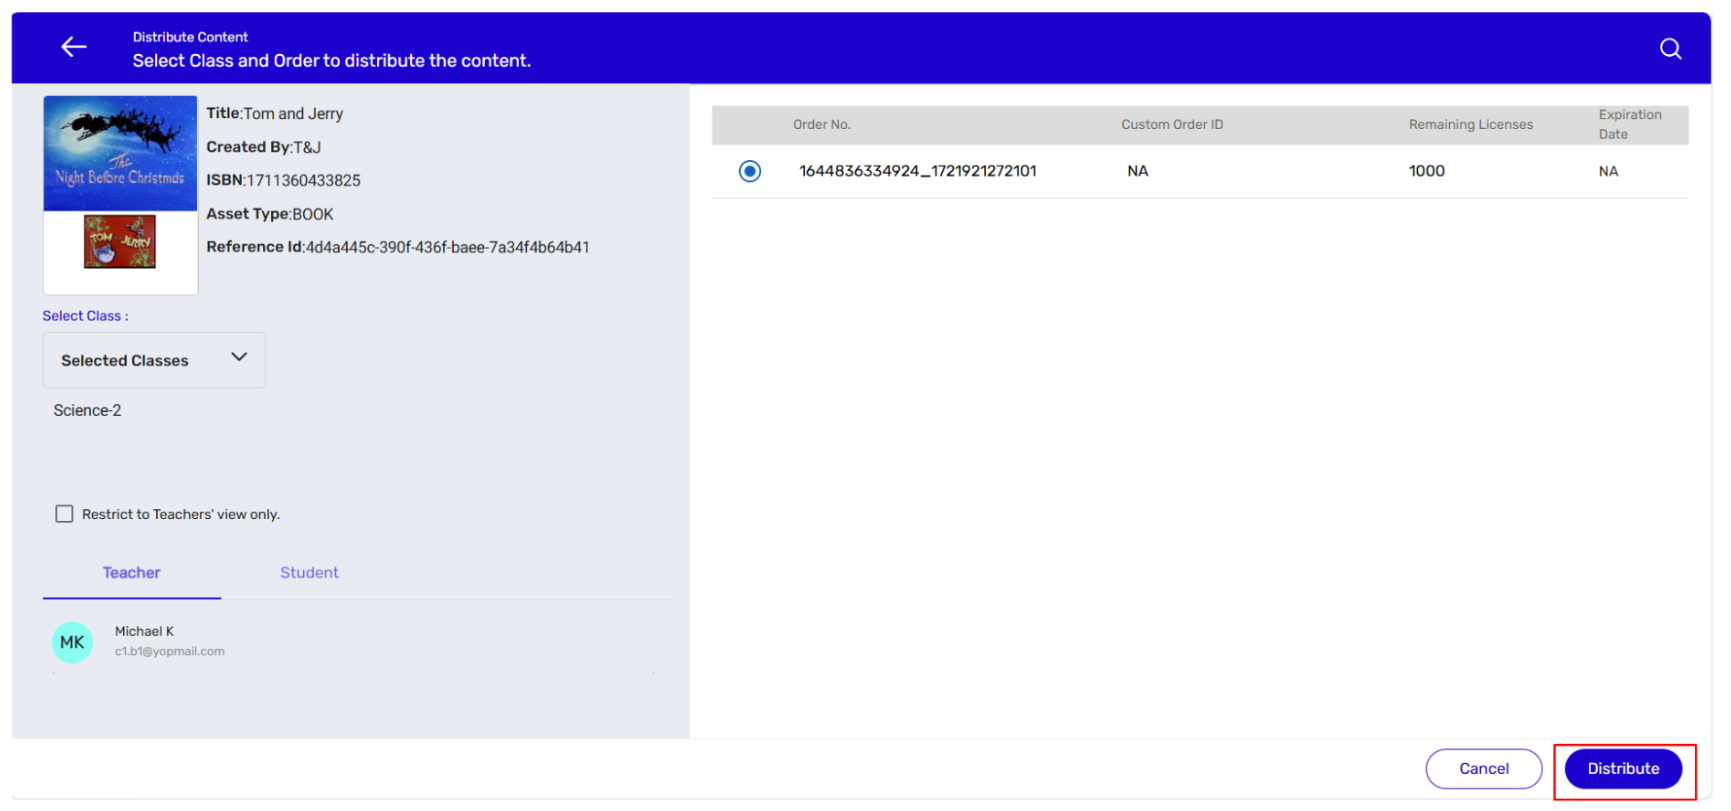
- Select Class from the list. > Check the Restriction box if you want the content to be accessible to teachers only. > Select the Order No. > Click on Distribute.
1.2 Distributing Content to All Classes At Once
- Sign in with your Customer Admin credentials.

- On the Distribute Content tab, click on Class against the title you want to distribute.
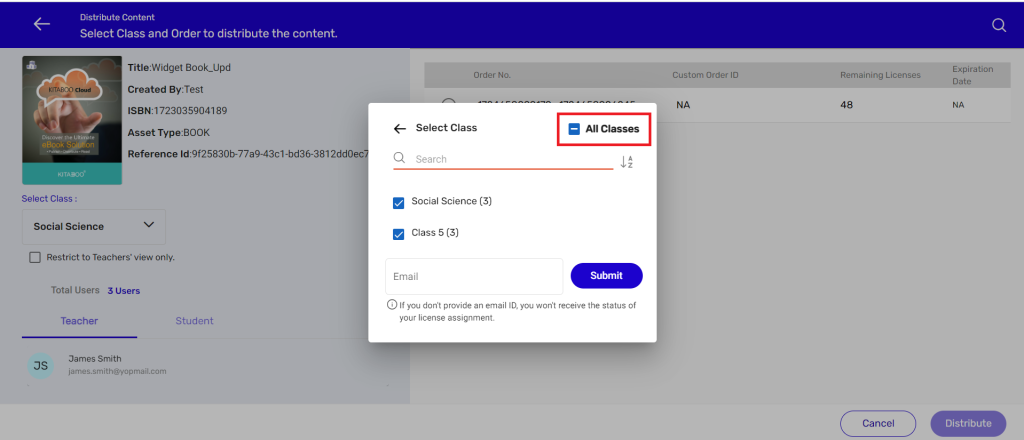
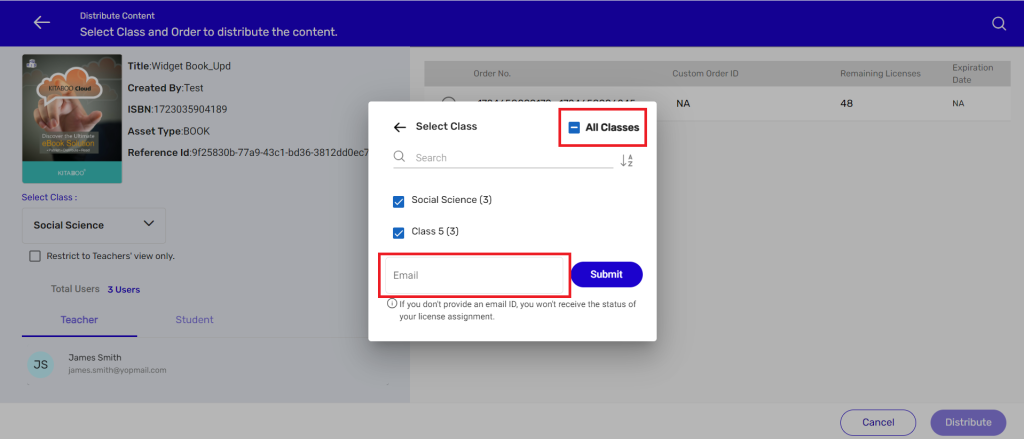
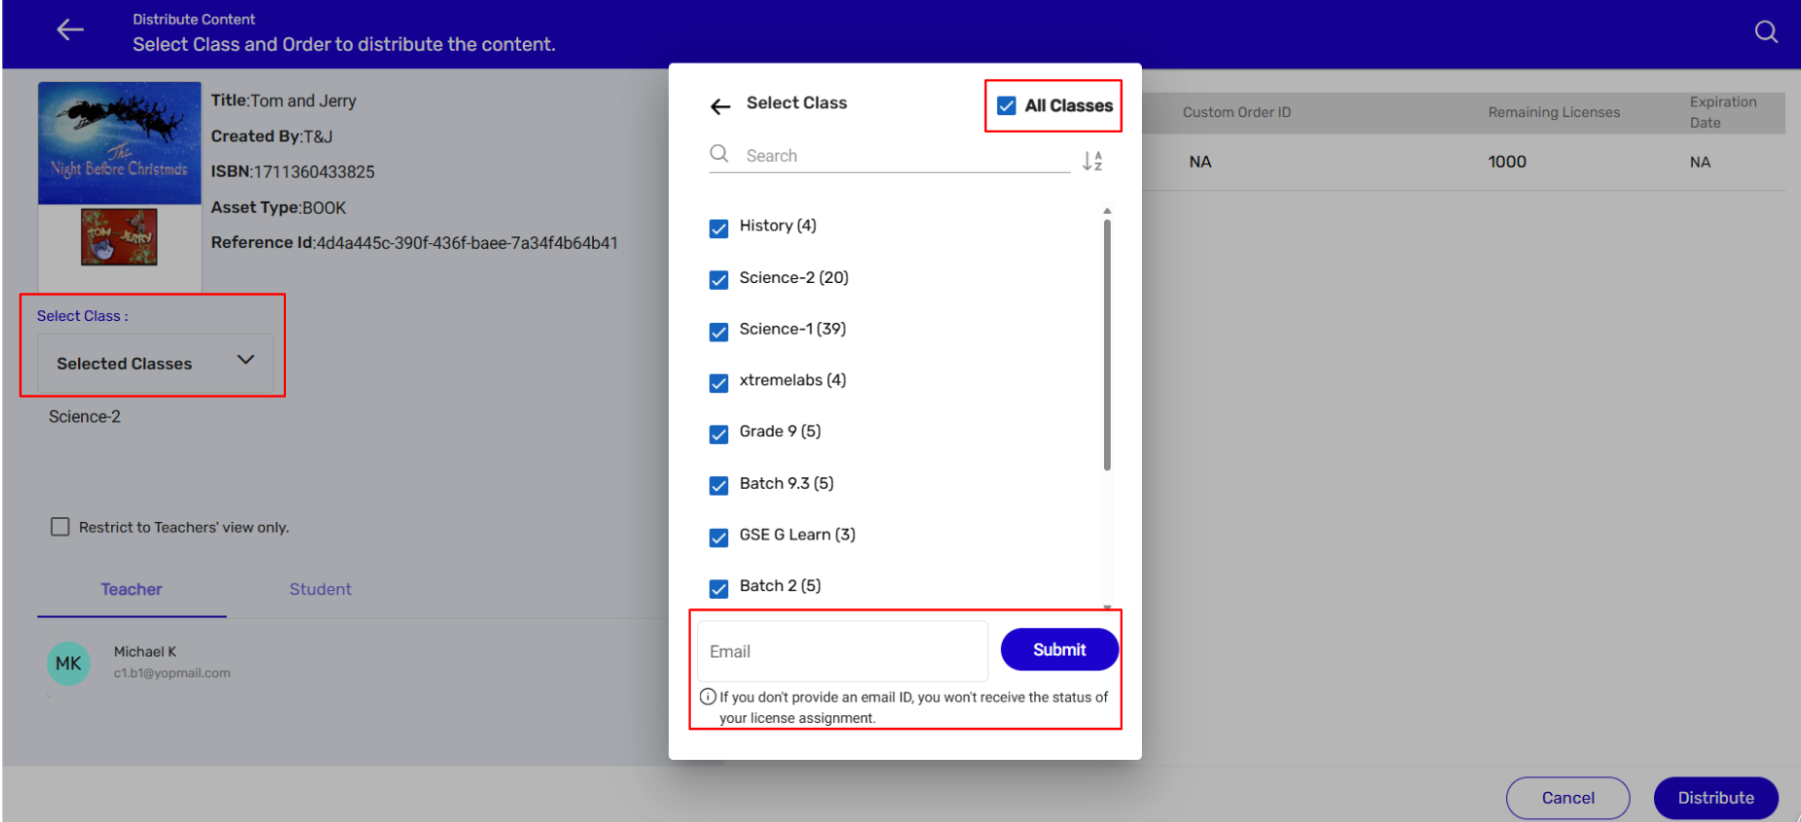
- Click on the Select Class drop-down menu arrow. A pop-up will appear which will allow you to select either a particular class or the entire list of classes by checking the All Classes box. As you want to distribute content to the entire list of classes, select the All Classes box. > Provide an email ID in the field that appears once you select the All Classes box. > Click on the Submit button.
NOTE:
● Once you click on the Submit button, the server will start the process of assigning content one-by-one. After the process is completed, the system will send an email to the email ID you have provided with.
● The system will assign content to both set of classes – those you had created manually as well as to those that were created by using the group access code.
- Select the Order. > Click on the Distribute button. A confirmation message will appear for posting a successful request for bulk distribution.
Important: You must have a sufficient number of licenses to complete the bulk distribution
process.

1.3 Distributing Content to Multiple Class
- Sign in with your Customer Admin credentials.

- On the Distribute Content tab, click on Class against the title you want to distribute.

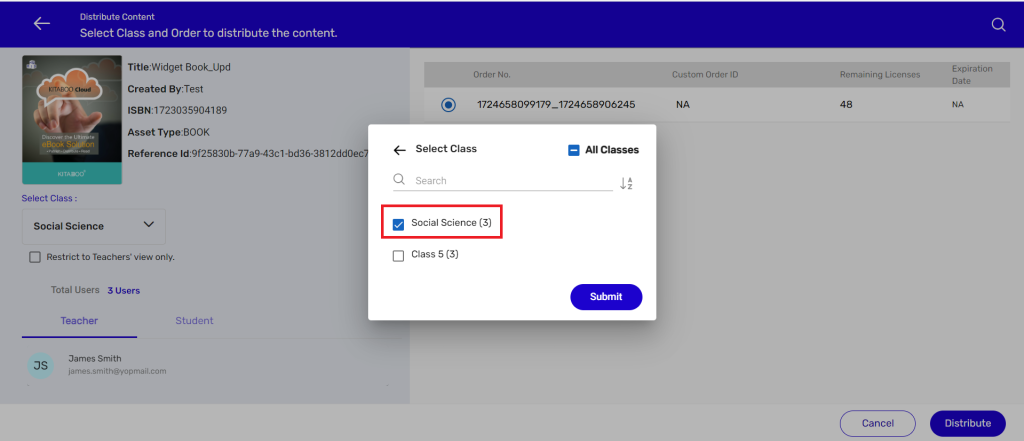
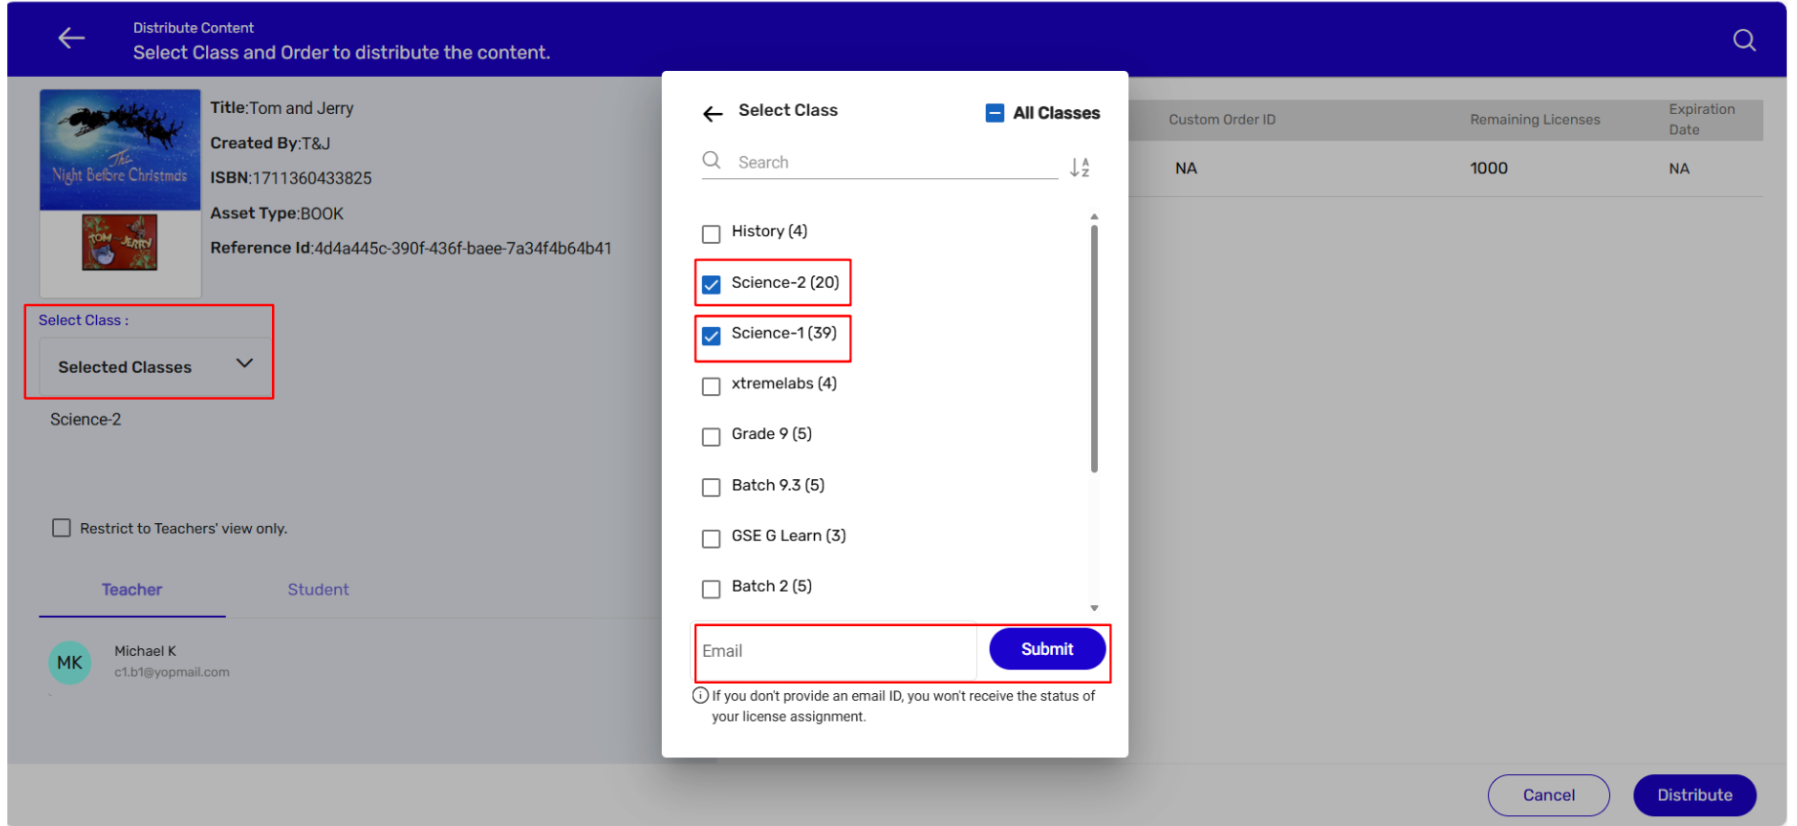
- Click on the Select Class drop-down menu arrow. A pop-up will appear which will allow you to select either a particular class or a Check-Box to select multiple classes. As you want to distribute content to the Selected list of classes. Provide an email ID in the field that appears once you select the Multiple Classes box. > Click on the Submit button.
NOTE:
● Once you click on the Submit button, the server will start the process of assigning
content one-by-one. After the process is completed, the system will send an email to
the email ID you have provided with.
● The system will assign content to both set of classes – those you had created
manually as well as to those that were created by using the group access code.
- Select the Order. > Click on the Distribute button.
Important: You must have a sufficient number of licenses for completing the bulk distribution process.
- Sign in with your Customer Admin credentials.

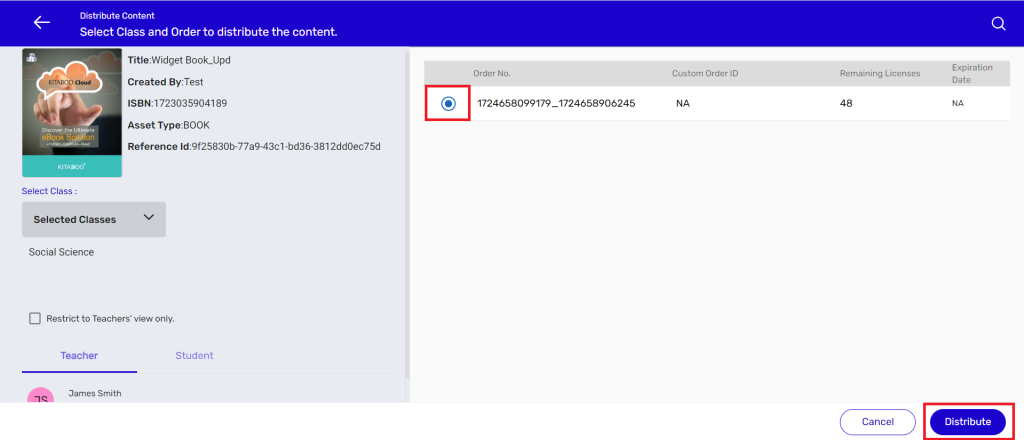
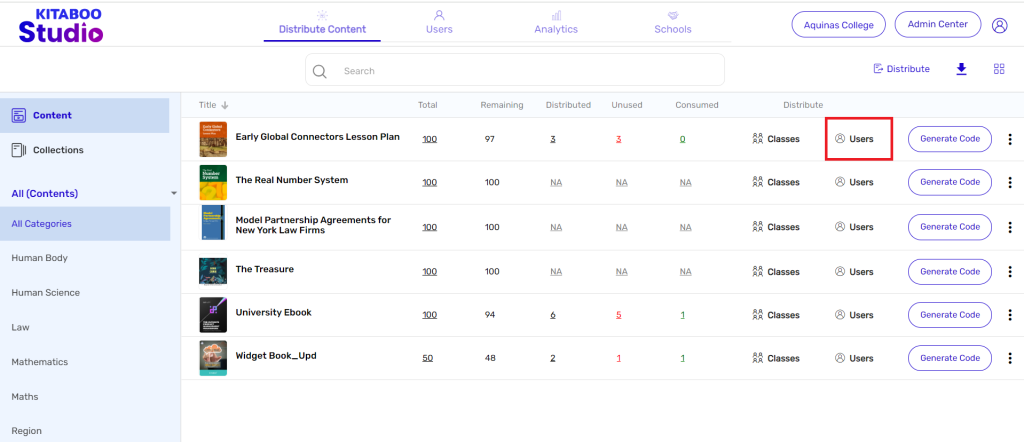
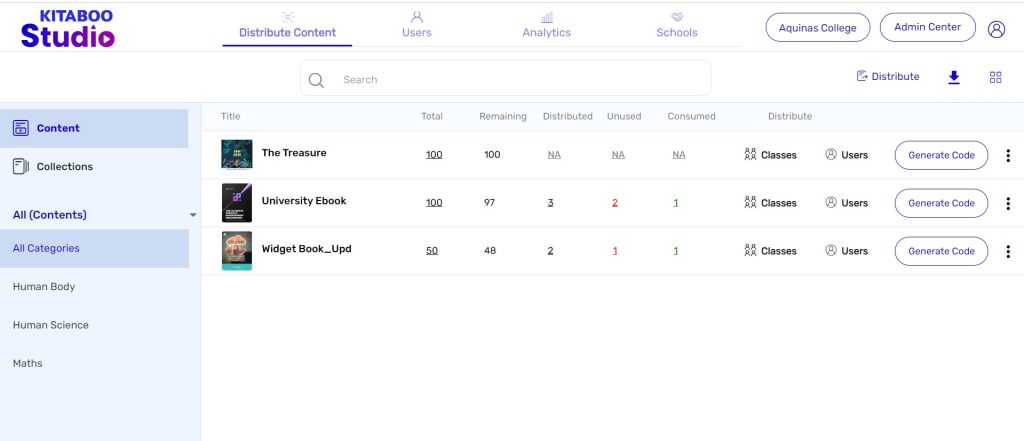
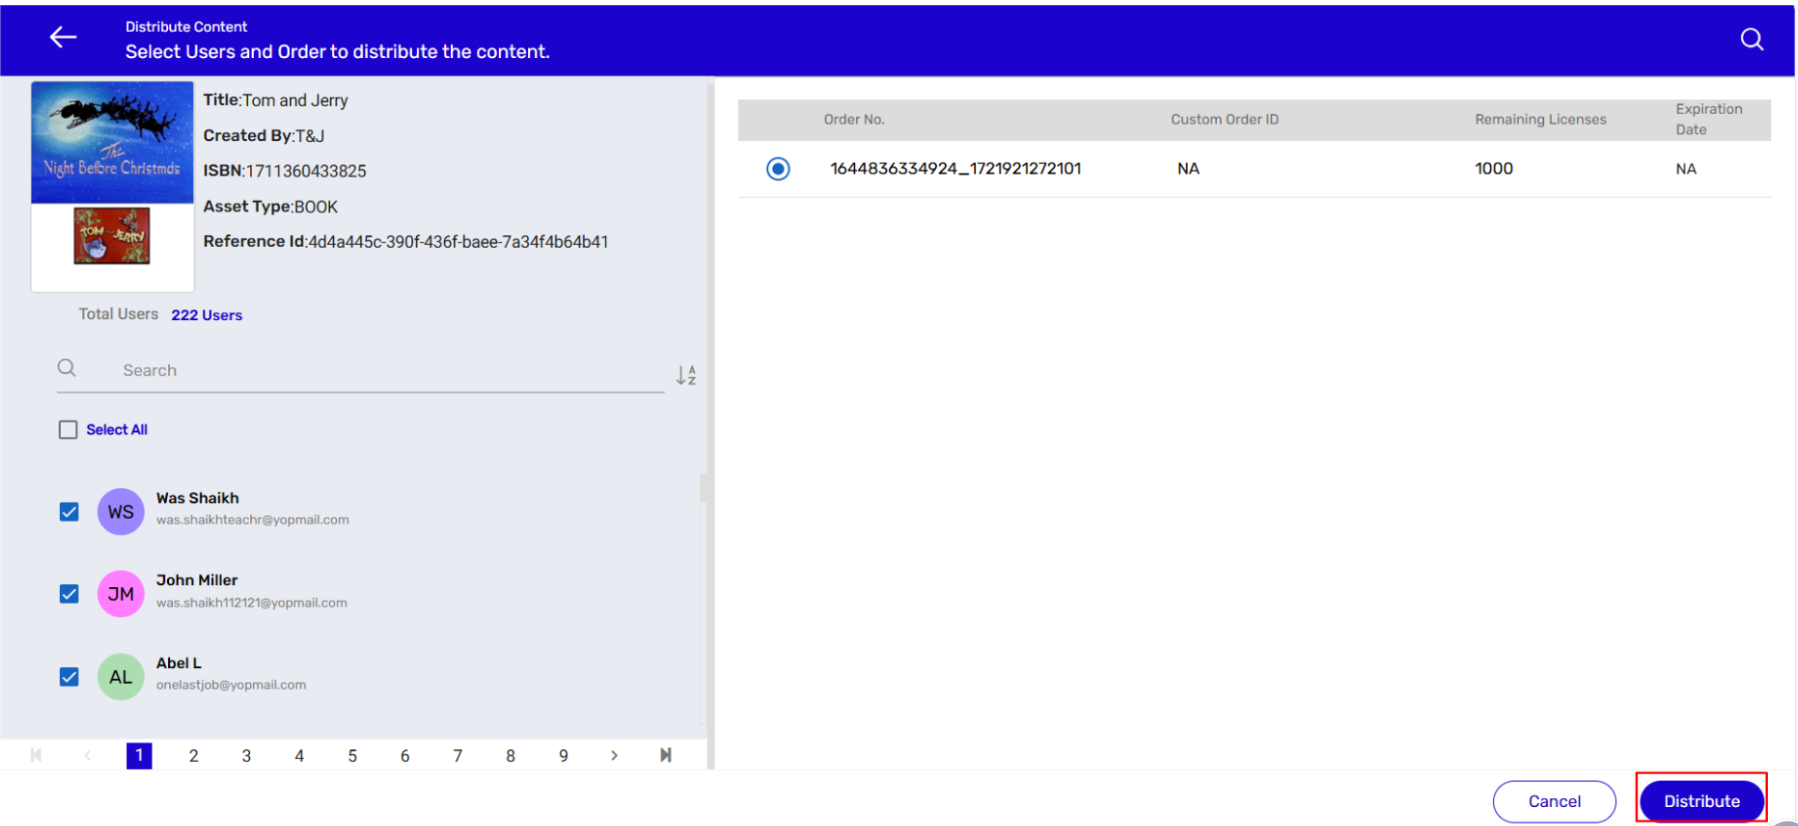
- Go to the Distribute Content tab. > Click on Users aligned to the title you want to distribute. Go to the Distribute Content tab. > Click on Users aligned to the title you want to distribute.
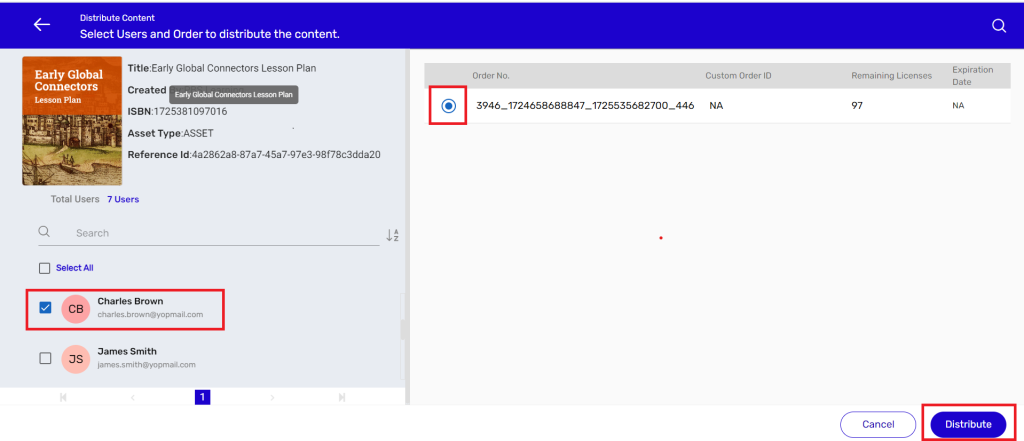
- Select User(s) from the list. > Select the Order No. > Click on Distribute.
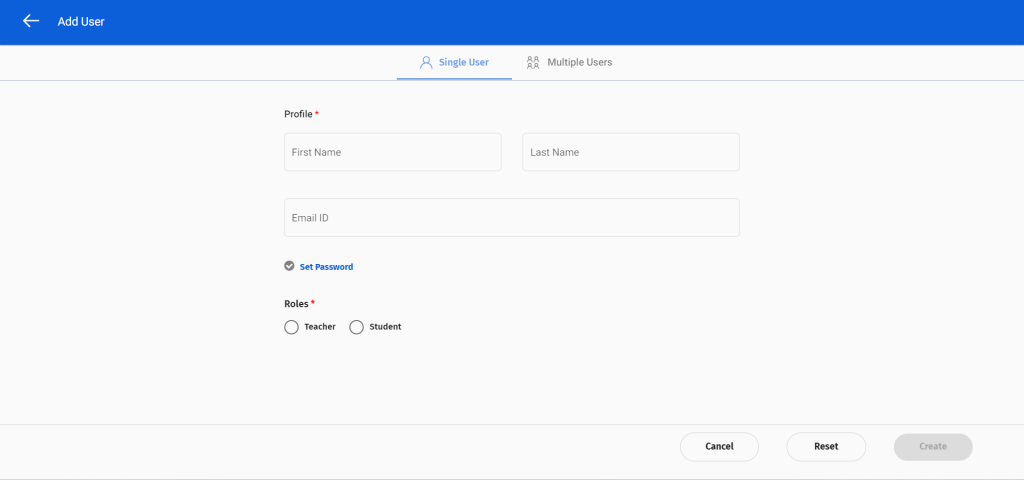
1. Adding Single User –
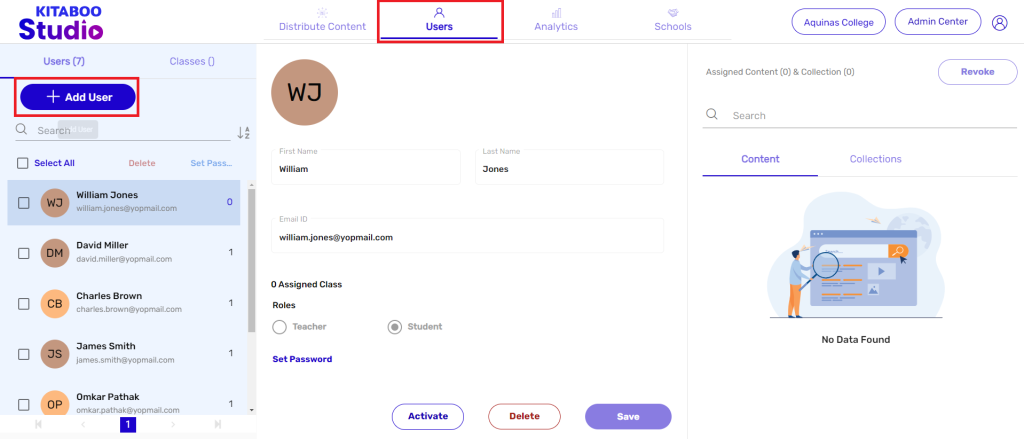
- Navigate to the Kitaboo Studio Reader login page. > Enter your Customer Admin credentials
- Switch to the Users tab. > Click on Add User.
- Enter the User’s profile details > Define Role (Teacher or Student) > Click on Create. > Click on the Set Password link.
NOTE: Multiple users can also be created in one go by using a sample sheet.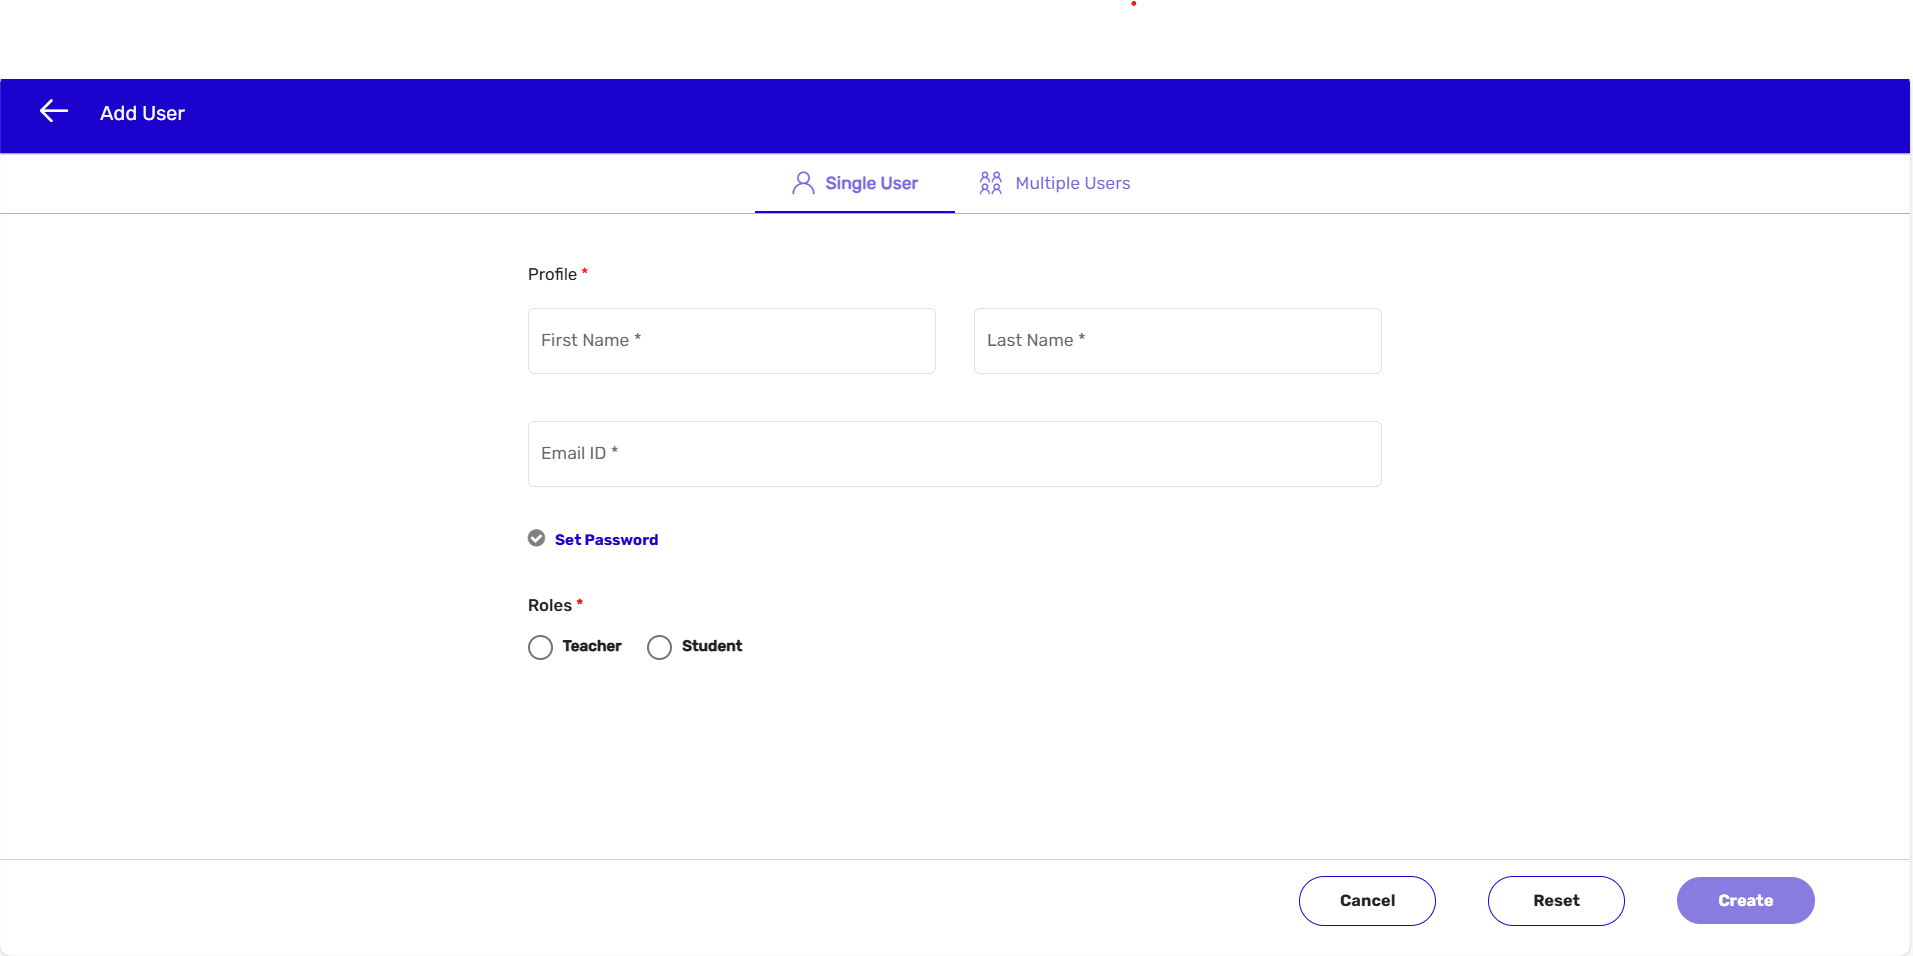
- On the Set Password pop-up, enter a new password as per the prescribed format for a password. > click on the Set button. > Click on Save.
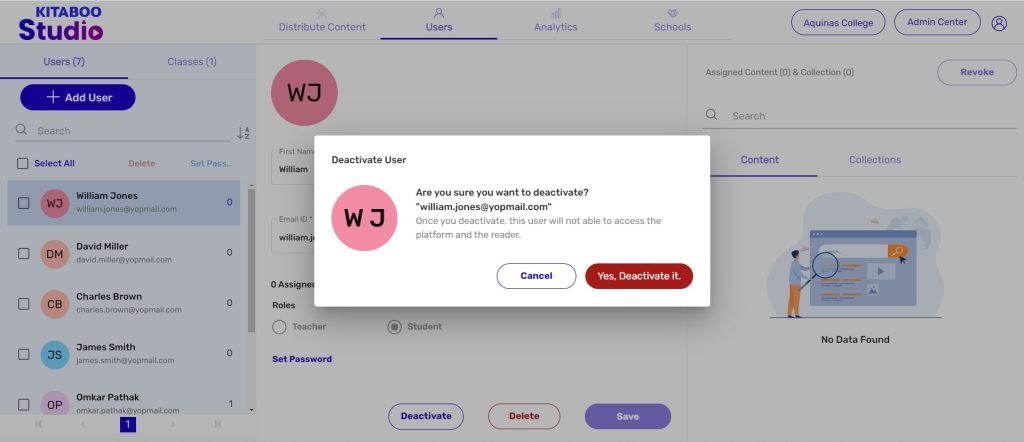
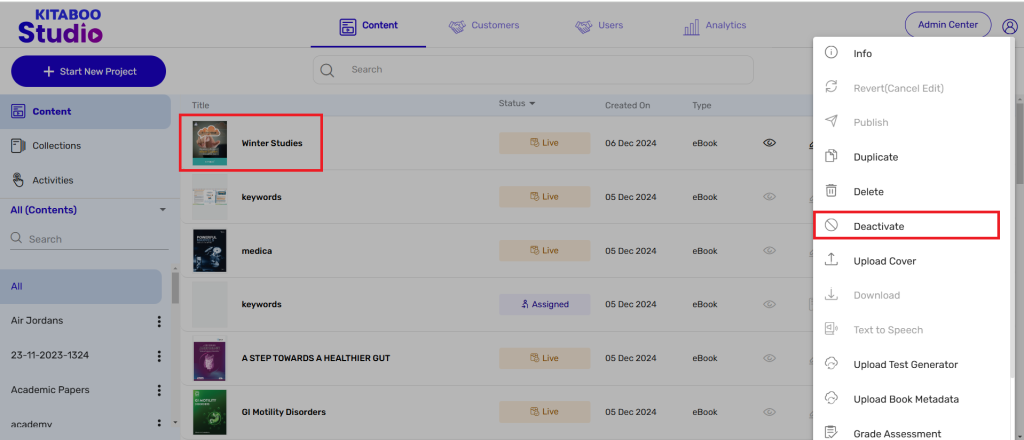
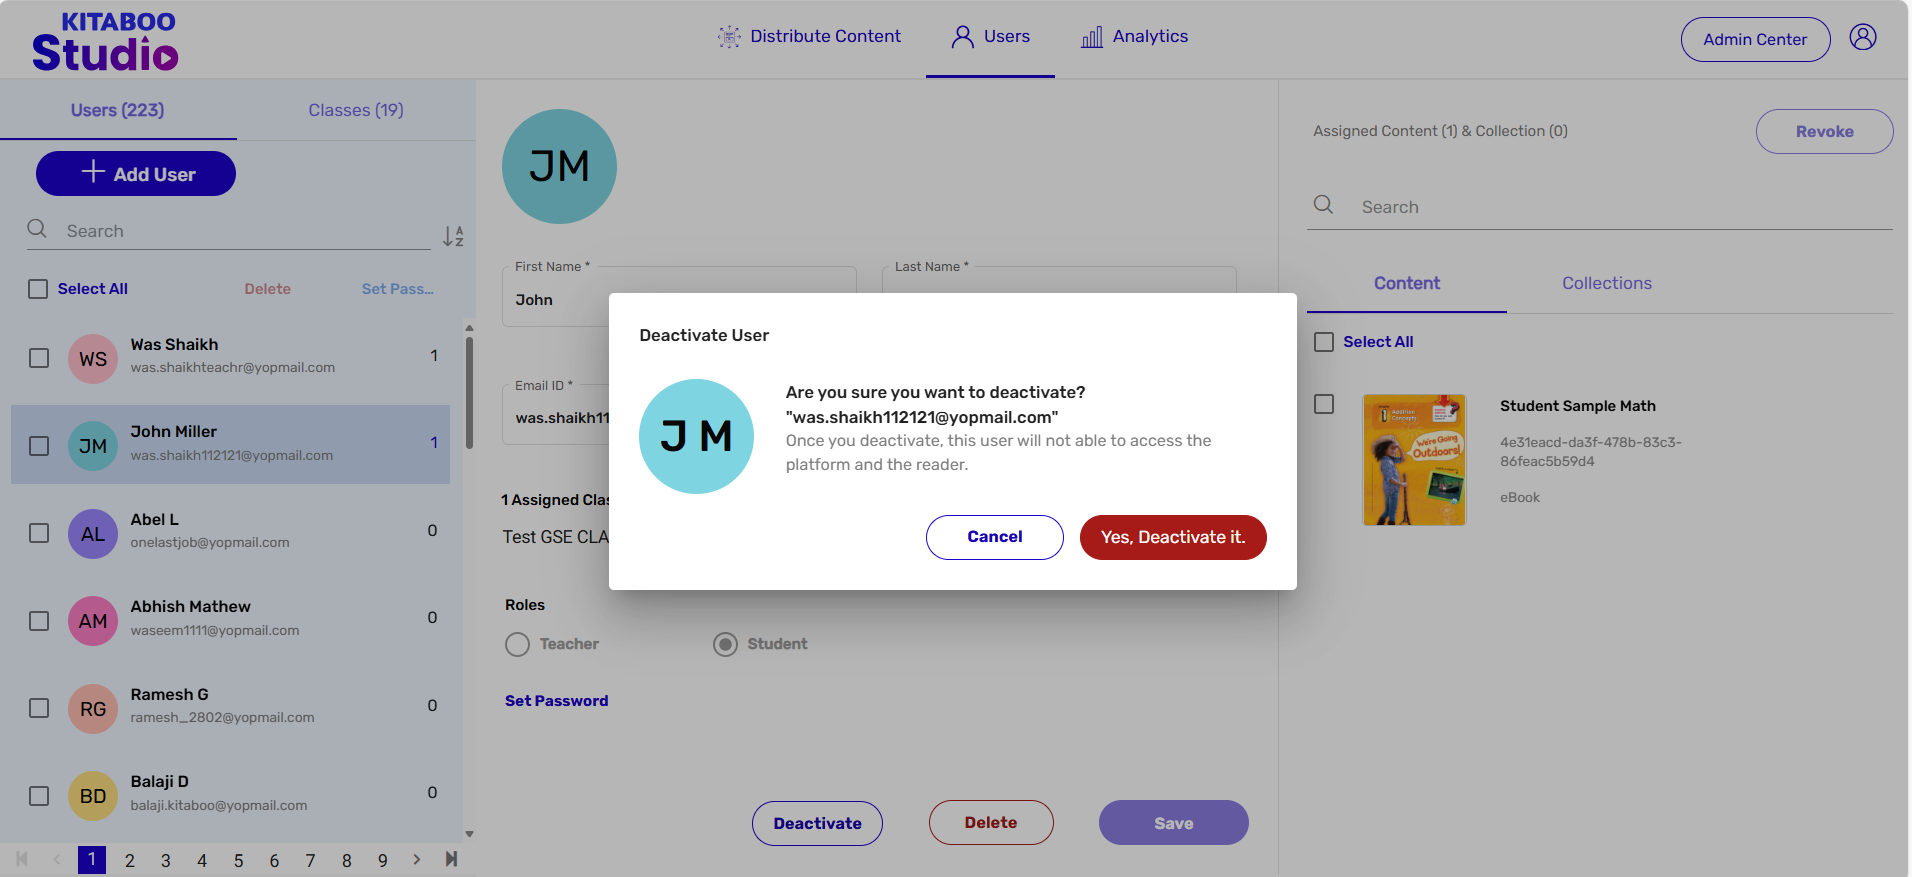
- You can also deactivate a user. For deactivating a user: Select the user, on the left pane, you want to deactivate. > Click on the Deactivate button.
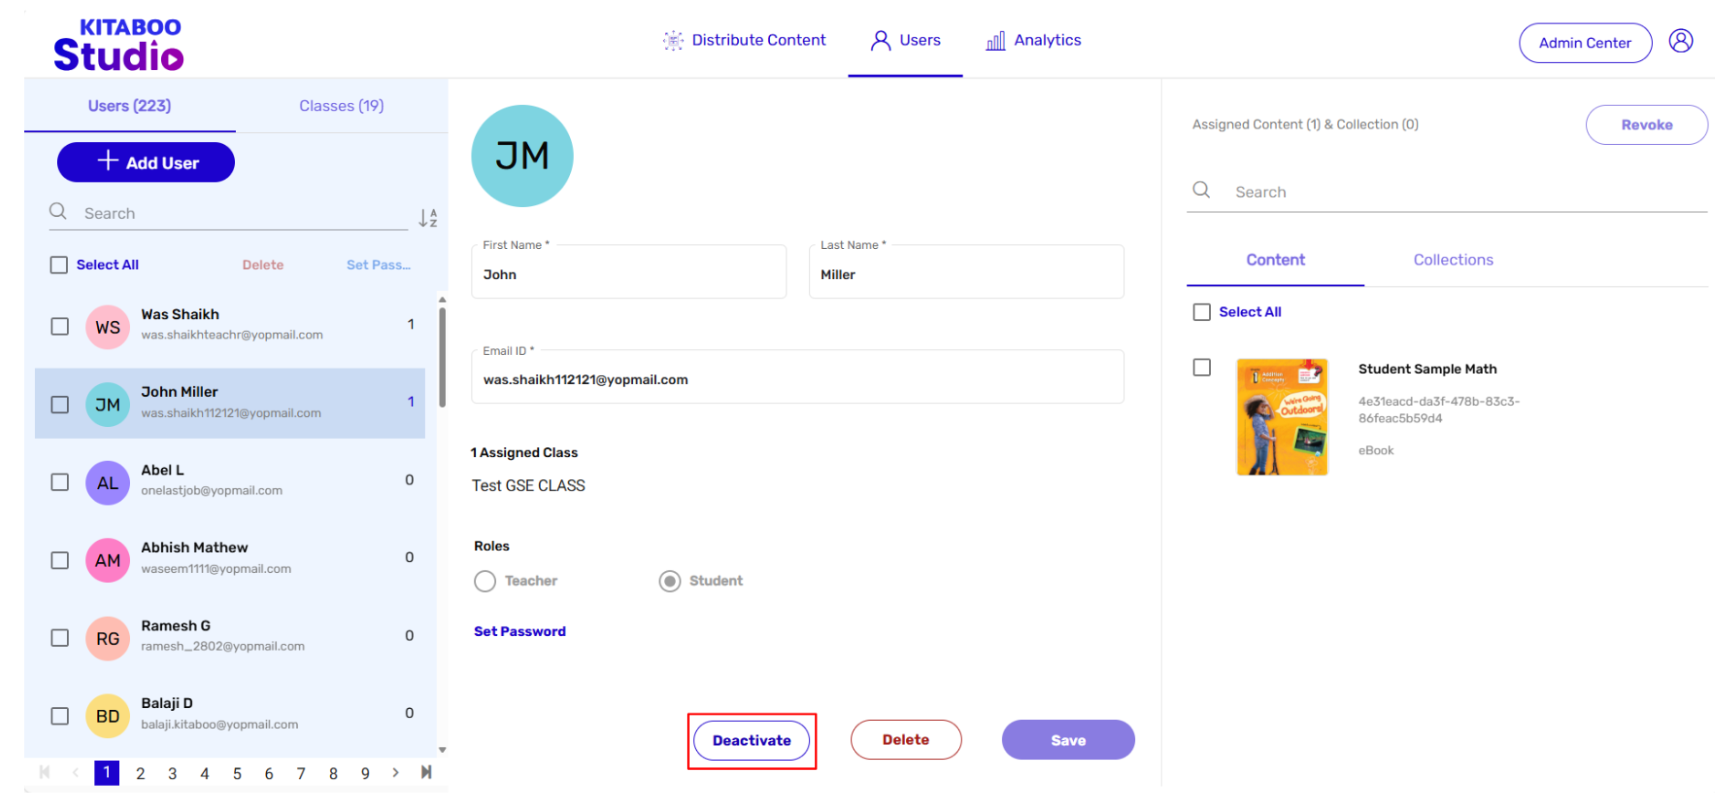
- Click on Yes, Deactivate it on the pop-up. Once confirmed for deactivation, the deactivated user will NOT be able to access the reader.
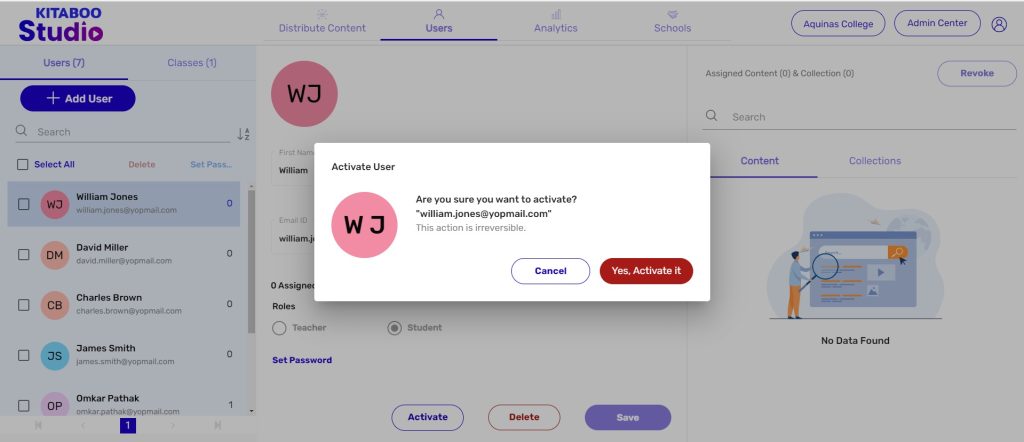
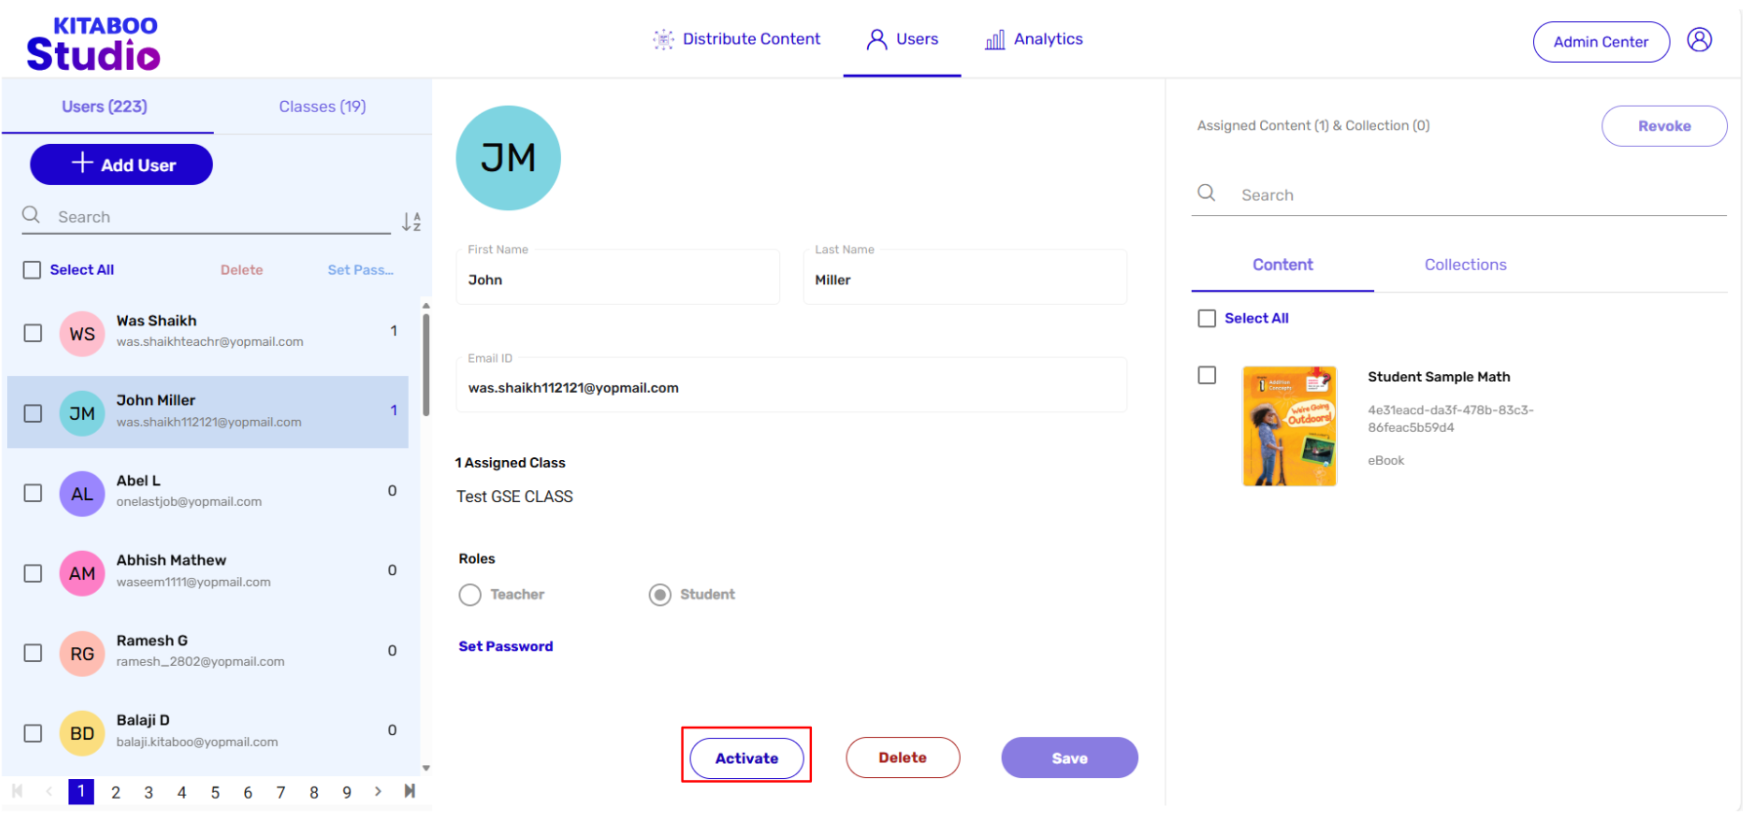
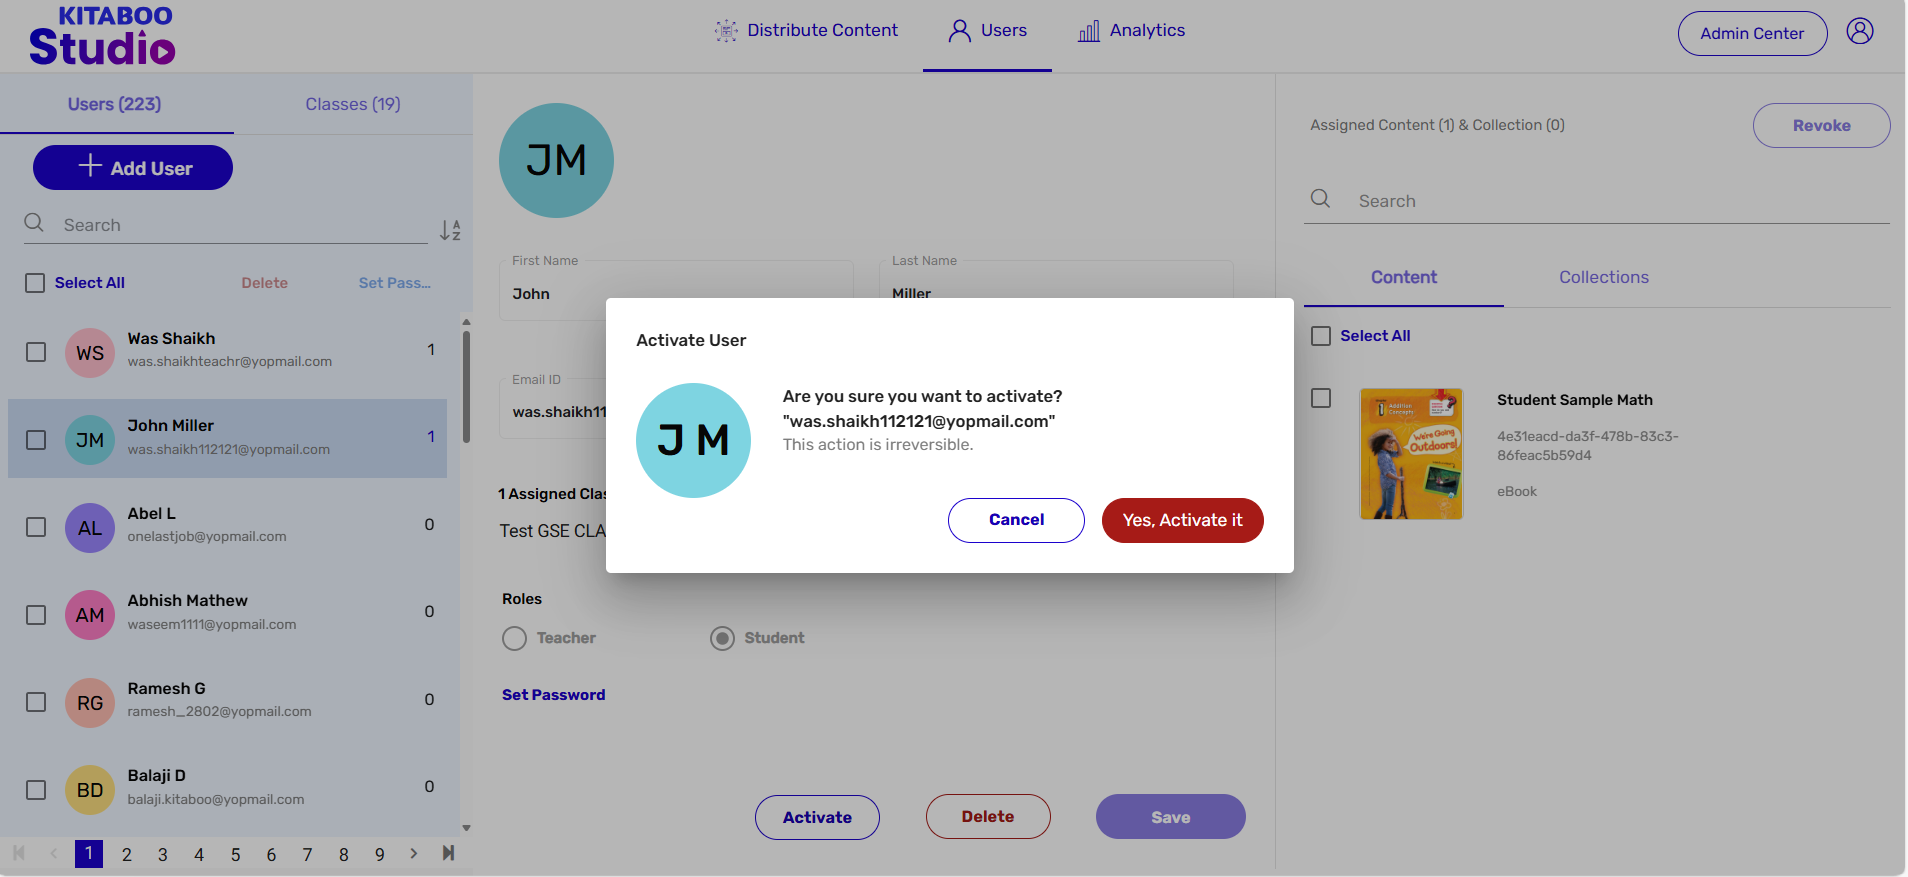
- You can also reactivate a deactivated user. For this: Select the user you want to reactivate. > Click on Activate.
- Click on Yes, Activate it to confirm
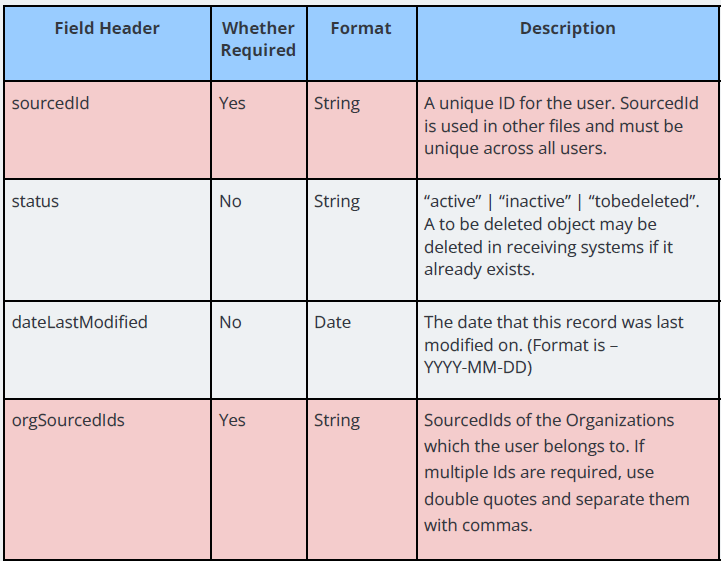
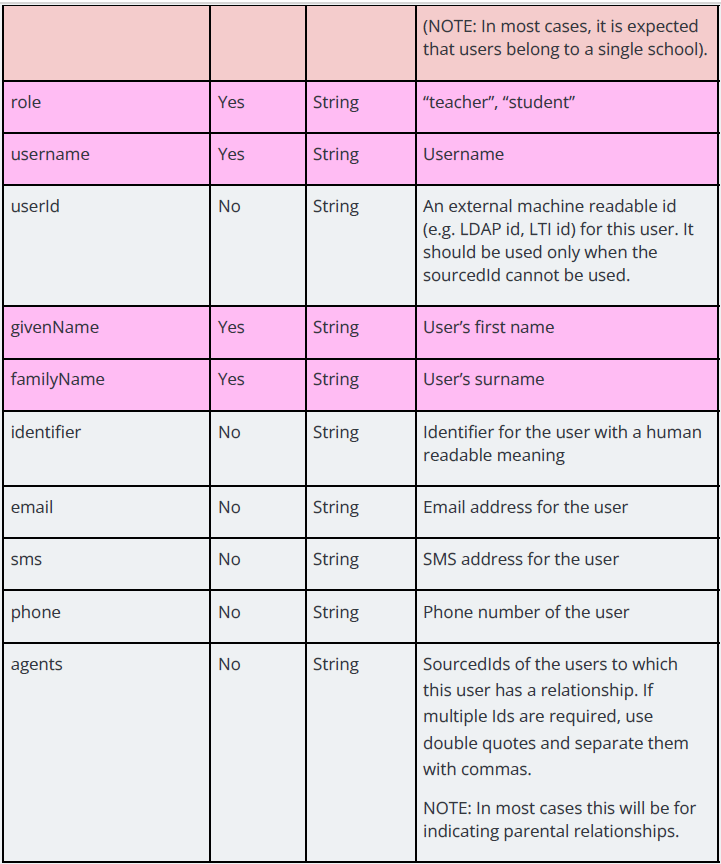
2. Creating Bulk Users via Bulk Upload sheet
Kitaboo Studio also enables you to create bulk users for a class. Let’s see how to do it.
- Sign in with your Customer/Partner Admin credentials.

- Switch to the User tab. > Click on the + Add User button.
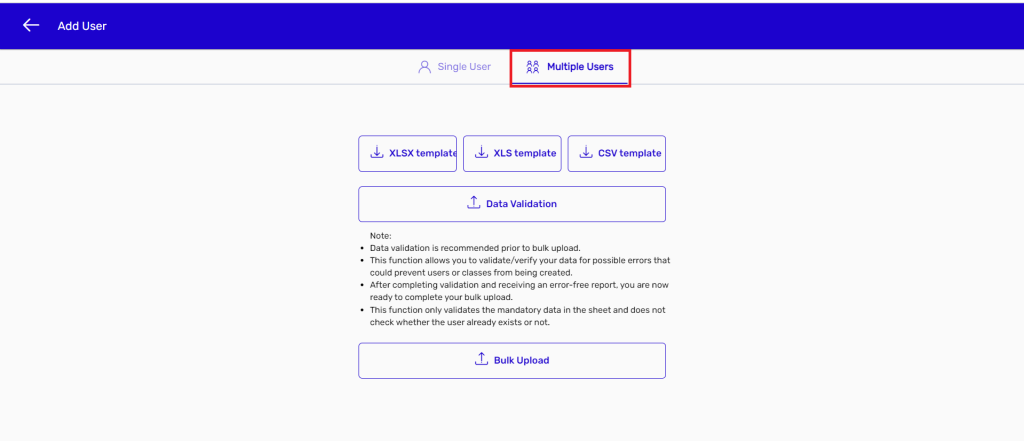
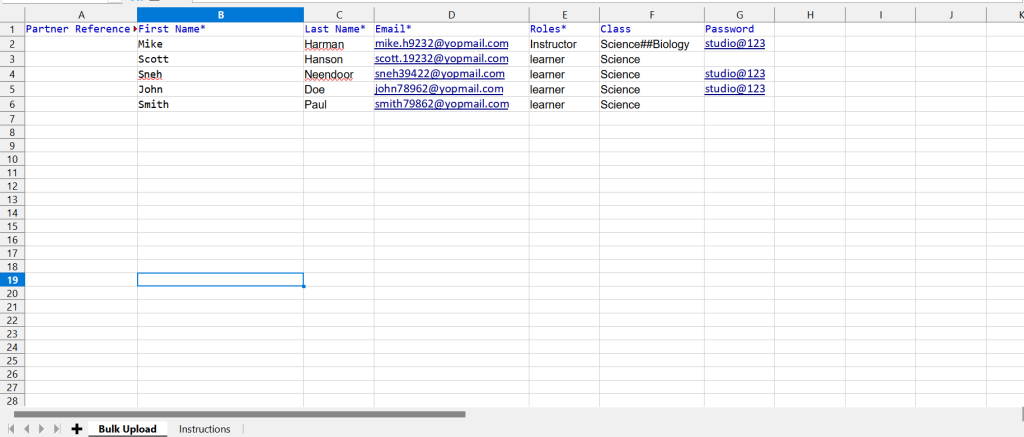
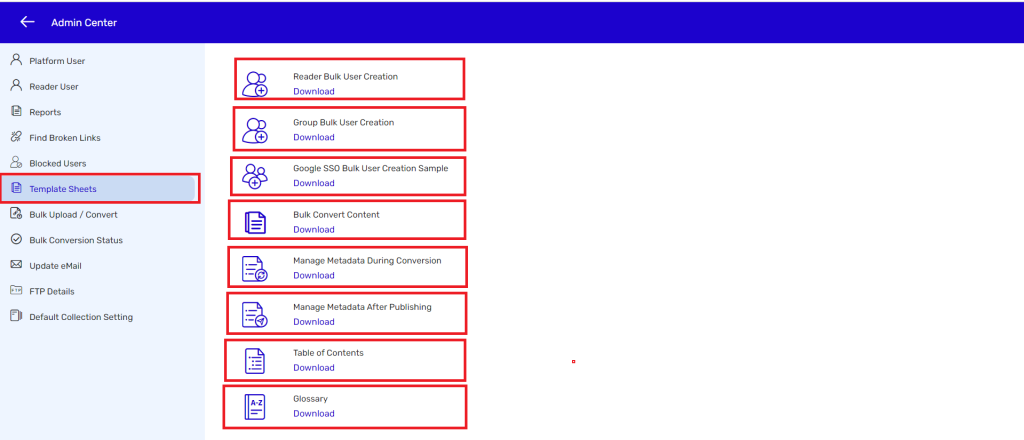
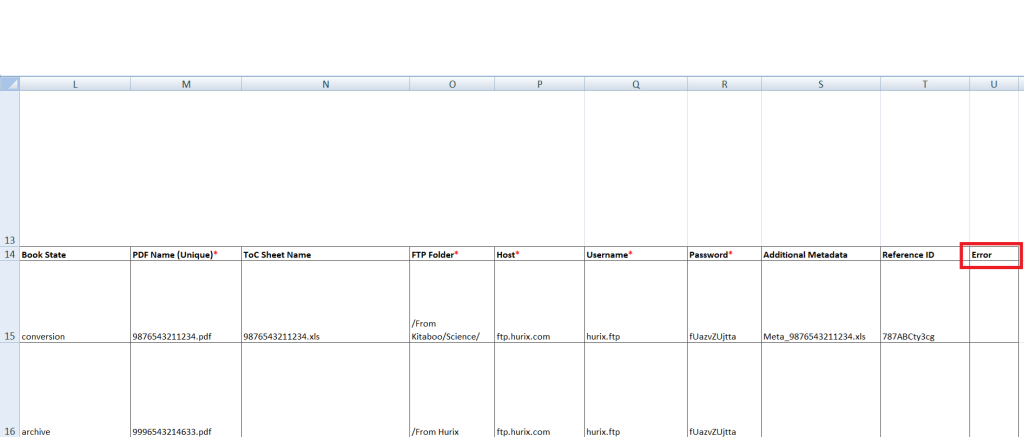
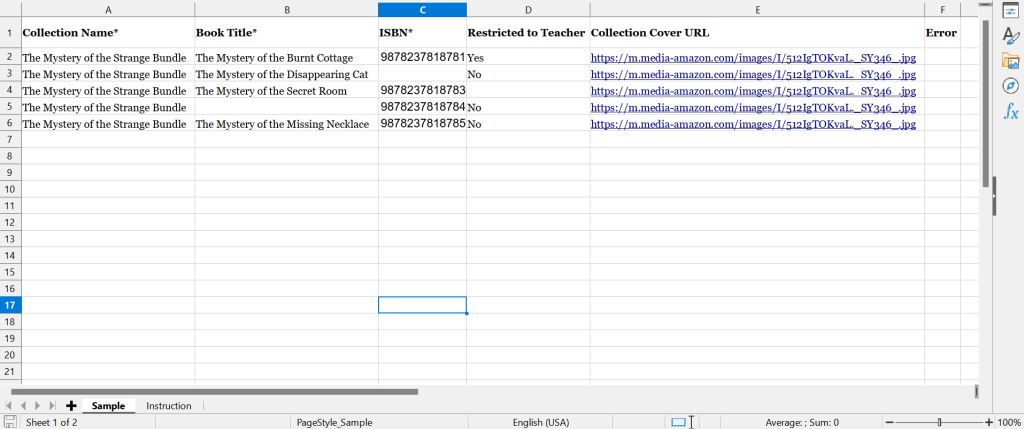
- On the Multiple Users tab, click on the Download Sample link. > Save the Excel sheet on your local machine. You need to enter the users’ details as per the format in the sheet.
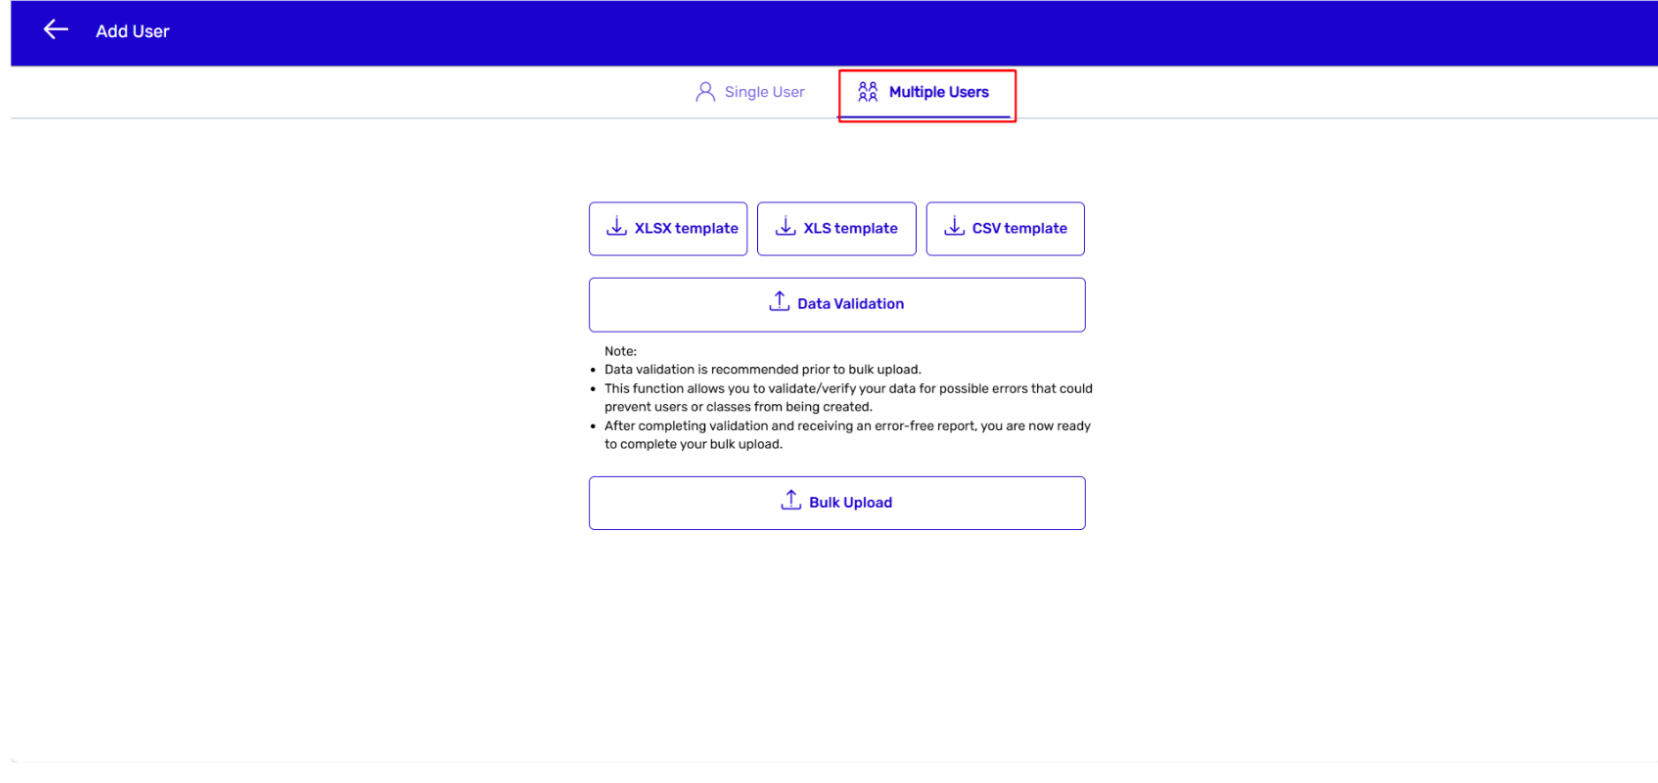
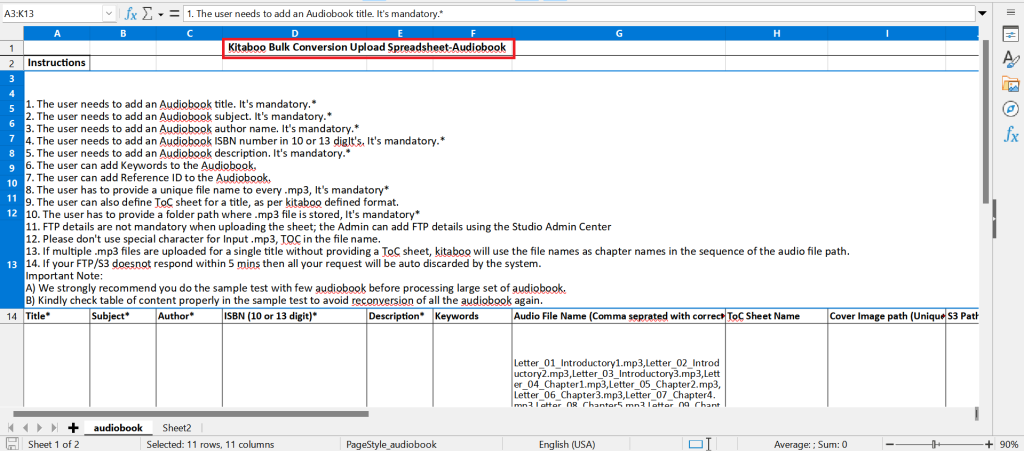
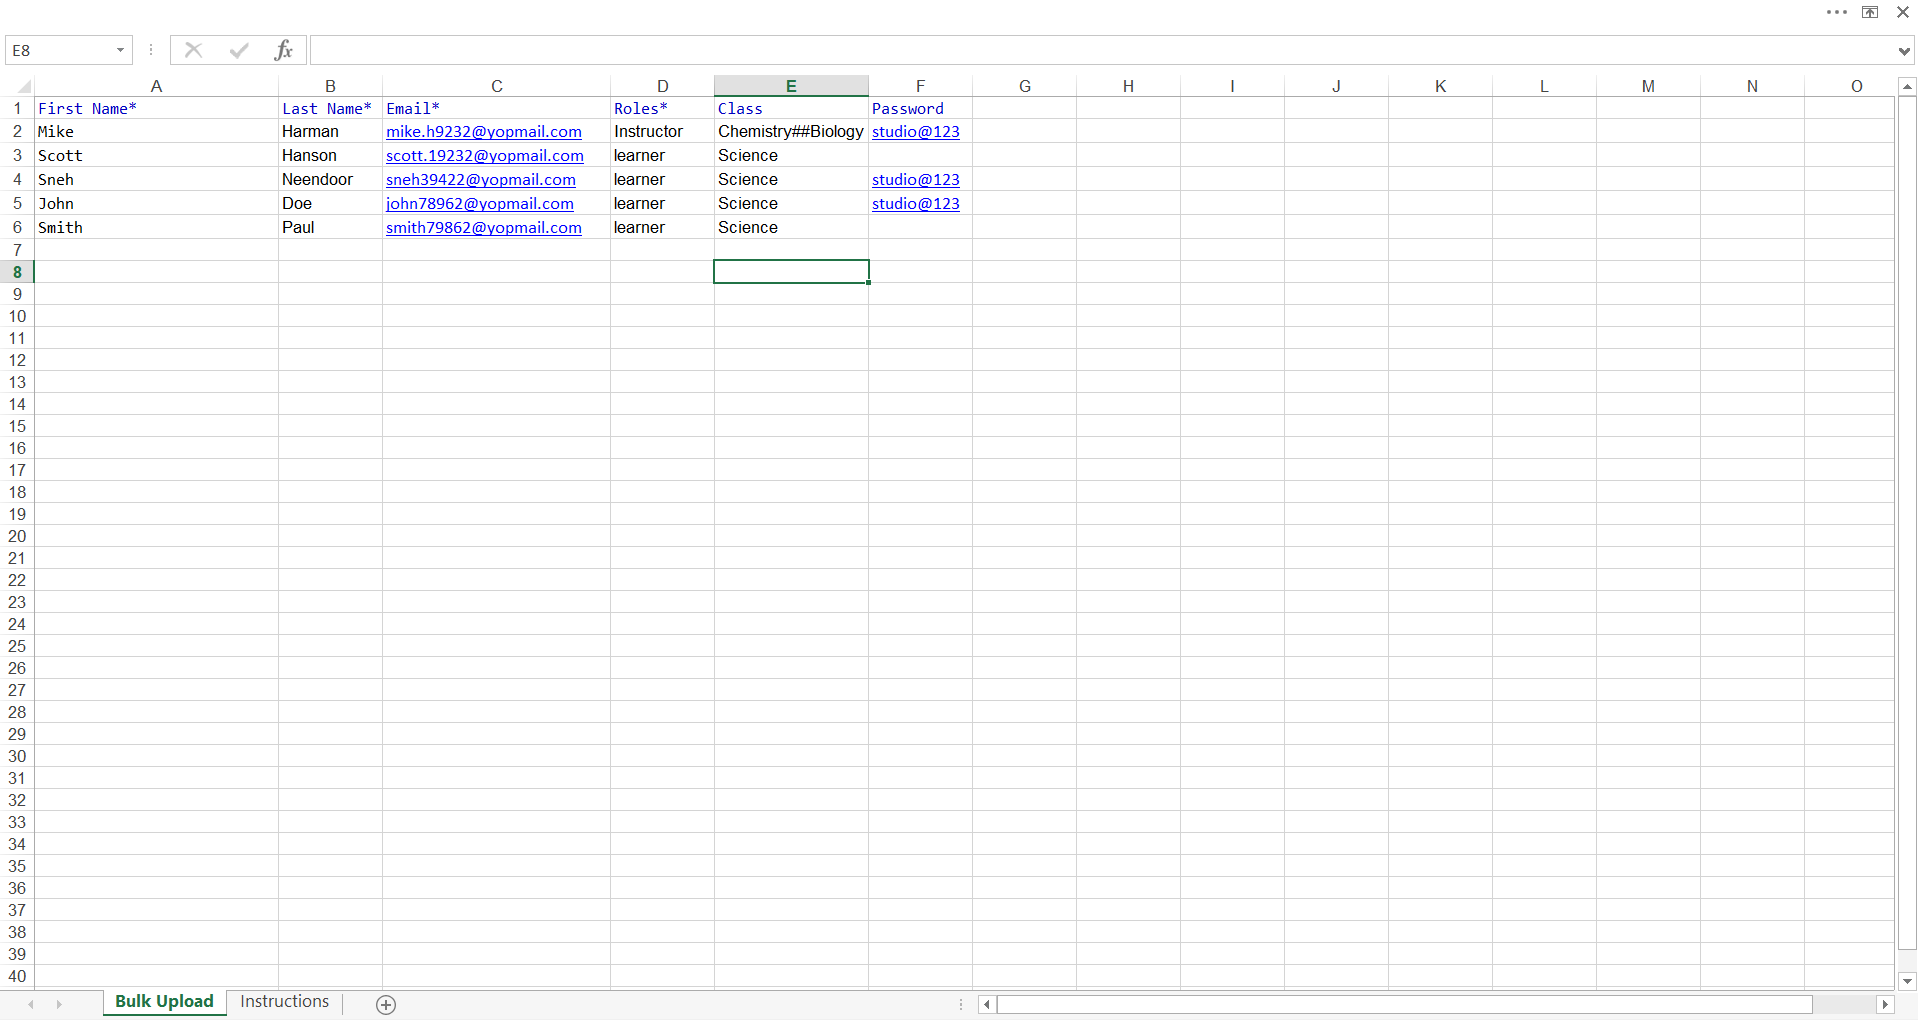
There are two tabs on the sample Excel sheet (download the sample file) – Bulk Upload and Instructions. You need to enter the details of the users on the Bulk Upload page. It is advisable to read through the instructions on the Instructions page before adding the users’ details. A recap of the
I) Special characters should not be used in contact numbers, city names, ZIP codes, and country names.
II) Username is a mandatory field. If you leave it blank, the system will create a username based on the given email ID. For example, for the email ID john.ked@gmail.com, the system will be creating a username as john.ked@gmail.com.
IV) You must ensure that all the mandatory fields are filled in before uploading the Bulk Upload Excel sheet.
V) You should refer to the Bulk Upload sheet for example, clarification, or reference.
VI) You should not edit the column header and order on the Bulk Upload sheet.
- Enter the new users’ details in the respective columns as per the format only. > Save the changes you have made.
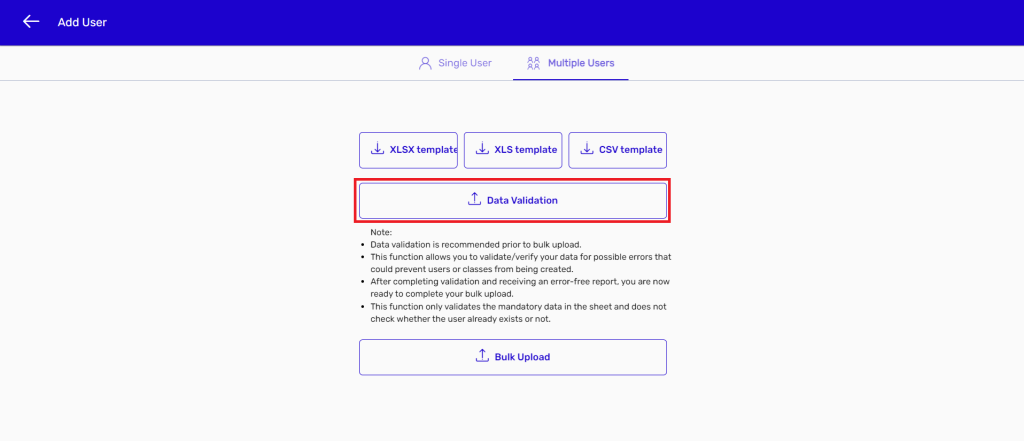
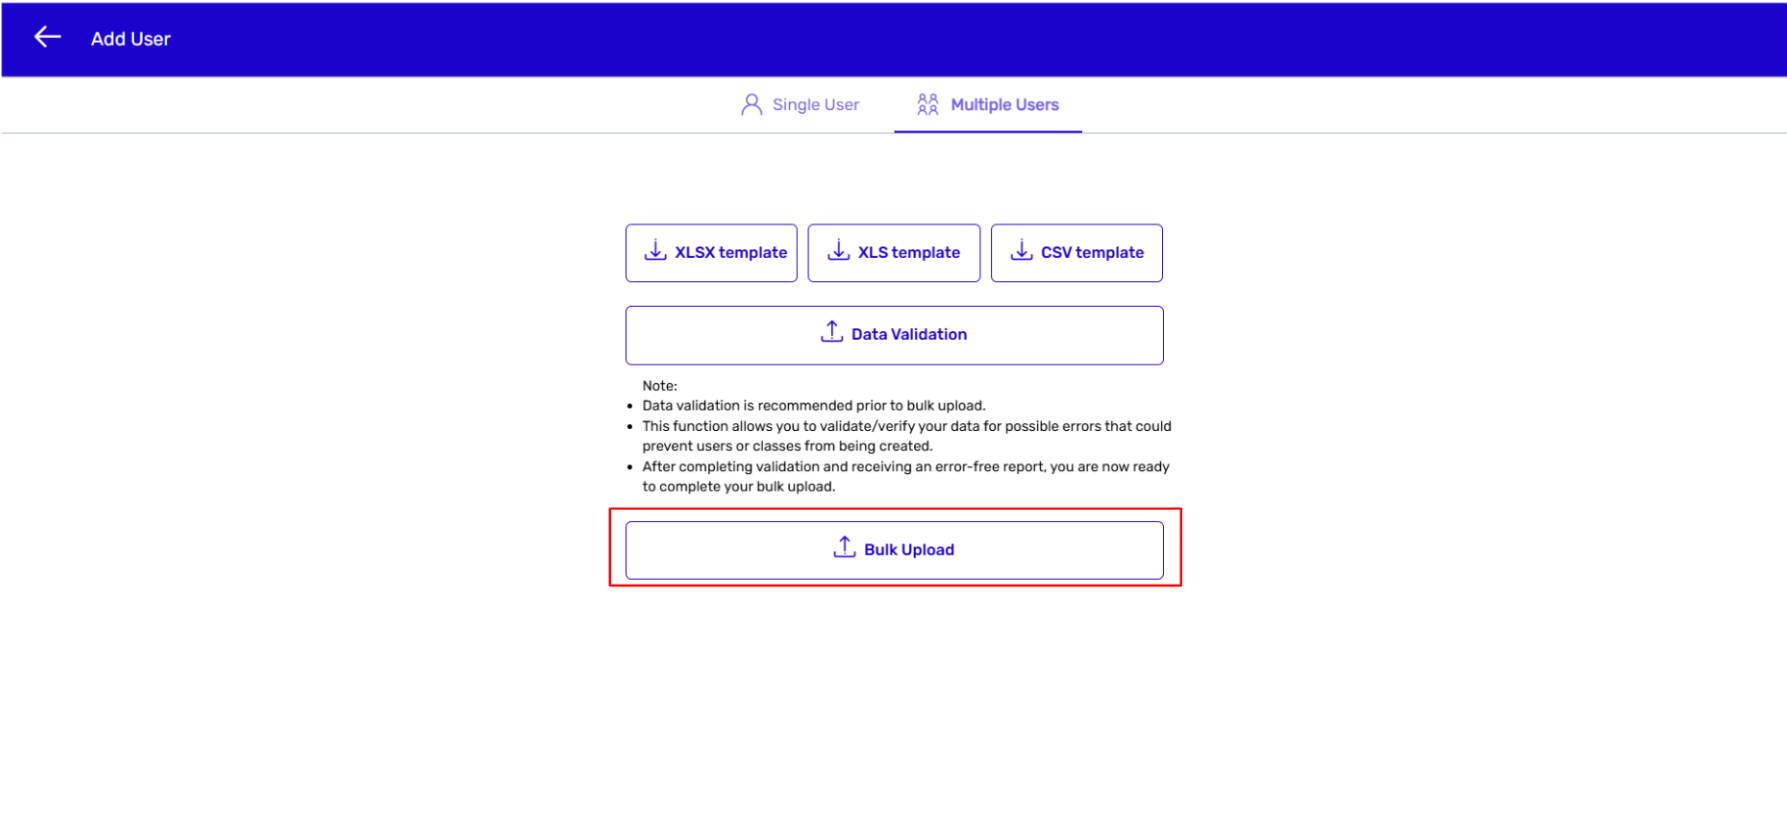
- Click on Data Validation on the Multiple Users page. > Upload the updated Sample sheet.

Note: Data validation is recommended before bulk upload. This function allows you to validate/verify your data for possible errors that could prevent users or classes from being created. After completing validation and receiving an error-free report, you are now ready to complete your bulk upload.
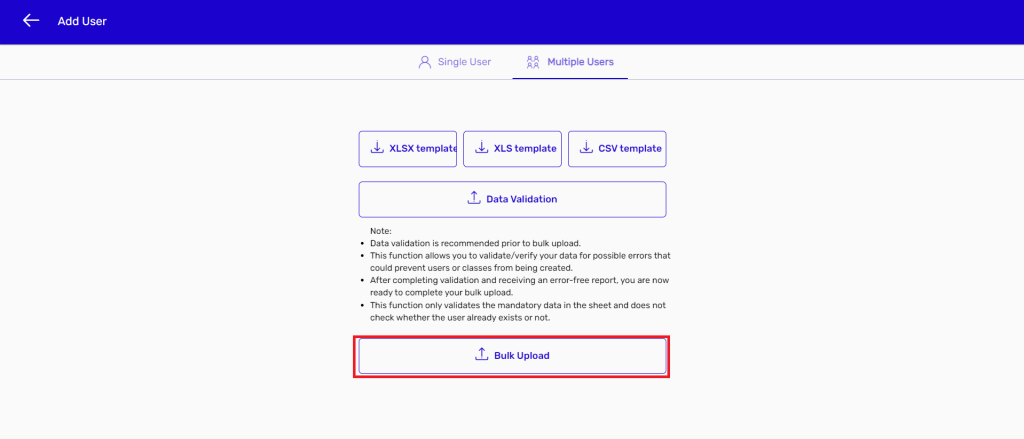
- Click on Upload Sheet on the Multiple Users page. > Upload the updated Bulk Upload sheet.
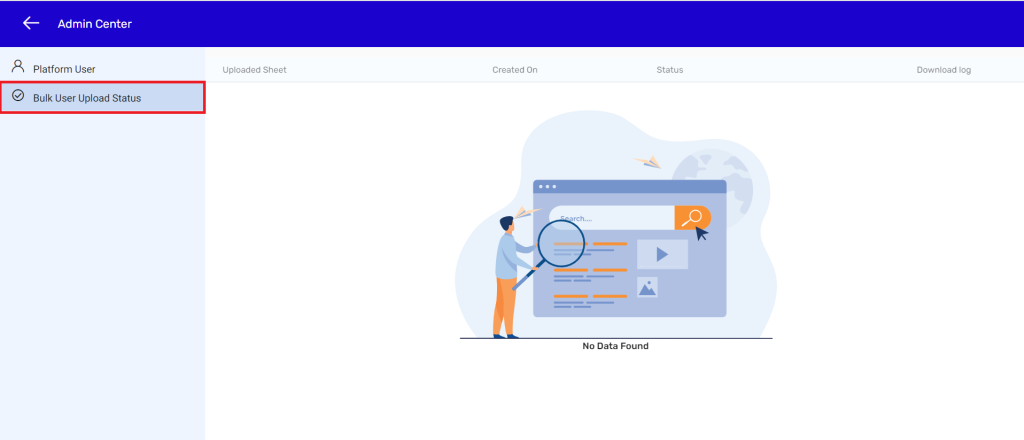
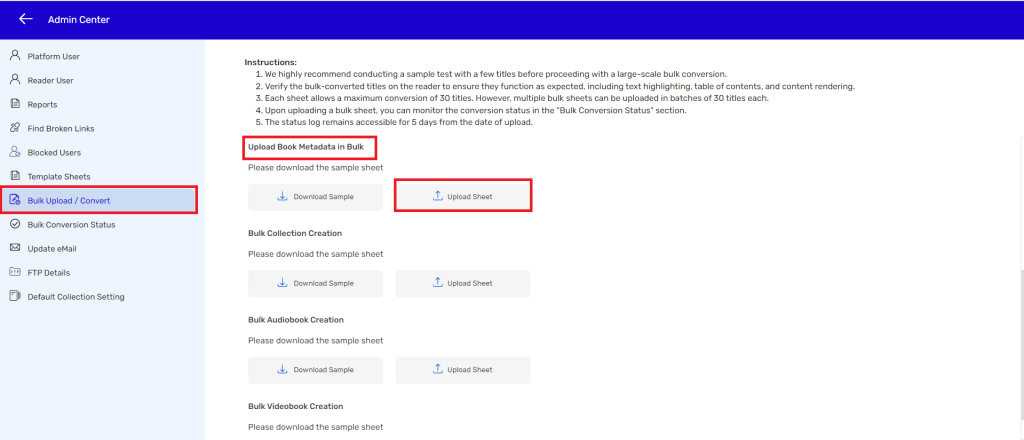
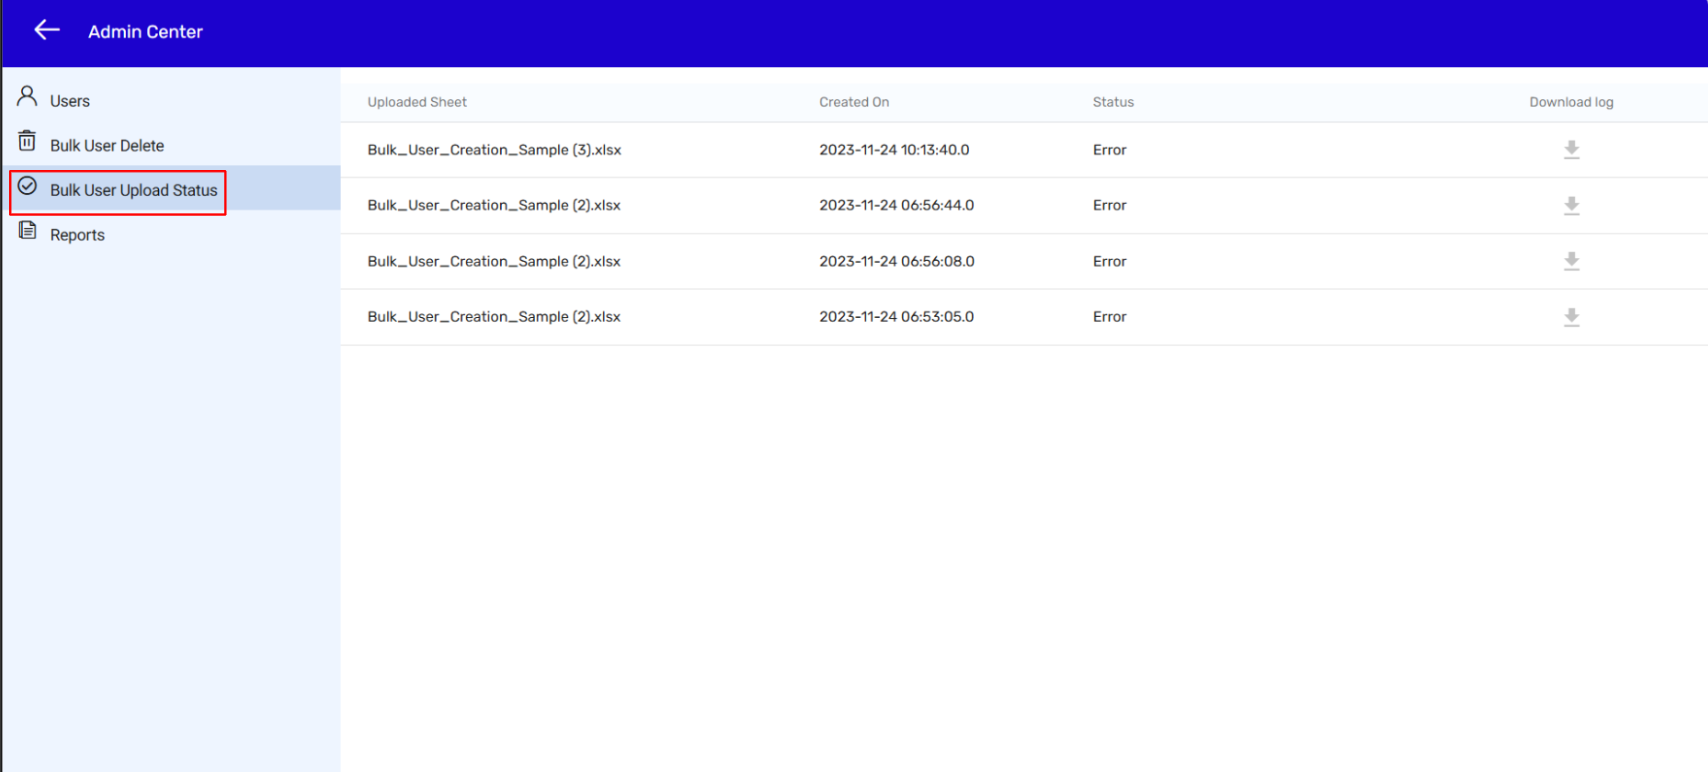
- You will be getting a confirmation message for a successful file upload. You can also download the updated sheet by clicking on Admin Center > Bulk User Upload Status,
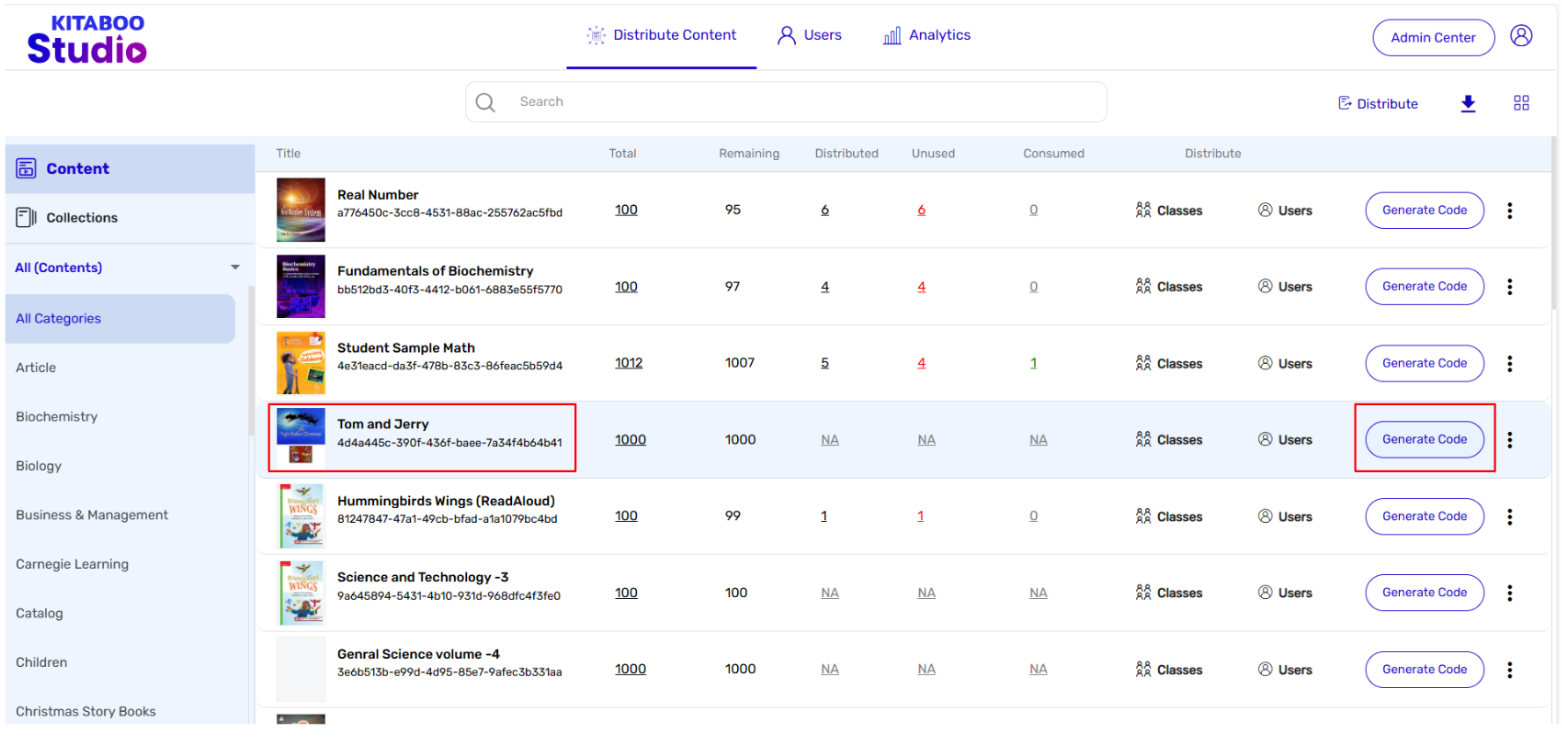
- Sign in with your Customer Admin credentials.

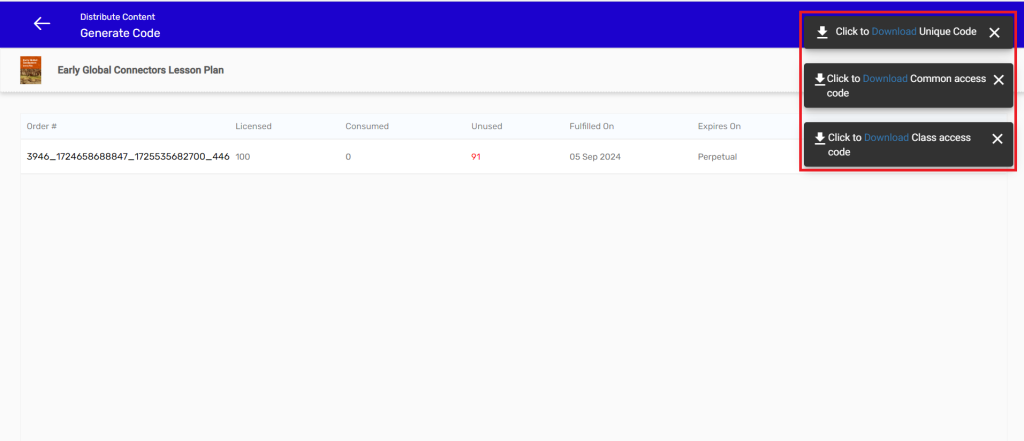
- Go to the Distribute Content tab > Select the content a user wants to access. > Click on Generate Code.
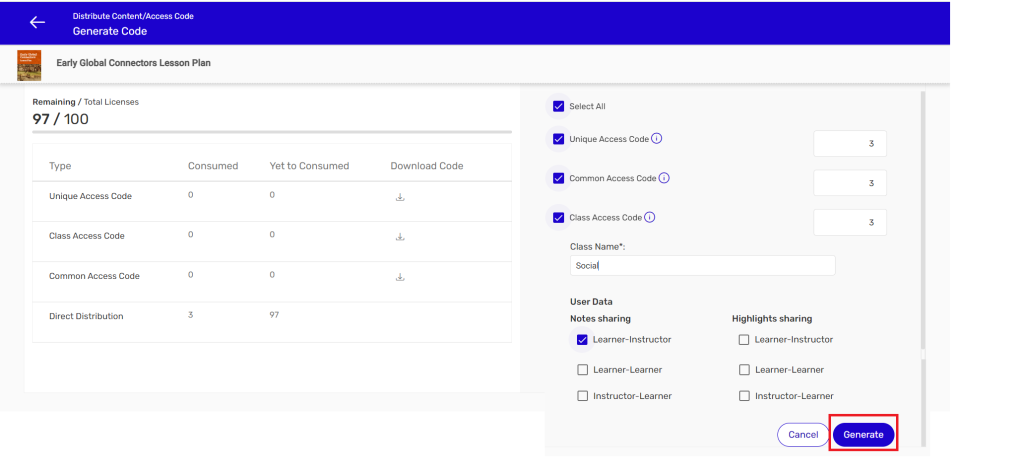
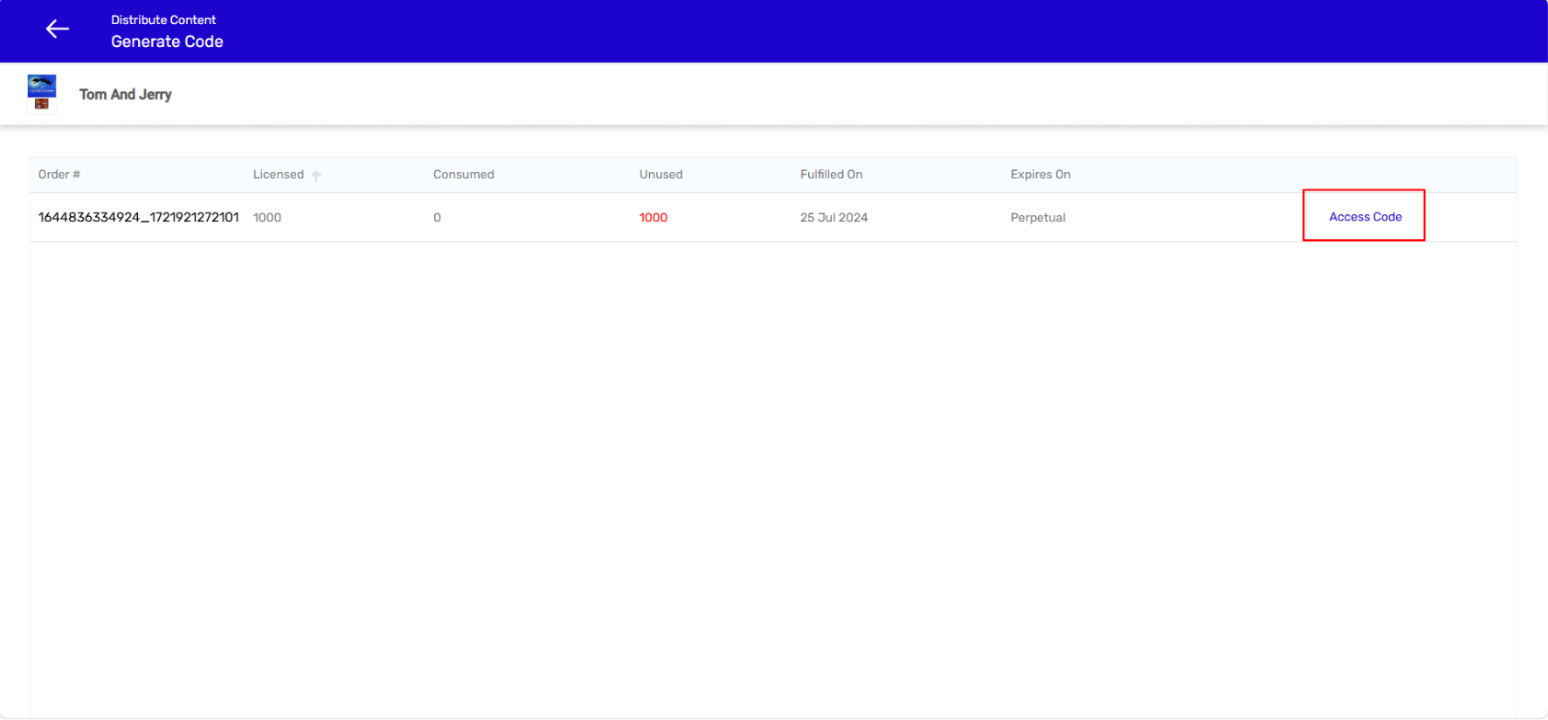
- Click on Access Code.
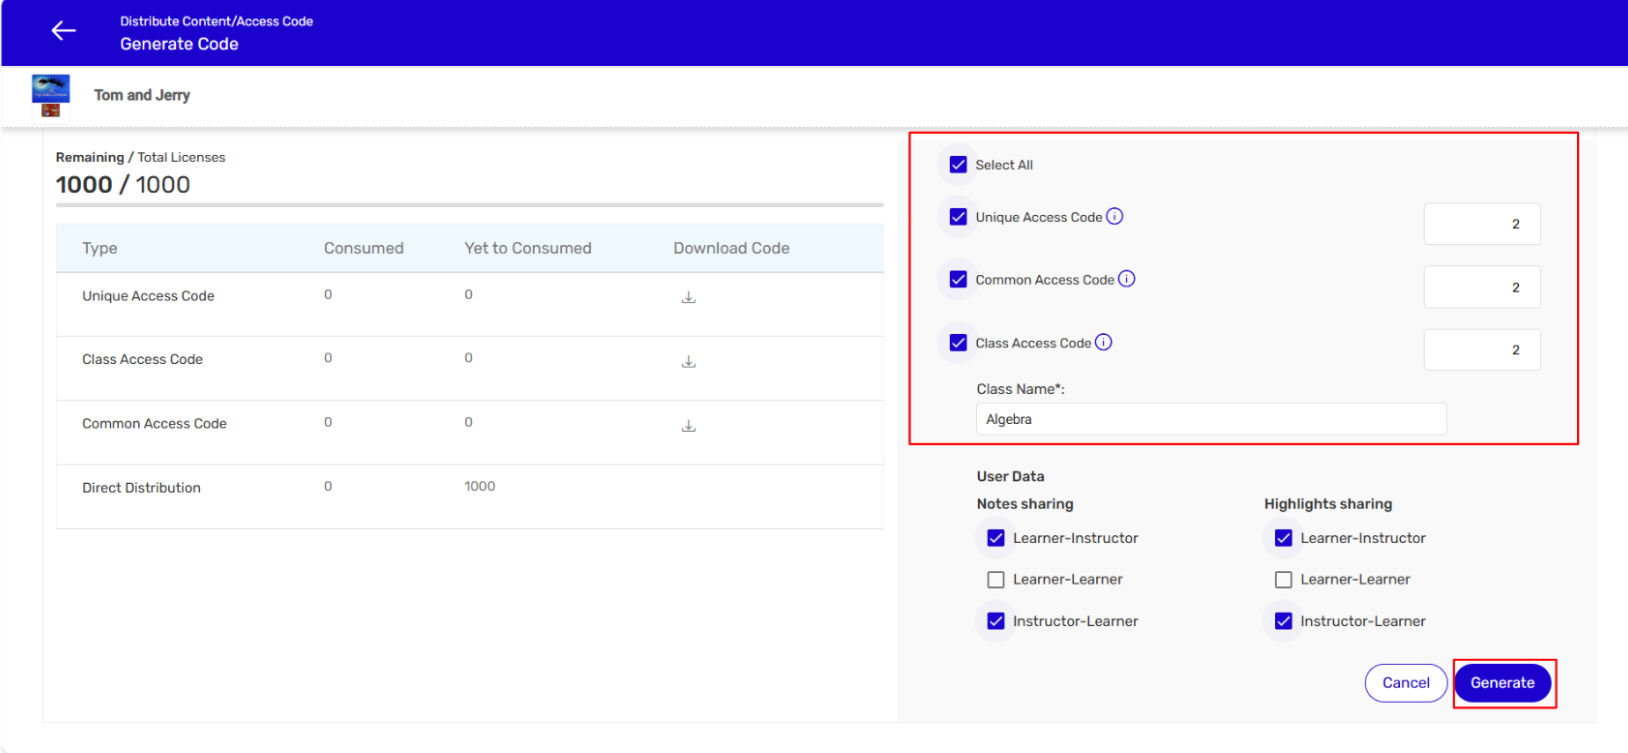
- Select the Access Code type boxes. > Enter the number of codes to be generated. > Click on Generate.
NOTE:
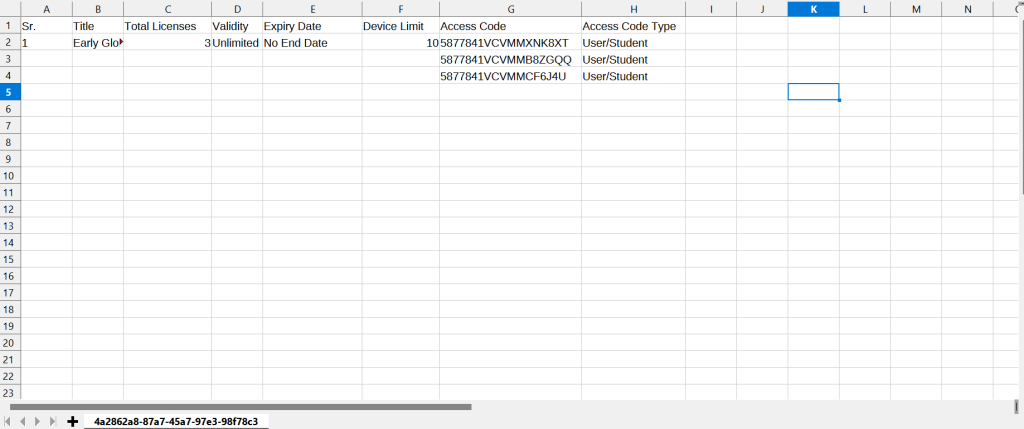
● Unique Access Codes can be utilized by individual users only once.
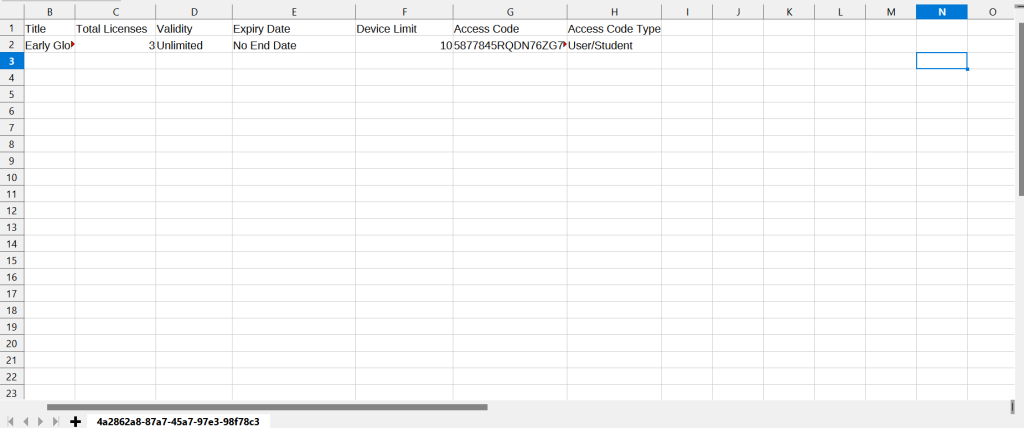
● Common Access Code provides a single access code that can be utilized by individual users multiple times as per the license limit.
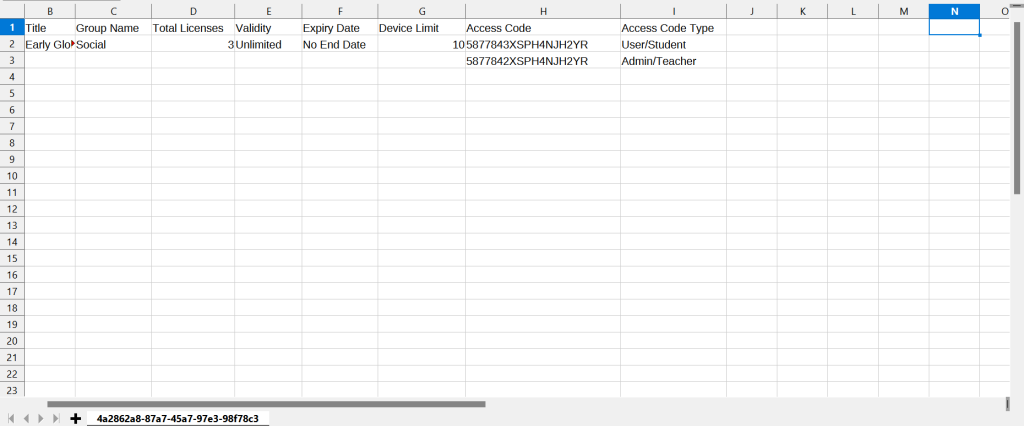
● Class Access Codes are redeemed by a student-type user and an instructor-type user. When these access codes are redeemed, the users automatically become part of a single group or a class.
● Once you select the Class Access Code checkbox the Class Name field and the Data-sharing options will appear. You should provide the required information before clicking on Generate.
- Download each type of Access Code sheet.
NOTE: Access codes get generated in Excel sheets. The number of sheets depends upon the number of access code types you select for generating codes.
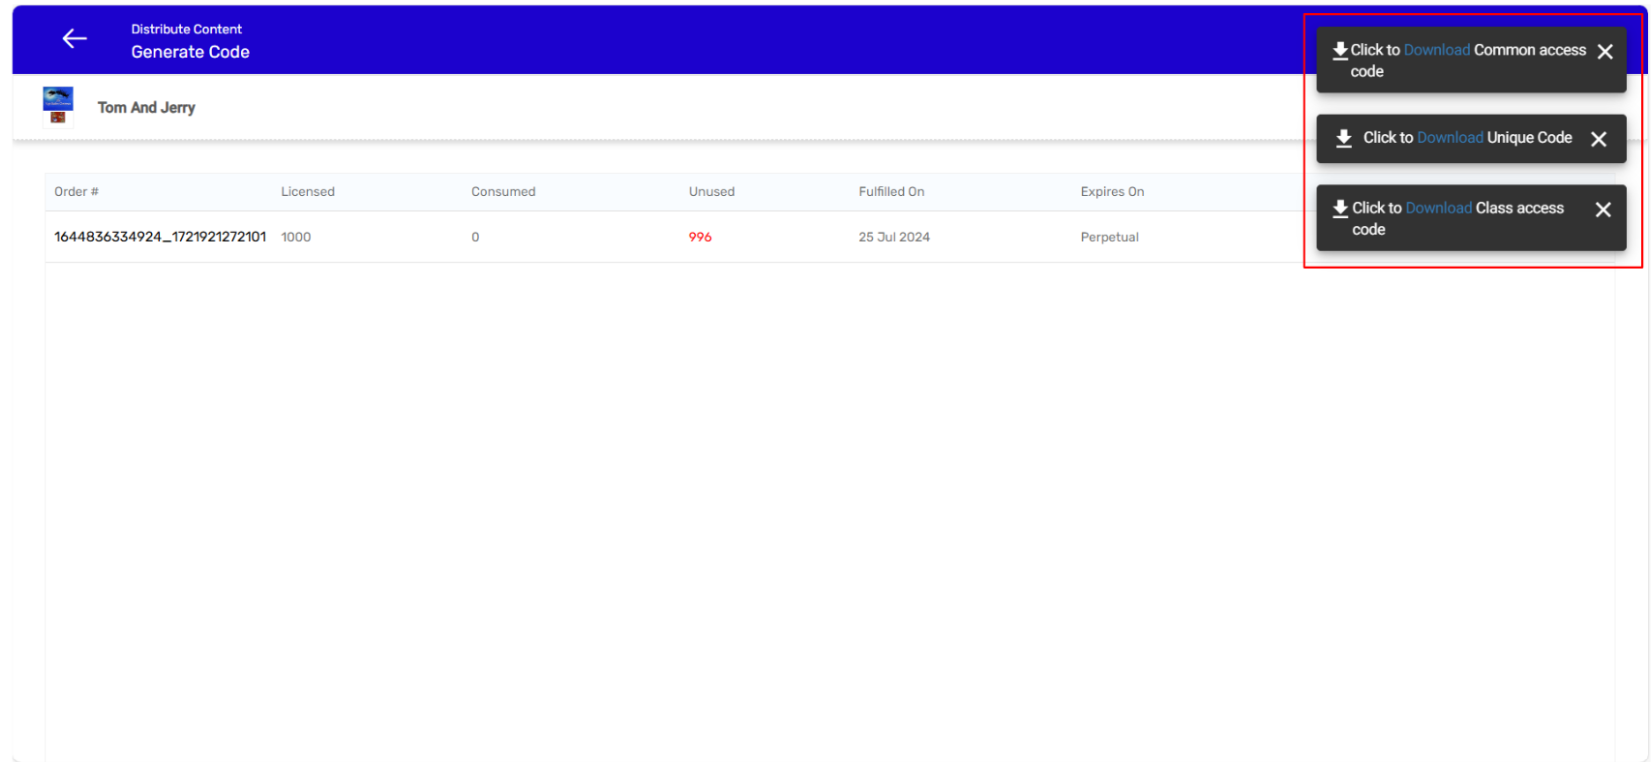
1. Access Code sheet: Unique Access Code
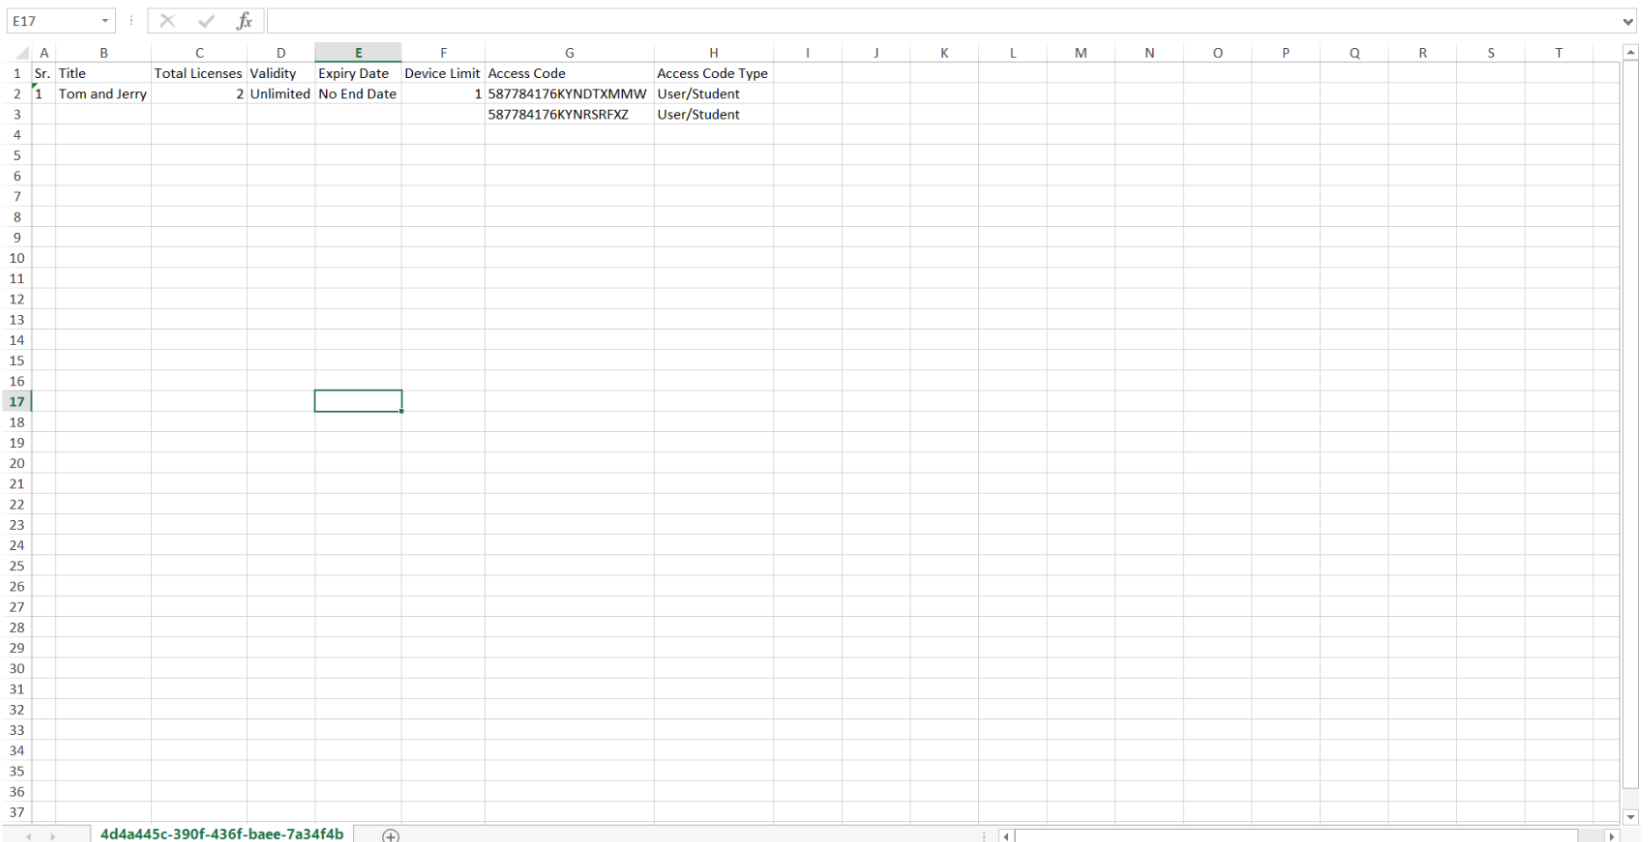
2. Access Code sheet: Common Access Code

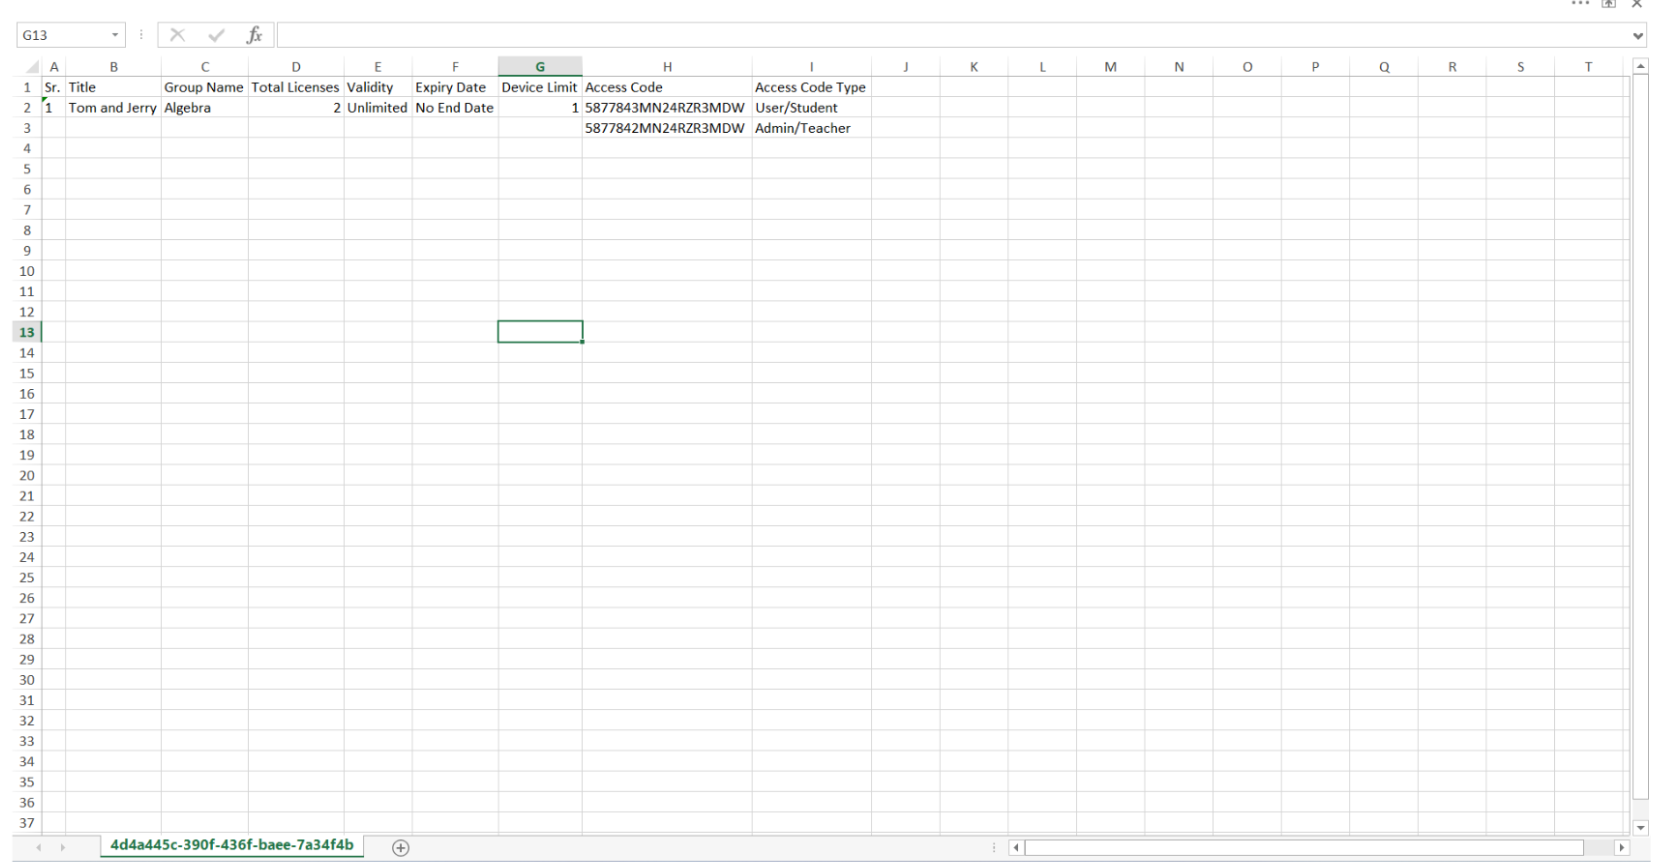
3. Access Code sheet: Class Access Code
- Sign in to the Kitaboo Reader portal for redeeming the access codes > Go to the Access Code tab > Copy the required access codes from the excel sheet > Enter the Access Code and click on Send.