Popular

- Manage License (Add on)
- Bulk Revoke
- Generating Access Code
- Direct Distribution (Add On)
- Creating Single User or Multiple Users (Bulk Upload)
- Admin Center and Profile and Settings
- Revoking Content
- Distributing Content
- Signing in to Kitaboo
- Promote User/Transfer
- Create Class/Update Class
- Selective Oneroster Sync with API/ZIP/SFTP

- Customer Order Details -View Order
- License Management
- Analytics Dashboard and Reports Overview
- How Kitaboo Reader – Text-to-Speech (TTS) Works
- Activated User – Definition & Billing Policy
- What is Sequential Learning and How to Enable It? (Add On)
- Understanding User Roles: Producer vs. Admin
- How to Add External LTI Link (Add-On)
- Auto Book Deletion Process
- Adding group with SAML
- Syncing Data with Clever
- Selective Oneroster Sync with API/ZIP/SFTP
- Syncing Data with PowerSchool
- Syncing Data with OneRoster
- Adding a Group
- Searching a Customer
- Issuing Licenses
- Editing a Customer
- Deactivating a Customer
- Adding a Google Classroom Customer
- Adding a OneRoster Customer
- Adding One roster 1.2
- Adding a LTI 1.3 Customer with OneRoster
- Adding a LTI 1.3 Customer
- Adding an LTI 1.1 Customer with OneRoster
- Adding LTI 1.1 Customers
- Sorting Customer and Group
- Creating a Collection
- Enable K-AI at the content level
- Content Lifecycle Stages in Kitaboo for eBooks
- Creating a Fixed-layout Kitaboo eBooks
- Creating Fixed-layout ePub 3.0
- Upload 3rd Party ePub 2.0/3.0
- Creating a Course or Uploading Scorm
- Activity or Gradable Activity Creation
- Authoring an ePub
- Creating a Video Book
- Creating an Audio Book
- Updating the Cover Image
- Editing a Fixed eBook
- Deleting and Deactivating Content
- Users Tab
- How to Edit and Delete a Category
- Clever Integration
- Classlink Integration
- Canvas LTI Integration
- Admin Center
- Analytics Tab
- Adding a Customer
- Creating Admin Accounts
1. Distribute to Class –
1. 1 Distributing Content to a Class
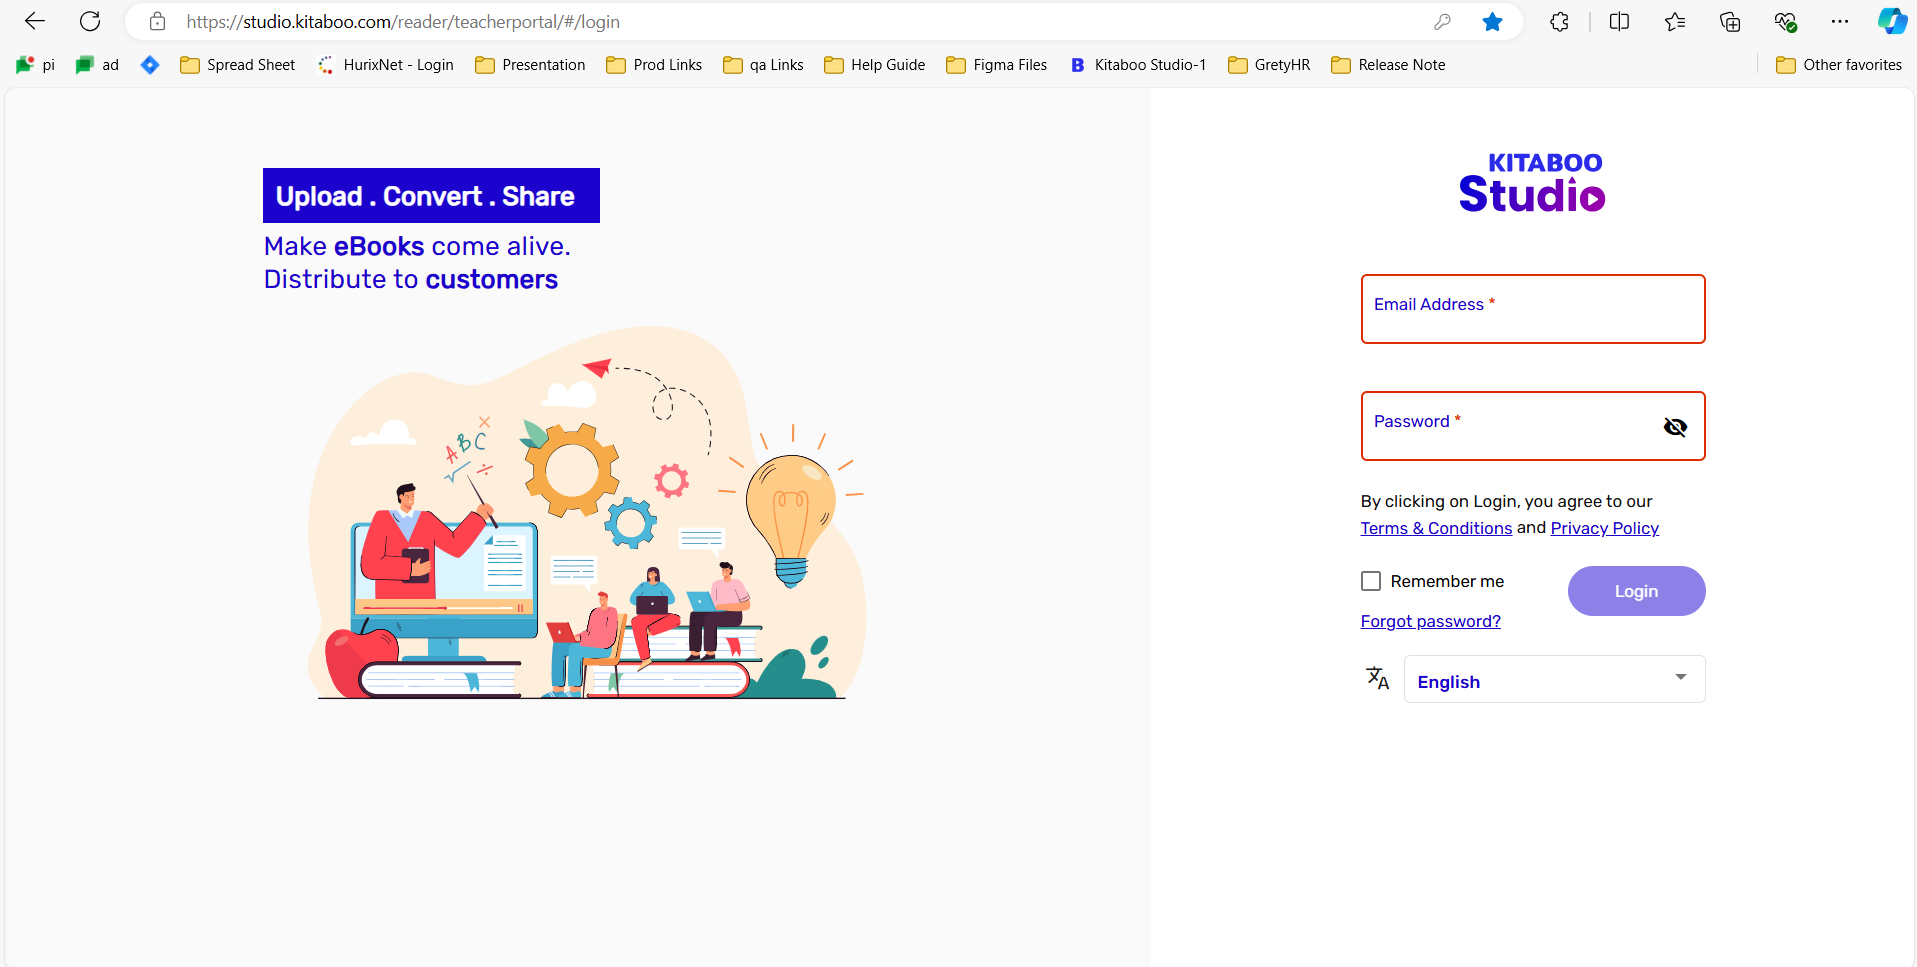
- Sign in with your Customer Admin credentials.

- On the Distribute Content tab, you have three options – Contents, Collections, and All (Content) – to use for distributing a content.
NOTE: The Contents option will be the default selection.
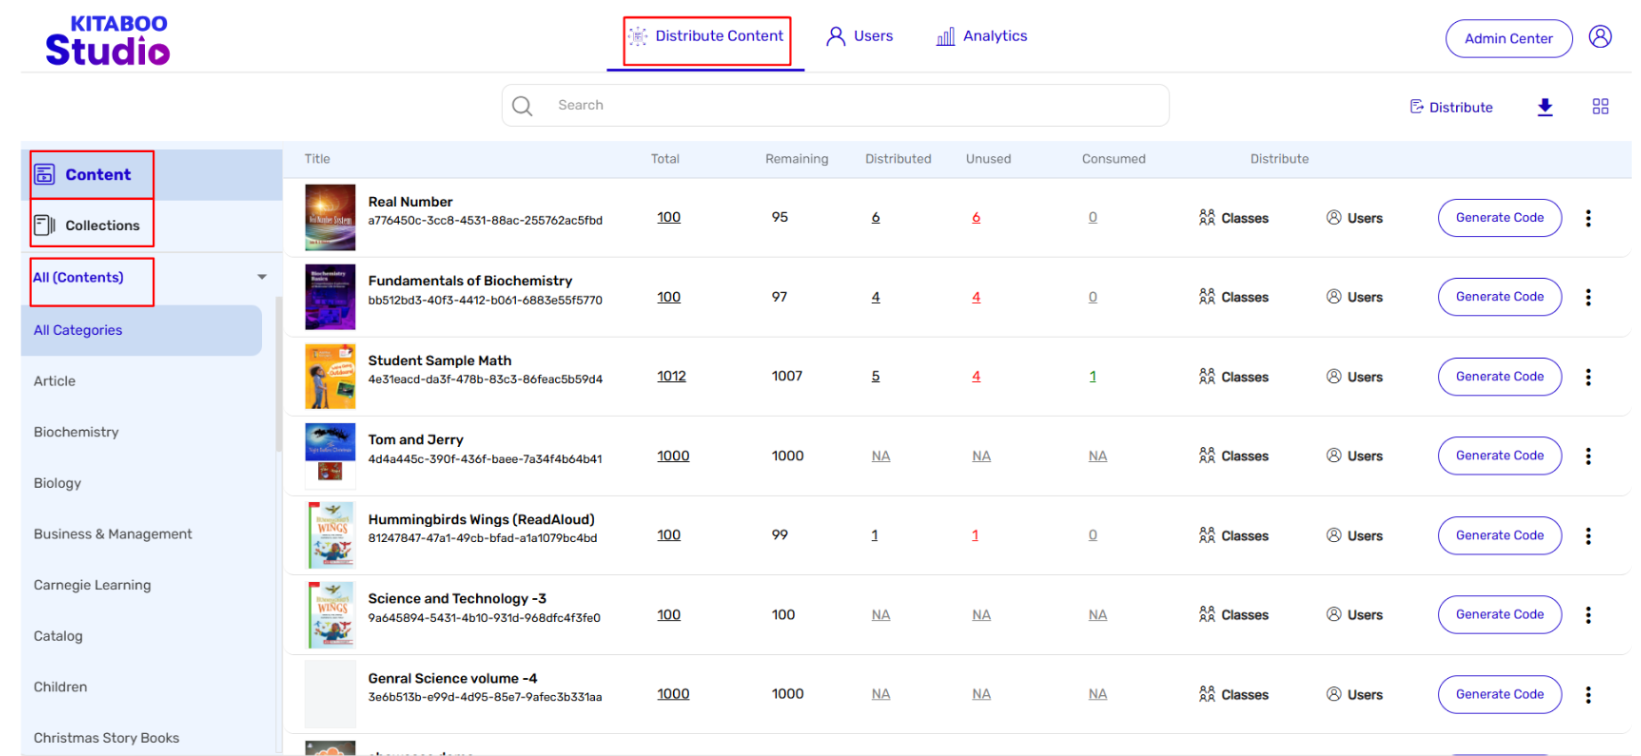
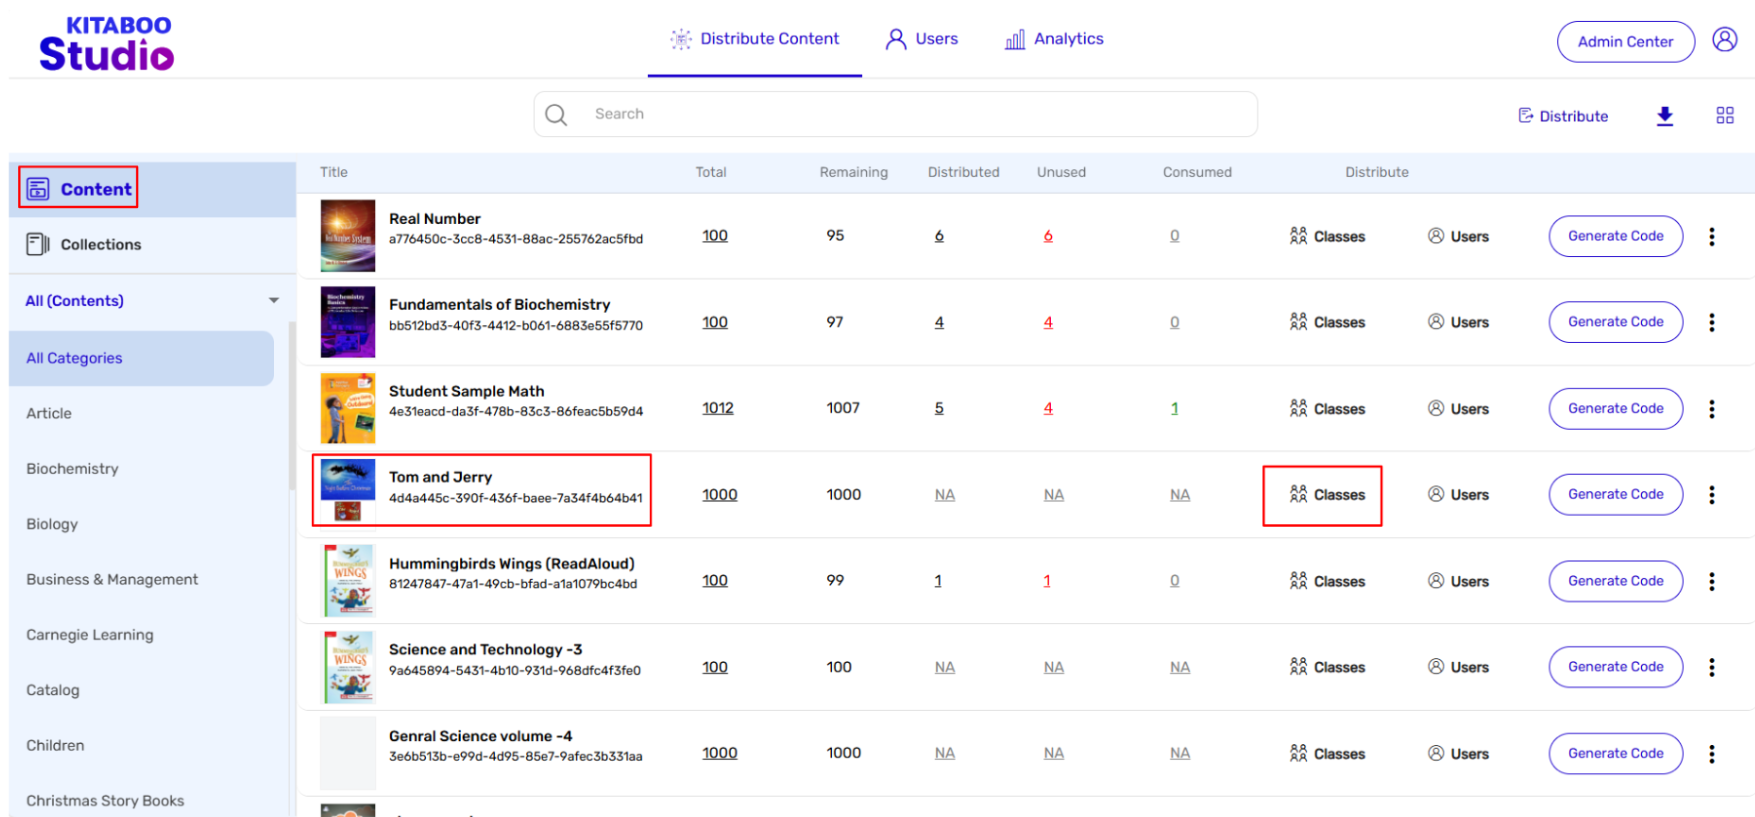
- Click on any of the three options. > Click on the Class against the title you want to distribute.

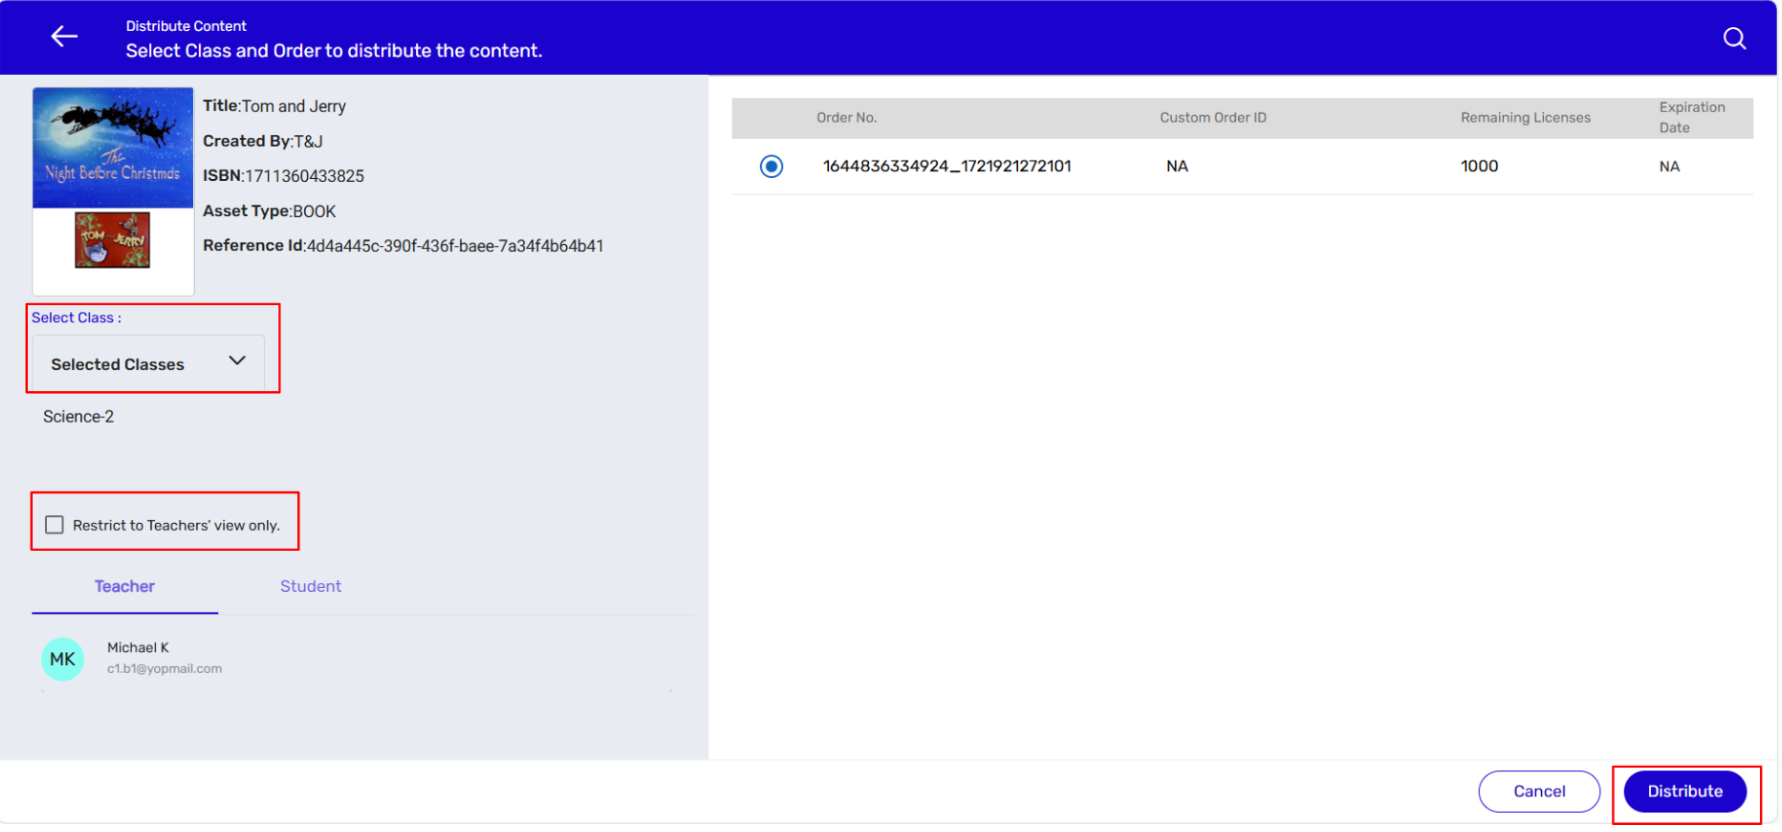
- Select Class from the list. > Check the Restriction box if you want the content to be accessible to teachers only. > Select the Order No. > Click on Distribute.
1.2 Distributing Content to All Classes At Once
- Sign in with your Customer Admin credentials.

- On the Distribute Content tab, click on Class against the title you want to distribute.
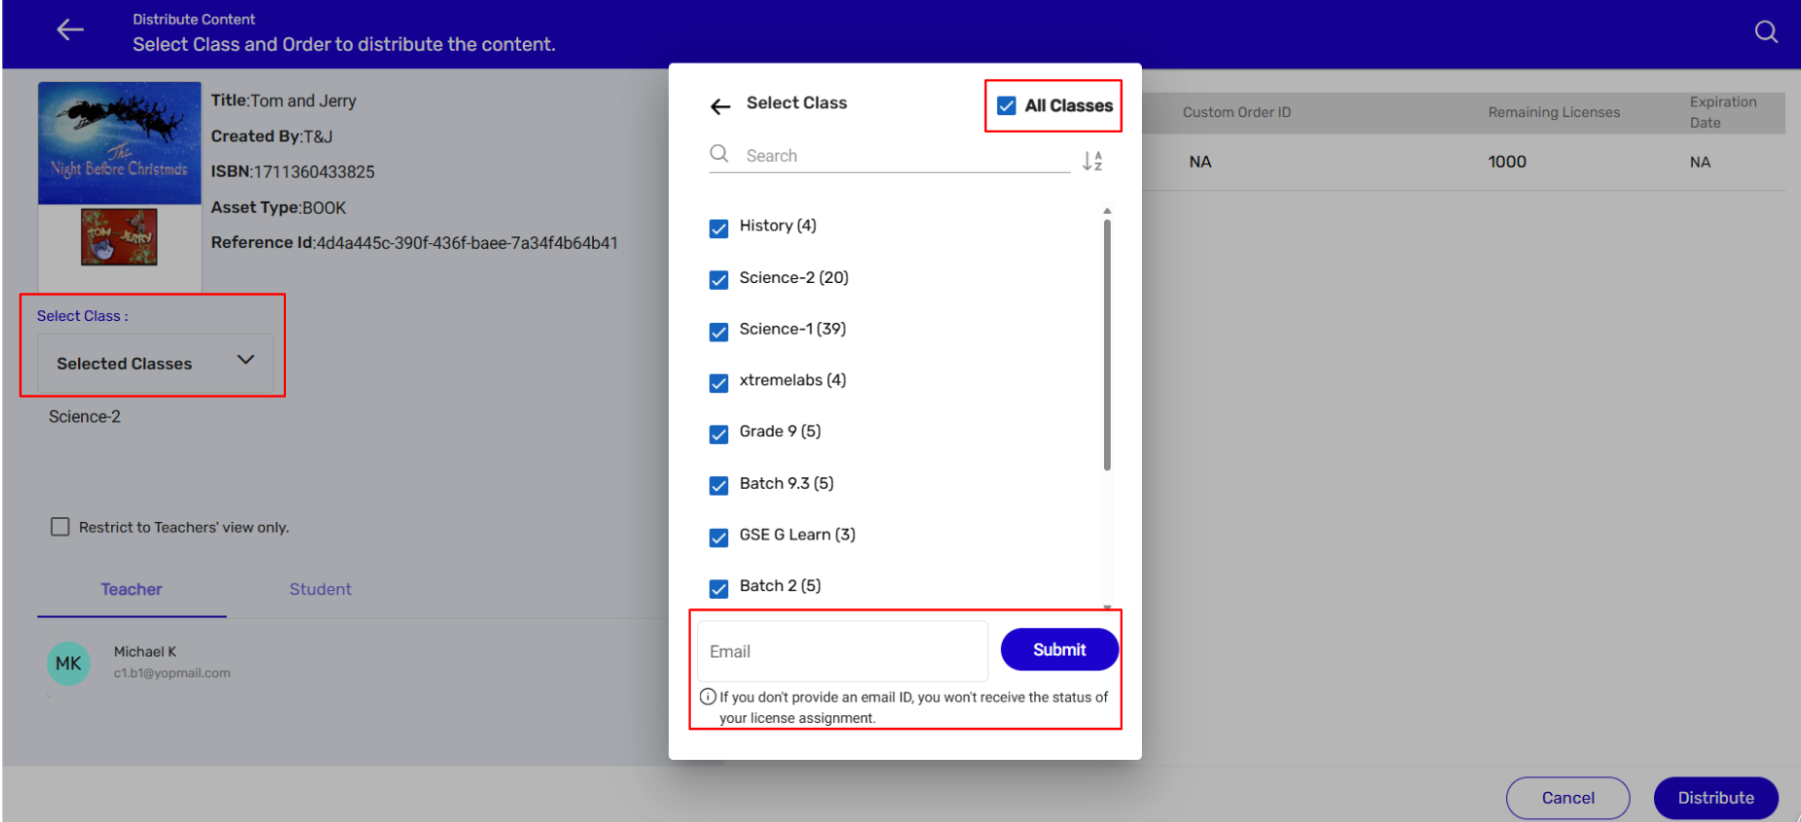
- Click on the Select Class drop-down menu arrow. A pop-up will appear which will allow you to select either a particular class or the entire list of classes by checking the All Classes box. As you want to distribute content to the entire list of classes, select the All Classes box. > Provide an email ID in the field that appears once you select the All Classes box. > Click on the Submit button.
NOTE:
● Once you click on the Submit button, the server will start the process of assigning content one-by-one. After the process is completed, the system will send an email to the email ID you have provided with.
● The system will assign content to both set of classes – those you had created manually as well as to those that were created by using the group access code.
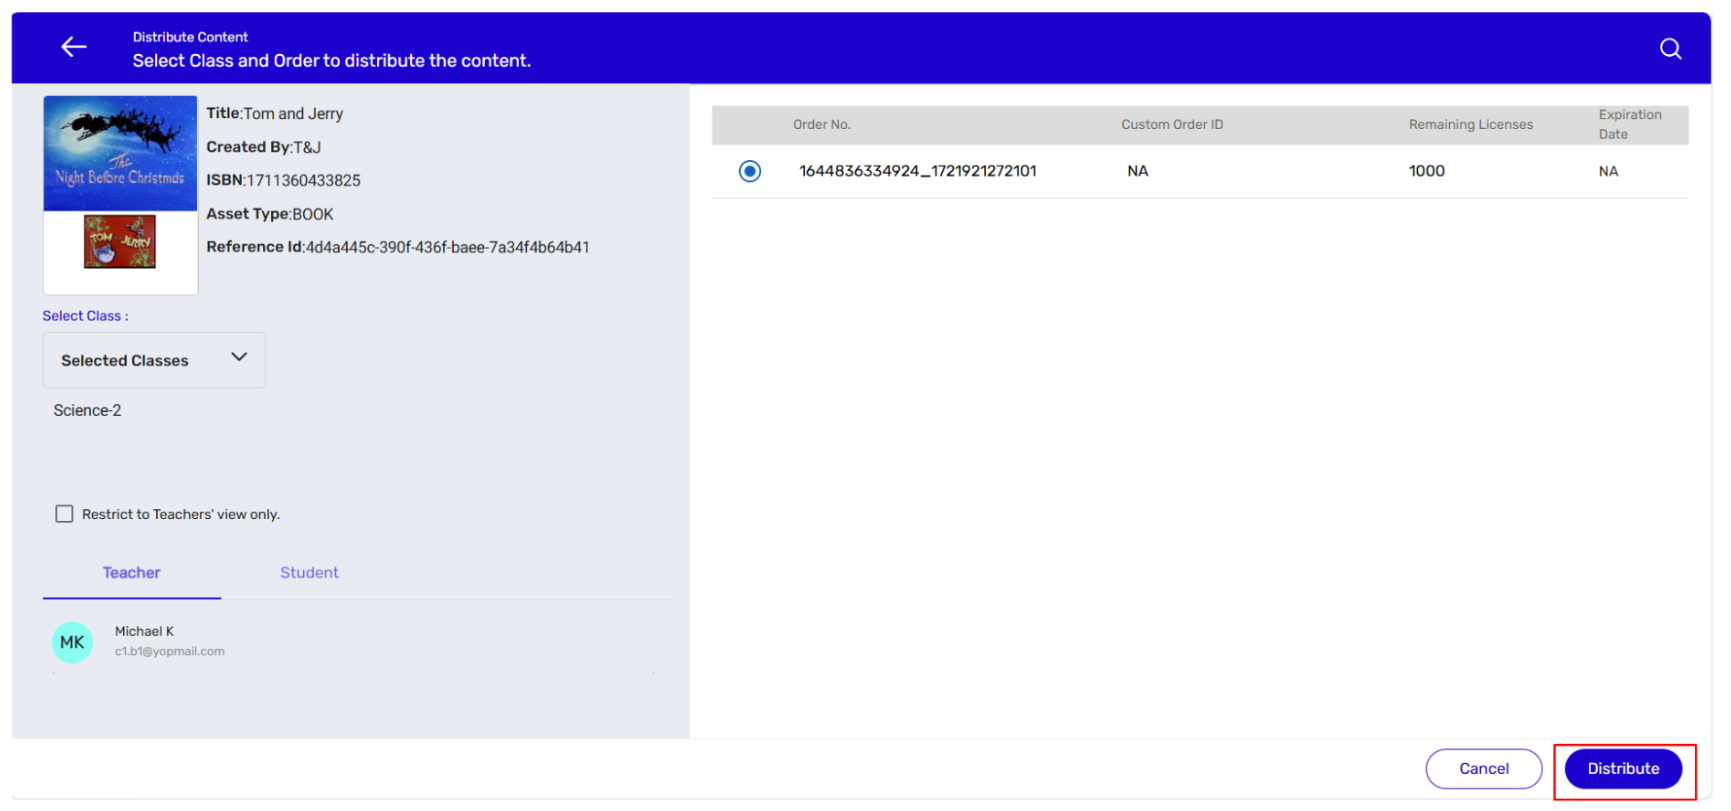
- Select the Order. > Click on the Distribute button. A confirmation message will appear for posting a successful request for bulk distribution.
Important: You must have a sufficient number of licenses to complete the bulk distribution
process.

1.3 Distributing Content to Multiple Class
- Sign in with your Customer Admin credentials.
- On the Distribute Content tab, click on Class against the title you want to distribute.

- Click on the Select Class drop-down menu arrow. A pop-up will appear which will allow you to select either a particular class or a Check-Box to select multiple classes. As you want to distribute content to the Selected list of classes. Provide an email ID in the field that appears once you select the Multiple Classes box. > Click on the Submit button.
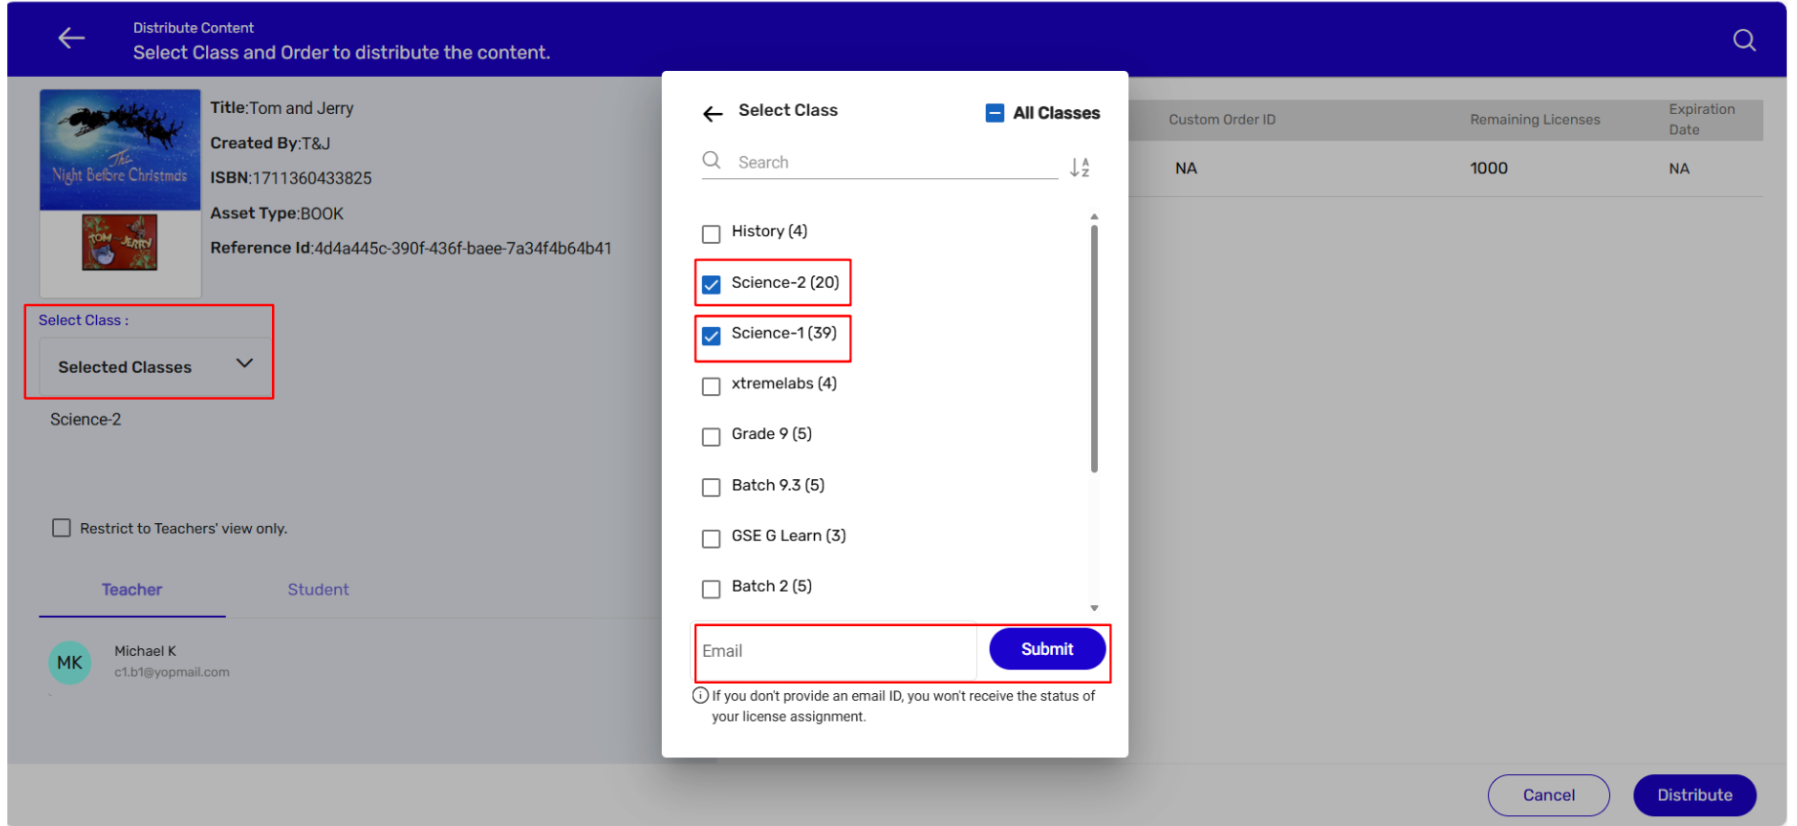
NOTE:
● Once you click on the Submit button, the server will start the process of assigning
content one-by-one. After the process is completed, the system will send an email to
the email ID you have provided with.
● The system will assign content to both set of classes – those you had created
manually as well as to those that were created by using the group access code.
- Select the Order. > Click on the Distribute button.
Important: You must have a sufficient number of licenses for completing the bulk distribution process.
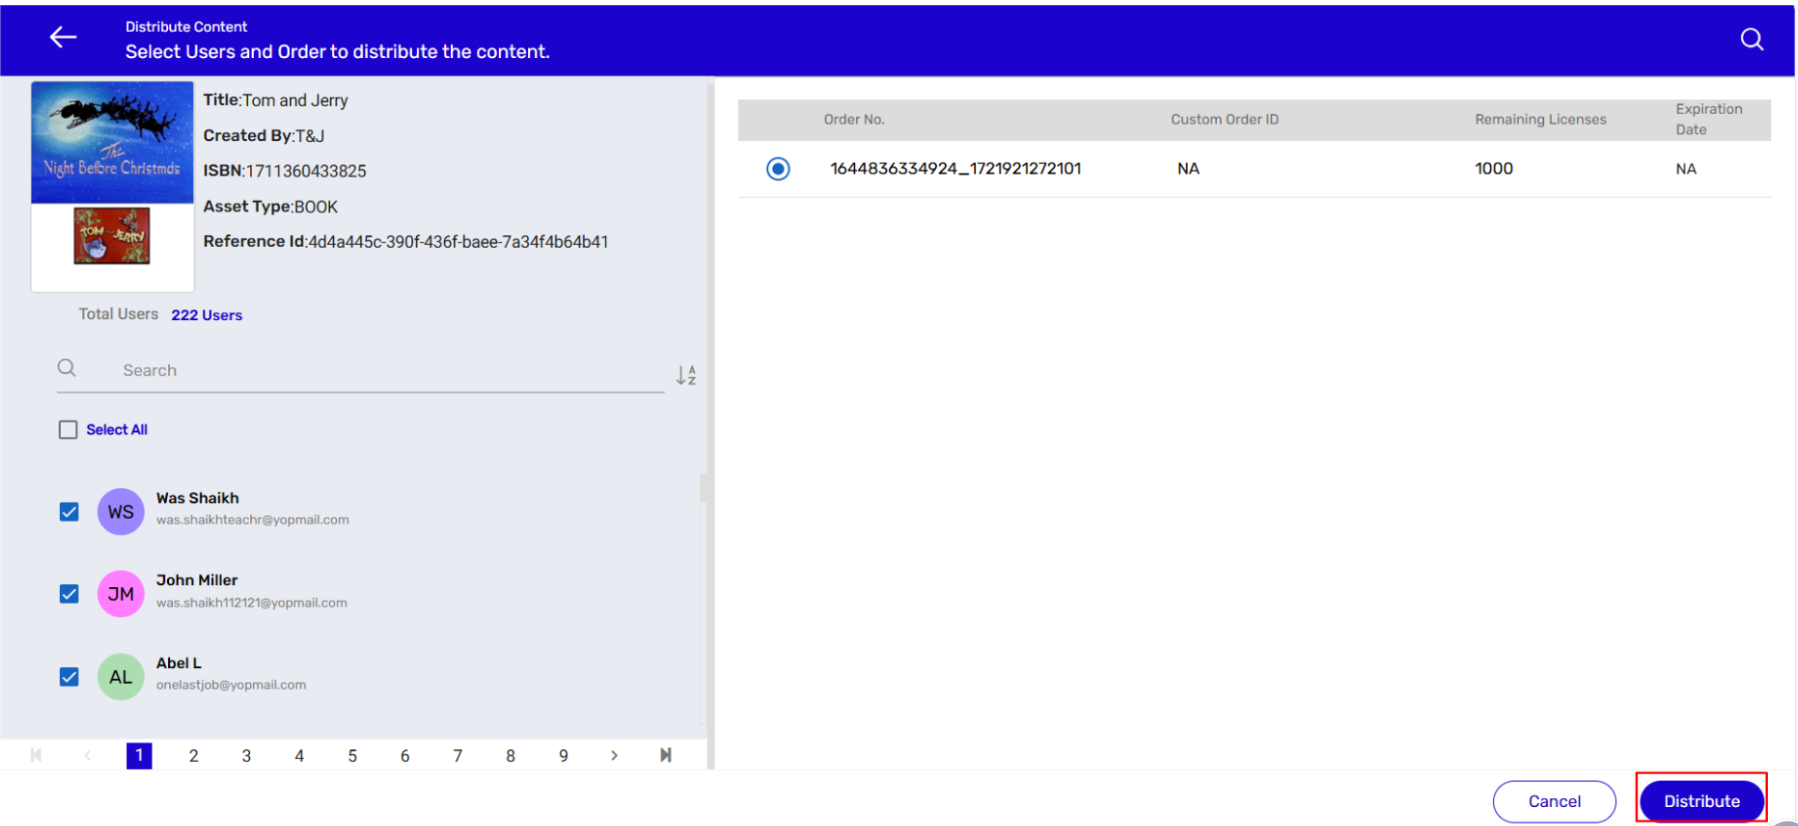
- Sign in with your Customer Admin credentials.

- Go to the Distribute Content tab. > Click on Users aligned to the title you want to distribute. Go to the Distribute Content tab. > Click on Users aligned to the title you want to distribute.
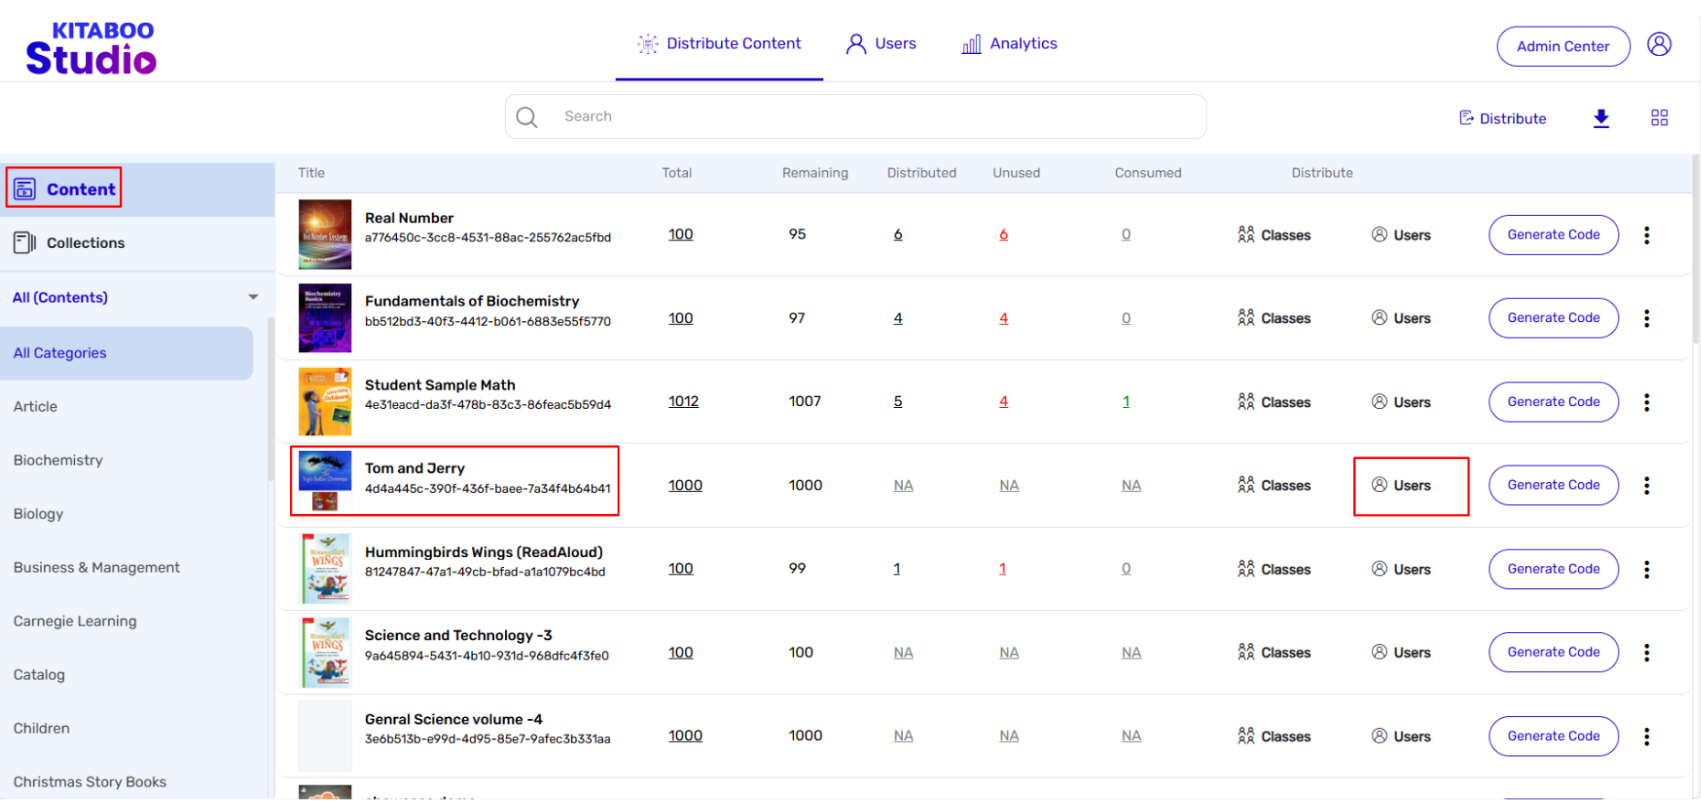
- Select User(s) from the list. > Select the Order No. > Click on Distribute.