Popular
- Manage License (Add on)
- Bulk Revoke
- Generating Access Code
- Direct Distribution (Add On)
- Creating Single User or Multiple Users (Bulk Upload)
- Admin Center and Profile and Settings
- Revoking Content
- Distributing Content
- Signing in to Kitaboo
- Promote User/Transfer
- Create Class/Update Class
- Selective Oneroster Sync with API/ZIP/SFTP
- Customer Order Details -View Order
- License Management
- Analytics Dashboard and Reports Overview
- How Kitaboo Reader – Text-to-Speech (TTS) Works
- Activated User – Definition & Billing Policy
- What is Sequential Learning and How to Enable It? (Add On)
- Understanding User Roles: Producer vs. Admin
- How to Add External LTI Link (Add-On)
- Auto Book Deletion Process
- Adding group with SAML
- Syncing Data with Clever
- Selective Oneroster Sync with API/ZIP/SFTP
- Syncing Data with PowerSchool
- Syncing Data with OneRoster
- Adding a Group
- Searching a Customer
- Issuing Licenses
- Editing a Customer
- Deactivating a Customer
- Adding a Google Classroom Customer
- Adding a OneRoster Customer
- Adding One roster 1.2
- Adding a LTI 1.3 Customer with OneRoster
- Adding a LTI 1.3 Customer
- Adding an LTI 1.1 Customer with OneRoster
- Adding LTI 1.1 Customers
- Sorting Customer and Group
- Creating a Collection
- Enable K-AI at the content level
- Content Lifecycle Stages in Kitaboo for eBooks
- Creating a Fixed-layout Kitaboo eBooks
- Creating Fixed-layout ePub 3.0
- Upload 3rd Party ePub 2.0/3.0
- Creating a Course or Uploading Scorm
- Activity or Gradable Activity Creation
- Authoring an ePub
- Creating a Video Book
- Creating an Audio Book
- Updating the Cover Image
- How to Update Title Metadata (Editing)
- Deleting and Deactivating Content
- Users Tab
- How to Edit and Delete a Category
- Clever Integration
- Classlink Integration
- Canvas LTI Integration
- Admin Center
- Analytics Tab
- Adding a Customer
- Creating Admin Accounts
- Q1. How can I get help with a specific service?
- Q2. How do I report bugs or request service enhancements?
- Q3. As the main institute admin, if I revoke or delete a user created using an access code, can the same access code be reused? What will be the expiry period for that access code’s content?
- Q4. As a main institute admin, can I change the password(s) of institute(s) associated with my account?
- Q5. Why is my Customer ID and Password not working?
- Q6. As a main group admin, can I change the password(s) of groups (sub-admin) associated with my account?
- Q7. How can I redeem an access code?
- Q8. What is a common access code?
- Q9. While distributing content to all classes in one go, how does a user know if he/she has been assigned content?
- Q10. While distributing content, can I restrict access to it to teachers only?
- Q11. What are the prerequisites for adding a user to an existing class?
- Q12. Can I create a class with students only?
- Q13. How can I create multiple users on the Kitaboo system?
- Q14. Why is my Group ID and Password not working?
- Q15. I forgot my password. How do I reset it?
- Q16. How do I log in to the Kitaboo portal/Reader?
- Q17. How can I search for a Custom Order ID while assigning content or a collection in the Institute/Customer login?
- Q18. How to add a custom order ID to a new order or an Existing order?
- Q19. What is the API update process, how are changes communicated, and what is the support period for deprecated features?
- Q20. What is the notification process for product release notifications, product issues (discovered by Kitaboo), and product outage/downtime notifications?
- Q21. Why are some symbols not displaying correctly in my eBook or why is the file failing during the conversion process?
- Q22. Does Kitaboo support the Chinese language?
- Q23. What types of quiz activities does Kitaboo support?
- Q24. What is the file size limit supported in Kitaboo?
- Q25. What happens if I do not provide a Table of Contents (TOC) sheet during the bulk upload process in Kitaboo?
- Q26.How does the Multiple Admin Edit feature work, and what are its limitations?
- Q27.How to Update Widgets/Activities in Kitaboo After New Fixes or Enhancements Are Deployed ?
- Q28. Print Configuration in Kitaboo Reader.
- Q29. Glossary Instructions Guide (Kitaboo Fluid 360)
- Q30. WCAG 2.2 Compliance – Reader and Content Responsibilities
- Q31. Keyboard Shortcuts for Table and TOC Management in Author (Kitaboo Fluid 360)
- Q32. Kitaboo SSO & OneRoster Capabilities
- Q33. What DRM are you using to protect the content & How?
- How can we help you publish with Fluid 360?
- Help Screen: Your Personal Guide
- Easy Steps to Create or Upload a Cover Page
- Creating a structured Table of Contents (TOC)
- Choosing the Perfect Layout
- #1. Add content using the Authoring
- 1.1. Title: A Simple Way to Add Clear, Catchy Headings!
- 1.2. Explore the smart “Header” Element!
- 1.3. Discover the Power of Text in Authoring!
- 1.4. Make Your Pages Come to Life with Images!
- 1.5. Add Engaging Videos to Your Pages!
- 1.6. Add Engaging Sounds to Your Pages
- 1.7. Explore HTML Interactivity!
- 1.8. Organize your data with the Table element!
- 1.9. Callout Box: A Handy Way to Highlight Important Information!
- #2. Explore Fun and Interactive Widgets with the Authoring Platform
- 2.1. Multiple Choice activity
- 2.2. Create Engaging Presentations with the Slideshow Component!
- 2.3. Image Labelling: Make Your Pictures Interactive!
- 2.4. Fill in the Blanks: Fun and Interactive Learning!
- 2.5. Highlighter: Your Handy Tool for Highlighting Important Text!
- 2.6. Correction Element: Make Learning Fun and Interactive!
- 2.7. Sorting Component – Organize with Ease!
- 2.8. Match the Pairs: An Interactive Learning Tool!
- 2.9. Easy-to-Use Sidebar for Your Content
- 2.10. Click to Reveal activity – Making Learning Fun!
- 2.11. Explore the Fun World of Wordsearch
- 2.12. Discover the Flashcard Element for Your Learning Journey!
- 2.13. Explore the “Group Activity” Element
- 2.14. Discover the Fun of Categorizing with the “Categorize” widget
- 2.15. Explore the Question and Answer Activity
- #3. Unlock the Power of Gradable Activities in Kitaboo’s Authoring Platform
- 3.1. Creating a Gradable Activity
- 3.2. Adding a Gradable Activity in an eBook
- 3.3. Students Accessing the Activities
- 3.4. Standalone Gradable Activity
- 3.5. Grade Assessment: Activity Management for Admins and Teachers
- 3.6. Customizable Certificates for Course Completion
- #4. K.AI: Transforming Content Creation with AI-Driven Interactivity
- 4.1. K.AI Automatic Quiz Generation from PDF
- 4.2. Automatic Generation of Quiz from PDF Using K.AI Markup
- Kitaboo 6.0 Reader Accessibility Help Manual
- Login to Kitaboo Reader
- How to use Access Code
- Bookshelf Overview
- Bookshelf Search in Kitaboo Reader
- Guide to view Fixed Layout Ebooks
- Guide to view Reflowable ePUBs
- Guide to view VideoBooks
- Guide to view AudioBooks
- Changing Profile Settings in Reader
- Collections in Kitaboo Reader
- Viewing More Info in Kitaboo Reader
- How to add Bookmarks
- How to add Sticky Notes
- How to add Highlights
- How to use Pen Tool
- How to Access Resources
1. 1 Editing/Updating the Fixed eBook Content Metadata
The Kitaboo system also allows you to edit Fixed eBook content in a simple way. Let’s see how to edit Fixed eBook content Metadata on the Kitaboo system.
- Sign in with your Enterprise Admin credentials.
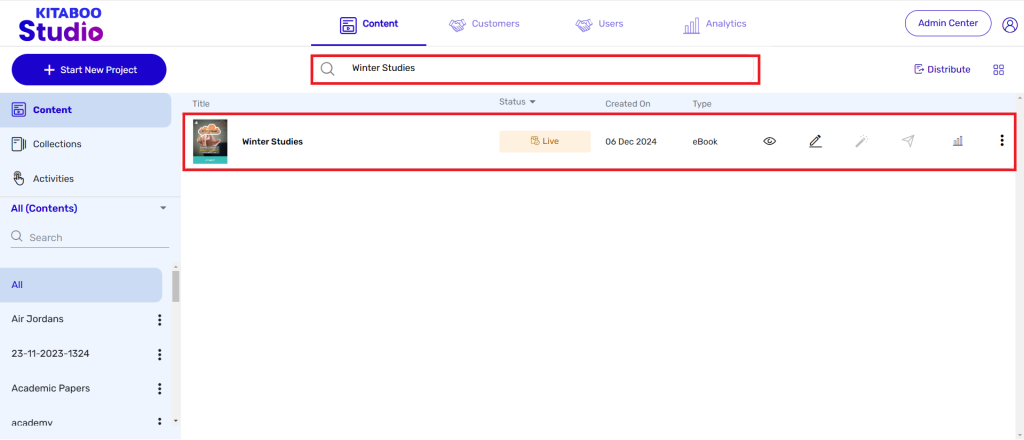
- Switch to the Content tab. > Click on the Search button and search for the ebook which want to edit.

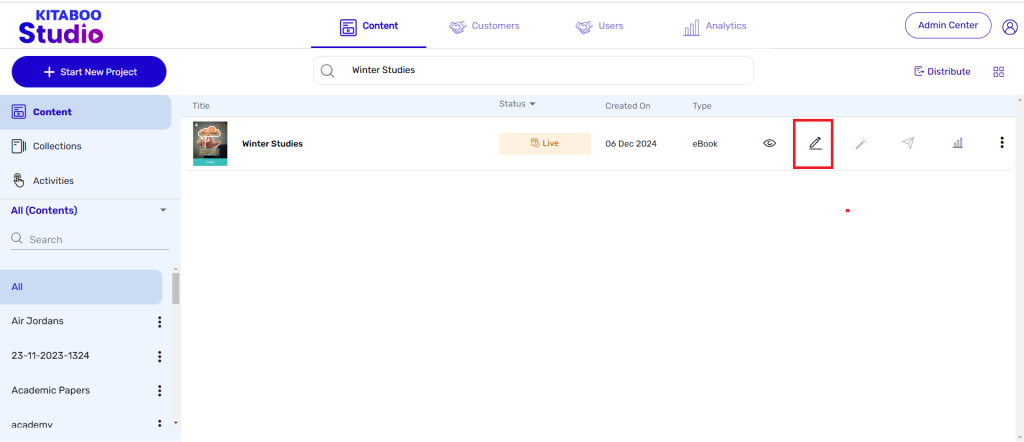
- Click on Edit button (Pencil button) for editing the eBook
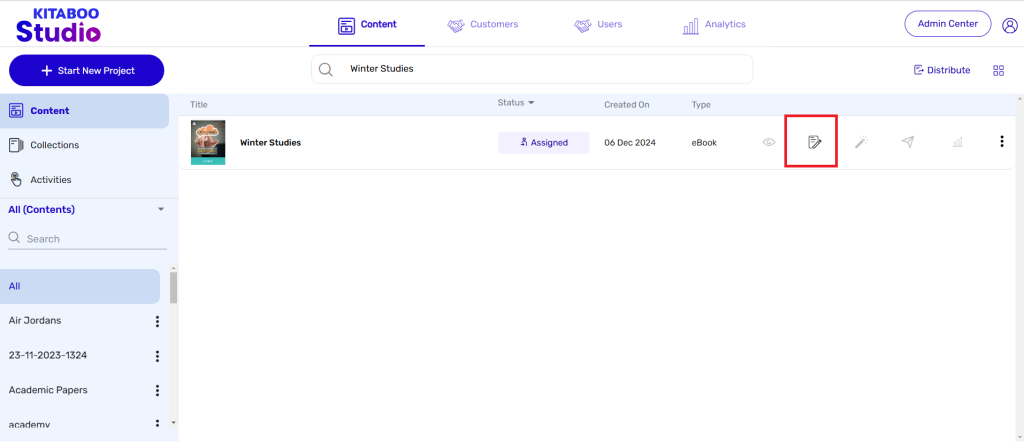
Note: After clicking on edit button the book will be in conversion state and once conversion is done user can edit the eBook.
- Click on Resume Editing Button for Editing the eBook.
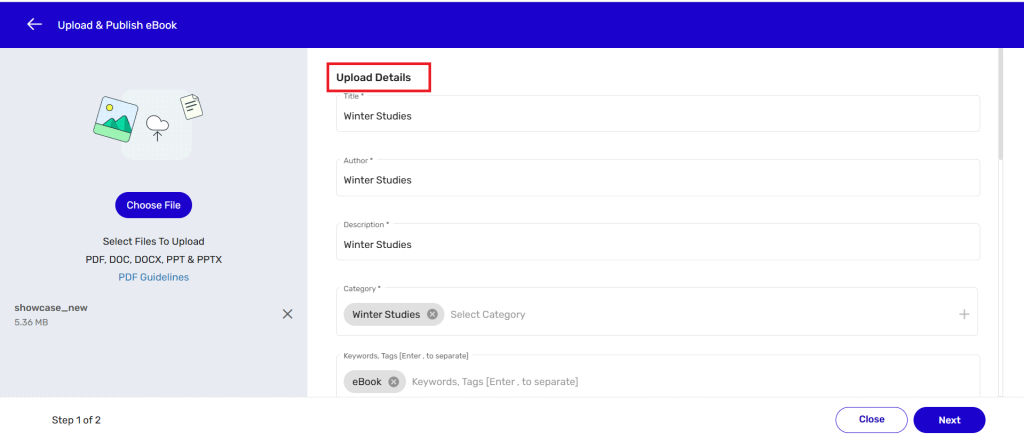
- Enter details which needs to be updated in the Title, Author, Description, and Category, and Keywords fields in the Upload Details section.
- NOTE:
1. Several categories have already been added to the Category list. You can either select one of them or add a new category to the list, if required.
2. If you want to add a new category, enter a relevant name for the category, and click on the + icon.
3. Keywords and Tags should be relevant to the content of the eBook you’re going to create.
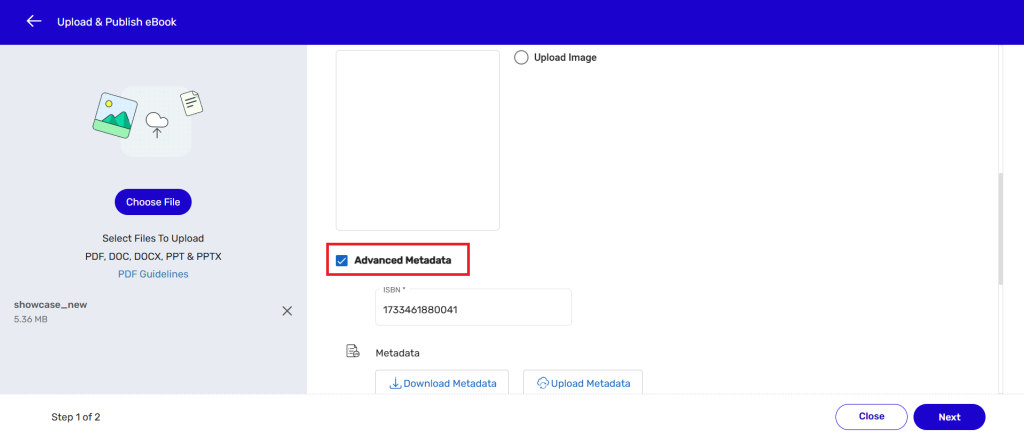
- Scroll down and select a cover image, if any, for the to-be-created eBook. > Check the Advance Metadata checkbox.
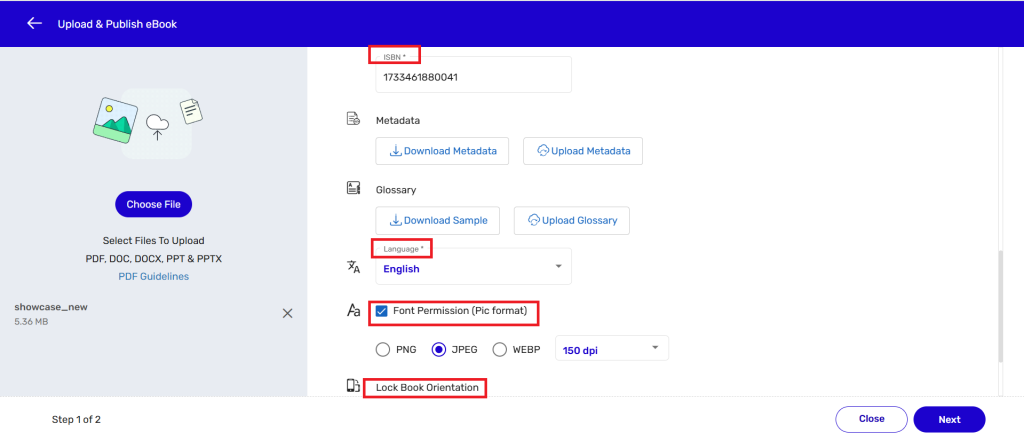
- Provide details in the ISBN field and select the desired options for Font Permission, Lock Book Orientation, and Book Type that appear after selecting the Advance Metadata checkbox. > Click on the Next button
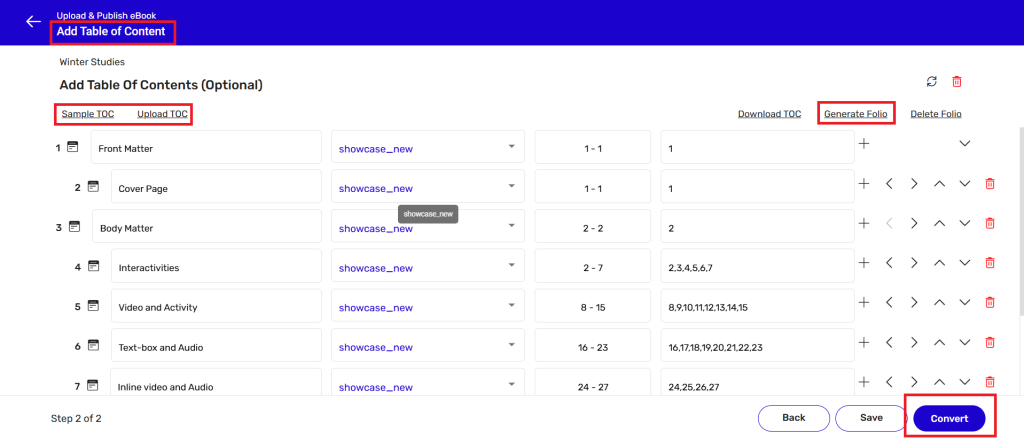
- On the Add Table of Contents page, you can add/update a Table of Contents (TOC), define a title for your eBook, define page range for various chapters, topics, sections etc., and also generate folios for them. > Click on Convert.
NOTE:
1. You can enter a title for your eBook in this field.
2. The system will automatically display your file name(s) in this field.
3. The system will automatically display page range(s) for chapters, topics, sections etc. in this field.
4. The system will automatically display folios in this field. You can manually modify them and then generate a final table of folios by clicking on the Generate Folio button.
5. User can edit the Fixed eBook in Converted, Published, and Archive state when the process of Conversion, Publish and Archive is completed.
6. User cannot edit the Fixed eBook when the process of Conversion, Published and Archive is in process of Conversion, Publish, Archive. Once an eBook has been successfully updated/edited, you can issue licenses and distribute the eBook.
1. 2 How to Update the PDF for an Existing Live Title
This section explains how to update a Fixed eBook’s PDF file while retaining existing markups (annotations, highlights, etc.) using the TOC Mapping feature.
- Sign in with your Enterprise Admin credentials.

- Switch to the Content tab. > Click on the Search button and search for the ebook which want to edit.

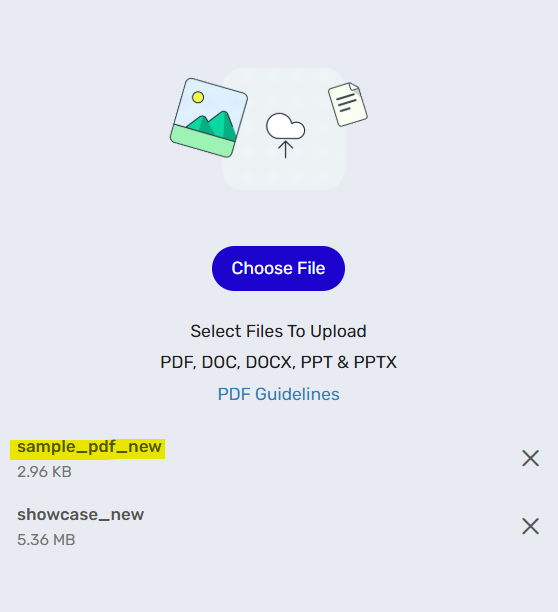
- In meanwhile you need to change the name of the new PDF file, Eg. showcase_new (original PDF file name) sample pdf new (new updated PDF file name).
Note: To retain assets, Make sure the new PDF should be the same as the old pdf. Only re-print page should have a changes.
- Upload the new PDF file (highlighted in yellow)
- Once you have upload the PDF file you will be able to view the new option in the menu bar ‘Download TOC Mapping File’ (highlighted in yellow) Click on the button to download the file and open it.

- Now click on the ‘Upload TOC Mapping File’ button (highlighted in yellow). Select the updated excel and upload. You will see a pop-up message confirming ‘File uploaded successfully.’ click on ‘OK’. Then Click on ‘NEXT’ button.

- Case 1: Old PDF and Updated PDF contains same number of pages After you have opened the excel you will find many columns with blue and red coloured headings. In the inline screenshot you can see a column heading ‘Original’ is the PDF file no changes to be done here. Also you can see a column heading ‘New Filename’ is the column where you have to change the PDF file name with the new PDF file name. Once data is updated, save and close the file.
NOTE: Do not change any data in other columns.

- Case 2: Number of pages differs in the updated PDF against the Old PDF (i.e updated PDF contains additional pages against Old PDF file).
Screenshot 1: Kitaboo TOC

Screenshot 2: TOC book mapping sheet

Now we will modify the above sheet to add 2 pages in the updated PDF file.
Screenshot 3: Updated TOC mapping file

Here we have added two new pages at the start of the updated PDF against the old PDF file and also retain their markup.
Instructions: (refer screenshot 3)
1. Inserted two lines in the excel to add the new pages of the updated PDF file. Highlighted in double red table border.
2. Update the right side data for the updated PDF file. (column: New Filename, New Page no, New folio no, Level 1, level 2,…etc )
3. Update PDF navigational page numbers in column “New Page no”. Highlighted in yellow background.
4. Data in the left (with blue column heading) will get replaced by the corresponding data from right side (with red column heading). Leave the left side column blank if we are inserting new data.
5. Kindly compare screenshot 2 and screenshot 3 for more details.
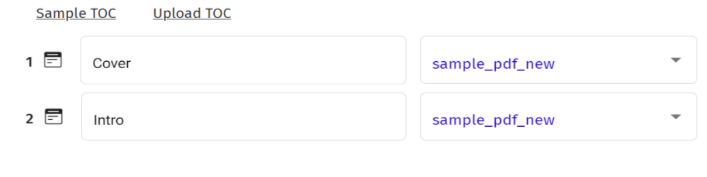
- On the next page you will be able to see the changes in the TOC as highlighted in the inline screenshot. The PDF file name will be changed to your required PDF file name, retaining the
markups in the book.
- Rest steps for publishing and archiving remains the same.